Whistler might be best known for skiing, but it has great snowshoeing too. (And it’s waaaay less expensive than skiing!) In this guide to snowshoeing in Whistler I’ll give you info and directions for 10 different trails ranging from super-flat beginner trails to all-day epics treks in the backcountry.
This guide covers every trail in the Whistler area that is safe to snowshoe. I haven’t included the countless expert-only areas that are not marked and have significant avalanche danger.
I grew up in Vancouver and live in nearby Squamish, so I’ve been snowshoeing in Whistler for close to two decades. So I know the BEST places to snowshoe near Whistler.
This guide to snowshoeing in Whistler includes:
- Quick reference guide: An easy overview of the stats for all the trails
- Snowshoeing safety: key info to help get you prepared to snowshoe in Vancouver
- Snowshoe trails in Whistler: details for 10 trails
- No-go trails: summer trails that aren’t safe for snowshoeing
- Where to rent snowshoes in Whistler – both at the trailheads and in the village
- Snowshoe tours in Whistler: options for going with a guide
If you’re looking for even more places to go snowshoeing or other things to do in Whistler in winter, don’t worry – I got you! Check out these other guides:
- 40+ Things to do in Whistler in Winter
- 40+ Cheap and Free Things To Do in Whistler
- Where to Go Snowshoeing in Vancouver
- Where to Go Snowshoeing in Squamish
Psst: Looking for a full list of Whistler activities? Check out my list of the best things to do in Whistler. It includes over 80 ideas!
Hey there: Some of the links in this post are affiliate links, which means I earn a small commission at no cost to you. Thanks for your support. -Taryn
Snowshoeing in Whistler Quick Reference Guide
| Trail | Rating | Time | Cost |
|---|---|---|---|
| Brandywine Falls | Super Easy-Moderate | 30 min- 2 hours | FREE |
| The Callaghan | Super Easy-Challenging | 30 min-All Day | $18 |
| Whistler Olympic Park | Super Easy-Moderate | 30 min-All Day | $20 |
| Whistler Train Wreck | Easy | 1-1.5 hours | FREE |
| Cheakamus River Trail | Easy-Moderate | 2-3 hours | FREE |
| Cheakamus Lake | Moderate | 2-8 hours | FREE |
| Rainbow Falls | Moderate | 45 min-1 hour | FREE |
| Lost Lake | Super Easy-Easy | 1-4 hours | $13.50 |
| Ancient Cedars | Moderate/Challenging | 4-6 hours | FREE |
| Parkhurst Ghost Town | Moderate | 3-5 hours | FREE |
| Nairn Falls | Easy | 1.5 hours | FREE |
| Joffre Lakes | Challenging | 5-6 hours | FREE |
But First… Be Prepared
- Make a trip plan: While these trails may be steps from a busy ski area, they access serious wilderness. Tell someone where you are going and when you expect to be back. Use the great trip planning tools from Adventure Smart.
- Check the weather, trail conditions, and avalanche forecast: If the weather and trail conditions don’t look good, don’t go. Use my list of the best weather apps for hiking. Check the avalanche forecast. Unless you have taken an avalanche safety course, you probably shouldn’t go out unless the forecast is rated “Low”.
- Wear winter clothing and pack the essentials: Prepare for emergencies by packing the 10 essentials. Read my recommendations for what to wear snowshoeing and tips for winter hiking and snowshoeing.
- Use safe snowshoeing techniques: Snowshoes keep you from sinking into deep snow, but they aren’t great for walking sideways or downhill – it’s easy to slip and injure yourself. Read up on snowshoeing safety and check out my guide to choosing snowshoes.) They also have crampons and other traction aids underfoot to help grip icy snow.
- Take an avalanche safety course: If you plan to stray from flat terrain, you need avalanche safety training. great FREE online Avy Savvy beginner tutorial from Avalanche Canada. You should also take a 2.5 day AST1 course with avalanche Canada.
READ NEXT: Snowshoeing Safety: 14 Ways to Get into Trouble and How to Prevent Them
Brandywine Falls Snowshoe
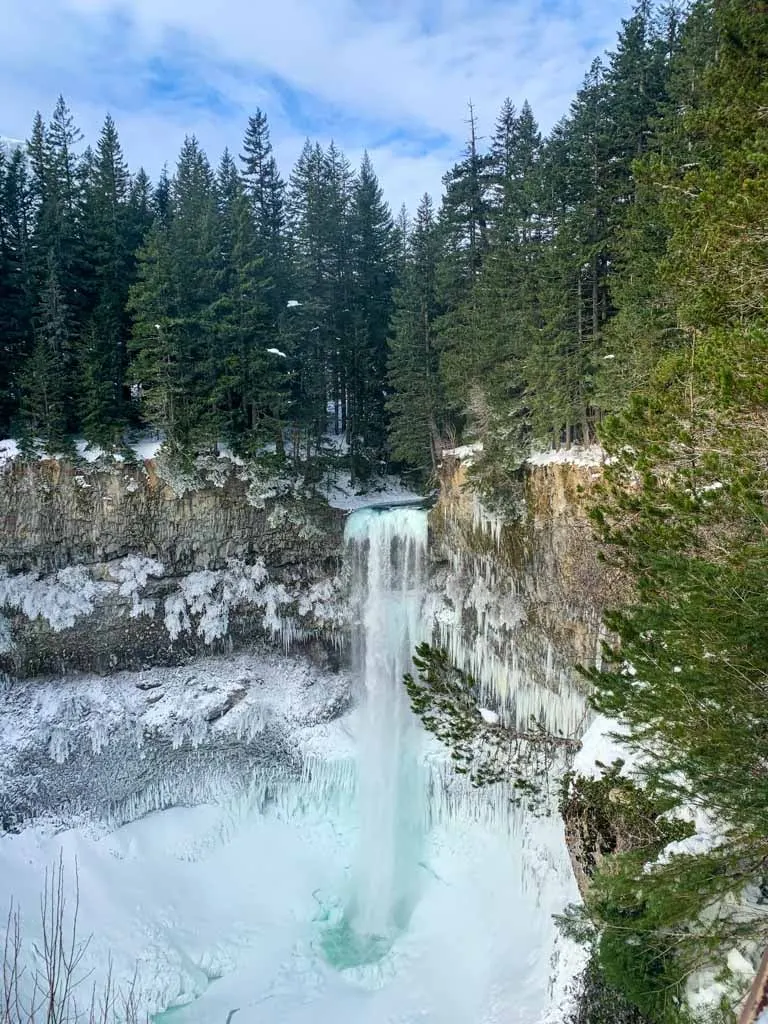
Distance: 1km round trip to the falls, 6km round trip to the Bungee Bridge
Time Needed: 30 min round trip to Brandywine Falls, 2 hours round trip to the bungee bridge
Elevation Gain: 50-60m
Rating: Super easy to Brandywine Falls. Easy/Moderate to the Bungee Bridge
The Trail: The flat and easy trail to the Brandywine Falls viewing platform is a great option for snowshoeing near Whistler. If you want to extend your trip, you can snowshoe a portion of the Sea to Sky trail over to the Whistler Bungee Bridge. You can look down into the depths of the Cheakamus River canyon and maybe even watch people bungee jump.
Avalanche Danger and Hazards: The trail crosses train tracks: use caution. There is no maintained trail down to the base of Brandywine Falls: there is an illegal route that uses a scary old rope to descend a cliff but it travels over slippery rocks and is very icy and dangerous in the winter.
Trail Map/Guide: My Brandywine Falls hiking guide has all the info you need.
Permits/Fees: None.
Dogs: Permitted on leash.
Getting There: The park gate is locked in the winter and unfortunately you are not allowed to park on the side of Highway 99. (Your car will get towed.) Unless you get dropped off and picked up, unfortunately the only way to do this snowshoe trip currently is to park at Whistler Bungee on the Cal-Cheak Forest Service Road and walk in from that direction. Whistler Bungee does plow the road but it is rough.
Snowshoeing at The Callaghan
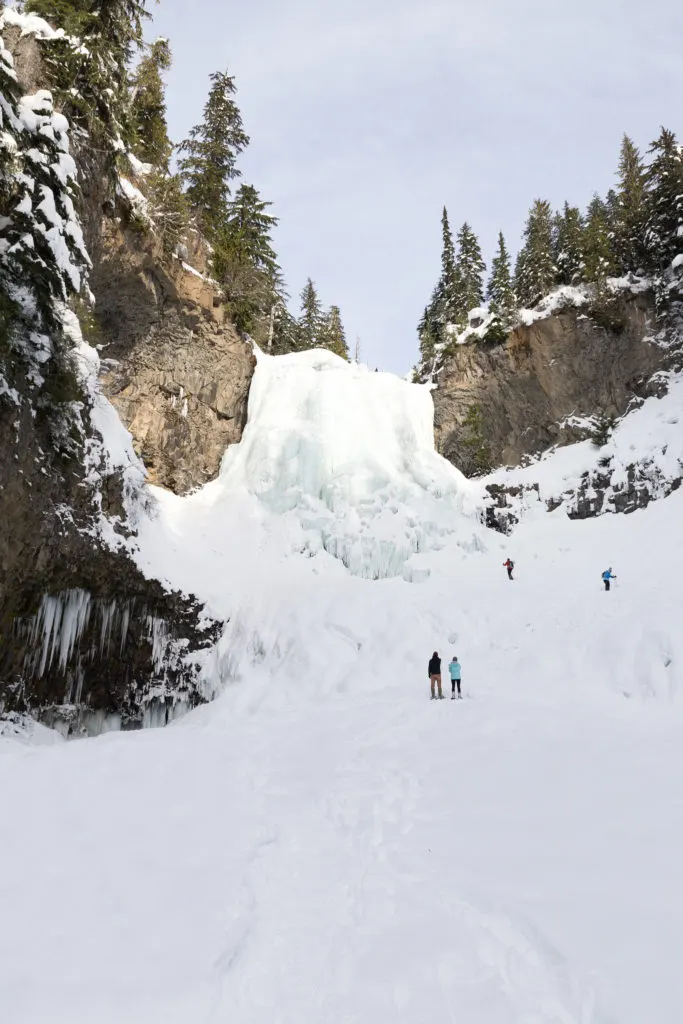
Distance: Up to 21 km of trails with various loops possible
Time Needed: 30 min to all day
Elevation Gain: Up to 600m
Rating: Super easy to challenging
The Trails: There are two separate cross country ski areas in the Callaghan Valley (Whistler Olympic Park and The Callaghan). They used to operate together, but in 2024/2025 they have separate tickets. The Callaghan has cross country and backcountry ski trails, but there are also 21 km of snowshoe trails ranging from super flat to more moderate. The highlight of the area is 43m high Alexander falls, which looks spectacular when frozen. You can snowshoe right to the base.
Avalanche Danger and Hazards: Most trails in the park are on flat or rolling terrain. However, some trails travel across steeper slopes that can be prone to avalanche. The park may close these trails if conditions are not safe. There are several backcountry access points in the park. Once you pass into the backcountry, there are no trail markings and you are in serious avalanche terrain. Some trails are shared with cross country skiers. Stay on the side of the trail and don’t walk in the set ski track.
Trail Map/Guide: Plan your route with this map.
Permits/Fees: Trail passes are $18 a day.
Dogs: The current website for the The Callaghan does not have any info about dogs. In the past dogs were allowed with the purchased of a day ticket . There were some on-leash on some trails. I’ll update this post after I get more info for the 204/25 season.
It costs $7 for a dog day pass. Dogs are allowed on leash on some trails and prohibited on others. There are also a few off-leash trails and a designated dog parking lot. (See this map for details on dog-friendly trails and parking).
Getting There: Follow signs to The Callaghan ski area along the Callaghan Valley Road. It is located just before the Whistler Olympic Park parking area.
Snowshoeing at Whistler Olympic Park
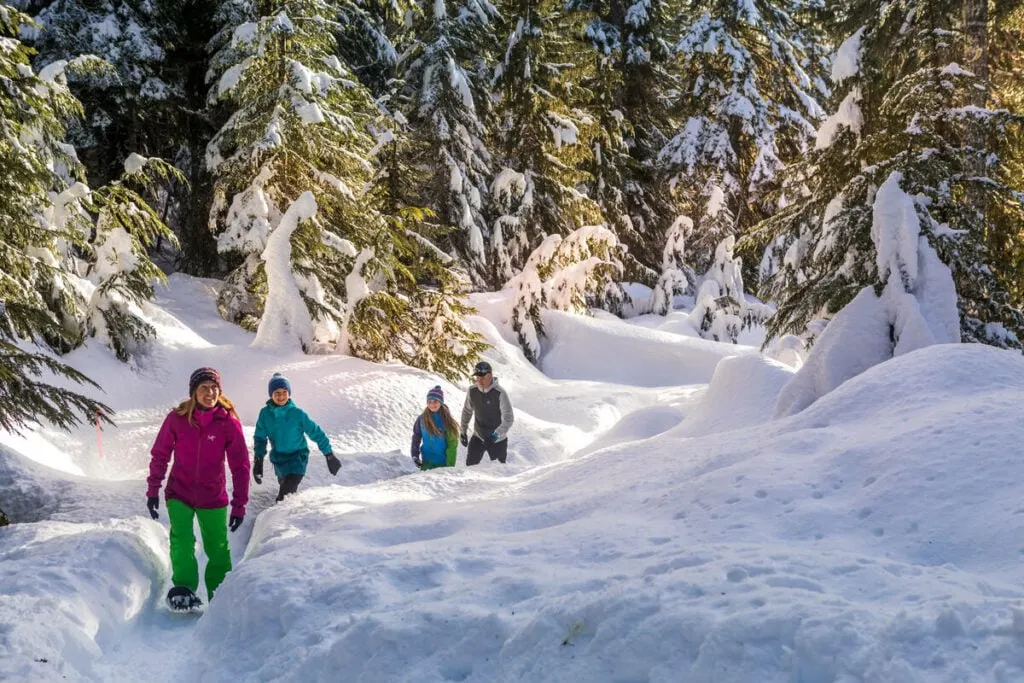
Distance: 18.5 km with various loops possible
Time Needed: 30 minutes to all day
Elevation Gain: Up to 300 m
Rating: Super Easy to Challenging
The Trails: There are two separate cross country ski areas in the Callaghan Valley (Whistler Olympic Park and The Callaghan). They used to operate together, but in 2024/2025 they have separate tickets. Whistler Olympic Park has cross country ski trails as well as a network of snowshoe trails.
Avalanche Danger and Hazards: Most trails in the park are on flat or rolling terrain. However, some trails travel across steeper slopes that can be prone to avalanche. The park may close these trails if conditions are not safe. There are several backcountry access points in the park. Once you pass into the backcountry, there are no trail markings and you are in serious avalanche terrain. Some trails are shared with cross country skiers. Stay on the side of the trail and don’t walk in the set ski track.
Trail Map/Guide: Plan your route with this map.
Permits/Fees: Trail passes are $20 a day.
Dogs: It costs $8 for a dog day pass. Dogs are allowed on leash on some trails and prohibited on others. There are also a few off-leash trails and a designated dog parking lot. Read through the Whistler Olympic Park dog info to see where dogs are allowed.
Getting There: Follow signs to the Whistler Olympic Park ski area along the Callaghan Valley Road. It is located just after The Callaghan parking area.
Snowshoeing to Whistler Train Wreck
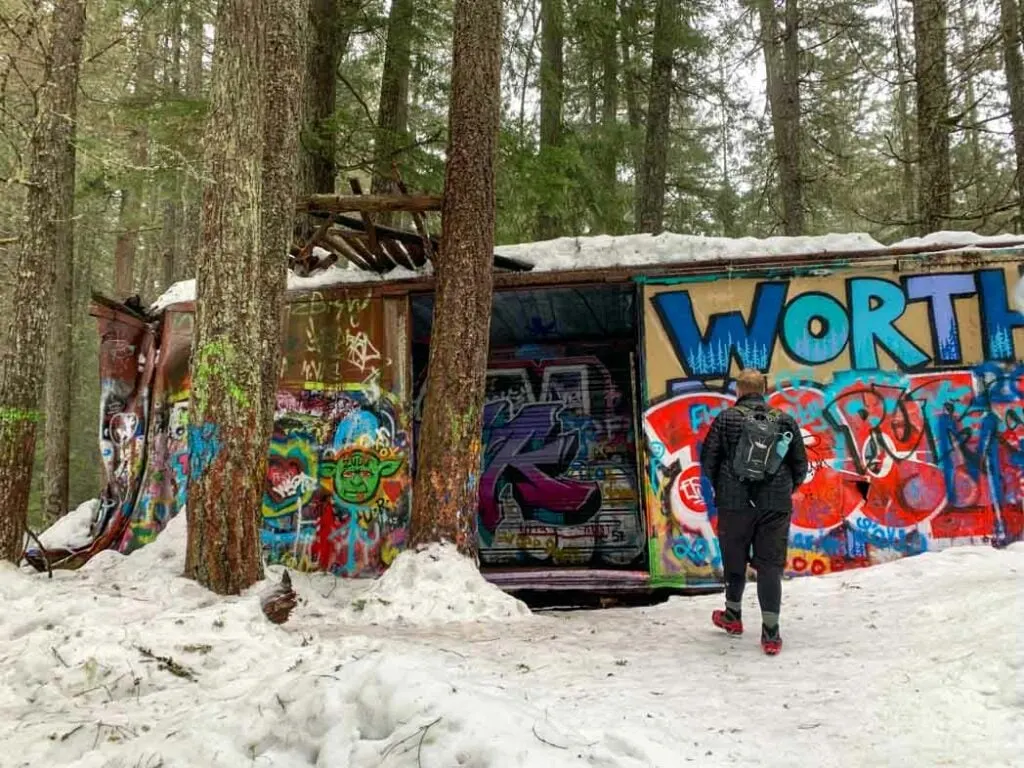
Distance: 2.5 km round trip
Time Needed: 1-1.5 hours
Elevation Gain: 70m
Rating: Easy
The Trail: This short trail is one of the best hikes in Whistler, so in the winter it’s a great place to go snowshoeing. The trail descends gradually to a brand new suspension bridge over the Cheakamus River.
On the other side, there are 7 graffiti-covered box cars in the forest along with some old mountain bike jumps. The main 5 are right where you came up the hill. The other two are a little further along the trail to the left.
Avalanche Danger and Hazards: No avalanche danger. Be sure to follow the directions in the trail guide linked below. There are still some old trail guides online that use an old (an illegal!) way to access the train wreck. The old way involves trespassing on some train tracks.
Trail Map/Guide: My Whistler Train Wreck Trail guide has all the info.
Permits/Fees: None required.
Dogs: Allowed on leash.
Getting There: There is free parking at the trailhead in the Cheakamus Crossing neighbourhood of Whistler. You can get to within a 10 minute walk of the trail on public transit. From Whistler Village take bus 20 to Legacy Way, then walk 700m down Jane Lakes Road to the trailhead.
Snowshoeing the Cheakamus River Trails
Distance: 6.5 km loop
Time Needed: 2-3 hours
Elevation Gain: 250 m
Rating: Easy/Moderate
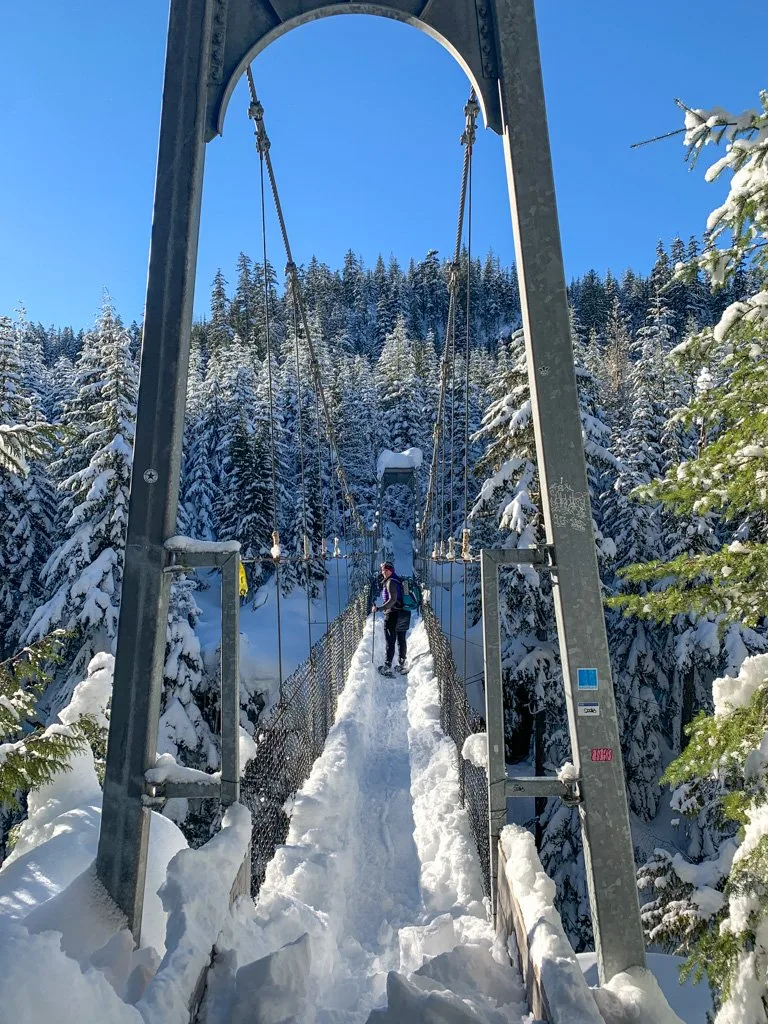
The Trail: The Whistler Interpretive Forest in Whistler’s Cheakamus Crossing neighbourhood is a great place to go snowshoeing in Whistler. You can make a loop by using the Riverside Trail on one side of the Cheakamus River and the Farside Trail on the other. Connect the two with a walk over a picturesque suspension bridge. The route has some short rolling hills, but its never very steep.
Avalanche Danger and Hazards: None.
Trail Map/Guide: This map shows all the trails. Use my Cheakamus River Snowshoe Trail guide.
Permits/Fees: None
Dogs: Allowed on leash.
Getting There: Park in Whistler Interpretive Forest Parking lot on Cheakamus Lake Road just after you turn off the highway.
You can get to the trail on public transit. From Whistler Village take bus 20 to the first stop in Cheakamus Crossing.
READ NEXT: Cheakamus River Snowshoe Trail in Whistler
Cheakamus Lake Snowshoeing
Distance: Up to 29km round trip
Time Needed: 2-8 hours
Elevation Gain: Up to 200m
Rating: Moderate
The Trail: Cheakamus Lake is a popular short hike in the summer time. In winter it’s a much longer journey since the normal access road is closed. First you have to snowshoe 7.5 km along the closed road to the summer parking lot. From there it’s another 3km to Cheakamus Lake following the summer trail. Once you get to the lake you can continue along the shore for a further 4km.
Avalanche Danger and Hazards: The road portion of the trip has no hazards. Once you leave the summer parking lot for the Cheakamus Lake and start on the trail you will be crossing a large rock slide and a steep slope. This slope is an avalanche hazard. Use caution and cross one at a time. Be prepared to turn back if conditions aren’t right.
Trail Map/Guide: This map shows all the trails.
Permits/Fees: None
Dogs: Allowed on leash on the road portion and the Whistler Interpretive Trails. Dogs are not permitted in Garibaldi Park so you can’t bring your dog on the Cheakamus Lake Trail.
Getting There: Parking: Park in Whistler Interpretive Forest Parking lot on Cheakamus Lake Road just after you turn off the highway. You can walk down the road to the trailhead.
You can get to within a 5 minute walk of the trail on public transit. From Whistler Village take bus 20 to the first stop in Cheakamus Crossing, then walk 350m down Cheakamus Lake Road to the trailhead.
Join: Snowshoeing in Vancouver Facebook Group
Snowshoeing to Rainbow Falls
Distance: 2.3 km return
Time Needed: 1-1.5 hours
Elevation Gain: 130m
Rating: Moderate
The Trail: This short trail takes you to the base of pretty little Rainbow Falls near Alta Lake in Whistler. It looks particularly gorgeous when frozen. While the trail is short, it does gain over 100m in less than a kilometer so it’s not super easy.
Avalanche Danger and Hazards: No avalanche hazard. The trail to Rainbow Falls branches off right from the main trail to Rainbow Lake (which isn’t accessible in the winter due to a removed bridge). The turn off to the falls can be hard to spot, but my trail guide will help you find the way.
Trail Map/Guide: Use my Rainbow Falls Loop Trail guide.
Permits/Fees: None required.
Dogs: Allowed on-leash on the Rainbow Falls Loop Trail but not allowed on other trails in the area.
Getting There: There is a parking lot at the trailhead. You can also take a taxi from Whistler Village.
Snowshoeing at Lost Lake Park
Distance: 3-15 km
Time Needed: 1-4 hours
Elevation Gain: 50m
Rating: Super Easy/Easy
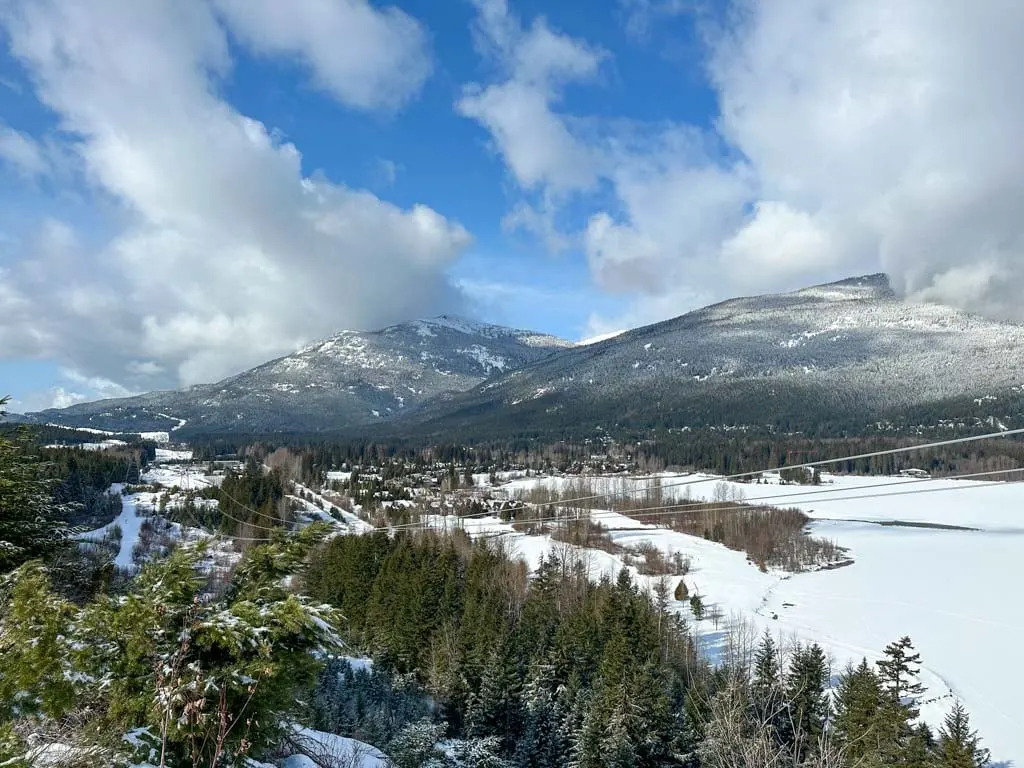
The Trail: Lost Lake Park is mostly known for its cross country ski trails, but it also has a 15km network of snowshoe trails to explore. These rolling trails wind through the forest around Lost Lake, intersecting the ski trails occasionally. If you climb up some of the hillier trails, you’ll discover views of Lost Lake or Green Lake. If you want a break, there’s a day lodge with a cafe and a warming hut.
Avalanche Danger and Hazards: No avalanche danger. The trails sometimes intersect cross country ski trails. Watch for on-coming skiers. Stay on the side of the trail and carefully step over the set ski track.
Trail Map/Guide: Read my Lost Lake snowshoe guide for step-by-step directions for my recommended route, a map, driving directions, and more.
Permits/Fees: Day passes are $13.50.
Dogs: Not permitted.
Getting There: The closest parking is in Lot 5 in Whistler Village. On public transit, take bus 5 to the corner of Blackcomb Way and Lorimer Road, then walk 5 minutes down Lorimer to the entrance to Lost Lake Park.
READ NEXT: Lost Lake Snowshoe Trails in Whistler
Snowshoeing the Ancient Cedars Trail
Distance: 13 km round trip
Time Needed: 4-6 hours
Elevation Gain: 350 m
Rating: Moderate/Challenging
The Trail: In the summer, the Ancient Cedars Trail is an easy hike to a grove of huge old-growth cedars. But in the winter it turns into a much longer outings since the rough logging road to the trailhead (4 km in total) isn’t plowed, so you will have to walk that as well.
Avalanche Danger and Hazards: The first two kilometres of the road is in a tight valley with steep slopes above you that will expose you to avalanche hazard.
Trail Map/Guide: There is a good description of the summer route on Vancouver Trails. Keep in mind that you will need to snowshoe up the access road.
Permits/Fees: None
Dogs: Allowed
Getting There: From Whistler, head north on Highway 99. Just past the end of Green Lake, turn left onto Cougar Mountain Road. Drive up the road for a few minutes to the Superfly Ziplines base area. Park here as the road past this point is impassable in winter.
Snowshoeing to Parkhurst Ghost Town
Distance: 6km loop
Time Needed: 3-5 hours
Elevation Gain: 100m
Rating: Moderate
The Trail: If you love abandoned buildings and are comfortable navigating unmarked trails, the free snowshoe trip to the former town of Parkhurst was made for you. The loop hike to the ghost town follows a network of mountain bike trails that can be a challenge to find in the winter.
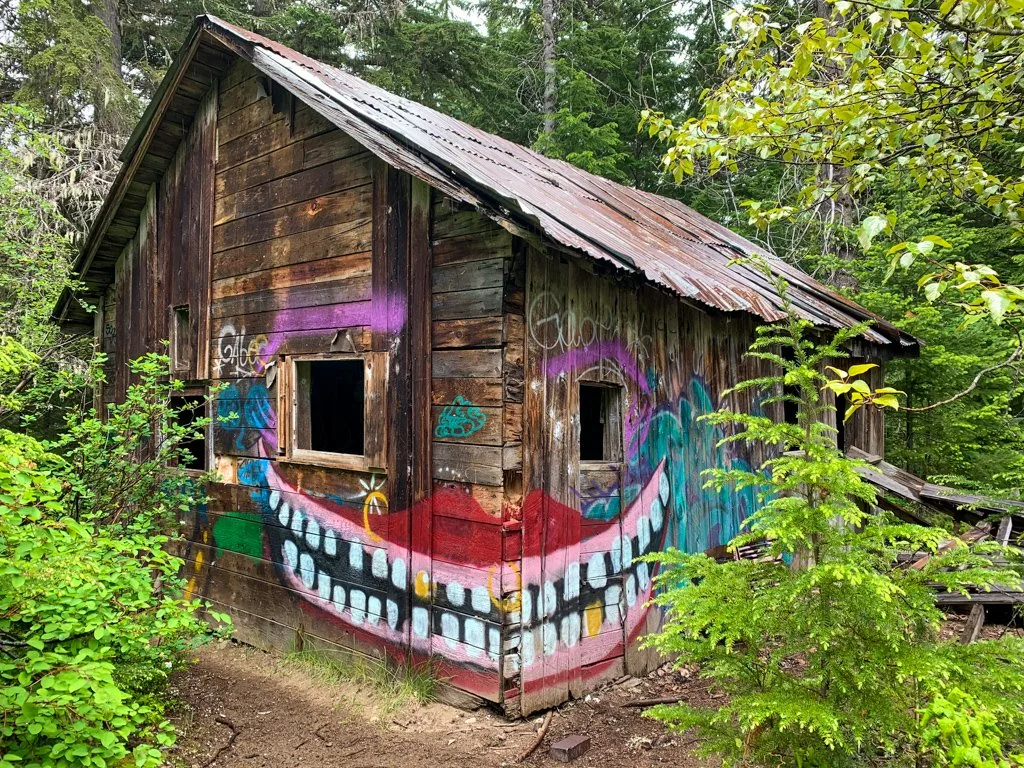
Parkhurst Ghost Town is a former logging town settlement on the shores of Green Lake that was abandoned in the 1960s, before Whistler was a ski area. There are lots of collapsed buildings and vehicles to discover in the area. The highlight is the one surviving building, covered in graffiti.
Avalanche Danger and Hazards: No avalanche danger. Some of the trails and junctions are not well marked so it can be easy to get lost. The markers are not easy to see in the winter. I recommend using a GPS app that shows trails like Gaia, Alltrails or Trailforks. Bring a map and compass just in case.
Trail Map/Guide: Read my complete guide to the Parkhurst Ghost Town hike. The directions were written for summer travel and the trail network will be much more challenging to find in the winter.
Permits/Fees: None.
Dogs: Allowed.
Getting There: Drive 10 minutes north of the village on highway 99 to the marked turn off for the Wedgemount Lake Trail. Turn right off the highway, then cross train tracks and a bridge. Park on the side of the road right after the bridge. There will usually be too much snow to drive all the way to the trailhead described in my trail guide. Walking the road will add 1km each way to your hike.
Snowshoeing to Nairn Falls
Distance: 3km return
Time Needed: 1.5 hours
Elevation Gain: None
Rating: Easy
The Trail: This flat trail runs above the bank of the Green River before ending at the spectacular viewpoint for Nairn Falls. The falls are especially dramatic when they partially freeze up in the winter.
Avalanche Danger and Hazards: No avalanche danger. Use caution in slippery conditions as the trail is on a wide ledge above the river and the drop down to the river is pretty steep.
Trail Map/Guide: There is info on the Nairn Falls Provincial Park website.
Permits/Fees: None.
Dogs: Allowed on leash.
Getting There: Drive 30 minutes north of Whistler Village to Nairn Falls Provincial Park. Watch for the BC Parks signs so you don’t miss the turn. The campground portion of the park is gated in winter, but you can drive into the day use parking lot.
Snowshoeing to Joffre Lakes
Distance: 10km return to the 3rd lake
Time Needed: 5-6 hours
Elevation Gain: 400m to the 3rd lake
Rating: Challenging. Best for experienced snowshoers only
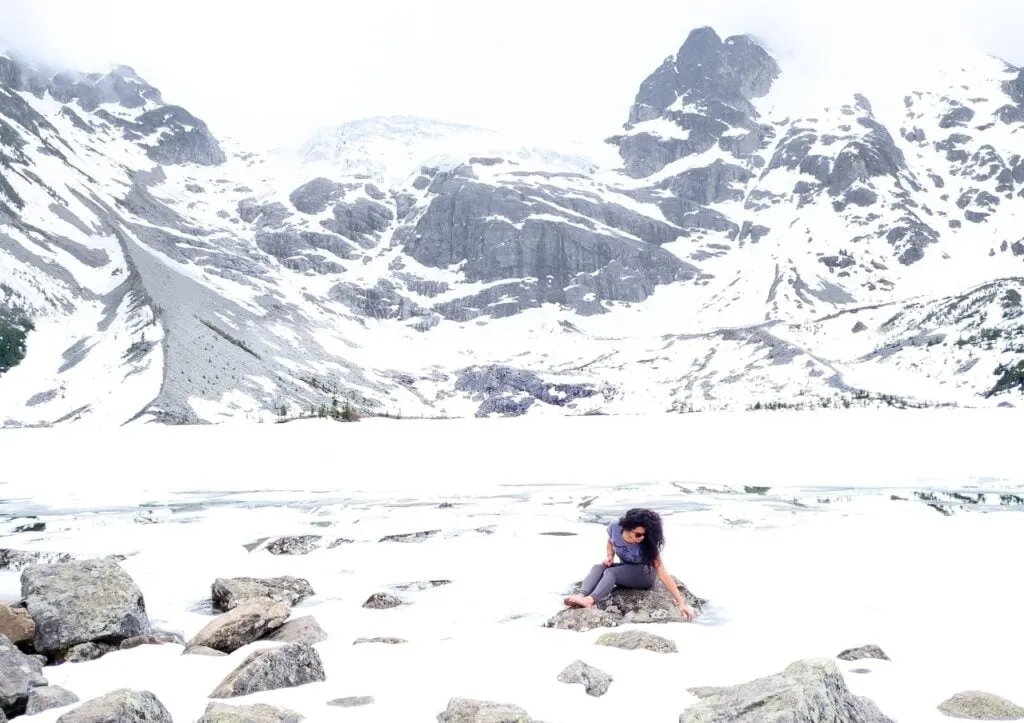
The Trail: This popular trail winds past two alpine lakes before arriving at a third alpine lake with a great view of the surrounding glaciers. In the summer the turquoise blue lakes are the draw, but in the winter the whole area is blanketed in white.
The first lake is an easy 5 minute walk from the car (great for beginners), but the other lakes will take substantially longer to reach and are best left for experienced snowshoers. You have to pay if you want to camp overnight, but it’s totally free to snowshoe there on a day trip.
Avalanche Danger and Hazards: This is serious backcountry terrain. You are far from help and there is no cell service. The trail crosses below some avalanche terrain, particularly in between the 2nd and 3rd lakes and at the far end of the 3rd lake. You should have avalanche gear and training if you plan to tackle this trail.
Trail Map/Guide: See my Joffre Lakes hiking guide for more details.
Permits/Fees: None in winter.
Dogs: Not allowed.
Getting There: Drive an hour north of Whistler, through Pemberton and Mount Currie to Joffre Lakes Provincial Park. Although the entire drive is on the paved road of highway 99, this is a VERY steep mountain road with lots of switchbacks and it can be slippery and snowy in the winter. Bring tire chains just in case.
In the summer there is a large parking lot, but only a fraction of it is plowed in the winter. And sometimes it’s not plowed at all. Try to park where you won’t block the plow and bring a snow shovel in case you need to dig yourself a parking spot. Get there early to make sure you get a spot.
Join: Snowshoeing in Vancouver Facebook Group
No-Go Trails for Snowshoeing in Whistler
There are lots of summer hiking trails in Whistler that may sound like a fun snowshoe adventure in winter. However, many of them have significant avalanche danger, or are closed in winter.
Here’s my list of no-go trails for snowshoeing:
- Blackcomb Ascent Trails: These trails are closed in winter because they go through the ski area.
- Blackcomb Alpine Trails: These trails are closed in winter because they go through the ski area.
- Singing Pass Trail to Russet Lake: This trail has significant avalanche hazard. As well, this trail is very long and is often used as a backcountry ski descent route. It is only suited for experienced snowshoers with avalanche training. And honestly, it’s not a very aesthetically pleasing route unless you are on your way to the Kees and Claire Hut at Russet Lake.
- Musical Bumps: This trail is closed in winter because it goes through the ski area.
- High Note Trail: This trail is closed in winter because it goes through the ski area.
- Rainbow Lake: This trail is closed in winter because a key bridge is removed to protect it from snow-loading.
- Skywalk Trail: This trail includes signifcant avalanche hazard. As well, once it leaves the trees wayfinding is very difficult. The trail is only suited for experienced snowshoers with avalanche training and off-trail travel skills.
- Wedgemount Lake: This trail has significant avalanche hazard, especially just before the lake. It is also very steep and can require an ice axe to navigate. The trail is only suited for experienced snowshoers with avalanche training.
Where to Rent Snowshoes in Whistler
If you want to try snowshoeing before you buy, lots of places in Whistler rent snowshoes. Sunny weekends and holidays can be really busy for rentals, so try to reserve a pair ahead of time if possible.
- Urban Alpine in Squamish
- Whistler Olympic Park
- Ski Callaghan
- Cross Country Connection at Lost Lake
- Spicy Sports in Whistler Village.
- Spud Valley Sporting Goods in Pemberton
Snowshoe Tours in Whistler
If it’s your first time snowshoeing, it can be helpful to go with a guide. They can help you get your snowshoes set up and provide tips for snowshoeing technique. Your guide will also have info about the plants, animals, and views you will see on your trip.
- Snowshoe the Medicine Trail: This snowshoe tour takes place on private land through beautiful forest, so you can only do it with a tour. The trip visits an old trapper’s cabin too!
- Private Snowshoeing Tour: Your guide will take you to the trail of your choice – you can pick from several destinations to suit your group.
Final Thoughts
Which of these Whistler snowshoe trails is your favourite? Have questions about snowshoeing in Whistler? Let me know in the comments.
READ NEXT:
More Snowshoeing Guides:
- Cheakamus River Snowshoe Trail in Whistler
- Lost Lake Snowshoe Trails in Whistler
- Brandywine Falls Provincial Park Hiking Guide
- Where to Go Snowshoeing in Vancouver
- Where to Go Snowshoeing in Squamish
- Where to Go to Snowshoeing in Manning Park
- Where to Go Snowshoeing in Vancouver’s Fraser Valley
- Snowshoe at Dakota Ridge on the Sunshine Coast, BC
Snowshoeing and Winter Hiking Advice
- How to Choose Snowshoes: A Complete Guide
- The Best Boots For Snowshoeing
- Best Gifts for Snowshoers (20+ Ideas)
- Snowshoeing Safety: 14 Ways to Get into Trouble and How to Prevent Them
- What to Wear Winter Hiking and Snowshoeing
- 9 Tips for Winter Hiking (You Don’t Have to Freeze!)
More Whistler Ideas:
- The Best Things to do in Whistler (By a Local)
- 44 Things to do in Whistler in Winter
- 40 Cheap and Free Things To Do in Whistler
- The Best Hikes in Whistler: A Guide to All the Trails
- Camping in Whistler, BC: The Best Campgrounds
- Hike to Parkhurst Ghost Town in Whistler
- Sea to Sky Highway Road Trip Guide: Driving from Vancouver to Whistler
- Grasslands National Park Travel Guide - February 4, 2026
- The Best (and Worst) Backpacking Meals Reviewed - December 16, 2025
- My Favourite Hiking Gear of 2025 - December 9, 2025

John
Thursday 7th of March 2019
Great guide, thanks! I was in Whistler for a few days and I hit the three waterfalls on your list. Rainbow Falls was excellent. I rented snowshoes (Tubbs) from Affinity Rentals, next to the Pinnacle Hotel in Whistler Village.
Taryn Eyton
Thursday 7th of March 2019
That's great to hear John! I bet the waterfalls were frozen in these cold temperatures we've been having. It's always so cool to see them all icy!
Paul
Saturday 16th of February 2019
Wonderful and useful site. You may like to update that dogs are no longer allowed at all at Joffre Lakes Provincial Park.
Taryn Eyton
Thursday 21st of February 2019
Ah good catch Paul. Thanks! I've updated the post.
Danielle
Sunday 21st of January 2018
Oh man! Now I want to make a winter trip to Whistler! I had always counted it out since I don’t ski... but I do snowshoe! Seeing Alexander Falls frozen would be epic!
Megan
Saturday 20th of January 2018
Awesome! I'm headed to Whistler for a week in March. I was planning to ski But maybe I will have to give snowshoeing a go, some of these trails look really special.
Josy A
Friday 19th of January 2018
This is soooo helpful!
I moved to Vancouver this year (so I think I have seen a couple of your other super-helpful hiking posts) but now I discovered that I love snowshoeing, I will follow a few more of these. Thank you so much for sharing your tips and adventures!!
I started following you anyway. :)
Taryn Eyton
Friday 19th of January 2018
Thanks Josy! Snowshoeing is pretty easy to do: if you can walk you can snowshoe :) If you live in Vancouver you'll also enjoy my snowshoeing guides to Vancouver and Squamish. I also have another one for the Fraser Valley coming out soon!