

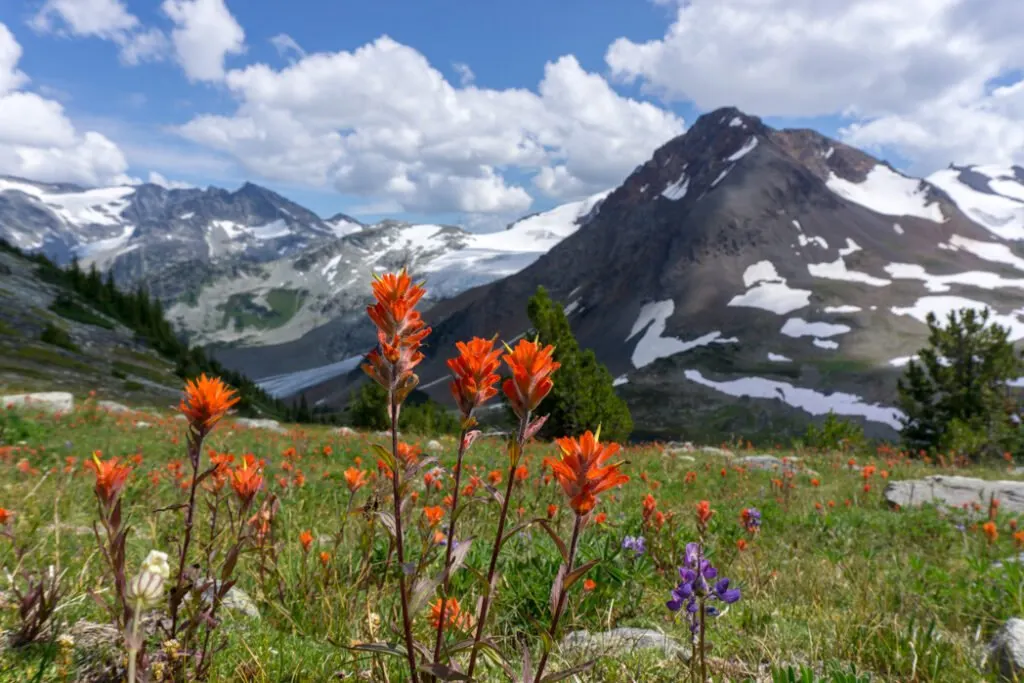
I grew up in Vancouver and now I live in Squamish, so I’ve been to Whistler more times than I can count. Since I’m not a skier, hiking in Whistler is my favourite thing to do when I visit. I’ve hiked most of the trails near Whistler and put together a list of the best hikes for you.
There is a Whistler hike for everyone on this list from short and easy hikes to all-day epic climbs. There are waterfalls, river canyons, historical ruins, lakes, viewpoints, and mountain tops.
These Whistler trails are all easy to navigate and don’t require tedious 4×4 driving to reach. Use this list of the best hikes in Whistler to plan your next adventure.
Psst: Looking for a full list of Whistler activities? Check out my list of the best things to do in Whistler. It includes over 80 ideas!
Whistler Hiking Basics
Getting to Whistler: Whistler is located in British Columbia, Canada. It’s a 1.5-hour drive from Vancouver via the Sea to Sky Highway a.k.a. Highway 99. If you don’t want to drive yourself, you can take a shuttle bus. The drive to Whistler is gorgeous! For a complete list of things to see between Vancouver and Whistler, check out my Sea to Sky Highway Road Trip Guide.
Hiking season in Whistler: Whistler sits high up in the Coast Mountains. That means it has a short summer hiking season from June to September. Generally, the valley bottom trails start to be snow-free in April or May with higher elevation trails staying snowy into July. By mid October, it has started to snow again in the mountains. No matter what time of year you hike, check the weather forecast before you head out. Checking the weather is just one of the things you should do before every hike. (And if you’re visiting in the winter, check out this list of places to snowshoe in Whistler.)
READ NEXT: The Best Weather Apps for Hiking
What to bring hiking in Whistler: Even if you are just going for a short hike, you need to be prepared for the weather and conditions. Don’t forget the 10 essentials. (Rain gear and warm clothing are especially important.)
Bear Safety: Whistler is home to both black bears and grizzly bears. Carry bear spray and make noise while you hike to reduce your risk of a negative bear encounter. For more info about hiking in bear country, read my post about bear safety for hikers.
Leave No Trace: The area around Whistler is sensitive wilderness. Learn about Leave No Trace principles to help keep the wilderness wild.
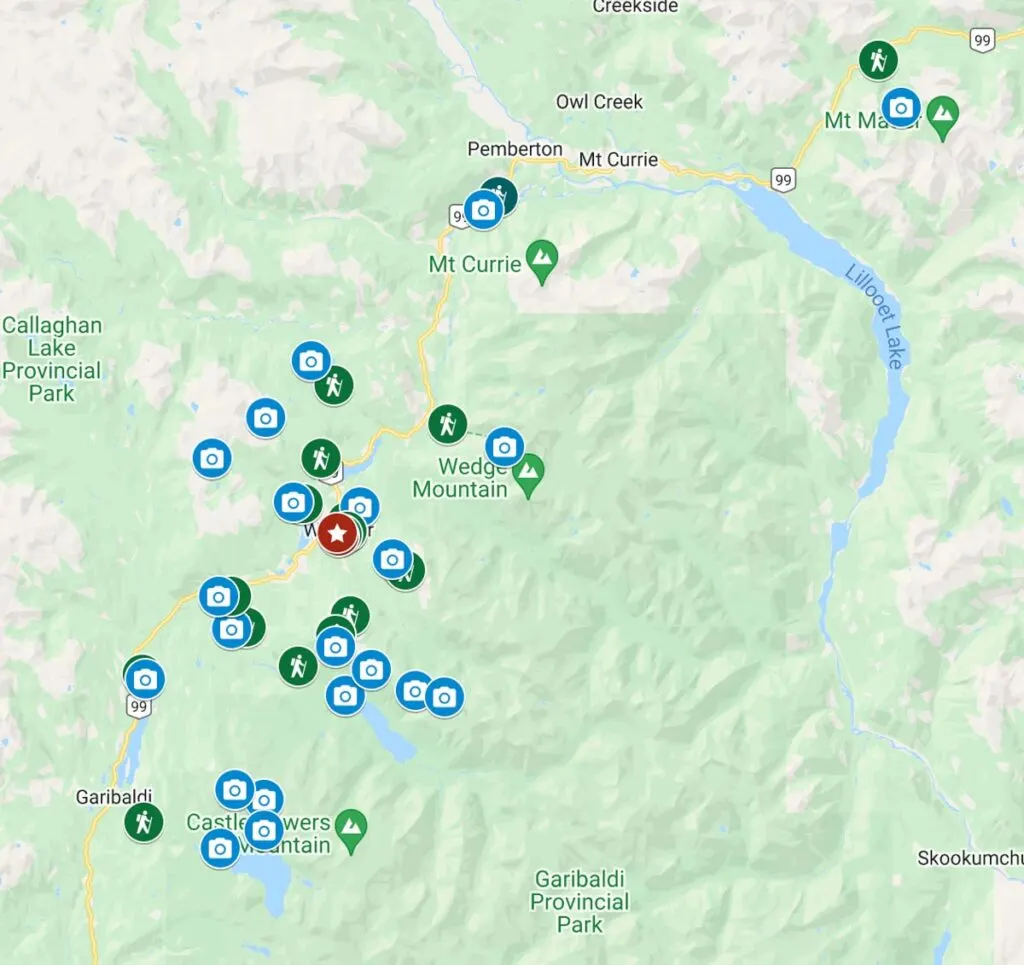
Whistler Trails Map
I made a custom Google map for you that shows all of the trails on this list, plus the exact location of the trailhead and parking.

Hikes in Whistler Village
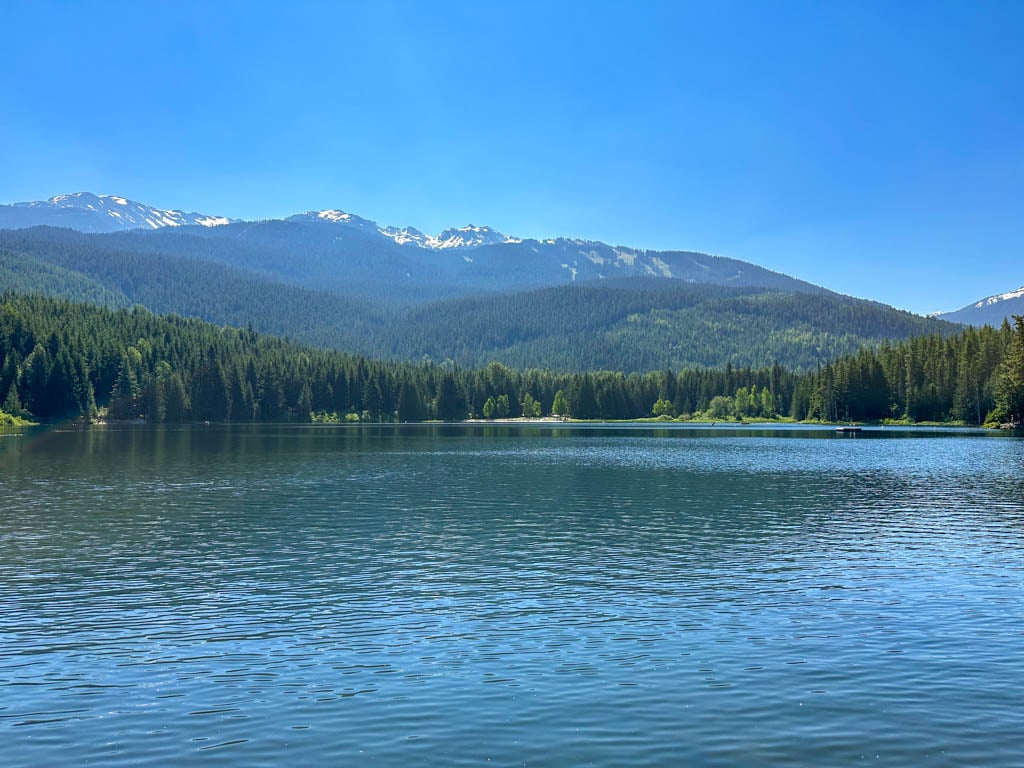
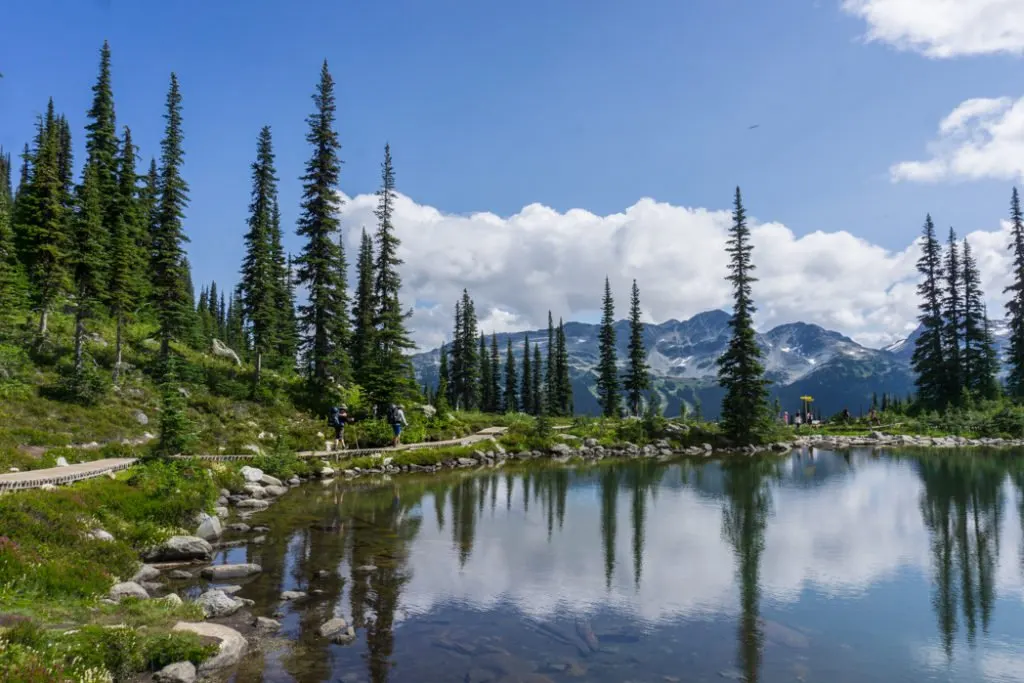
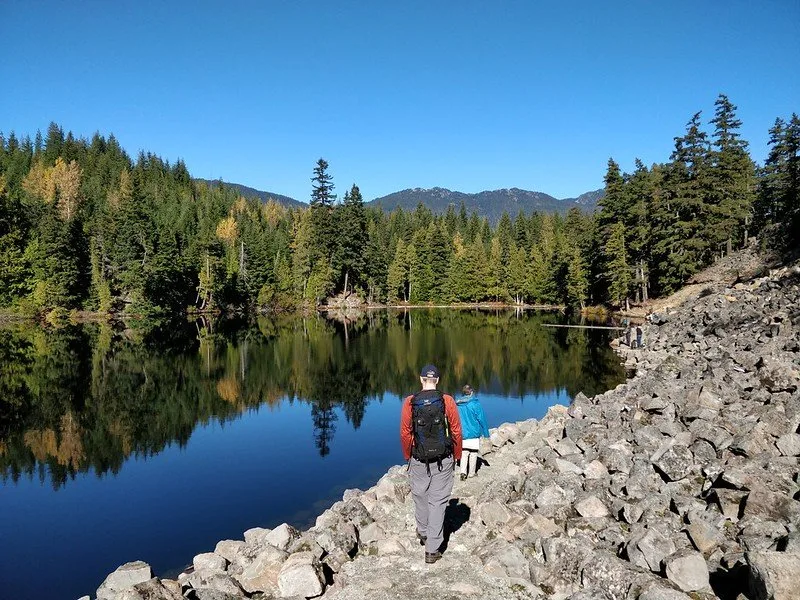
Lost Lake
The Lost Lake Trail is almost in the heart of Whistler Village. It is an easy hike through the forest to the lake. The trail is fairly flat and smooth enough for strollers. Follow the trail around the lake, then retrace your steps on the main trail back to the trailhead. On hot summer days, take a break at the lake for a swim.
If you want to add on some additional distance, a huge network of multi-use trails wind their way around the area, including the Sea to Sky Trail that stretches from Squamish to Pemberton. A few of them also go to viewpoints. Just watch out for mountain bikes. (In the winter the trail network is a great place to cross country ski or go snowshoeing in Whistler.)
Difficulty: Easy Distance: 5km loop Elevation gain: 50m Time Needed: 1.25 hours Best Time to Go: March to October Trail Info: My Lost Lake Park guide How to get there: The trailhead is located in Whistler on Lorimer Road near the intersection with Blackcomb Way. It’s a 10-minute walk from the village.

Blackcomb Ascent Trails
The steep Blackcomb Ascent trail is one of the hardest hikes in Whistler. Challenge yourself by hiking directly up the side of Blackcomb Mountain. But your knees won’t have to suffer because you can take the gondola back down. Known collectively as the Burn trails, the Blackcomb Ascent hike starts with Little Burn, which is the mellowest gaining just 74m over 0.8km. In the middle is Big Burn, which is steep and challenging – it’s 2.2km long with 494m of elevation gain. At the end of Big Burn, you can load onto the gondola at the Blackcomb Midstation or continue climbing upwards to the Rendezvous Lodge gondola station on the Heartburn Trail for another 3.1km, gaining 607m. Be sure to look up the gondola schedule before you go!
Difficulty: Very Challenging Distance: 6.1km one-way Elevation gain: 1175m Time Needed: 3.5 hours Best Time to Go: mid-June to September Trail Info: Whistler Blackcomb How to get there: The trail starts at Blackcomb Base on Blackcomb Way in Whistler. It’s an easy 10-minute walk from Whistler Village. To take the gondola back down, you’ll need to buy a ticket on the mountain.

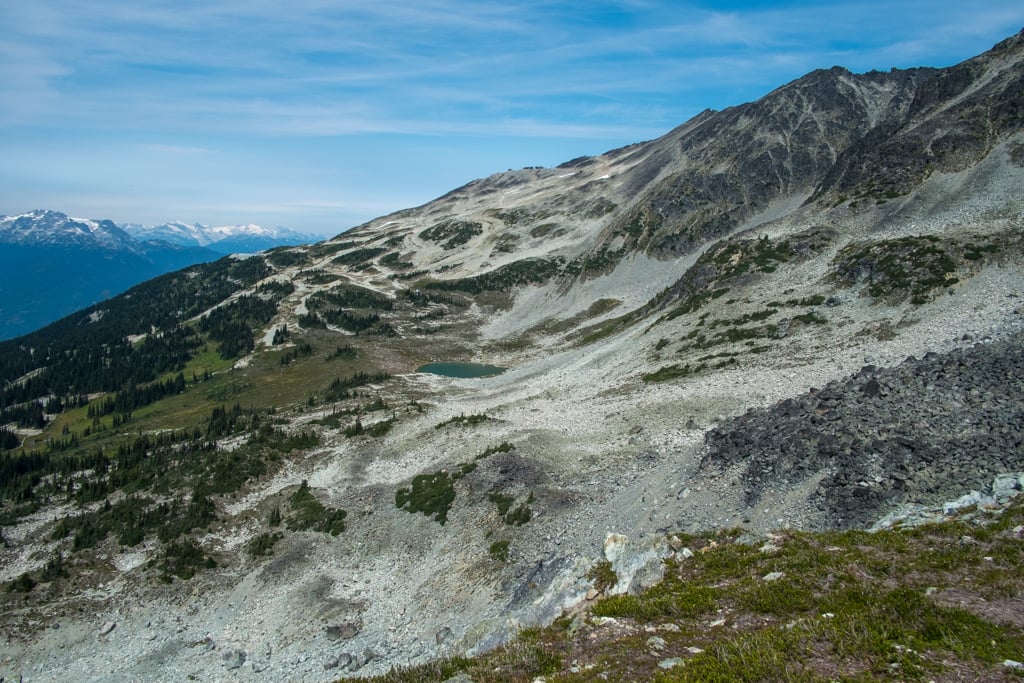
Blackcomb Alpine Trails
You’ll need to buy a gondola ticket to get the Blackcomb Alpine Trails, but the views are worth the price. You’ll ascend to 1850m above sea level in the gondola, emerging into an alpine landscape of rocks, glaciers, and wildflowers. Follow the Alpine Loop trail to the Fitzsimmons Viewpoint, then continue onwards on the Overlord Trail to Decker Tarn and Blackcomb Lake via loop trails. Your high point is Overlord Glacier Viewpoint at an elevation of 2050m.
Difficulty: Moderate Distance: Up t0 10km loop Elevation gain: 200m Time Needed: 3 hours Best Time to Go: mid-July to September Trail Info: My Blackcomb Trails guide How to get there: Take the Blackcomb gondola from Blackcomb Base up to Rendezvous Lodge at the top of Blackcomb. You can also get there via the Whistler Gondola and Peak to Peak Gondola directly from Whistler Village.

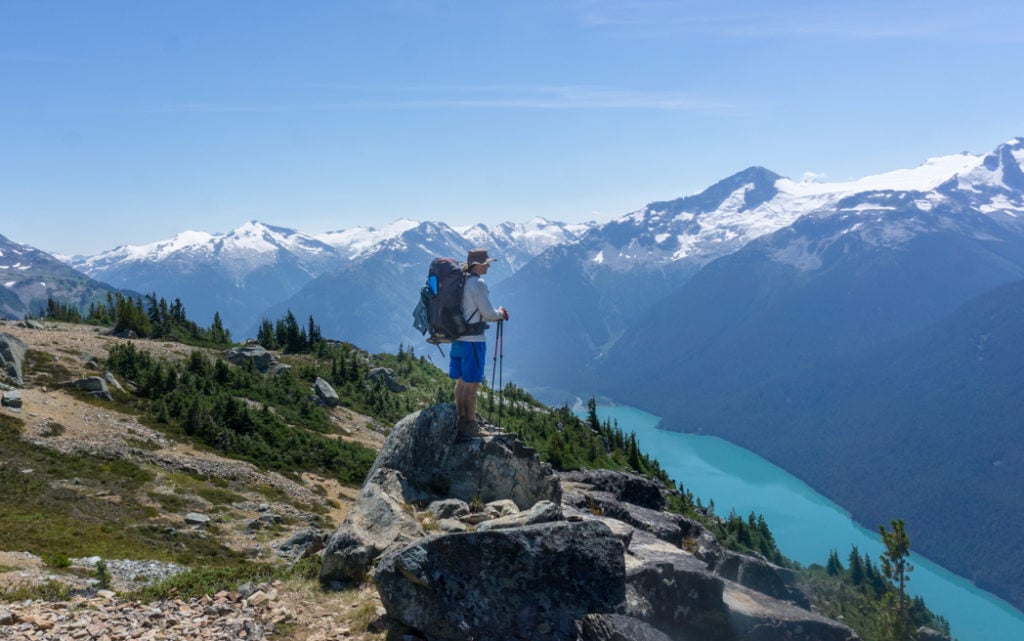
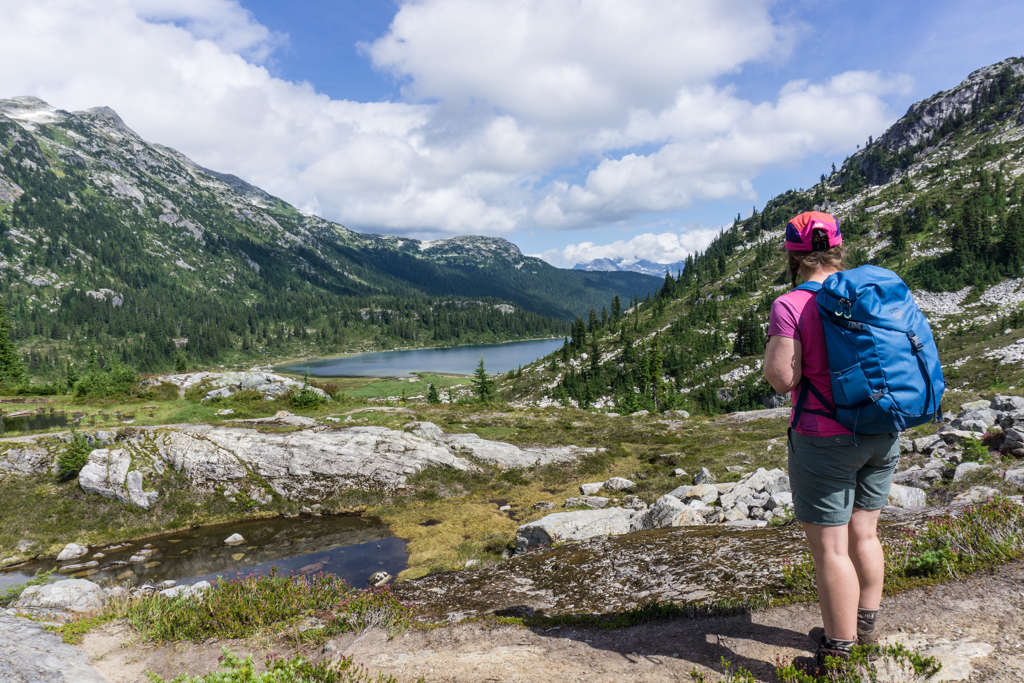
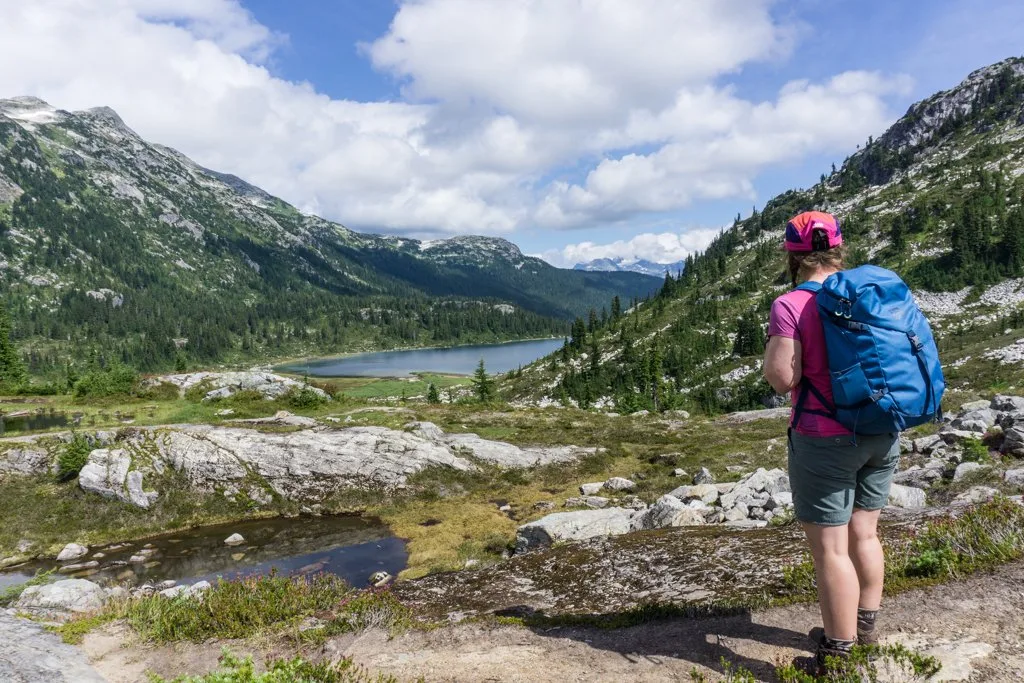
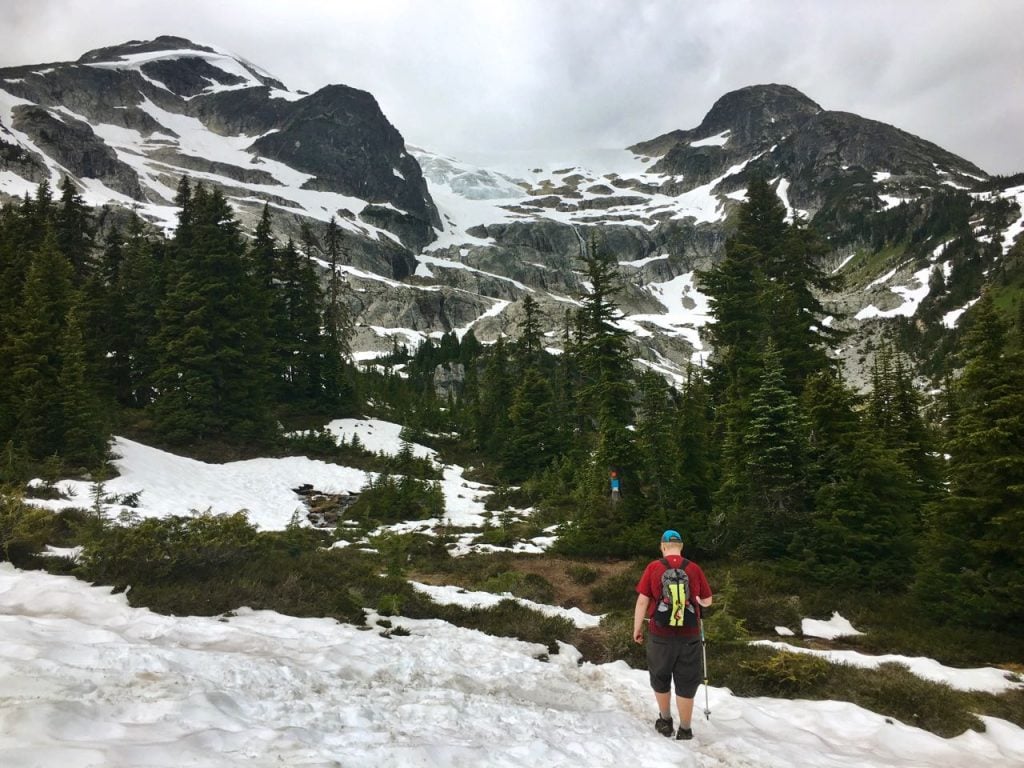
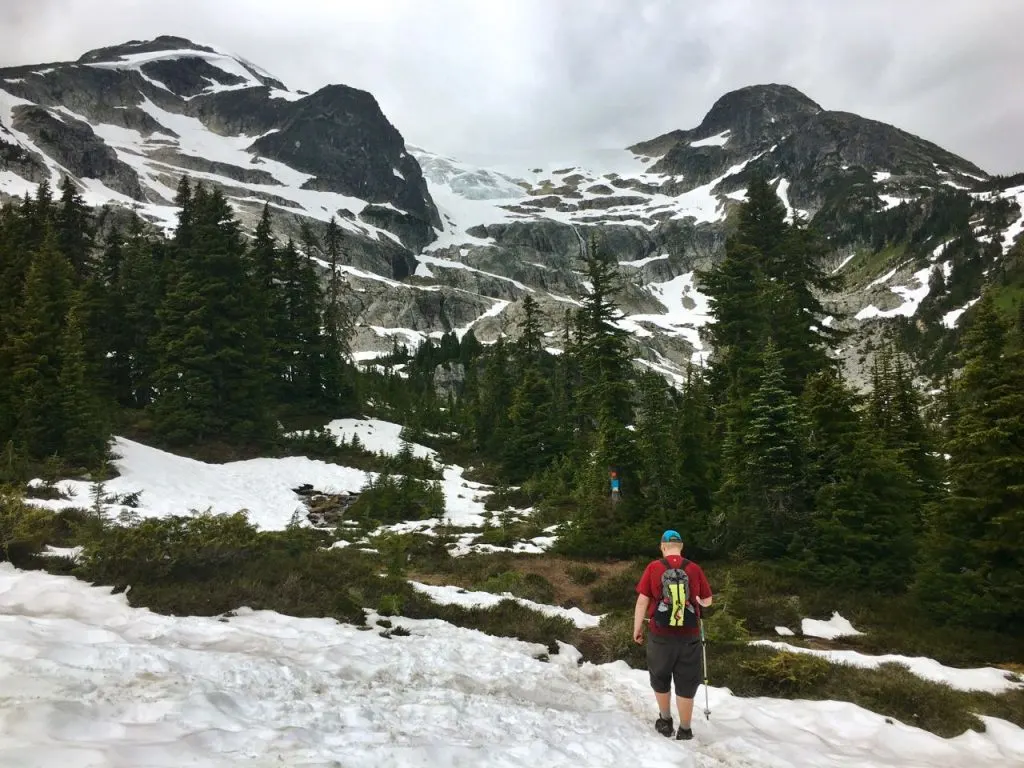
Singing Pass to Russet Lake
This trail is long and not particularly scenic, but it provides free access into the gorgeous alpine between Whistler and Blackcomb Peaks in Garibaldi Provincial Park. I’ve got a complete description for this trail in my Russet Lake hiking and backpacking guide.
The trail climbs first on an old road, then on a forested trail up the Fitzsimmons Creek valley. The trail has several washouts and unbridged creeks, so use caution during snow melt or after heavy rain. But at Singing Pass, you emerge into the alpine. The trail ends at Russet Lake, surrounded by glaciated peaks. You can also use this trail to connect with the Musical Bumps or High Note Trails to Whistler Peak.
Difficulty: Very Challenging Distance: 31km round trip Elevation gain: 1280m Time Needed: 10-11 hours Best Time to Go: July to September Trail Info: My Russet Lake hiking guide, Garibaldi Provincial Park How to get there: The trailhead is next to the Whistler Gondola bus loop on Blackcomb Way.
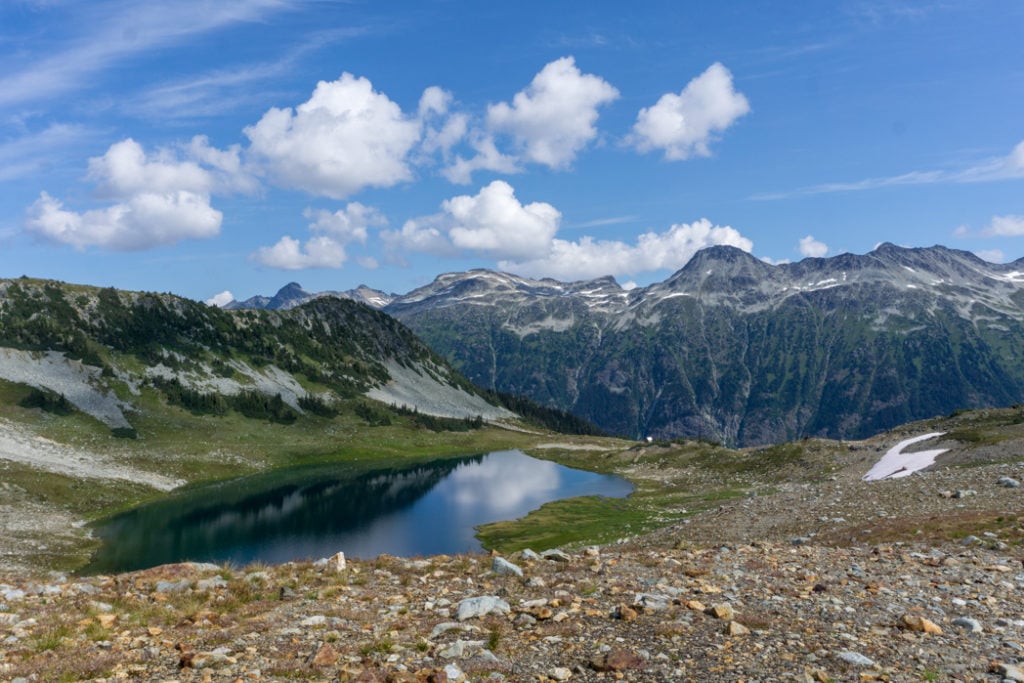

Musical Bumps
The Musical Bumps is one of the most beautiful hikes in Whistler. It travels along the top of a ridge, passing Harmony Lake, Symphony Lake, Piccolo Summit, Flute Summit, and Oboe Summit. Now do you understand why it’s called the Musical Bumps Trail?
To get there, pay for the gondola and take it all the way up to Roundhouse Lodge on Whistler Mountain. The trail ends at Singing Pass. From there, you can retrace your steps back to the Roundhouse, continue upward to Russet Lake, make a loop by using the High Note Trail, or walk all the way back down to Whistler Village on the Singing Pass Trail. Time your visit for mid-summer to see the wildflowers.
Difficulty: Challenging Distance: 19km round trip Elevation gain: 305m Time Needed: 8-9 hours Best Time to Go: July-September Trail Info: Whistler Blackcomb, Garibaldi Provincial Park How to get there: Ride the gondola from Whistler Village to the Roundhouse Lodge on Whistler Mountain.

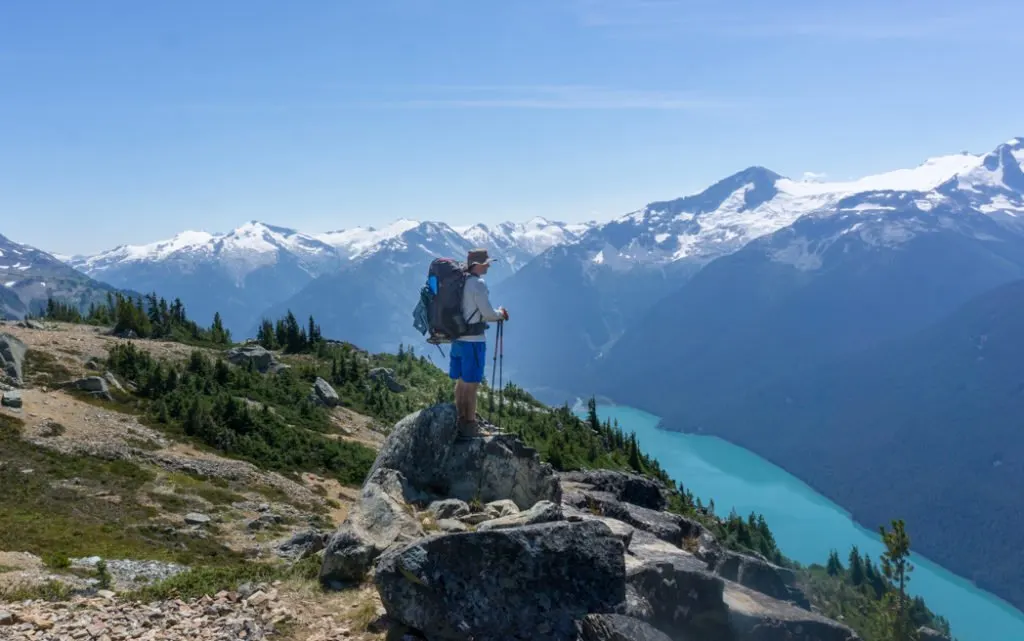
High Note Trail
The High Note Trail is one of the newest trails in Whistler, and also one of the most spectacular. (It made my list of the top 10 hikes near Vancouver.) You ascend to the very top of Whistler Peak, then make a descending loop. Along the way, there are gorgeous views of Cheakamus Lake below and Black Tusk across the valley. You can also connect this trail to the Musical Bumps. And if the entire High Note Trail is too long for you, there’s a shortcut halfway along called the Half Note.
Difficulty: Moderate Distance: 9.6km one-way Elevation gain: 430m Time Needed: 3-4.5 hours Best Time to Go: July to September Trail Info: My High Note Trail Guide How to get there: Ride the gondola from Whistler Village to the Roundhouse Lodge on Whistler Mountain, then take the Peak Chair up to the peak.
Hikes on the West Side of Whistler
Rainbow Lake
The trail to Rainbow Lake climbs through the forest on the west side of the Whistler Valley, passing Rainbow Falls along the way. It emerges into the alpine on the shores of beautiful Rainbow Lake, nestled beneath the rocky bulk of Rainbow Mountain. The entire hike is within the Whistler watershed that supplies drinking water to the town so swimming isn’t allowed and you should use the three toilets along the trail.
Difficulty: Challenging Distance: 16km round trip Elevation gain: 850m Time Needed: 6-7 hours Best Time to Go: July-September Trail Info: Rainbow Mountain Trail Map, Vancouver Trails How to get there: From Whistler Village, head south on Highway 99, then turn right on Alta Lake Road. Follow it for 6km to the trailhead and parking area on the left side of the road. You can also take a taxi.
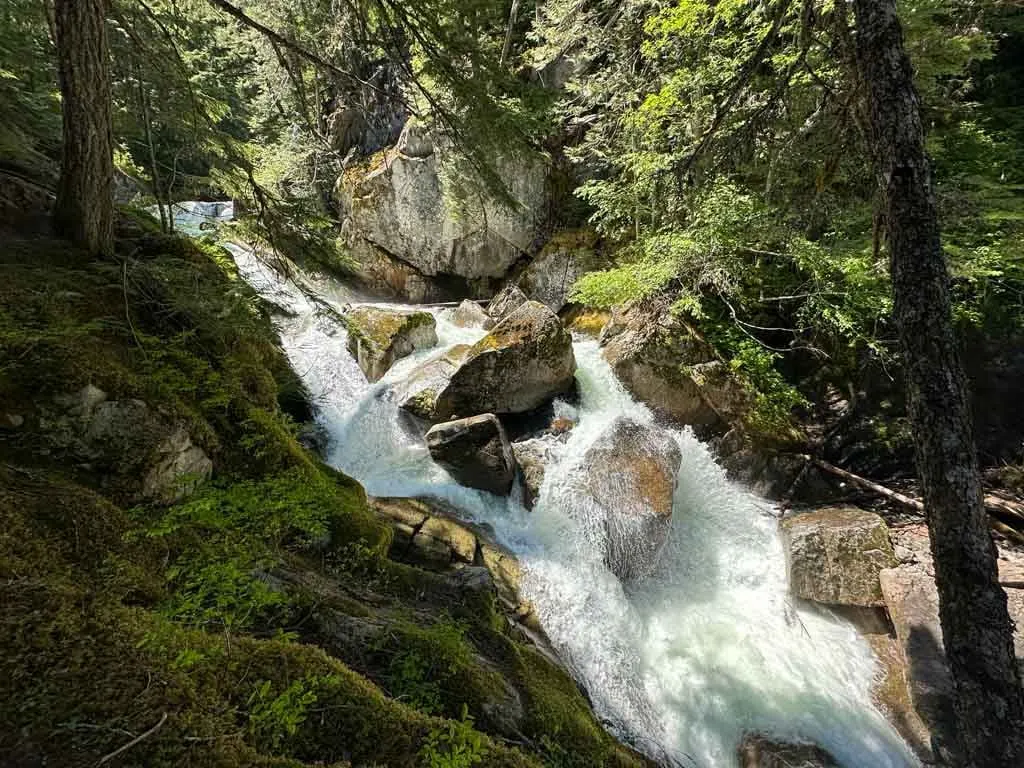
Rainbow Falls
If the hike to Rainbow Lake is too long, just head a short distance up the trail to visit Rainbow Falls. The falls aren’t visible from the main trail, but you can take a side trail to visit them. The best time to see the falls is during the spring runoff, but they are beautiful at any time of year. You can also snowshoe to Rainbow Falls in the winter. Use my Rainbow Falls trail guide to find your way.
Difficulty: Easy Distance: 2.3 km loop Elevation gain: 130 m Time Needed: 1-1.5 hours Best Time to Go: May-October Trail Info: My Rainbow Falls trail guide. How to get there: From Whistler Village, head south on Highway 99, then turn right on Alta Lake Road. Follow it for 6km to the trailhead and parking area on the left side of the road. You can also take a taxi.

Skywalk Trail
The Skywalk Trails are part of Whistler’s new alpine trail network on the northeast face of Rainbow Mountain. There are actually three trails: Skywalk South, 19 Mile Creek, and Skywalk North that connect to make several loop trips possible. All three trails top out in the alpine near the frozen waters of Iceberg Lake. A popular loop option is to combine the 19 Mile Creek and Skywalk North trails.
Difficulty: Challenging Distance: Up to 20km Elevation gain: 1025m Time Needed: 9 hours Best Time to Go: July to September Trail Info: Rainbow Mountain Trail Map, Vancouver Trails How to get there: The Skywalk North and 19 Mile Creek trails start at the end of Mountain View Drive in the Alpine Meadows neighbourhood. To get there from Whistler Village, drive Highway 99 north and turn left on Meadow Lane into Alpine Meadows. Immediately turn right onto Parkwood Drive, then go left on Mountain View Drive and follow it up the hill to its end. Bus route 30 stops at the intersection of Mountain View Drive and Valley drive a few minutes from the trailhead. You can also take a taxi.
Hikes in Cheakamus Crossing
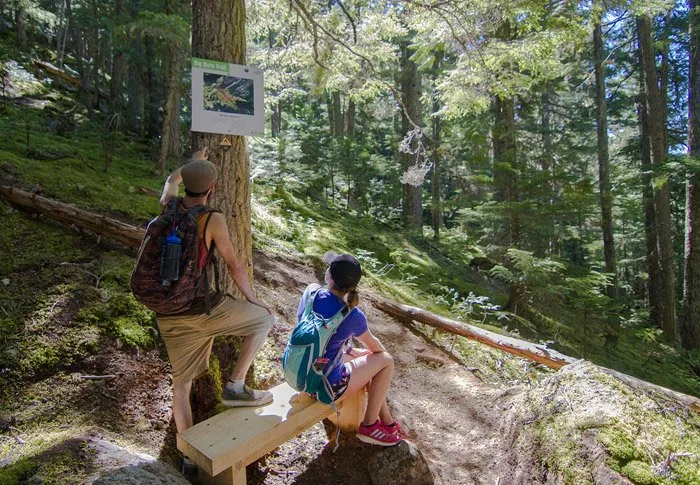
Riverside and Farside Trails
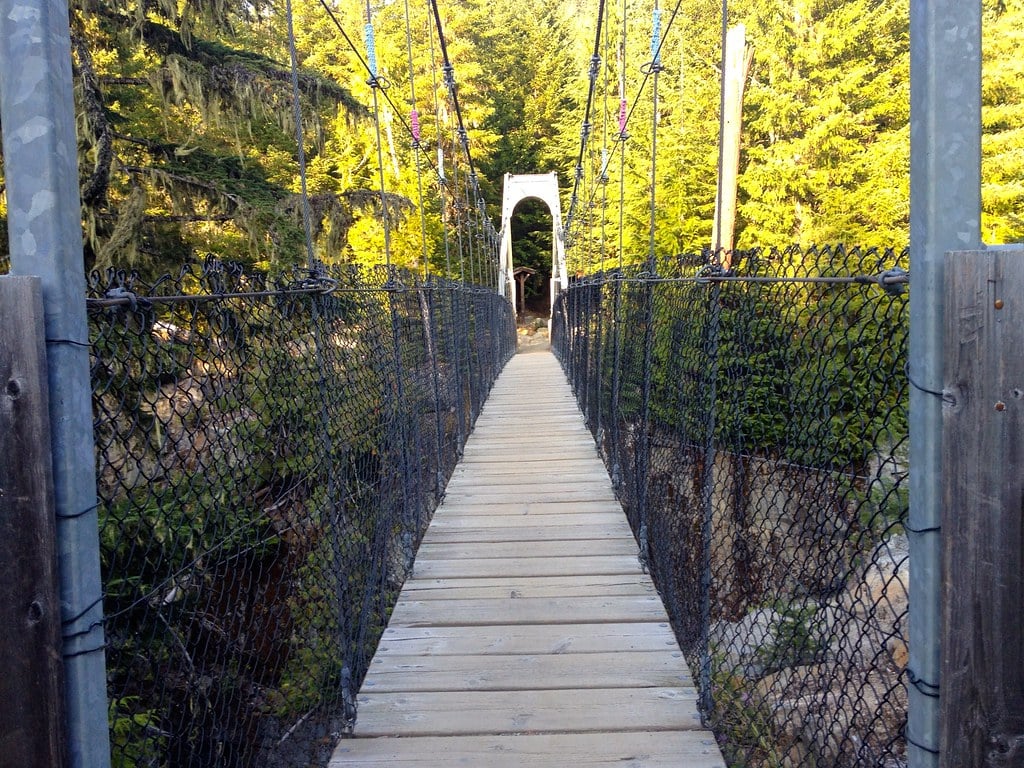
This easy loop hike follows the Riverside and Farside Trails (also known as the Cheakamus River Trail) along the banks of the Cheakamus River through the Whistler Interpretive Forest. It is located just south of Whistler in the Cheakamus Crossing neighbourhood, which was the site of the Whistler Olympic Village. Halfway through the hike, cross the Cheakamus River on a suspension bridge, then follow the opposite bank back to the trailhead. (The Riverside Trail is also a great snowshoe trail in the winter.)
Difficulty: Easy Distance: 6km loop Elevation gain: 90m Time Needed: 2 hours Best Time to Go: March to October Trail Info: Whistler Interpretive Forest Map How to get there: The trailhead and parking lot are on Cheakamus Lake Road immediately after you turn off Highway 99. You can also take bus route 10 or 20 from Whistler Village. The bus stop is at the trailhead.

READ NEXT: 40+ Cheap and Free Things To Do in Whistler
Crater Rim Trail
The Crater Rim trail makes a loop through the Whistler Interpretive Forest high above Loggers Lake. The lake is actually an extinct volcanic crater. As the trail passes above the lake, it visits several great viewpoints. If you want a longer hike, you could combine the Crater Rim Trail with the Riverside Trail or other trails in the Interpretive Forest.
Difficulty: Moderate Distance: 4.5km loop Elevation gain: 230m Time Needed: 2 hours Best Time to Go: May to October Trail Info: Whistler Interpretive Forest Map, Vancouver Trails How to get there: Turn off Highway 99 onto Cheakamus Lake Road. Less than 1km later, go left on a gravel road, then make your first right and follow the road across a bridge. Park at the Logger’s Lake trailhead on the side of the road about 2km after you left the pavement. If you don’t have a car, take bus route 10 or 20 to Cheakamus Lake Road, then walk the gravel road to the trailhead. You can also take a taxi.

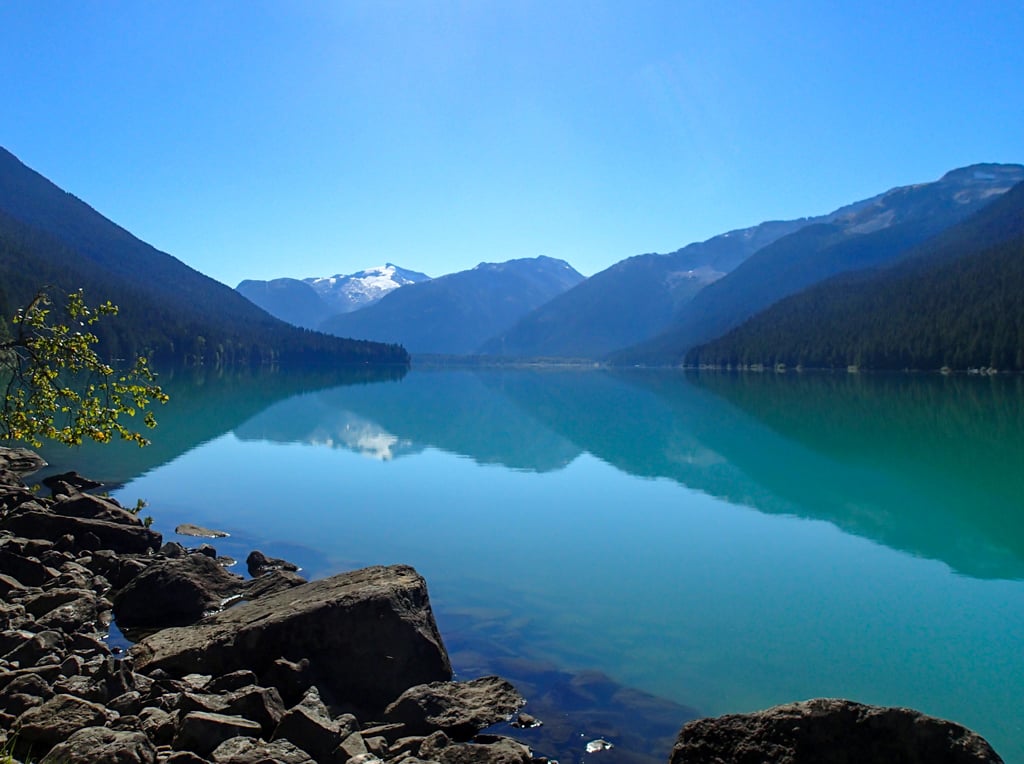
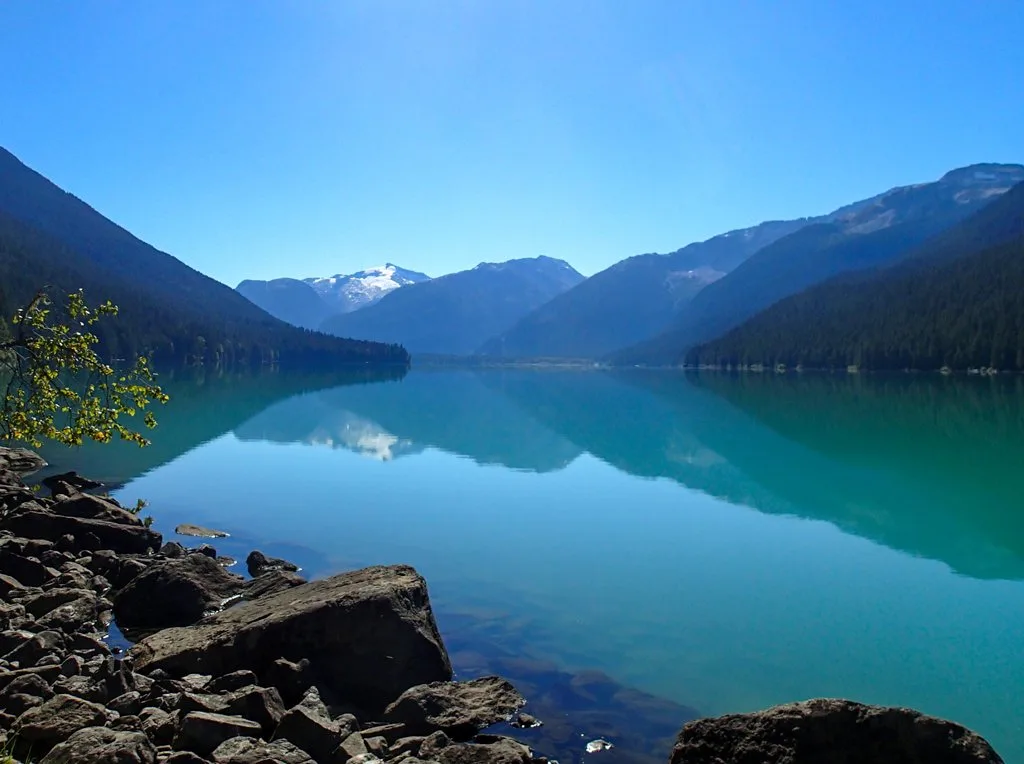
Cheakamus Lake
Heads up: Day passes are required at Cheakamus Lake in summer. Learn more in my guide to BC Parks day passes.
This is one of the best easy hikes in Whistler. It heads through old-growth forest to the shores of Cheakamus Lake. The lake has beautiful turquoise blue water thanks to glacial runoff. You can take a shorter 7km round trip hike to the west end of the lake, or continue along the trail until it ends at Singing Creek, for a 14km round trip hike. While the water looks beautiful, it’s bitterly cold so swim at your own risk.
Difficulty: Easy Distance: 7-14km round trip Elevation gain: 50m Time Needed: 2-4 hours Best Time to Go: May to November Trail Info: Garibaldi Provincial Park How to get there: Turn off Highway 99 onto Cheakamus Lake Road. Stay on the road for 7.5km, avoiding all branches, until it ends at a parking lot and trailhead. The road is bumpy, but fine for all for all vehicles. Some Whistler taxi companies will also drive you to the trailhead.
Helm Pass
Heads up: Day passes are required at the Cheakamus Lake trailehad in summer. Learn more in my guide to BC Parks day passes.
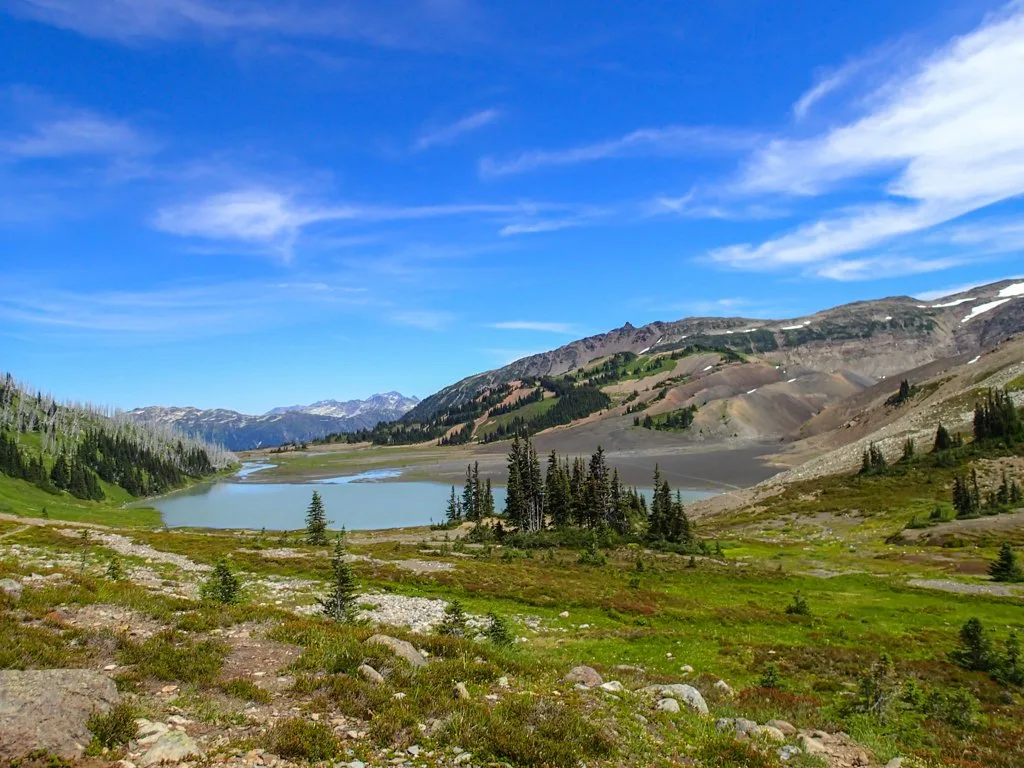
This challenging trail starts from the same trailhead as Cheakamus Lake. It crosses a bridge over the Cheakamus River then ascends forested slopes into the heart of Garibaldi Provincial Park. After passing the Helm Creek campground, you’ll arrive at the surreal volcanic landscape of Helm Pass. The pass has several beautiful light blue alpine lakes as well as a fascinating flat plain covered in lava rocks called the Cinder Flats. If you have the energy to continue onwards, you can connect to the Panorama Ridge, Garibaldi Lake and Black Tusk trails from Helm Pass.
Difficulty: Challenging Distance: 25km round trip Elevation gain: 930m Time Needed: 8-9 hours Best Time to Go: July-September Trail Info: Garibaldi Provincial Park How to get there: Turn off Highway 99 onto Cheakamus Lake Road. Stay on the road for 7.5km, avoiding all branches, until it ends at a parking lot and trailhead. The road is bumpy, but fine for all for all vehicles. Some Whistler taxi companies will also drive you to the trailhead.

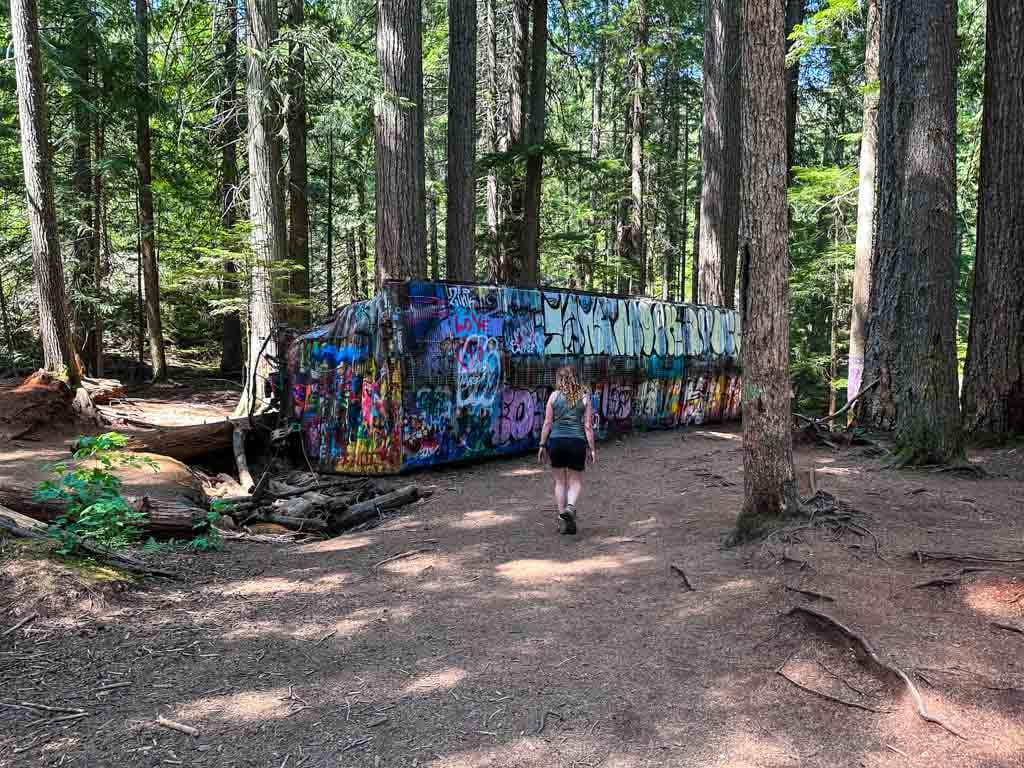
Whistler Train Wreck
The Whistler Train Wreck trail is one of the most unique trails in Whistler. A train derailed in the area in the 1950s. Today, the cars still lay where they landed in the forest, covered in graffiti, and surrounded by mountain bike trails. It’s an easy and flat hike to the wreck, which includes a suspension bridge over the Cheakamus River. The Whistler Train Wreck Trail is also a great place to snowshoe in the winter.
Difficulty: Easy Distance: 3km round trip Elevation gain: Minimal Time Needed: 1 hour Best Time to Go: March to October Trail Info: My Whistler Train Wreck hiking guide. How to get there: From Whislter Village, go south on Highway 99, then turn left onto Cheakamus Lake Road, which becomes Legacy Way. Turn right off Legacy Way onto Jane Lake Road. The trailhead is on your right 500m later. You can also take bus route 10 or 20 to the stop on Legacy Way and walk Jane Lakes Road to the trailhead. Whistler taxis will also take you to the trailhead.

Hikes South of Whistler
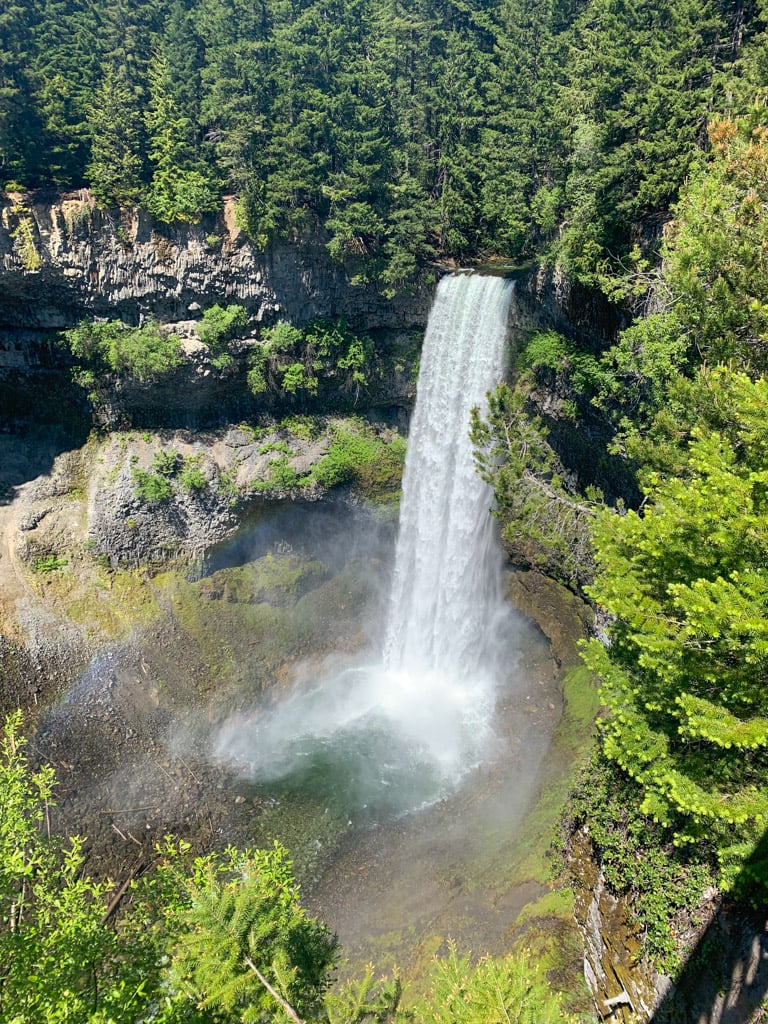
Brandywine Falls
This short and easy hike heads to one of the Whistler area’s most spectacular waterfalls: Brandywine Falls. It plummets 70 meters down volcanic basalt cliffs into the canyon far below. You can get a great view of the falls from a viewing platform. If you want a longer hike, there are other trails in the park. Snowshoeing at Brandywine Falls is also great in the winter.
Difficulty: Easy Distance: 1km round trip Elevation gain: none Time Needed: 30 minutes Best Time to Go: March to October Trail Info: My Brandywine Falls trail guide How to get there: Head south on Highway 99 from Whistler Village for 17km, then turn left into the parking lot for Brandywine Falls Provincial Park.

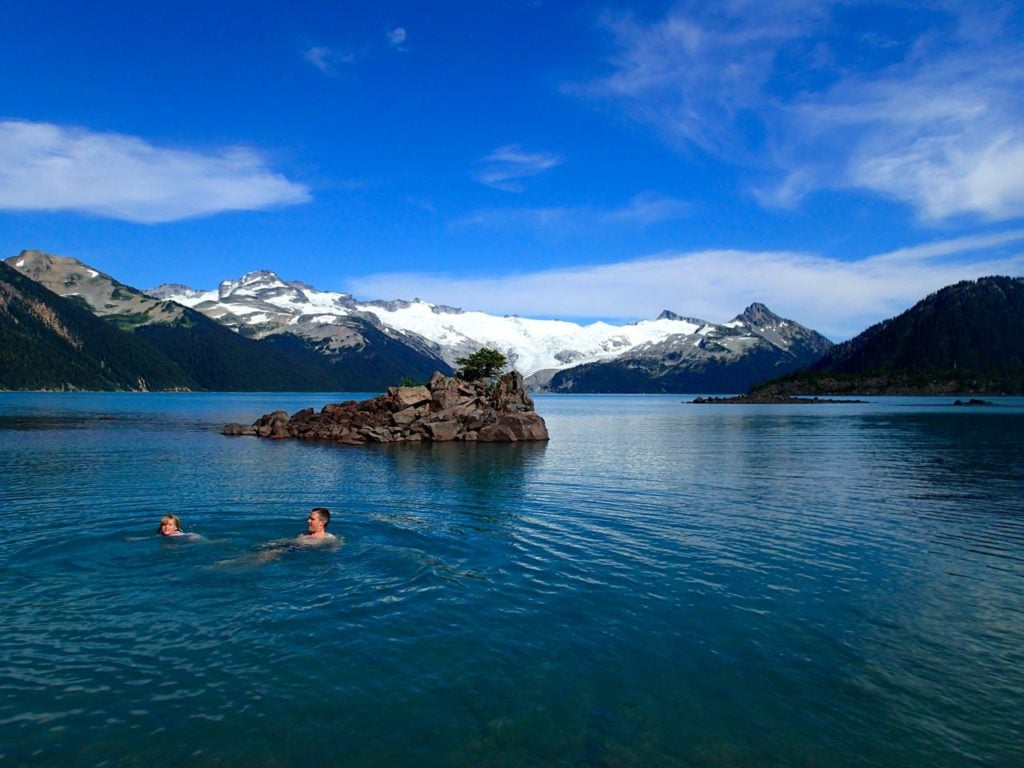
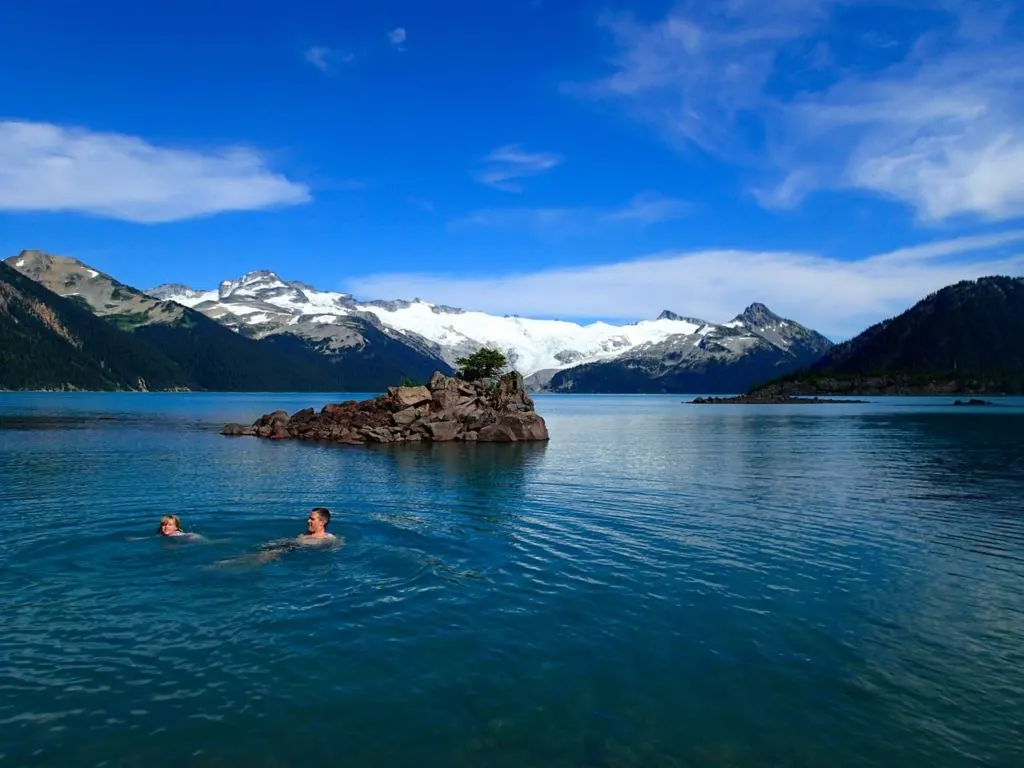
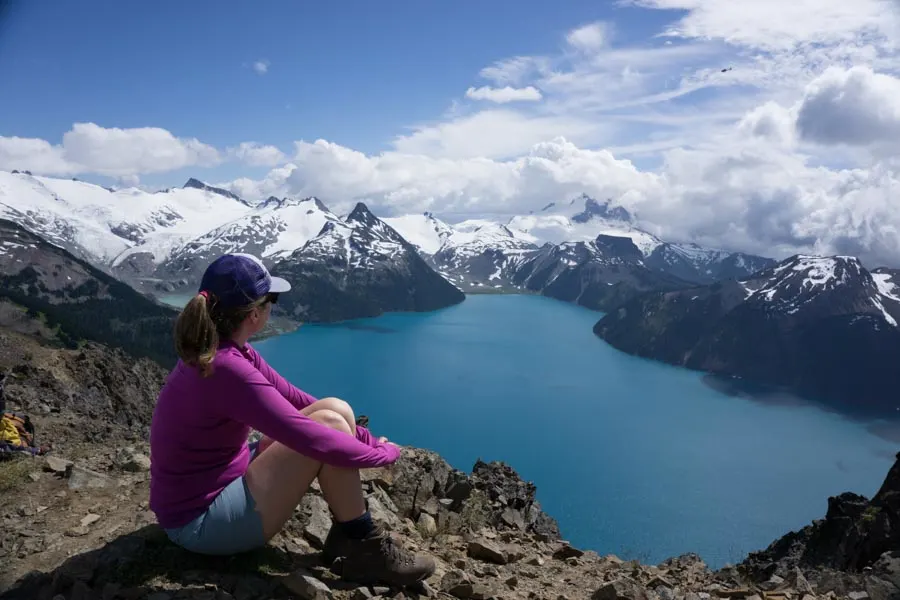
Garibaldi Lake
Heads up: Day passes are required at Garibadi Lake in summer. Learn more in my guide to BC Parks day passes.
The hike to Garibaldi Lake is a classic, and I think it’s one of the ten best hikes near Vancouver. The trail climbs up through the forest, passes a great viewpoint and several small lakes before arriving at Garibaldi Lake. This massive lake is glacially fed, giving the water an unreal blue tinge. From the picnic area and campground there are incredible views of the glaciers across the lake.
Difficulty: Challenging Distance: 18km round trip Elevation gain: 820m Time Needed: 6-7 hours Best Time to Go: July to September Trail Info: Garibaldi Provincial Park How to get there: From Whistler Village, head south on Highway 99 for 25km. Turn left onto Daisy Lake Road and follow it to its end at the Rubble Creek parking lot and trailhead.
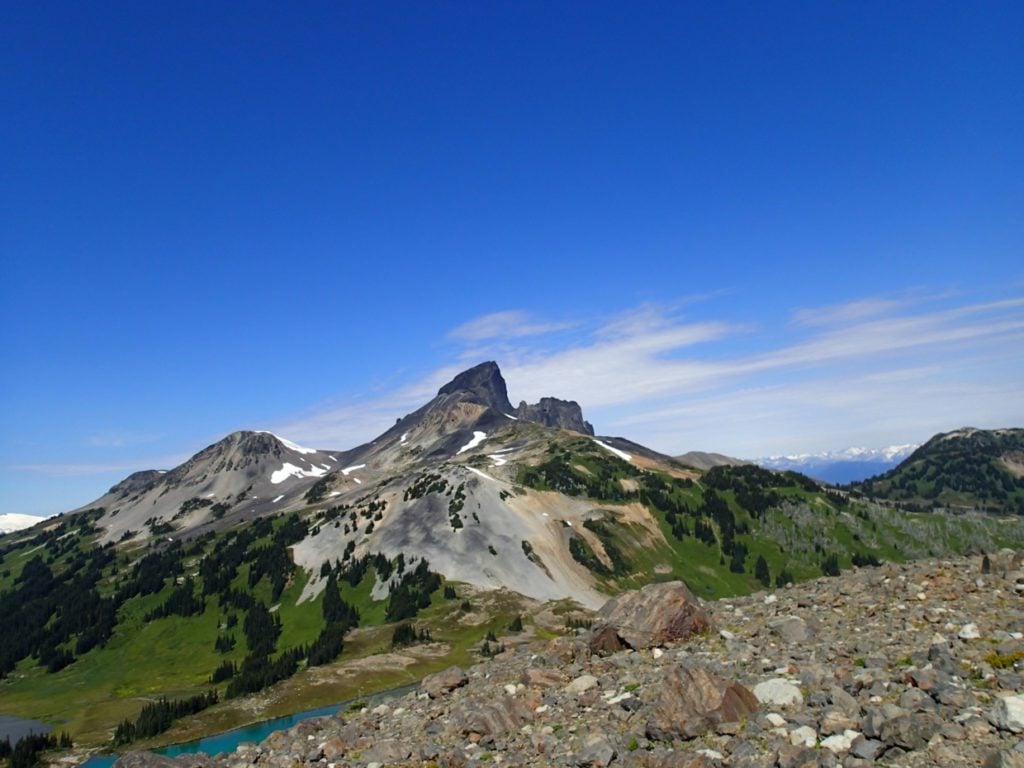
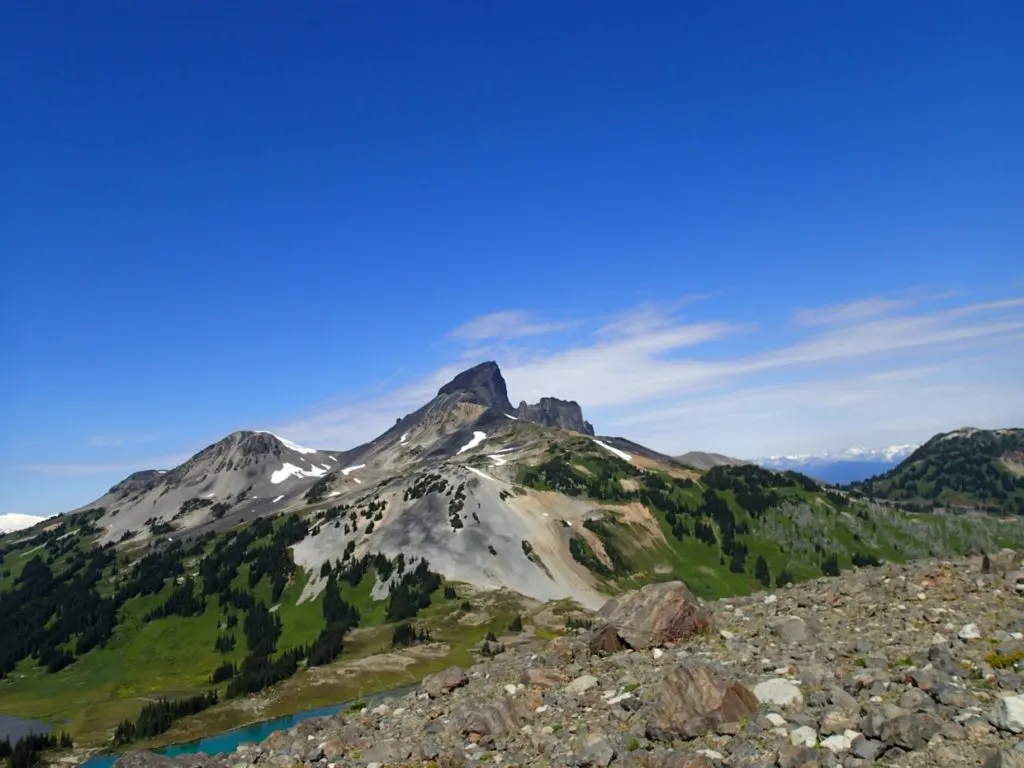
Black Tusk
Heads up: Day passes are required at Garibaldi Lake in summer. Learn more in my guide to BC Parks day passes.
Black Tusk is the prominent black peak you can see from many places in the Whistler area. It’s actually hardened lava from an extinct volcano. You can hike to the base of the Tusk, but only experienced rock climbers should make the final sketchy scramble to the summit. To get there, follow the Garibaldi Lake Trail uphill from the Rubble Creek trailhead to a junction. Go left through the wildflowers of Taylor Meadow, then turn left again to begin the tough slog up the rocky trail to the Tusk.
Difficulty: Very Challenging Distance: 29km round trip Elevation gain: 1740m Time Needed: 11-12 hours Best Time to Go: July to September Trail Info: Garibaldi Provincial Park How to get there: From Whistler Village, head south on Highway 99 for 25km. Turn left onto Daisy Lake Road and follow it to its end at the Rubble Creek parking lot and trailhead.
Panorama Ridge
Heads up: Day passes are required at Garibaldi Lake in summer. Learn more in my guide to BC Parks day passes.
Panorama Ridge is one of my favourite hikes, and on my list for the best hikes in the Vancouver area. It’s a long day on the trails, but the views from the summit are truly incredible. You start on the forested Garibaldi Lake Trail, go left through Taylor Meadows, pass the turnoff to Black Tusk, and arrive at the volcanic landscape of Helm Pass. From there you ascend the slopes of Panorama Ridge. At the top, you get mind-blowing 360-degree views. Garibaldi Lake is in front of you, Black Tusk is behind you and snow-capped mountains are all around.
Difficulty: Very Challenging Distance: 30km round trip Elevation gain: 1520m Time Needed: 11-12 hours Best Time to Go: July to September Trail Info: Garibaldi Park How to get there: From Whistler Village, head south on Highway 99 for 25km. Turn left onto Daisy Lake Road and follow it to its end at the Rubble Creek parking lot and trailhead.

Hikes North of Whistler
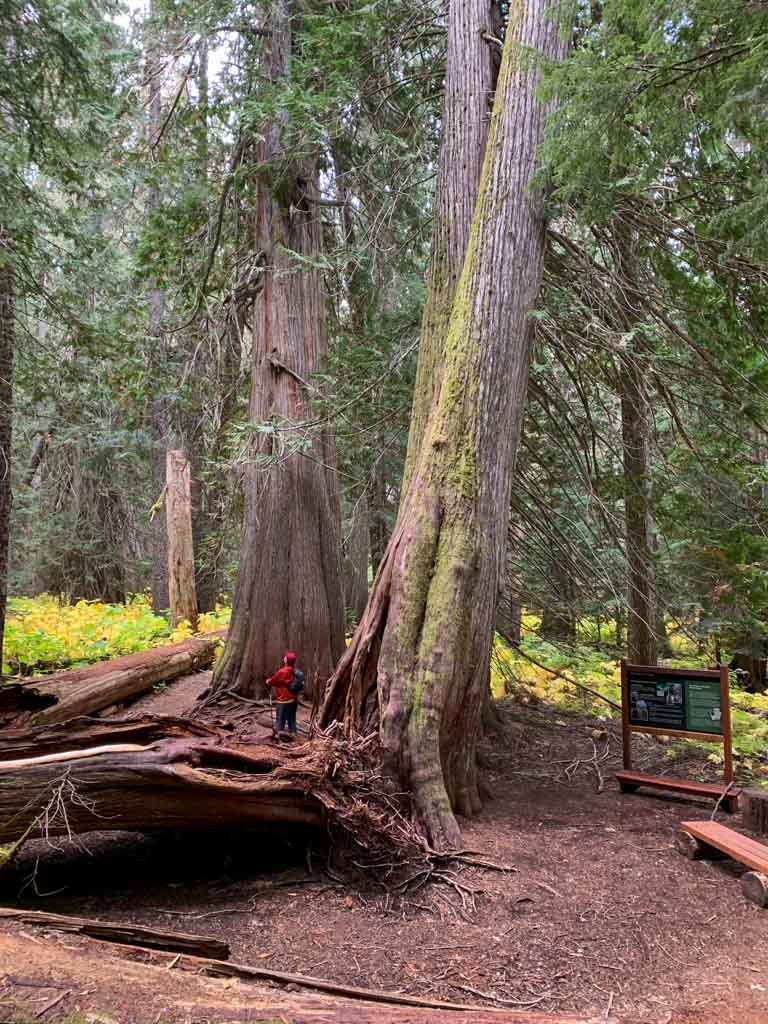
Ancient Cedars Trail
The short Ancient Cedars Trail travels to a grove of huge old-growth cedar trees at the north end of Whistler. These massive trees are part of a small parcel that wasn’t logged. Some of the trees are over 900 years old! The trail was upgraded with new signage in 2013 and now it is much easier to find than it used to be.
Difficulty: Moderate Distance: 5km round trip Elevation gain: 175m Time Needed: 2 hours Best Time to Go: June to October Trail Info: Cougar Mountain Trail Map, Vancouver Trails How to get there: Go north on Highway 99 from Whistler Village. Just past Green Lake, turn left onto the gravel Cougar Mountain Road about 8.5km from the village. The road is rough so you will need an AWD or 4WD vehicle. The trailhead is 4.5km up the road from the highway, past the ziplines and ATV rentals.

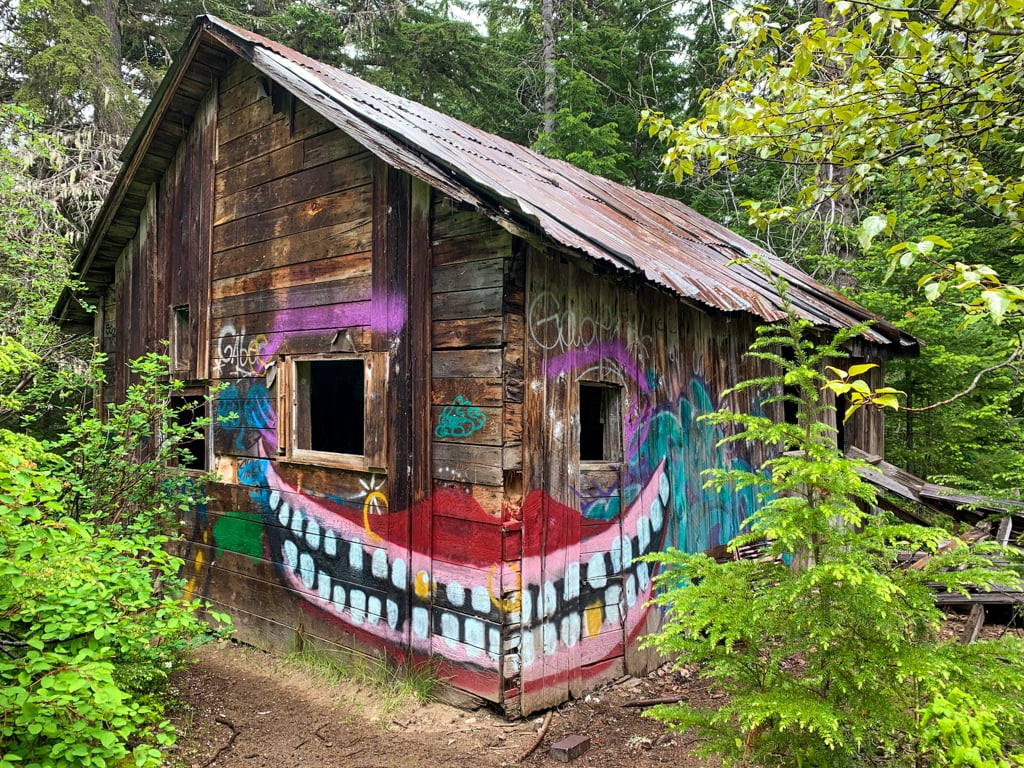
Parkhurst Ghost Town
Abandoned in the 1960s, Parkhurst was a logging settlement on the shores of Green Lake. Old buildings, machinery, and artefacts litter the site today, making it one of the area’s most unusual hikes. You can make a loop hike through the town to check it out. There are tons of mountain bike trails in the area that can be confusing and aren’t well marked, so bring a GPS. Parkhurst is also a great place to snowshoe in the winter.
Difficulty: Moderate Distance: 5km loop Elevation gain: Minimal Time Needed: 2 hours Best Time to Go: May to October Trail Info: Read my guide to the Parkhurst Ghost Town trail How to get there: Head north from Whistler Village on Highway 99 for 11.5km. Turn right across the train tracks onto Wedge Forest Service Road and cross a bridge. On the other side, go right at the junction and park just past Whistler Paintball. You can also take a taxi to the trailhead.

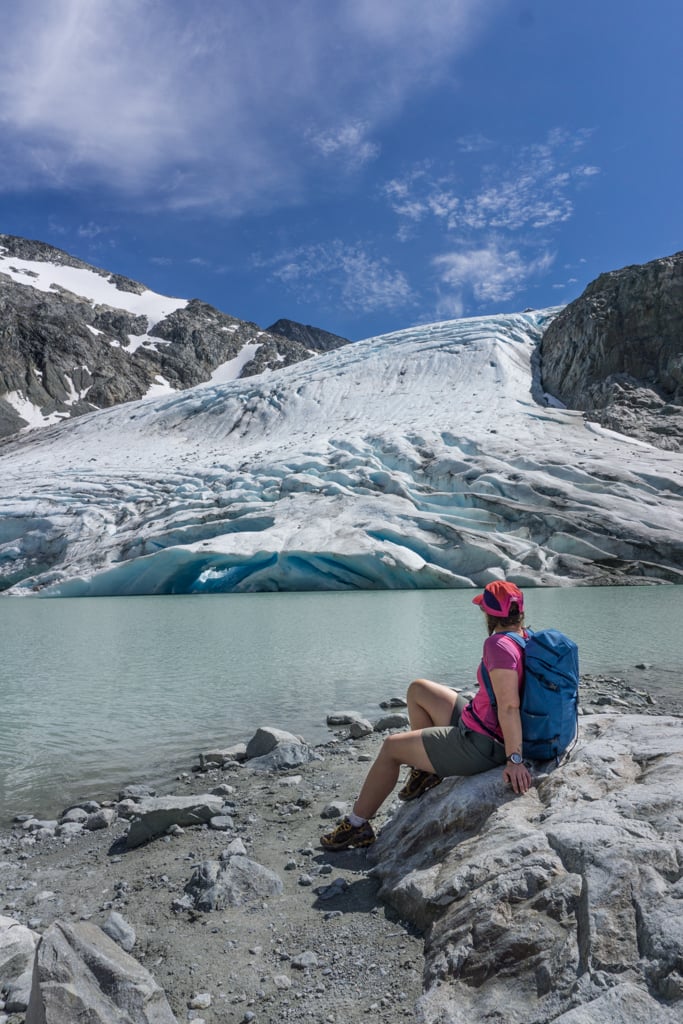
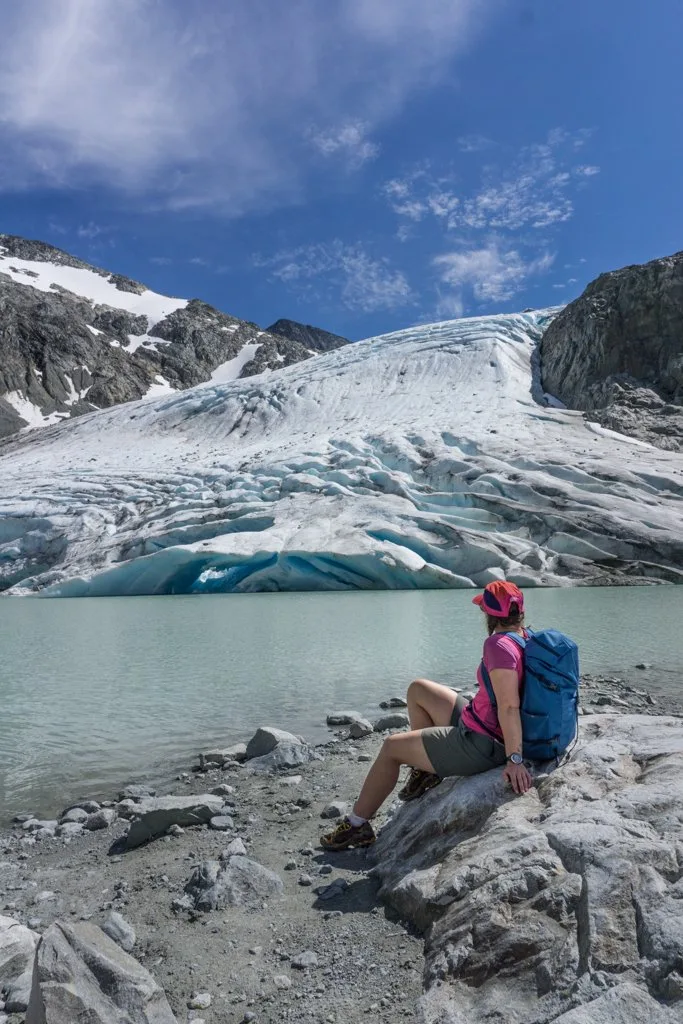
Wedgemount Lake
The hike to Wedgemount Lake is the steepest and most challenging hike in Whistler. Your legs will certainly feel the effort. At the top you’ll arrive at a beautiful blue lake, surrounded by mountains. Follow the trail to the far end of the lake, then uphill through the rocks for a few minutes to the toe of a glacier. A few decades ago, this glacier ended at the lakeshore – it’s sad to see how far it has retreated in such a short time!
Difficulty: Very Challenging Distance: 14km round trip Elevation gain: 1200m Time Needed: 8-9 hours Best Time to Go: July-September Trail Info: Garibaldi Provincial Park How to get there: Head north from Whistler Village on Highway 99 for 11.5km. Turn right across the train tracks onto Wedge Forest Service Road and cross a bridge. On the other side, go left at the junction and follow signs for another 2km to the trailhead. The gravel road is rough but passable for all types of vehicles. You can also take a taxi to the trailhead.
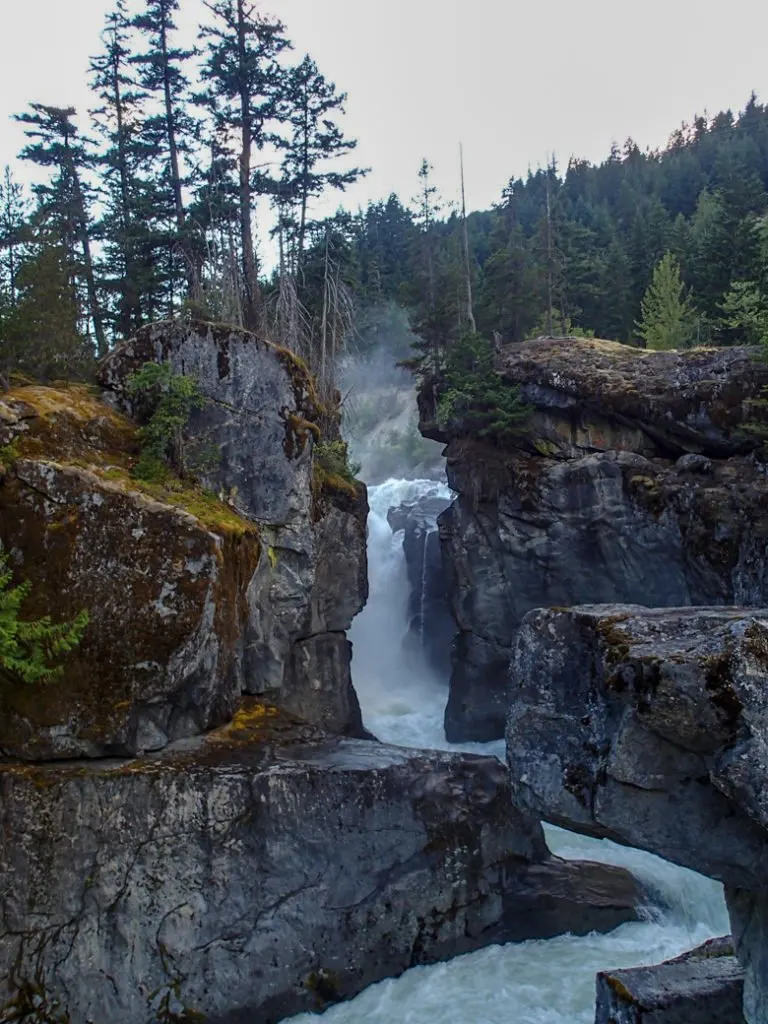
Nairn Falls
This easy hike follows the banks of the Green River to 60m-tall Nairn Falls. It’s one of many great waterfall hikes in the area. The falls crash down through smooth granite rocks, worn away by thousands of years of flowing water. Two different platforms give you great views of the falls. If you visit in winter, snowshoeing to Nairn Falls is fun too.
Difficulty: Easy Distance: 3km round trip Elevation gain: None Time Needed: 1 hour Best Time to Go: May to October Trail Info: Nairn Falls Provincial Park How to get there: From Whistler Village, head north on Highway 99 for 29km, then turn right into the park.

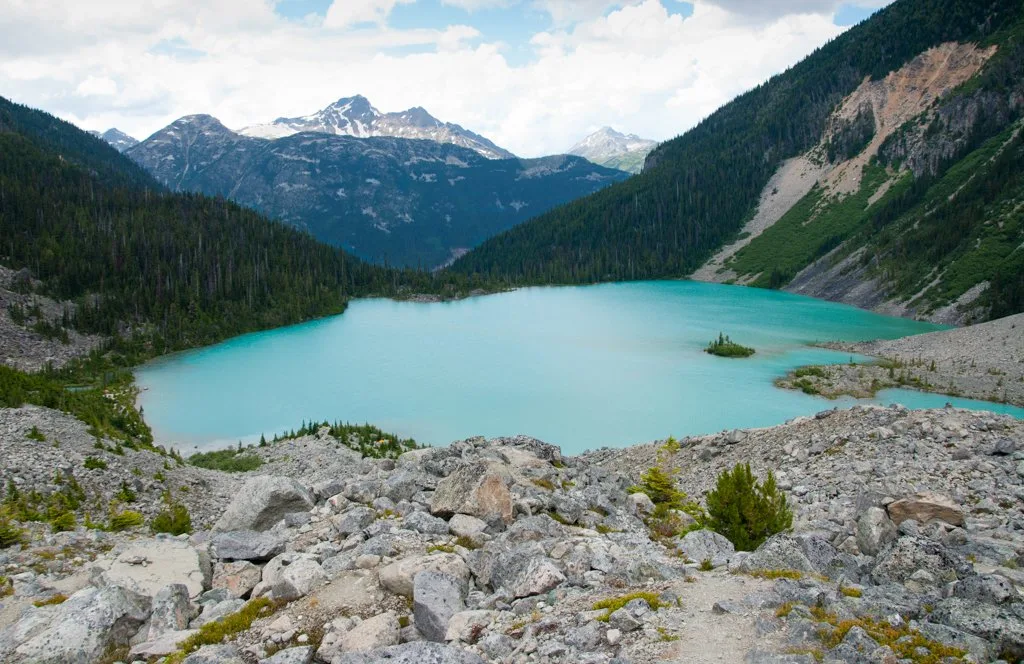
Joffre Lakes
Heads up: Day passes are required Joffre Lakes in summer. Learn more in my guide to BC Parks day passes.
The popular hike to Joffre Lakes isn’t in Whistler – it’s actually closer to the towns of Pemberton and Mount Currie. But since many people do it as a day trip from Whistler, I’ve included Joffre Lakes on this list. The hike travels to three beautiful turquoise lakes and passes by a waterfall. At the third lake, there are amazing views of the surrounding mountains and glaciers. The Joffre Lakes trail near Whistler can get incredibly busy, so try to go on a weekday.
Difficulty: Moderate Distance: 10km round trip Elevation gain: 400m Time Needed: 4 hours Best Time to Go: June to September Trail Info: My Joffre Lakes hiking guide How to get there: Go north on Highway 99 from Whistler Village for 61km, then turn right into the parking lot. If the lot is full, there are overflow lots on the other side of the highway.

With over 20 trails to choose from, I’m sure you’ll find a Whistler hike on this list that you love. Do you have other Whistler hikes to recommend? Tell me in the comments.
More Whistler Area Posts:
- 80+ Things to Do in Whistler (By a Local)
- Visiting Whistler, BC in Summer (By a Local)
- 40+ Cheap and Free Things To Do in Whistler
- 44 Best Things to Do in Whistler in Winter
- Camping in Whistler, BC: The Best Campgrounds
- Sea to Sky Highway Road Trip Guide: Driving from Vancouver to Whistler
More Whistler Hiking Posts:
- Joffre Lakes Hike (By a Local)
- High Note Trail in Whistler
- Whistler Train Wreck Hike
- Blackcomb Hiking Trails in Whistler (By a Season’s Pass Holder)
- Rainbow Falls Loop Trail in Whistler
- Brandywine Falls Provincial Park Hiking Guide
- Hike to Parkhurst Ghost Town in Whistler
- The Best Hikes in Squamish, BC (From a Local)
- Sea to Sky Trail from Squamish to Pemberton
More Whistler Outdoor Adventures:
- How to Paddle the River of Golden Dreams in Whistler, BC
- Lost Lake in Whistler: Hiking, Swimming, Biking and More
- Where to Go Snowshoeing in Whistler
- Cheakamus River Snowshoe Trail in Whistler
- Lost Lake Snowshoe Trails in Whistler


- Best Sun Hoodies for Hiking - June 3, 2026
- Lower Stein Valley Trail Hiking and Backpacking Guide - May 27, 2026
- The Best Things to Do in Vernon, BC - May 21, 2026
Rui Pedro
Thursday 8th of May 2025
When she says that all vehicles can go on the road to Cheakamus Lake she is very optimistic. If the road is not dry, I doubt most normal cars can get through and the road is definitely in horrible condition , not just bumpy. If you have a rental, I would not recommend you to go there. The same for Parkhurst Ghost Town access road, so if you are taking some other trails in this page, be skeptical about the indications.
Taryn Eyton
Saturday 10th of May 2025
The road conditions info is written for summer conditions. If you are going now in early spring, the roads haven't been graded yet and can be muddy.
Clare
Thursday 17th of August 2023
Great routes! We’re looking at October and I note for many it’s suggested May - September. Is there anything to stop us going later in the season?
Taryn Eyton
Thursday 17th of August 2023
Any of the routes up high will start to have snow in October. Early October may still be snow-free in some years but you'll have to check and see as snow can fall at any time in October - it's a variable month. If you are prepared with warm and waterproof clothing as well as microspikes and are comfortable navigating without trail markers (which can be covered by snow) October can be an ok month to go as there usually isn't enough snow for avalanche danger yet. But in October I would stick to trails closed to the valley bottom such as Lost Lake, Rainbow Falls, Riverside, Crater Rim, Cheakamus Lake, Whistler Train Wreck, Brandywine Falls, Ancient Cedars, Parkhurst, and Nairn Falls.
Ben
Thursday 6th of July 2023
Thanks for all this info! Are you able to recommend a hiking guidebook for the Whistler/Vancouver area?
Taryn Eyton
Thursday 6th of July 2023
My picks are all in my Vancouver hiking books post - unfortunately there is no one guide book for the area but there are a few that I recommend that cover that region.
Xiaolei Deng
Saturday 7th of November 2020
Very useful information and beautiful pictures! Bookmarked and thank you.
Kassia
Tuesday 16th of June 2020
Love the detail included in your post! Including the map! I didn't know about that feature so now I'm totally going to use it for my site (: THanks for sharing!