

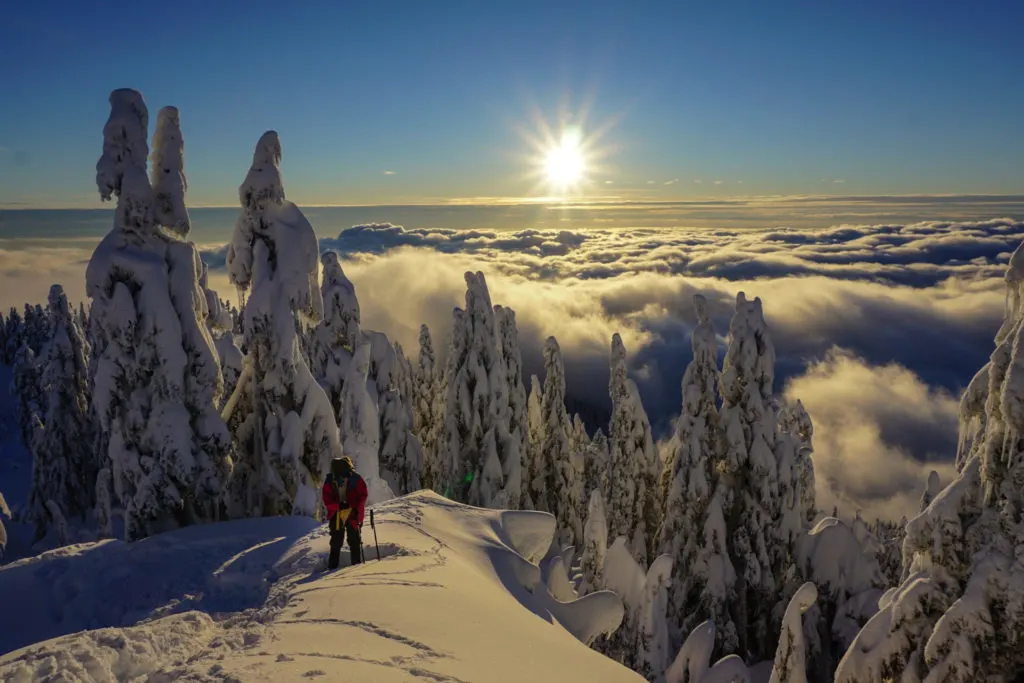
In Vancouver, we don’t stop hiking in the winter… we just switch to snowshoes. In this guide to Vancouver snowshoeing, you’ll get info and directions for 10 different snowshoe trails ranging from super-flat beginner trails to epic treks to mountain summits. They are easy to follow with winter markings and most are accessible by bus. You can bring your dog on lots of them too!
This post covers 10 snowshoe trails on Vancouver’s North Shore. That’s every single North Shore trail that is high enough for consistent snow AND is also safe to snowshoe. I haven’t included the countless expert-only areas that are not marked and have significant avalanche danger.
I’ve been snowshoeing in Vancouver for most of my life. I grew up here and my dad took me snowshoeing as a kid. I got my first pair of snowshoes over 20 years ago and have been snowshoeing near Vancouver every winter since then.
This guide to snowshoeing in Vancouver includes:
- Quick reference guide: An easy overview of the stats for all the trails
- Snowshoeing safety: key info to help get you prepared to snowshoe in Vancouver
- Snowshoeing at Grouse Mountain: details for three trails
- Snowshoeing at Mount Seymour: details for three trails
- Snowshoeing at Cypress Mountain: details for four trails
- No-go trails: summer trails that aren’t safe for snowshoeing
- Vancouver snowshoeing FAQ: answers to all your questions!
If you’re looking for even more places to go snowshoeing in the Vancouver area, don’t worry – I got you! Check out these other guides to snowshoeing trails near Vancouver:
- Where to go Snowshoeing in Whistler
- Where to go Snowshoeing in Squamish
- Where to go Snowshoeing in the Fraser Valley
- Where to go Snowshoeing in Manning Park
- Snowshoeing at Dakota Ridge on the Sunshine Coast, BC
Hey there: Some of the links in this post are affiliate links, which means I earn a small commission at no cost to you. Thanks for your support. -Taryn
Vancouver Snowshoeing Quick Reference Guide
There are three main places to go snowshoeing in Vancouver: Grouse Mountain, Mount Seymour and Cypress Provincial Park (which is where Cypress Mountain ski hill is.) These three locations are the only places in Vancouver at a high enough elevation to have consistent snow.
| Trail | Rating | Time | Cost |
|---|---|---|---|
| Blue Grouse Loop | Super Easy | 30-45 min | $80 |
| Snowshoe Grind | Moderate | 1-1.5 hours | $80 |
| Thunderbird Ridge | Moderate | 2.5-3 hours | $80 |
| Discovery Snowshoe Trails | Easy | 1-3 hours | $17 |
| Dog Mountain | Easy | 2-2.5 hours | FREE – day pass required |
| Mount Seymour 1st Peak | Challenging | 4-5 hours | FREE – day pass required |
| Hollyburn Nordic Area Trails | Easy/ Moderate | 1-5 hours | $22 |
| Bowen Lookout | Moderate | 1.5-2 hours | FREE |
| Black Mountain | Moderate/ Challenging | 2.5-3 hours | FREE |
| Hollyburn Mountain | Challenging | 4-5 hours | FREE |
Join: Snowshoeing in Vancouver Facebook Group


But First… Be Prepared
- Make a trip plan: While these trails may be steps from busy ski areas, they access serious wilderness. Tell someone where you are going and when you expect to be back. Use the great trip planning tools from Adventure Smart.
- Check the weather, trail conditions, and avalanche forecast: If the weather and trail conditions don’t look good, don’t go. Use my list of the best weather apps for hiking. Check the avalanche forecast. Unless you have taken an avalanche safety course, you probably shouldn’t go out unless the forecast is rated “Low”.
- Wear winter clothing and pack the essentials: Prepare for emergencies by packing the 10 essentials. Read my recommendations for what to wear snowshoeing and tips for winter hiking and snowshoeing.
- Use safe snowshoeing techniques: Snowshoes keep you from sinking into deep snow, but they aren’t great for walking sideways or downhill – it’s easy to slip and injure yourself. Read up on snowshoeing safety and check out my guide to choosing snowshoes.) They also have crampons and other traction aids underfoot to help grip icy snow.
- Take an avalanche safety course: If you plan to stray from flat terrain, you need avalanche safety training. There is a great FREE online Avy Savvy beginner tutorial from Avalanche Canada. You should also take a 2.5 day AST1 course with avalanche Canada.
READ NEXT: Snowshoeing Safety: 14 Ways to Get into Trouble and How to Prevent Them
Snowshoeing at Grouse Mountain

Grouse Mountain is one of the easiest places to go snowshoeing in Vancouver. You simply ride the gondola to the top, then head out on the trails. They have rentals too. There are three snowshoe trails at Grouse Mountain. Read on for details.
Permits/Fees: You need a Mountain Admission ticket to take the gondola to the top of Grouse Mountain. It’s $82 for a round trip. Once you get to the top, there are no extra charges for snowshoeing.
You can also access the top of Grouse Mountain for free if you hike up the very steep Grouse Grind or BCMC trails. However, these trails can close in the winter if conditions are bad. And even if they are open, you will need an ice axe and crampons.
Dogs: Not permitted on any trails.
Driving Directions: Drive 20 min from Vancouver to the base of the Grouse Mountain Skyride gondola, then buy a ticket and ride up. Click here for driving directions.
Parking: It costs $10/day to park in the lots at the base of Grouse.
Transit Access: Translink bus 236 from Lonsdale Quay will get you to the bottom of the gondola. Click here for transit directions.
Blue Grouse Loop Snowshoe Trail, Grouse Mountain

Distance: 1.5km loop
Time Needed: 30-45 min
Cost: $82 (or free if you hike up the Grouse Grind or BCMC)
Elevation Gain: 20m
Rating: Super easy
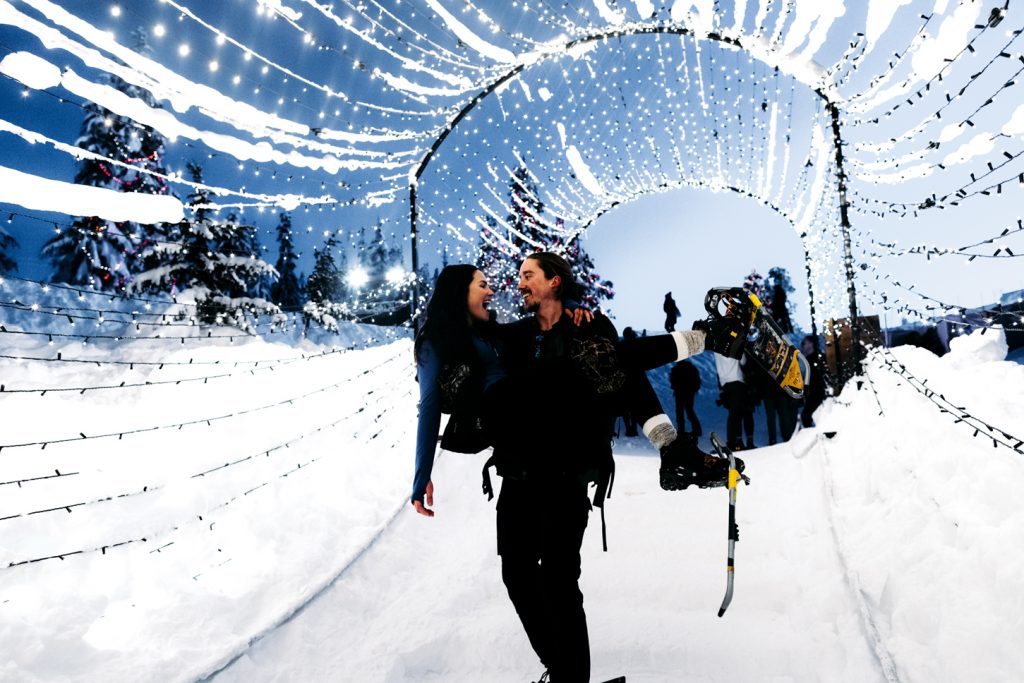
The Trail: This short loop trail meanders through the forest near the lodge and crosses a bridge over a small pond. Part of the route is lit up with Christmas lights as part of Grouse Mountain’s Lightwalk attraction. Expect to see tourists without snowshoes on the Lightwalk section.
Avalanche Danger and Hazards: None.
Trail Map/Guide: Trail descriptions and a map are available on the Grouse Mountain website.
Snowshoe Grind, Grouse Mountain
Distance: 4.3km round trip
Time Needed: 1-1.5 hours
Cost: $82 (or free if you hike up the Grouse Grind or BCMC)
Elevation Gain: 240m
Rating: Moderate
The Trail: A winter alternative to the Grouse Grind, the Snowshoe Grind isn’t nearly as steep as the regular grind, but it does go pretty steadily uphill. It finishes near the summit of Dam Mountain.
Avalanche Danger and Hazards: The first section of the trail is on the side of a very steep hill that can produce small avalanches. In general, stay on the trail: there is a lot steep and dangerous terrain if you leave the marked route. The final 50m to the summit is very steep and can be slippery. Do not go past the summit as the area is closed in winter since it is very dangerous terrain. Check the South Coast avalanche forecast before you go.
Trail Map/Guide: There’s more information and a map on the Grouse Mountain website.
Thunderbird Ridge Snowshoe Route, Grouse Mountain

Distance: 6km round trip
Time Needed: 2.5-3 hours
Cost: $82 (or free if you hike up the Grouse Grind or BCMC)
Elevation Gain: 200m
Rating: Moderate
The Trail: The first part of the trail to Thunderbird Ridge is shared with the Snowshoe Grind. After the Snowshoe Grind tops out, the Thunderbird Ridge trail meanders downhill on a mellow ridgeline with good views of the surrounding mountains. (Psst: In the summer, the Thunderbird Ridge trail is one of my picks for the best easy hikes near Vancouver.)
Avalanche Danger and Hazards: The first section of the trail after you leave the ski resort is on an old road cut into the side of a very steep hill. The slopes above this hill can produce small avalanches. Use caution in this area and spread out your group. Stay on the trail: there is a lot of steep and dangerous terrain if you leave the marked route. Check the South Coast avalanche forecast before you go.
Trail Map/Guide: There’s a map on the Grouse Mountain website.
Snowshoeing at Mount Seymour
There are two separate snowshoe areas here: one managed by the ski resort (paid), and one in Mount Seymour Provincial Park (free). I think Mount Seymour Provincial Park has the best free beginner-friendly terrain in Vancouver. Read on for the details.
Ski Resort Trails Tickets: If you snowshoe on the Mount Seymour Discovery Snowshoe Trails (part of the ski resort) snowshoe tickets cost $17 day and include free parking in the upper lots.
BC Parks Trails Day-Passes: If you want to snowshoe in Mount Seymour Provincial Park (Dog Mountain and Mount Seymour trails) it’s totally free. But you do need to get a day pass on weekends and holidays in order to park. You can get a pass online starting at 7am two days before your trip. On popular weekends, passes will run out so act quickly. See my guide to BC Parks day passes for more info.
Dogs: Permitted on leash on all trails.
Driving Directions: Drive 35 min from Vancouver to the downhill ski parking lot at Mount Seymour. Click here for driving directions.
Parking: Parking is free but depends on where you are snowshoeing. See the parking map here. If you are snowshoeing on the paid ski resort trails, you can park in the upper lots. If you snowshoeing on the free BC Parks trails, you need to park in the lower lots which are up to 1.5km walk to the trailhead.
Transit Access: The Mount Seymour Shuttle is $10-15. You don’t need a day pass if you take the shuttle.
Discovery Snowshoe Trails, Mount Seymour
Distance: Up to 5.5km of trails with various loops possible
Time Needed: 1-3 hours depending on how far you want to go
Cost: $17 (No BC Parks day pass needed!)
Elevation Gain: 50m
Rating: Easy
The Trails: A network of short trails loops around several lakes just downhill from the bunny hill. Most of the trails are very easy. Keep in mind that you’ll always have to head uphill to get back to the parking lot. These trails are operated by the ski resort so you will need to buy a trail pass to snowshoe here.
Avalanche Danger and Hazards: None.
Trail Map/Guide: Trail descriptions and a map are available on the Mount Seymour website.
Dog Mountain Winter Snowshoe Route, Mount Seymour

Distance: 4.5km round trip
Time Needed: 2-2.5 hours.
Cost: Free – but you must get a day pass online advance.
Elevation Gain: 30m
Rating: Easy/moderate
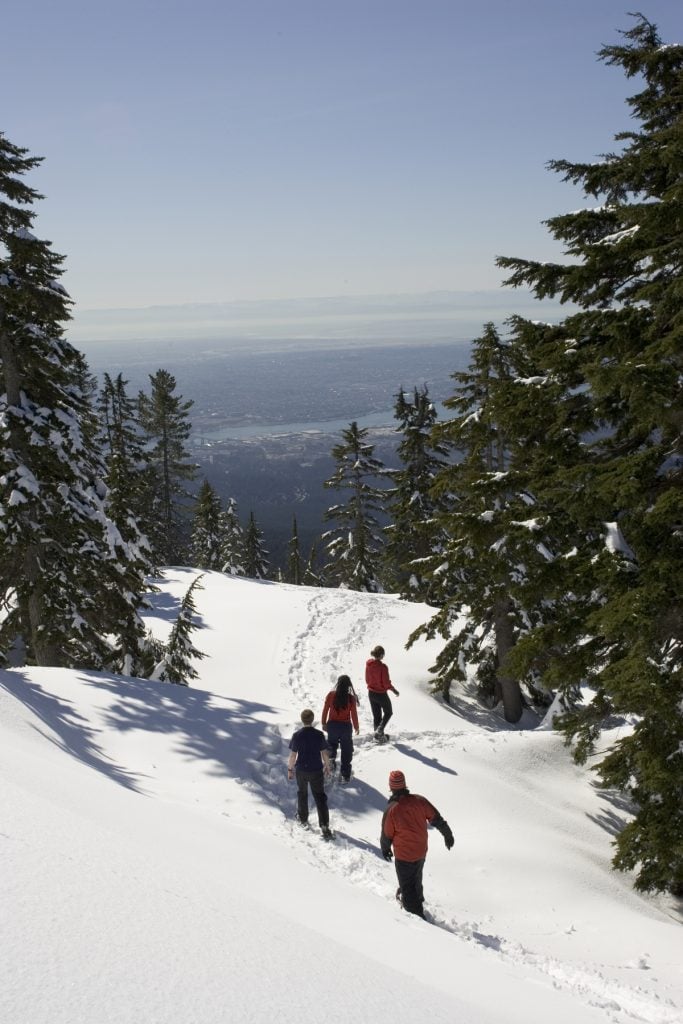
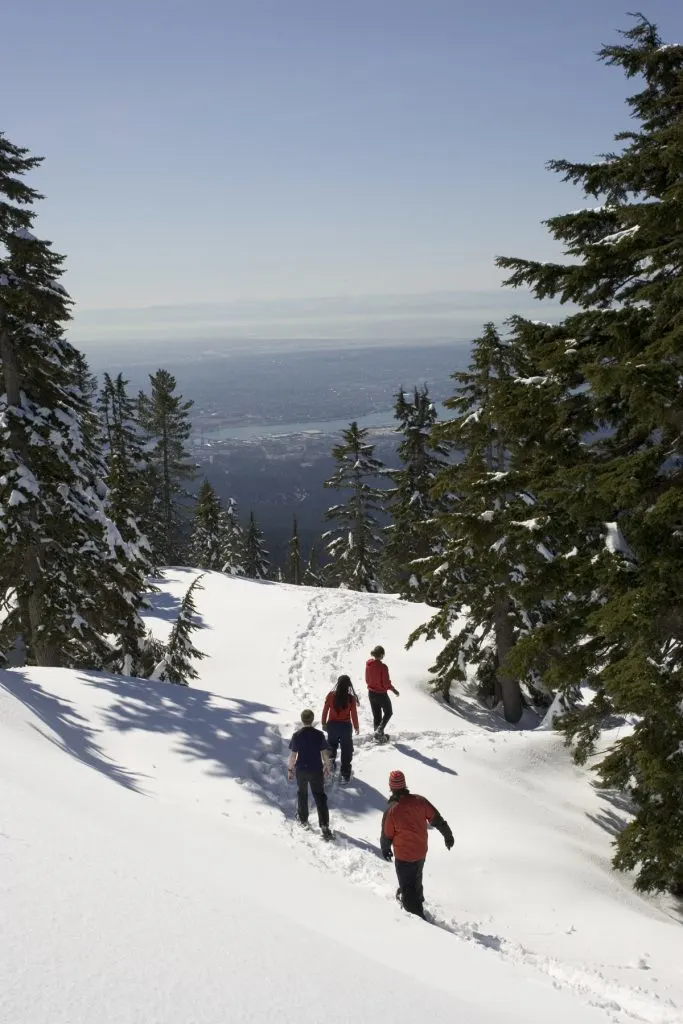
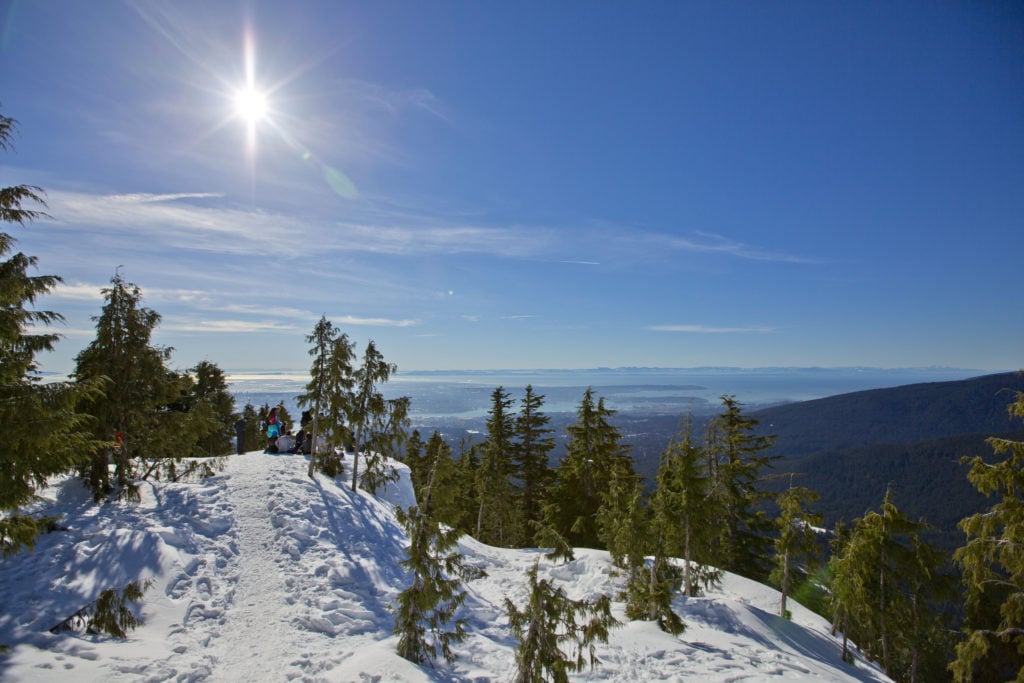
The Trail: This rolling trail travels past a small lake on the way to the open summit of Dog Mountain. From there you can get a great view of the city. This trail is probably the most popular place to go snowshoeing in Vancouver. No permits or fees are required.
Avalanche Danger and Hazards: No avalanche danger. Be careful to use bridges around stream channels as the water may not be completely frozen over.
Trail Map/Guide: For a map, see the Metro Vancouver Parks website.
Join: Snowshoeing in Vancouver Facebook Group
Mount Seymour First Peak Winter Backcountry Access Trail

Distance: 7km round trip
Time Needed: 4-5 hours
Cost: Free – but you must get a day pass online advance.
Elevation Gain: 400m
Rating: Challenging
The Trail: This steep route climbs to the first peak of Mount Seymour on a trail that starts out paralleling the ski runs. After passing over Brockton Point it traverses below the south face of Mount Seymour before climbing sharply up a ridge to the summit. The last kilometer of the route is very steep and can be slippery. Use caution. No permits or fees are required.
Avalanche Danger and Hazards: Avalanche.ca rates the first part of the trail as simple terrain and the final section to the summit as challenging. The trail crosses an avalanche path where it traverses below the south summit of Mount Seymour. The climb up the ridge to the peak is very steep and can be treacherous in icy conditions. Do not attempt the final climb from the junction with the Elsay Lake trail to the summit without crampons and an ice axe (and the skills to use them) if the trail is icy.
The summer routes to the 2nd and 3rd peaks and the trail to Elsay Lake are rated as complex by Avalanche.ca. They traverse steep slopes and narrow gullies with high avalanche risk. Do not continue past the summit of 1st peak without avalanche training and safety gear. Check the South Coast avalanche forecast before you go.
Trail Map/Guide: You can find information about the winter route to Mount Seymour on the BC Parks website.
Snowshoeing at Cypress Mountain
There is actually no mountain called Cypress Mountain – that’s just the name of the ski hill. You can snowshoe at the nordic ski area trails on Hollyburn Mountain. You can also snowshoe on BC Parks trails on Hollyburn Mountain, Black Mountain, and Bowen Lookout.
Ski Resort Trails Tickets: If you snowshoe on the Hollyburn Nordic Self-Guided Snowshoe Trails (part of the ski resort) snowshoe tickets cost $22 day and include free parking in the nordic lots.
BC Parks Trails: If you want to snowshoe in Cypress Provincial Park (Hollyburn Mountain, Black Mountain, Bowen Lookout) it’s totally free. However, you do need to pick up a free liability waiver pass for Black Mountain and Bowen Lookout. Details on those below. (In previous years, you needed to get a free day pass for all BC Parks trails, but passes aren’t required for winter 2025/26.)
Dogs: Not permitted on the Hollyburn Nordic Area trails. Dogs are permitted on-leash on all other trails.
Driving Directions: Drive 30 min from Vancouver to Cypress Mountain. Click here for driving directions.
Parking: There is free parking in lots 1, 2, 3a, and 3b, and 4 (nordic area) but the lots closest to the trailheads fill up fast. There is a shuttle from the furthest lots. I’ve got recommended parking location info for each trail below.
Transit Access: The Cypress Coachlines shuttle is $35.
Hollyburn Nordic Area Self-Guided Snowshoe Trails, Cypress Mountain
Distance: Up to 11km of trails with various loops possible
Time Needed: 1-5 hours depending on how far you want to go
Cost: $22
Elevation Gain: Up to 150m
Rating: Easy/Moderate
The Trails: Cypress Mountain’s cross country ski area is also home to a maze of snowshoe trails that crisscross the ski trails. There are a few flat trails but most have hills. Two warming huts give you a place to take a break. These trails are inside the ski area so you need trail passes for $22 a day.
Avalanche Danger and Hazards: None.
Trail Map/Guide: Trail descriptions and a map are available on the Cypress Mountain website.
Parking: Park in Lot 4 (Nordic ski area) or if that is full, in lot 3B.
Bowen Lookout Winter Snowshoe Route, Cypress Mountain

Distance: 3.5km return
Time Needed: 1.5-2 hours
Cost: Free
Elevation Gain: 100m
Rating: Moderate
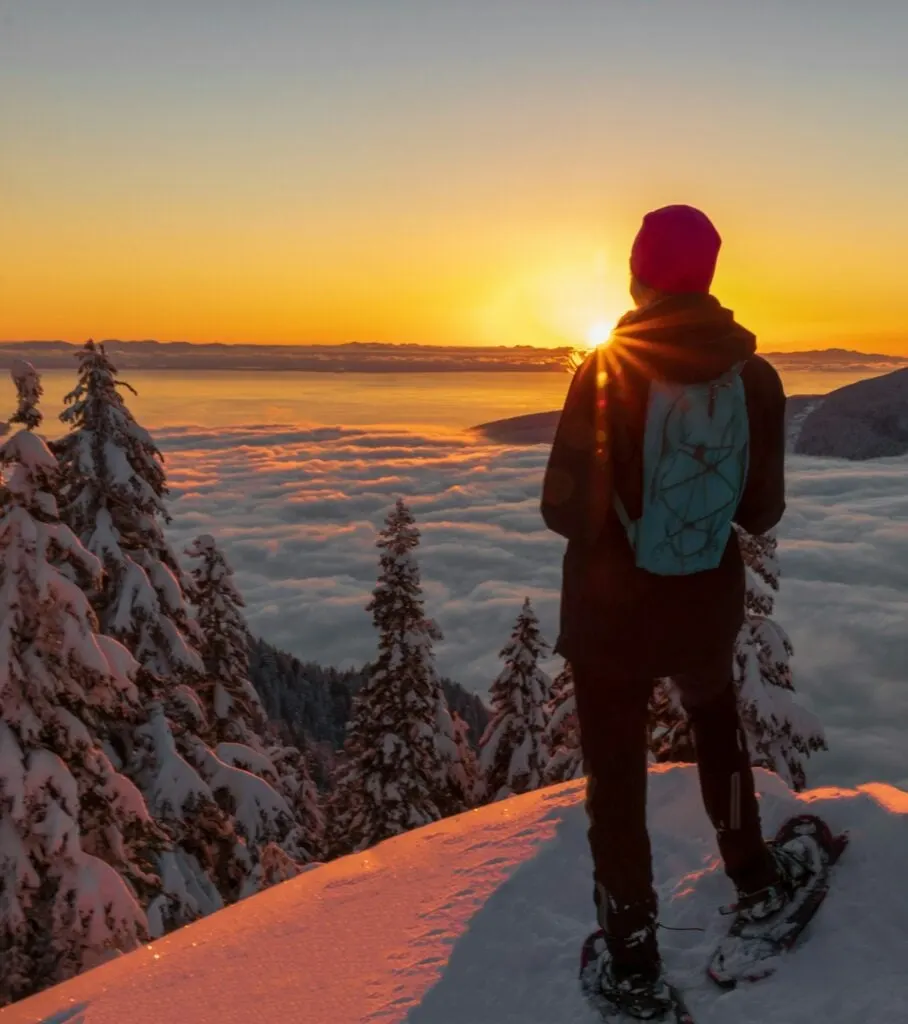
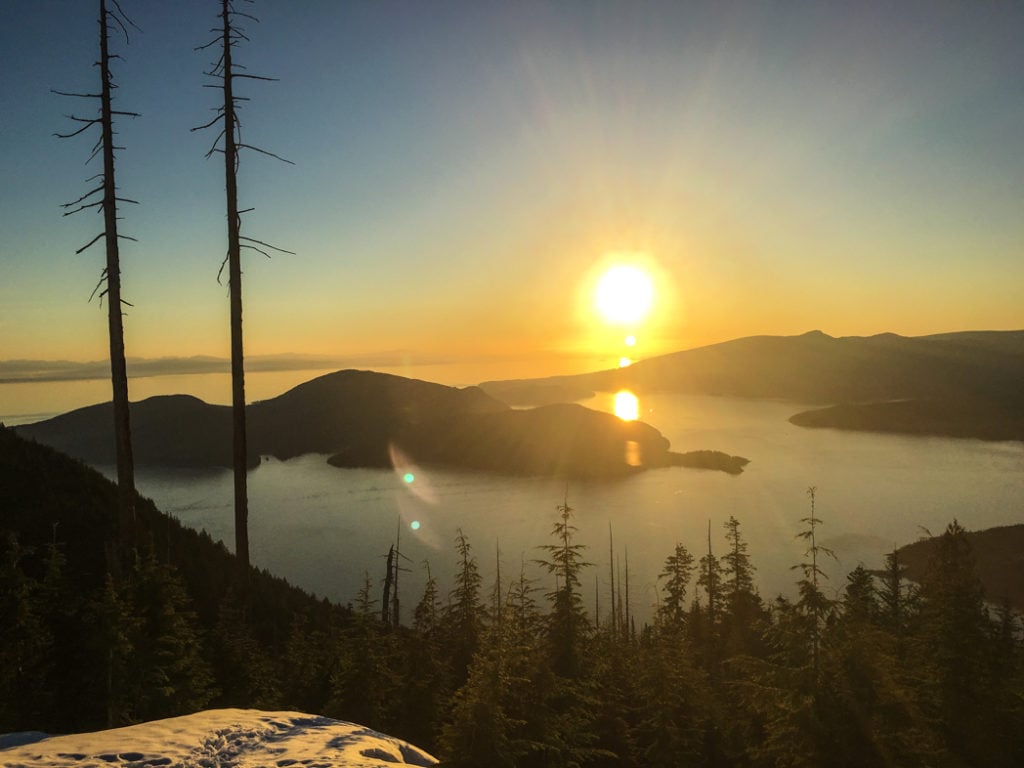
The Trail: This short but steep trail climbs the first section of the Howe Sound Crest Trail to a lookout with great views of Bowen Island. Bowen Lookout is my favourite place to go for a sunset snowshoe near Vancouver.
Passes: Due to the ski resorts liability policy, a free backcountry access pass is required to cross the ski hill to get to the start of the trail. You can pick one up at the old Black Mountain Lodge in the main downhill ski area parking lot.
Avalanche Danger and Hazards: No avalanche danger. The steep switchbacks on the trail can get really icy. Use caution when descending. This trail extends along the Howe Sound Crest Trail to St. Mark’s Summit.
In the winter travelling any further than Bowen Lookout will take you into serious avalanche terrain with many dangerous gullies and sharp drop-offs. Two snowshoers died in the area in December 2016. If you snowshoe this trail, please don’t go any further than Bowen Lookout without avalanche training and safety equipment.
Trail Map/Guide: A trail description and trail map are available on the BC Parks website.
Parking: Park in Lot 1, 2, or 3A. If those are full, park in lot 3B and take the shuttle.
Black Mountain Winter Snowshoe Route, Cypress Mountain

Distance: 7km return including the loop at the top
Time Needed: 2.5-3 hours
Cost: Free
Elevation Gain: 270m
Rating: Moderate/Challenging
The Trail: This steep trail climbs up beside the ski runs to the top of Black Mountain. Once at the top a loop trail travels past a few lakes.
Passes: Due to the ski resorts liability policy, a free backcountry access pass is required to cross the ski hill to get to the start of the trail. You can pick one up at the old Black Mountain Lodge in the main downhill ski area parking lot.
Avalanche Danger and Hazards: Avalanche.ca rates this as simple terrain which can be travelled with the normal amount of caution in most conditions. There is a very steep section of trail next to the ski run. Use caution and consider taking off your snowshoes when descending to avoid slipping. Check the South Coast avalanche forecast before you go.
Trail Map/Guide: A trail description and trail map are available on the BC Parks website.
Parking: Park in Lot 1, 2, or 3A. If those are full, park in lot 3B and take the shuttle.
Hollyburn Mountain Winter Trail, Cypress Mountain

Distance: 7.5km return
Time Needed: 4-5 hours
Cost: Free
Elevation Gain: 440m
Rating: Challenging
The Trail: The trail to the peak of Hollyburn Mountain climbs a few short hills and meanders beside the cross-country ski trails. In the last kilometer, it climbs steeply straight up to the summit.
Passes: No permits or fees are required as long as you stay out of the nordic ski area.
Avalanche Danger and Hazards: Avalanche.ca rates this as simple terrain which can be travelled with the normal amount of caution in most conditions. The final slope up to the summit is rated as challenging terrain. It very steep and can be treacherous in icy conditions. There is no significant avalanche danger if you stay on the trail, but the steep cliffs and gullies around the summit are prime avalanche territory. Check the South Coast avalanche forecast before you go.
Trail Map/Guide: A trail description and trail map are available on the BC Parks website.
Parking: Park in Lot 4 (Nordic ski area) or if that is full, in lot 3B.
Join: Snowshoeing in Vancouver Facebook Group
No-Go Trails for Snowshoeing in Vancouver
There are lots of summer hiking trails in Vancouver that may sound like a fun snowshoe adventure in winter. However, many of them have significant avalanche danger, are closed in winter, or just don’t have enough snow to be worthwhile for snowshoeing.
Here’s my list of no-go trails for snowshoeing:
Elsay Lake Trail: This trail has significant avalanche hazard since it passes through and below avalanche chutes for almost its entire length.
Lynn Peak: There is usually not enough snow to make this a worthwhile snowshoeing trip – you will usually have to carry your snowshoes for about 90% of the ascent until you reach deep snow.
Hanes Valley: This route is officially closed and forbidden to hike in winter. It passes through significant avalanche terrain.
Coliseum Mountain: This route is officially closed and forbidden to hike in winter. It passes through significant avalanche terrain.
Crown Mountain: This route is officially closed and forbidden to hike in winter. It passes through significant avalanche terrain and has very dangerous steep slopes.
Goat Mountain and Goat Ridge: This route is officially closed and forbidden to hike in winter. It passes through significant avalanche terrain and has very dangerous steep slopes.
Mount Strachan: The route up the front (south) side of the peak is closed in winter since it is part of the ski hill. The route up Christmas Gully on the back (north) side of the peak has significant avalanche danger.
St. Mark’s Summit: The trail crosses several dangerous avalanche chutes and is difficult to follow when snow covered.
Vancouver Snowshoeing FAQ
High elevation trails have snow between November and May. The best months for snowshoeing are December, January, February, and March, as they have the most consistent deep snow.
At Mount Seymour Provincial Park, the Dog Mountain and Mount Seymour First Peak trails are free to snowshoe. At Cypress Provincial Park, the Hollyburn Mountain, Black Mountain, and Bowen Lookout trails are free to snowshoe.
Beginners should try the Blue Grouse Loop at Grouse Mountain, Dog Mountain at Mount Seymour, or Bowen Lookout at Cypress Mountain.
Wear warm winter clothing and dress in layers. Wear waterproof layers on the outside, moisture wicking layers next to your skin, and insulating layers in the middle. See my recommendations for what to wear snowshoeing.
You can rent snowshoes at Grouse Mountain, Mount Seymour, and Cypress Mountain, but they have higher prices and have restrictions on where you can use them. It’s cheaper to rent snowshoes in Vancouver at Sports Junkies on Broadway, Yes Cycle in downtown Vancouver or The Destination in North Vancouver.
How many of these snowshoe trails have you done? Which is your favourite? Have questions about snowshoeing in Vancouver? Hit me up in the comments.
READ NEXT:
More Snowshoeing Guides:
- Where to Go Snowshoeing in Squamish
- Where to Go Snowshoeing in Whistler
- Where to Go Snowshoeing in Vancouver’s Fraser Valley
- Where to Go Snowshoeing in Manning Park
- Snowshoeing at Dakota Ridge on the Sunshine Coast, BC
More Snowshoeing and Winter Hiking Advice
- How to Choose Snowshoes: A Complete Guide
- The Best Boots For Snowshoeing
- Snowshoeing Safety: 14 Ways to Get into Trouble and How to Prevent Them
- Best Gifts for Snowshoers (20+ Ideas)
- What to Wear Winter Hiking and Snowshoeing
- 9 Tips for Winter Hiking (You Don’t Have to Freeze!)
- 100+ Snow-Free Hikes in Vancouver: Trails You Can Hike Year Round


- Best Sun Hoodies for Hiking - June 3, 2026
- Lower Stein Valley Trail Hiking and Backpacking Guide - May 27, 2026
- The Best Things to Do in Vernon, BC - May 21, 2026
Natasha
Wednesday 20th of December 2017
This is a really helpful list of the trails locally!
Josy A
Wednesday 20th of December 2017
This is really helpful thank you! I can't wait to try some of these trails! :)
Kate Korte
Saturday 16th of December 2017
This guide is awesome, you've really covered it well - can't wait to visit Van some day!
Ioanna
Saturday 16th of December 2017
Can you believe that I've never even held snowshoes in my hand? :D I actually did a snowshoeing trail in Quebec... in July ;-) Don't recommend it. This post makes it pretty obvious I have to go back to Canada in winter! :) Happy snowshoeing! Ioanna
Andrea Mayfield
Saturday 16th of December 2017
What a great guide! I would love to go snowshoeing one day! Nice photos!