
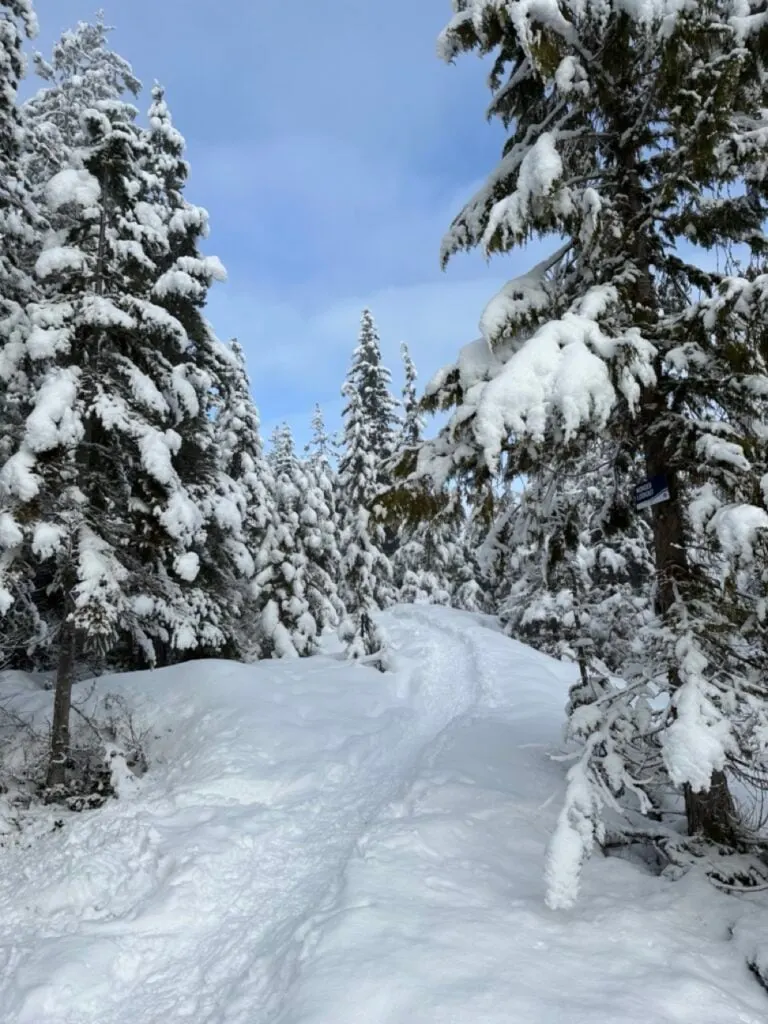
Squamish is one of the best small towns in Canada for outdoor adventures. So it’s no surprise that the outdoorsy fun continues in the winter… in the form of snowshoeing. The terrain around Squamish is pretty rugged, but there are still a few great places go snowshoeing in Squamish.
In this guide to snowshoeing in Squamish, you’ll get info and directions for 9 different trails ranging from super flat beginner trails to all-day epics to deep backcountry wilderness. I’m a Squamish local, so I’ve got the inside scoop on the best places to snowshoe in Squamish.
This guide to snowshoeing in Squamish includes:
- Quick reference guide: An easy overview of the stats for all the trails
- Snowshoeing safety: key info to help get you prepared to snowshoe in Vancouver
- Where to rent snowshoes in Squamish including which shops have the best price
- Snowshoe tours in Squamish: options for going with a guide
- Snowshoe trails in Squamish: details for 10 trails
- No-go trails: summer trails that aren’t safe for snowshoeing
Looking for other places to snowshoe in BC? Check out these posts about Vancouver-area snowshoe trails:
- Snowshoeing in Vancouver
- Snowshoeing in Whistler
- Snowshoeing in the Fraser Valley
- Snowshoeing in Manning Park
- Snowshoeing at Dakota Ridge on the Sunshine Coast
Hey there: Some of the links in this post are affiliate links, which means I earn a small commission at no cost to you. Thanks for your support. -Taryn
Snowshoeing in Squamish Quick Reference Guide
| Trail | Rating | Time Needed | Cost |
|---|---|---|---|
| Panorama Trail | Super Easy | 45min-1 hour | $72 |
| Wonderland Lake Loop | Super Easy | 30min-1 hour | $72 |
| Shannon Basin Loop | Moderate | 3-4 hours | $72 |
| Al’s Habrich Ridge | Moderate | 2-2.5 hours | $72 |
| Sky Pilot Valley | Moderate | 3-4 hours | $72 |
| Skyline Ridge Trail | Challenging | 8-10 hours | $72 |
| Red Heather/ Elfin Lakes | Moderate/ Challenging | 4 hours- overnight | FREE |
| Garibaldi Lake/Taylor Meadows | Challenging | 7 hours- overnight | FREE |
| Brandywine Falls | Super easy/Moderate | 30 min- 2 hours | FREE |
But First… Be Prepared
- Make a trip plan: While these trails may be steps from busy ski areas, they access serious wilderness. Tell someone where you are going and when you expect to be back. Use the great trip planning tools from Adventure Smart.
- Check the weather, trail conditions, and avalanche forecast: If the weather and trail conditions don’t look good, don’t go. Use my list of the best weather apps for hiking. Check the avalanche forecast. Unless you have taken an avalanche safety course, you probably shouldn’t go out unless the forecast is rated “Low”.
- Wear winter clothing and pack the essentials: Prepare for emergencies by packing the 10 essentials. Read my recommendations for what to wear snowshoeing and tips for winter hiking and snowshoeing.
- Use safe snowshoeing techniques: Snowshoes keep you from sinking into deep snow, but they aren’t great for walking sideways or downhill – it’s easy to slip and injure yourself. Read up on snowshoeing safety and check out my guide to choosing snowshoes.) They also have crampons and other traction aids underfoot to help grip icy snow.
- Take an avalanche safety course: If you plan to stray from flat terrain, you need avalanche safety training. Avvy Savvy is a great FREE online beginner tutorial on Avalanche.ca. You should also take a 2.5 day AST1 course with avalanche Canada.
READ NEXT: Snowshoeing Safety: 14 Ways to Get into Trouble and How to Prevent Them
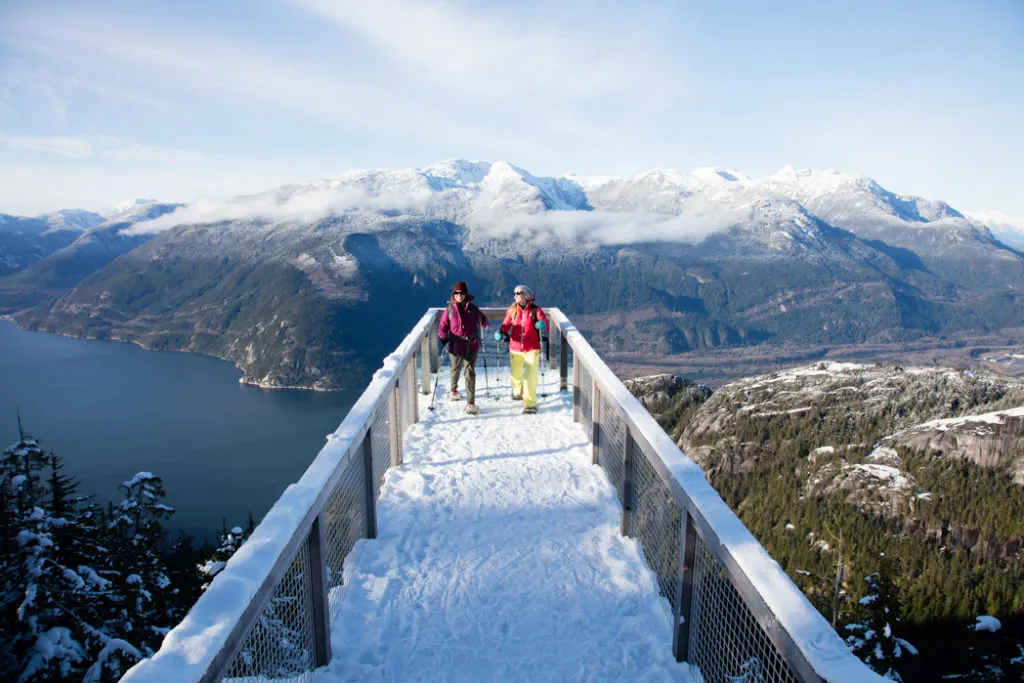
Snowshoeing at the Sea to Sky Gondola
The easiest place to go snowshoeing in Squamish is at the Sea to Sky Gondola. They have lots of trails to choose from (beginner to expert), and you don’t have to worry about driving on unplowed mountain roads. The only downside is the cost.
Permits/Fees: Day tickets for the gondola are $72. Once you get to the top there are no additional charges for snowshoeing.
If you want to avoid paying for the gondola up, you can hike up the Sea to Summit Trail instead, carrying your snowshoes. (You can take the gondola down for only $19.)
However, in the winter the Sea to Summit Trail sometimes closes due to hazardous conditions and if it’s open, it can be icy and dangerous so you will need crampons and an ice axe. For more information on the Sea to Summit trail including trail closures and conditions, see the Sea to Sky Gondola website.
Dogs: Not permitted on the gondola and on most trails. You can hike up via the Sea to Summit Trail and then snowshoe with your dog on a leash on the Al’s Habrich Ridge, Sky Pilot Valley and Skyline Trail and they must be on leash.
Driving Directions: Drive 50 min from Vancouver to Sea to Sky Gondola parking lot. If you’re coming from Squamish, it’s a 10-minute drive south of downtown. Note that BC law requires you to have winter tires to drive on highway 99 between October and April.
Transit Access: The Sea to Sky Gondola runs a shuttle service from Vancouver each day. It’s $112 for a combo shuttle and gondola pass, which isn’t a bad deal. Be sure to keep the shuttle schedule in mind when planning which trail to tackle.
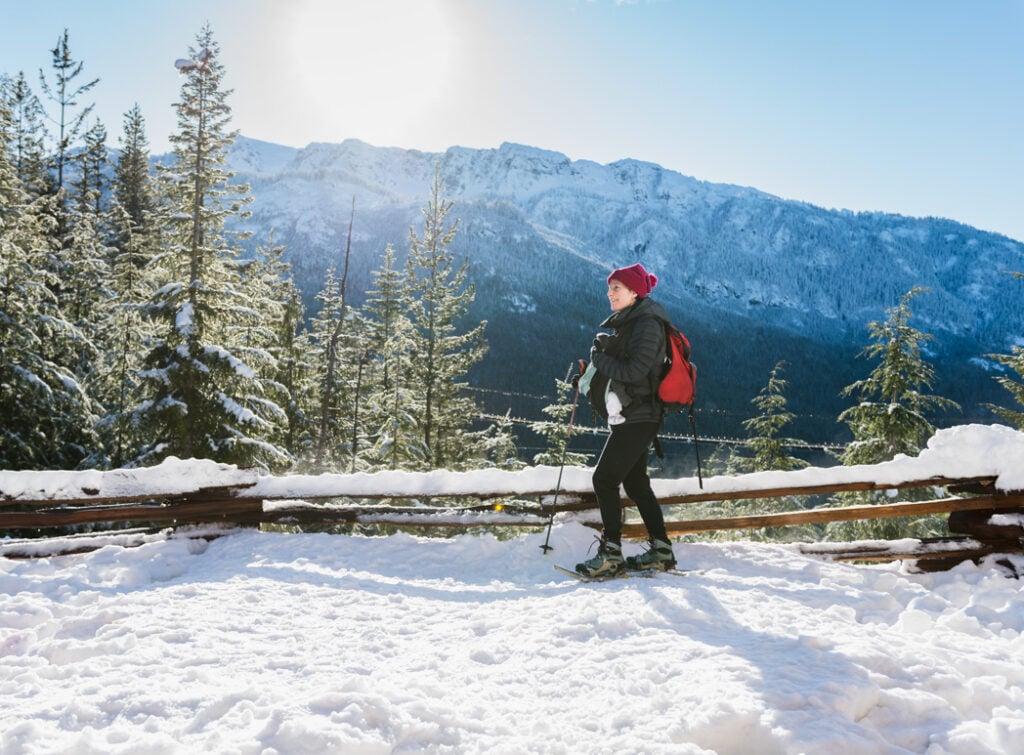
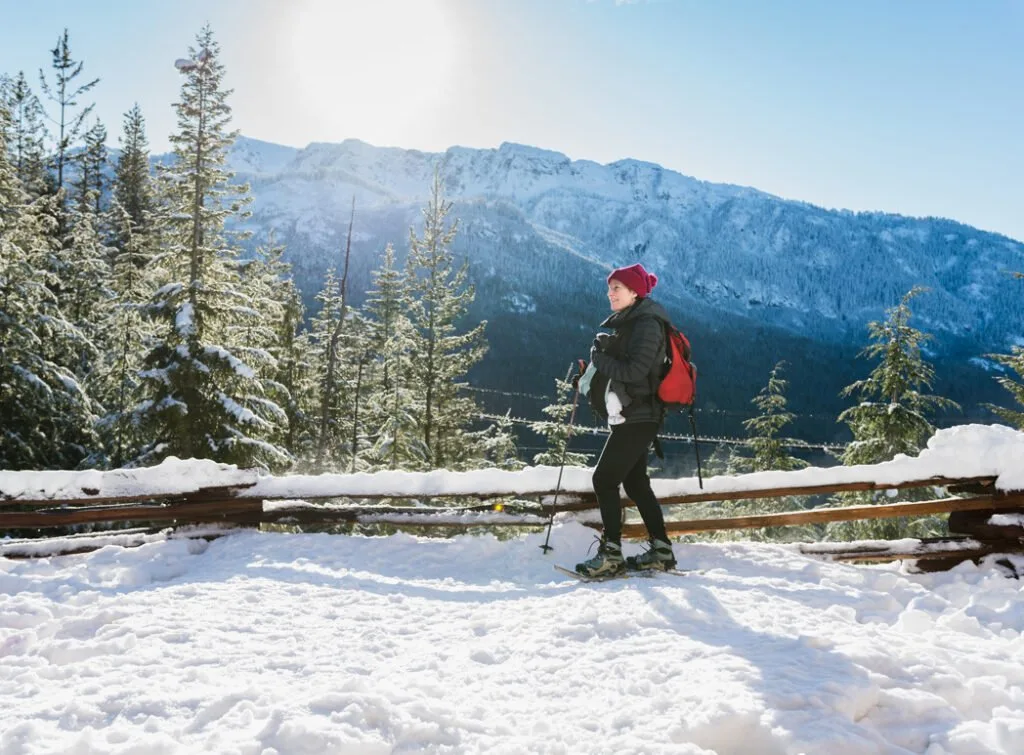
Panorama Trail, Sea to Sky Gondola

Distance: 1.6km loop
Time Needed: 45min- 1 hour
Elevation Gain: 100m
Rating: Super easy
The Trail: This is the Sea to Sky Gondola’s signature trail in both summer and winter. It’s a loop through gently rolling terrain that leads to some great viewpoints. The best one by far is the Chief viewing platform where you can look down to the Chief, the town of Squamish, the Squamish River valley and Howe Sound. Choose a sunny day for this one to really soak up the views.
Avalanche Danger and Hazards: None.
Trail Map/Guide: The Sea to Sky gondola has a trail app you can download or just pick up a copy of their map when you buy your tickets. You can also find more info about the Panorama trail and about snowshoeing at the gondola in general on their website.
Wonderland Lake Loop, Sea to Sky Gondola
Distance: 1.6km loop
Time Needed: 30min-1 hour
Elevation Gain: 35m
Rating: Super easy
The Trail: This short and easy loop provides a bit more of a wilderness experience (and sees far fewer tourists) than the Panorama trail. It loops around through rolling terrain and passes several viewpoints. Be sure to take the narrow side Wonder View Spur to the right (south) to get the views.
Avalanche Danger and Hazards: None.
Trail Map/Guide: The Sea to Sky gondola has a trail app you can download or just pick up a copy of their map when you buy your tickets. You can also find more info about the Wonderland Lake Loop and about snowshoeing at the gondola in general on their website.
Shannon Basin Loop, Sea to Sky Gondola

Distance: 10km loop
Time Needed: 3-4 hours
Elevation Gain: 475m gain, 290m loss
Rating: Moderate
The Trail: This trail follows an old road on a meandering loop that descends to cross Shannon Creek on a bridge, then comes back up to the gondola on a portion of the Sea to Summit Trail. While it does gain over 400m, since it’s on an old roadbed, it’s never very steep. This is the lowest elevation trail at the Sea to Sky Gondola, so in mild weather it may not have enough snow to snowshoe.
Avalanche Danger and Hazards: None.
Trail Map/Guide: The Sea to Sky gondola has a trail app you can download or just pick up a copy of their map when you buy your tickets. You can also find more info about the Shannon Basin Trail and about snowshoeing at the gondola in general on their website.
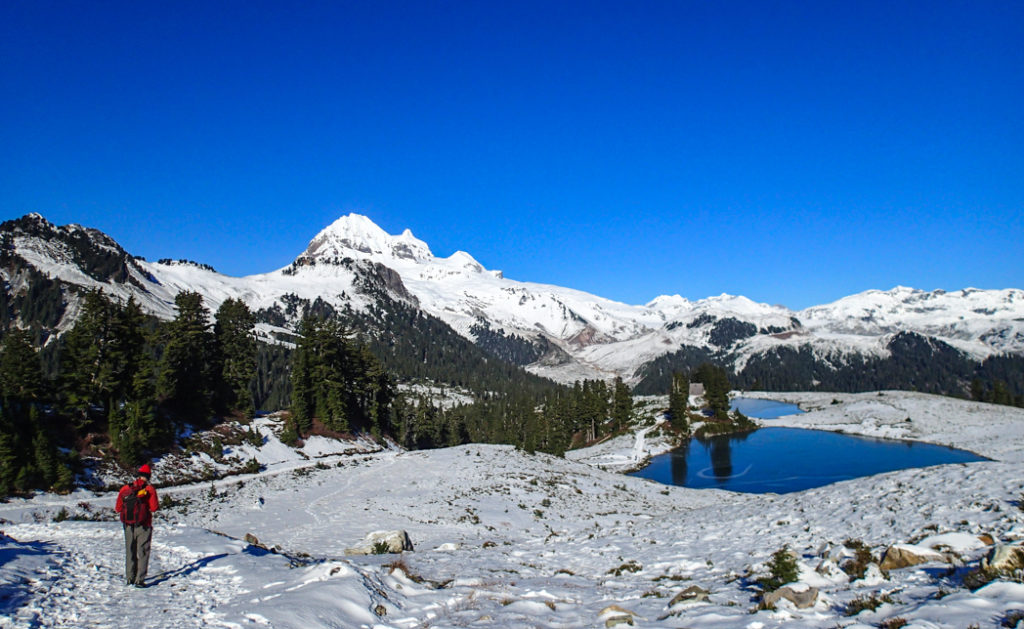
Al’s Habrich Ridge, Sea to Sky Gondola

Distance: 4km return (to the far end of the ridge)
Time Needed: 2-2.5 hours
Elevation Gain: 250m
Rating: Moderate
The Trail: This backcountry trail travels a few hundred meters on a road before heading off into the forest. It immediately crosses a creek (there is no bridge), then heads uphill through the trees. The trail emerges onto a ridge and follows the crest of the ridge past several great viewpoints. The official winter route stops at the far end of the ridge. Unlike the other snowshoeing trails at the Sea to Sky Gondola, this trail mostly avoids roads and tourist attractions so it feels like real wilderness.
Avalanche Danger and Hazards: The initial stream crossing can be a bit awkward: The creek doesn’t ice over but the rocks you need to use to hop across are icy. The far bank of the stream is also very steep. Take off your snowshoes to cross the stream and use poles for balance.
Watch carefully for diamond markers in the trees – it can be easy to lose the trail Once on the ridge, stay on the top of the ridge: there is a lot of steep and dangerous terrain if you leave the marked route.
The official winter route stops at the far end of the ridge. The summer trail continues past here and climbs steeply through the trees. It is very difficult to follow and is not well marked. Unless you are an expert in backcountry winter navigation, turn around at the far end of the ridge.
Check the avalanche forecast before you go.
Trail Map/Guide: My Al’s Habrich Trail guide has all the info you need. The Sea to Sky gondola has a trail app you can download or just pick up a copy of their map when you buy your tickets. You can also find more info about snowshoeing at the gondola in general on their website.
Sky Pilot Valley Trail, Sea to Sky Gondola

Distance: 8km return
Time Needed: 3-4 hours
Elevation Gain: 380m
Rating: Moderate
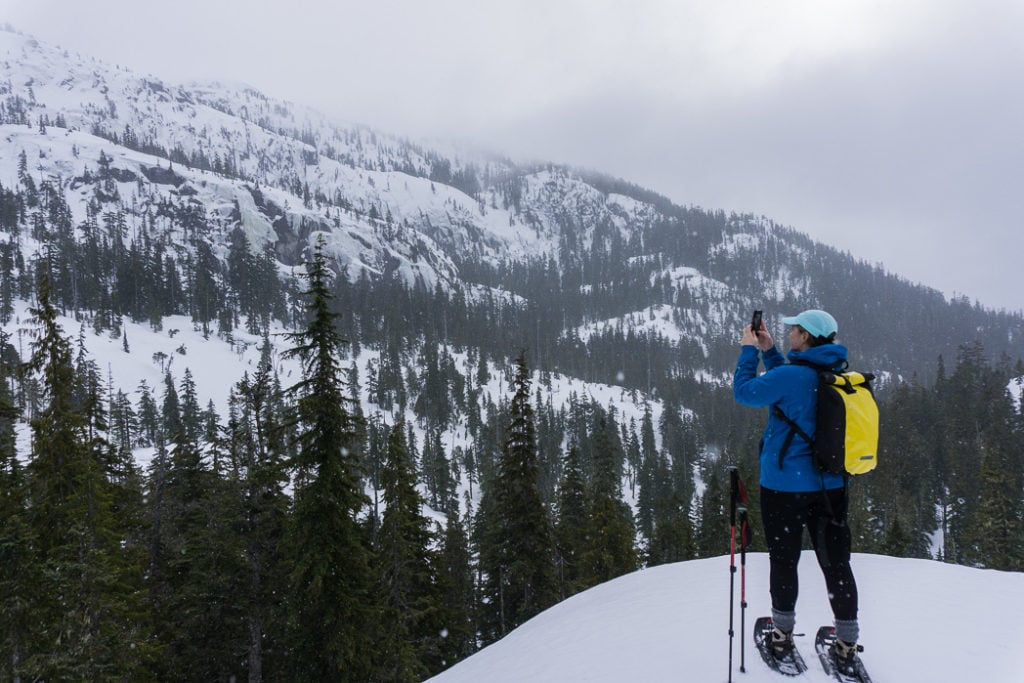
The Trail: This trail is primarily used by experienced backcountry skiers and mountaineers accessing challenging terrain. But it does follow an old road in a beautiful valley so it is accessible for snowshoers just looking for a winter walk with great views of the surrounding mountains.
Avalanche Danger and Hazards: Past the end of the marked trail the skiers/climbers route goes steeply uphill into avalanche terrain. The slopes above the road are steep enough to slide – use caution if the avalanche forecast is anything except low. Please be prepared to share the trail with skiers and step aside to let them pass, especially when they are coming downhill. Don’t walk in the ski tracks – leave them intact for the skiers to use. Check the avalanche forecast before you go.
Trail Map/Guide: The Sea to Sky gondola has a trail app you can download or just pick up a copy of their when you buy your tickets. You can also find more info about snowshoeing at the gondola in general on their website. There’s also information on the summer hiking route on the Skyline Pilot Valley Trail. Keep in mind that the winter route only covers the first three-quarters of the trail before turning around.
Skyline Ridge Trail, Sea to Sky Gondola
Distance: 17km return
Time Needed: 8-10 hours
Elevation Gain: 380m
Rating: Challenging
The Trail: This trail follows an old (and sometimes overgrown) road through the valley before climbing on to the shoulder of Goat Ridge where there are some views. It’s a long way to go in a day, but it is a good option if you’re looking for a challenging trip from the top of the Sea to Sky Gondola. Be sure to stop at the end of the marked trail since route-finding past there will be very difficult and potentially dangerous in the winter.
Trail Map/Guide: The Sea to Sky gondola has a trail app you can download or just pick up a copy when you buy your tickets. You can also find more info about the the Skyline Ridge Trail and snowshoeing at the gondola in general on their website
Join: Snowshoeing in Vancouver Facebook Group
Other Places to Go Snowshoeing in Squamish
Red Heather/Elfin Lakes, Garibaldi Provincial Park

Distance: 10km return to Red Heather, 22km to Elfin Lakes
Time Needed: 4-5 hours to Red Heather, 7-10 hours to Elfin Lakes. You can also spread out the trip across 2 days by camping near Red Heather Hut or Elfin Lakes hut or staying inside the Elfin Lakes hut.
Elevation Gain: 450m to Red Heather, +250m more to Elfin Lakes
Rating: Moderate to Red Heather, Challenging to Elfin Lakes
The Trail: The trail follows an old road for the first 5km to the Red Heather warming hut. Past there, the winter route is marked by reflective bamboo poles that lead another 6km along the undulations of Paul Ridge to the Elfin Lakes Hut. There are great views of the mountains from the ridge. Red Heather hut makes a great destination for shorter day trips.
Going all the way to Elfin Lakes and back is doable in a day but it is challenging. You can also snow camp overnight next to both Red Heather and Elfin Lakes huts, or you can reserve a bunk inside the Elfin Lakes Hut.
Avalanche Danger and Hazards: No avalanche danger or hazards below Red Heather hut.
After Red Heather hut the trail emerges above treeline on to the ridge. The winter route is placed to minimize avalanche exposure, but the trail does travel through avalanche terrain and on slopes that can slide.
Use caution in these areas and do not attempt this trail if the avalanche forecast is above moderate. Avalanche.ca rates this as simple terrain which can be travelled with the normal amount of caution in most conditions. Check the avalanche forecast before you go.
Trail Map/Guide: My Elfin Lakes hiking guide has all the info you need.
Permits/Fees: No permits or fees are required for day trips on the trail in winter. If you want to camp or stay overnight in the Elfin Lakes hut you need to make a reservation and pay backcountry fees. Elfin Lakes Hut is $15/person/night + $6 reservation fee. Camping is $10/person/night + $6 reservation fee.
Dogs: Not permitted in Garibaldi Park.
Getting There: Drive 2 hours from Vancouver to the trailhead. If you’re coming from Squamish, it’s a 45-minute drive. After passing Quest University in Squamish the road turns to gravel and it is not plowed often.
You will need chains and possibly also 4-wheel drive (depending on the conditions) to get up this road in the winter. Cars without chains slip off the road every year and require very expensive tow trucks to get them out.
The parking lot can fill up on winter weekends so carpool and be prepared to park in the pullouts further down the road and walk up. Don’t park on the shoulder as you will block the narrow road.
READ NEXT: Backcountry Huts in British Columbia and the Canadian Rockies
Garibaldi Lake/Taylor Meadows, Garibaldi Provincial Park

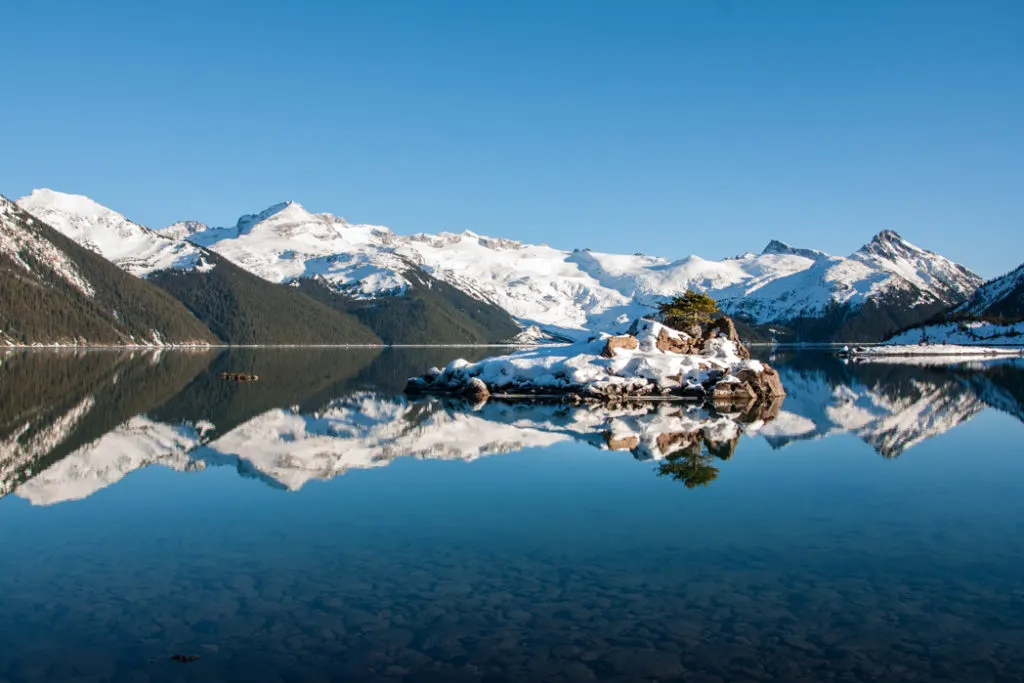
Distance: 18km return to Garibaldi Lake, 15km return to Taylor Meadows
Time Needed: 7-10 hours for either option. You can also camp at either Taylor Meadows or Garibaldi Lake campgrounds.
Elevation Gain: 900m to Garibaldi Lake, 950m to Taylor Meadows
Rating: Challenging/Difficult
The Trail: This snowshoe route follows the usual summer trail up the switchbacks to Garibaldi Lake or Taylor Meadows. At the 6km the trail forks: left for Taylor Meadows, right for Garibaldi Lake. The trail can be icy lower down and covered in deep snow higher up so you may need to pack both microspikes and snowshoes. (Read my guide to the differences between microspikes, crampons, and snowshoes.) It’s a long hike to either destination so be sure to give yourself plenty of time and pack a headlamp in case you end up coming down in the dark.
Avalanche Danger and Hazards: The switchbacks up to the 6km junction are steep and can be icy. Bring microspikes just in case. Watch for open creek crossings and partially buried bridges. Later in the year Barrier Lake and Lesser Garibaldi Lake on the Garibaldi Lake route freeze over. You can take a shortcut by walking across the lakes. Use extreme caution if you decide to walk on the lakes.
Avalanche.ca rates the trail as simple terrain which can be travelled with the normal amount of caution in most conditions. The terrain is rated challenging past Taylor Meadows. Check the avalanche forecast before you go.
On your descent stay on trail and don’t follow skier descent trails into the Rubble Creek valley. The valley is prone to slides. A snowshoer drowned in Rubble Creek in 2008 after getting lost on the descent.
Trail Map/Guide: You can also find more information on the BC Parks website.
Permits/Fees: No permits or fees are required for day trips on the trail in winter. If you want to camp overnight you need to make a reservation and pay backcountry fees. Camping is $10/night + $6 reservation fee.
Dogs: Not permitted in Garibaldi Park.
Getting There: Drive 1.5 hours from Vancouver to the trailhead. If you are coming from Squamish it’s only 30 minutes. Note that BC law requires you to have winter tires to drive on highway 99 between October and April.
The road to the trailhead and the parking lot is plowed sporadically. However, it is still a mountain road so winter tires and chains are recommended in case the plow has not been through recently.
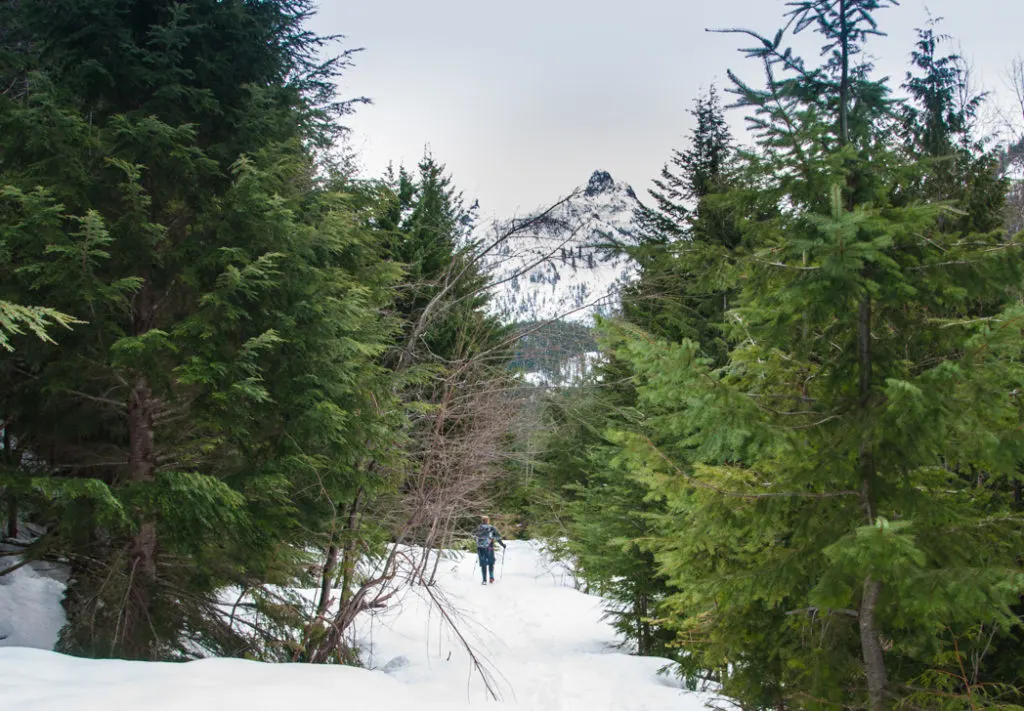
Brandywine Falls

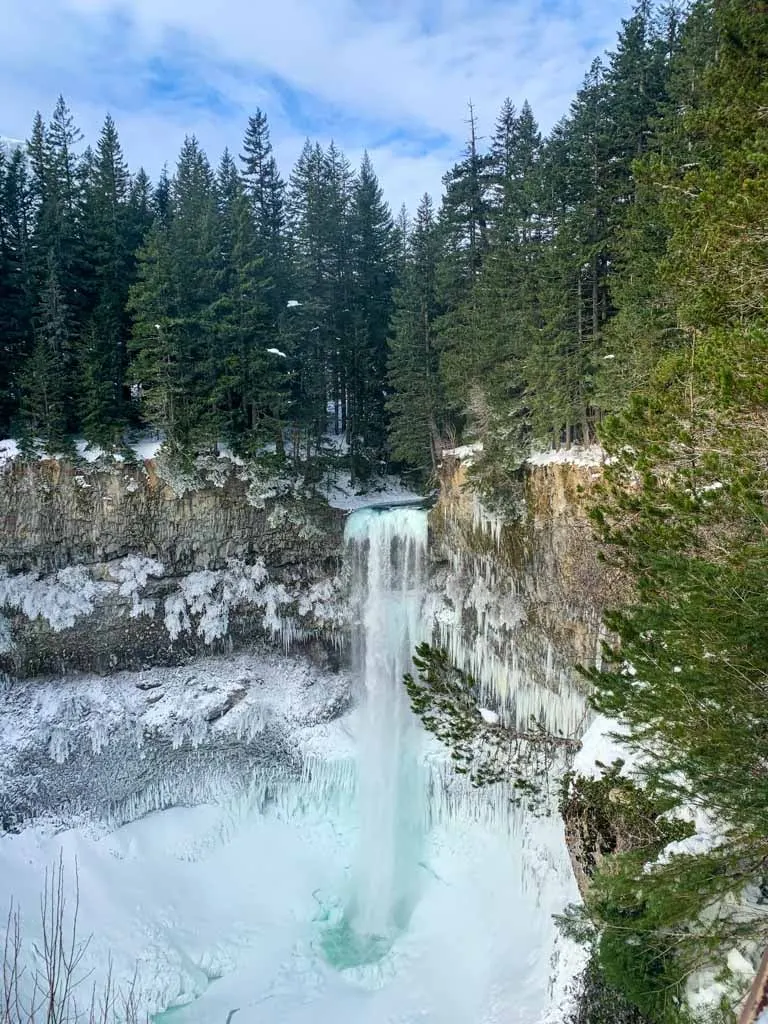
Distance: 1km round trip to the falls, 6km round trip to the Bungee Bridge
Time Needed: 30 min round trip to Brandywine Falls, 2 hours round trip to the bungee bridge
Elevation Gain: 50m
Rating: Super easy to Brandywine Falls. Easy/Moderate to the Bungee Bridge
The Trail: The flat and easy trail to the Brandywine Falls viewing platform is a great option for snowshoeing near Whistler. If you want to extend your trip, you can snowshoe a portion of the Sea to Sky trail over to the Whistler Bungee Bridge. You can look down into the depths of the Cheakamus River canyon and maybe even watch people bungee jump.
Avalanche Danger and Hazards: The trail crosses train tracks: use caution. There is no maintained trail down to the base of Brandywine Falls: there is an illegal route that uses a scary old rope to descend a cliff but it travels over slippery rocks and is very icy and dangerous in the winter. No avalanche hazard.
Trail Map/Guide: My Brandywine Falls hiking guide has all the info you need.
Permits/Fees: None.
Dogs: Permitted on leash.
Driving Directions: Drive 1.5 hours from Vancouver. It’s only 30 minutes from Squamish. Note that BC law requires you to have winter tires to drive on Highway 99 between October and April.
Getting There: The park gate is locked in the winter and unfortunately you are not allowed to park on the side of Highway 99. (Your car will get towed.) Unless you get dropped off and picked up, unfortunately the only way to do this snowshoe trip currently is to park at Whistler Bungee on the Cal-Cheak Forest Service Road and walk in from that direction. Whistler Bungee does plow the road but it is rough.
Join: Snowshoeing in Vancouver Facebook Group
No-Go Trails for Snowshoeing in Squamish
There are lots of summer hiking trails in Squamish that may sound like a fun snowshoe adventure in winter. However, many of them have significant avalanche danger, are closed in winter, or just don’t have enough consistent snow for good snowshoeing.
Here’s my list of no-go trails for snowshoeing:
- Sea to Summit Trail: Only the last section of the Sea to Summit Trail is high enough to see consistent snow, and it’s steep enough to make microspikes or crampons a safer choice than snowshoes even if there is snow.
- Stawamus Chief: It snows on top of the Chief a few times a year, but it doesn’t usually stick for long since it is not at a high enough elevation. As well, it’s too steep for snowshoes – microspikes are better here.
- Watersprite Lake: The road to Watersprite Lake is not plowed so even with 4×4 and chains, you often have to walk a long distance just to get to the trailhead. The summer trail has significant avalanche hazard, so in winter, you have to use an unmarked route to get to the lake. Watersprite Lake is best for experienced snowshoers with avalanche training and experience with off-trail winter navigation.
Squamish Snowshoeing FAQ
High elevation trails have snow between November and May. The best months for snowshoeing are December, January, February, and March, as they have the most consistent deep snow.
Elfin Lakes, Garibaldi Lake, and Brandywine Falls are all free to snowshoe.
I recommend the Panorama Trail or the Wonderland Lake Loop at the Sea to Sky Gondola for beginners.
Wear warm winter clothing and dress in layers. Wear waterproof layers on the outside, moisture wicking layers next to your skin, and insulating layers in the middle. See my recommendations for what to wear snowshoeing.
In Squamish you can rent snowshoes at Urban Alpine or Valhalla Pure. (Pro tip: Valhalla has the best price). The Sea to Sky Gondola also rents snowshoes from a kiosk at the top of the gondola.
Final Thoughts
How many of these snowshoe trails have you done? Which is your favourite? Have questions about snowshoeing in Squamish? Hit me up in the comments.
READ NEXT:
More Snowshoeing Guides:
- Snowshoeing in Vancouver
- Snowshoeing in Whistler
- Manning Park Snowshoeing
- Snowshoeing in Vancouver’s Fraser Valley
Advice for Snowshoeing and Winter Hiking:
- How to Choose Snowshoes: A Complete Guide
- The Best Boots For Snowshoeing
- Snowshoeing Safety: 14 Ways to Get into Trouble and How to Prevent Them
- Best Gifts for Snowshoers (20+ Ideas)
- What to Wear Winter Hiking and Snowshoeing
- 9 Tips for Winter Hiking (You Don’t Have to Freeze!)
- 100+ Snow-Free Hikes in Vancouver: Trails You Can Hike Year Round
More Squamish Posts:
- The Best Hikes in Squamish, BC (From a Local)
- 70+ Things to Do in Squamish
- Camping in Squamish, BC: 22 Places to Camp Near Squamish
- Sea to Sky Highway Road Trip Guide: Driving from Vancouver to Whistler
- 10 Best Hotels in Squamish


- Best Sun Hoodies for Hiking - June 3, 2026
- Lower Stein Valley Trail Hiking and Backpacking Guide - May 27, 2026
- The Best Things to Do in Vernon, BC - May 21, 2026