

The High Note Trail is the most spectacular hike in Whistler, but it’s also the most expensive. Here’s everything you need to know about hiking the High Note Trail so you can decide if it’s worth the price.
I live in nearby Squamish, so I’ve hiked the High Note tons of times. Honestly, I like this trail so much that I hike it a few times each summer. But if you’re not a local, you might be wondering if the High Note Trail is worth it. (Spoiler: I think it’s worth the money on a clear day and it’s one my picks for things to do in Whistler in the summer.)
Since I’ve hiked this trail so many times (and I literally wrote a book about hiking in Southwestern BC) I’ve got everything you need to know about the High Note Trail. This guide includes:
- Trail stats including how long it takes, difficulty, cost, best time to go, and more
- High Note Trail map that shows all the key locations I mention in this post
- How to get to the High Note Trail including parking and which gondola to take
- Step-by-step hiking directions and tips for where to get the best views
- How to make your hike shorter or longer including info on the Half Note Trail
- How to hike the High Note Trail without taking the gondola (although I don’t recommend it)
- Tips for hiking the High Note Trail including what to pack and how to prep
This is a sensitive wilderness area. Learn how to Leave No Trace to keep the wilderness wild. Make sure you are prepared by bringing the 10 Essentials. Get ready for adventure with this checklist of things to do before every hike.
Hey there: Some of the links in this post are affiliate links, which means I earn a small commission at no cost to you. Thanks for your support. -Taryn
High Note Trail Stats
Here are the basic stats that you need to know about hiking the High Note Trail in Whistler:
Duration: 3 to 4.5 hours
Distance: 9.6 km loop
Difficulty: Moderate (Whistler Blackcomb rates it as difficult, but that is in comparison to their other trails. Compared to hiking trails in the entire Whistler area, I would say it is moderate.)
Elevation Change: 430 m elevation gain, 825 m elevation loss
Cost: $105/adult for an all-day sightseeing lift ticket that also includes the Peak 2 Peak Gondola. (If you plan to go sightseeing for more than one day, it’s worth it to buy a season’s pass. That’s what I do.)
Best Time to Go: Late June/early July to late September. The trail is closed the rest of the year. I highly recommend picking a clear day so you can enjoy the views. It’s not worth your money if it’s cloudy.
What’s With the Name? The peaks on the nearby ridge are named Piccolo, Flute, and Oboe Summits and are known as the Musical Bumps. Since these are high-pitched instruments, they named it the High Note.
Toilets: There are no toilets on the trail, but there are toilets at the Roundhouse Lodge where you start and end the hike.
Drinking Water: There are no water sources on the first half of the trail so pack drinking water. You can collect water at Symphony and Harmony Lakes on the second half of the trail, but you need to filter or treat it first. (I use a Katadyn BeFree.)
Dogs: Only guide dogs and service dogs are allowed.
Bikes: While there are tons of mountain bike trails on Whistler Mountain, bikes aren’t allowed on the High Note.
Caution: Keep an eye on the gondola hours – you don’t want to miss the last one off the mountain!
Indigenous Context: The High Note Trail is in the traditional territory of the Lil’wat and Skwxwu7mesh (Squamish) Nations. Their oral tradition teaches us that before settlers arrived, the two Nations shared the Whistler Valley, using summer camps to harvest plants and animals. To learn more, visit the Squamish Lil’wat Cultural Centre.
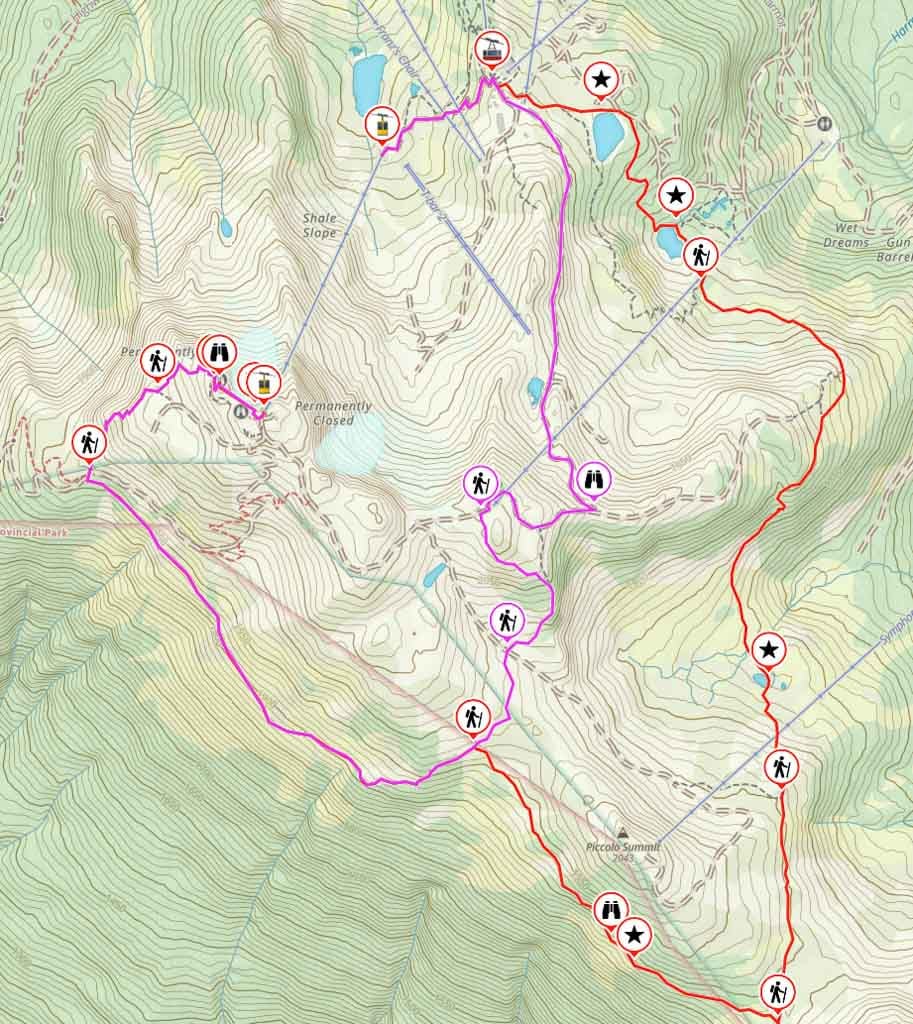
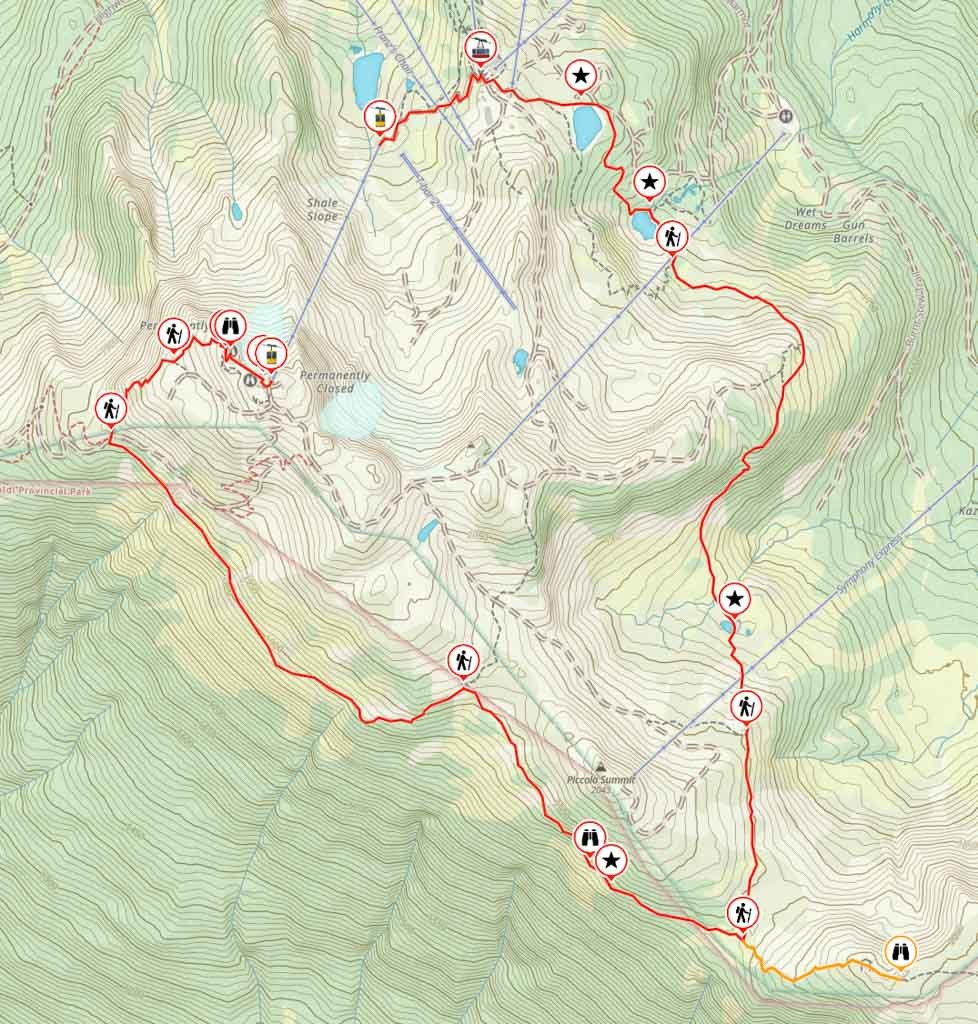
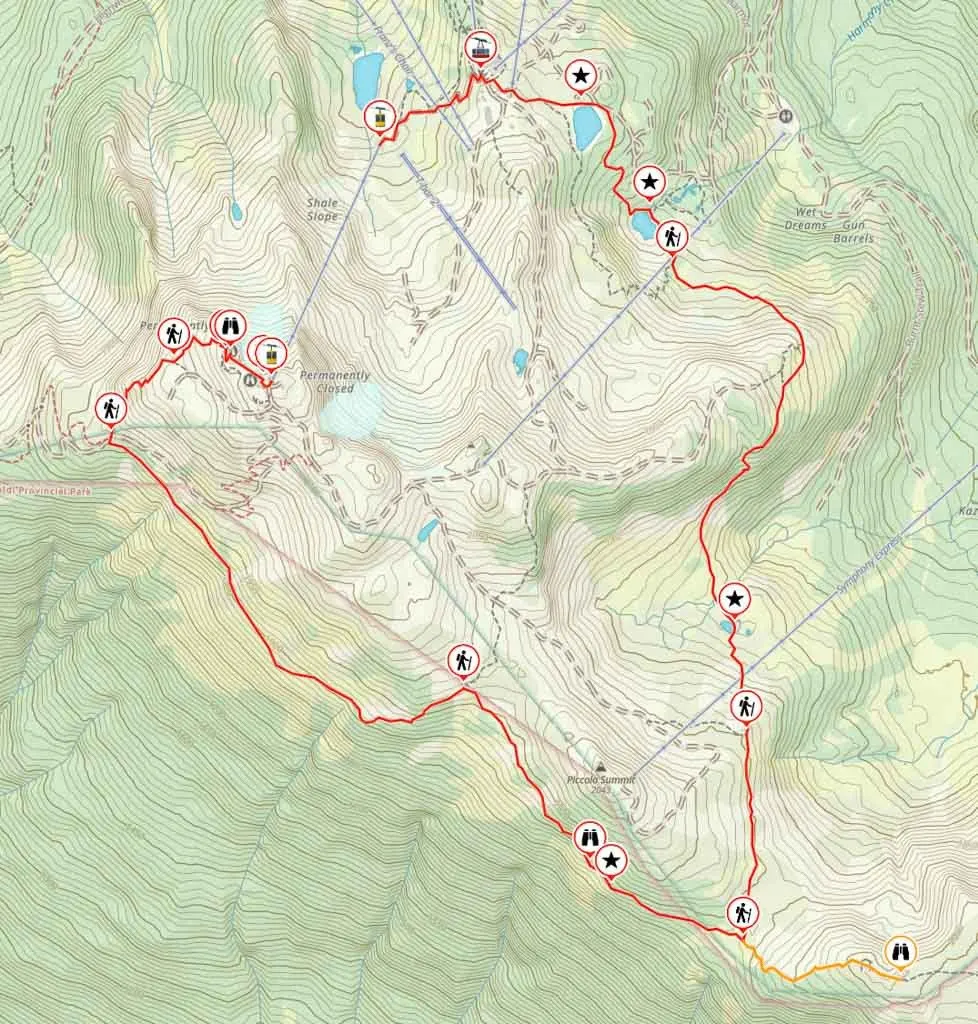
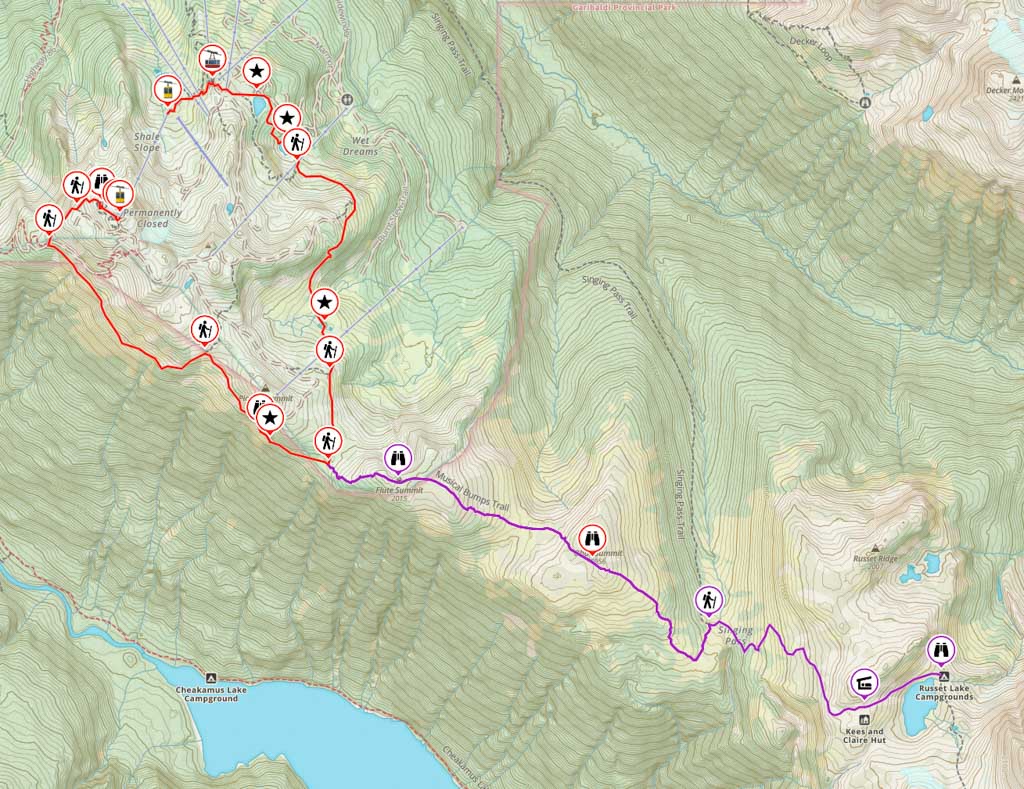
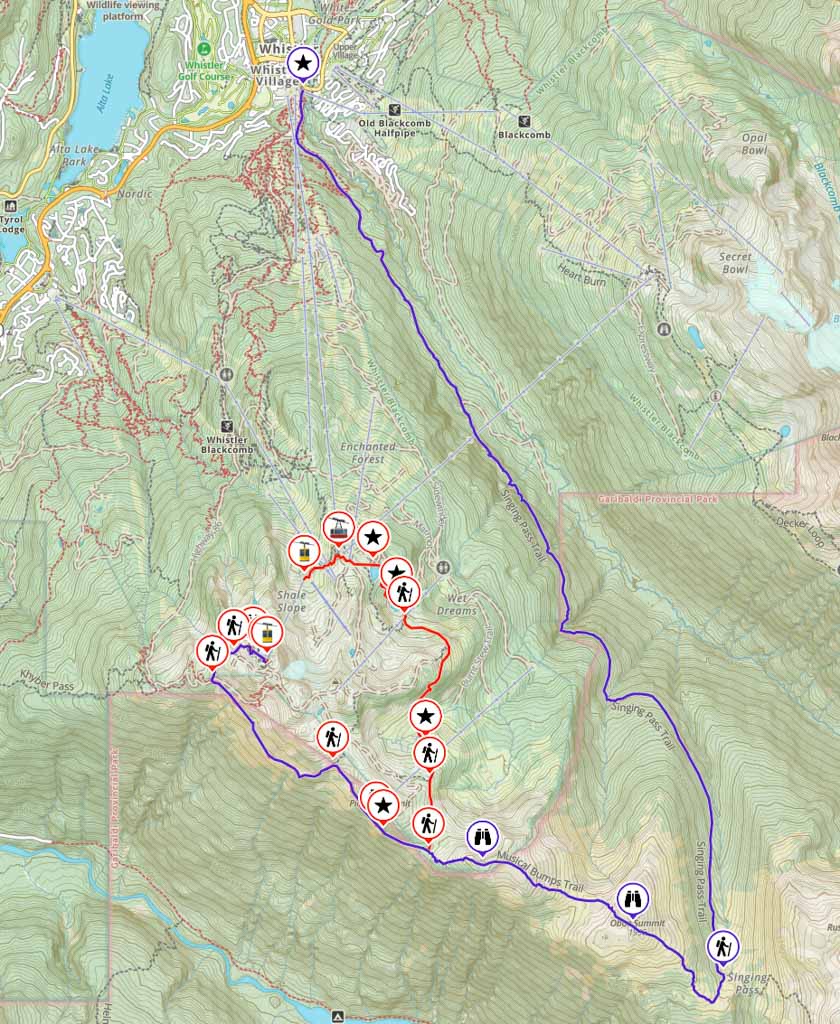
High Note Trail Map
The High Note Trail is easy to follow with lots of signs. But it can be helpful to have a map to understand where you are. I made you a custom trail map using Gaia GPS, my favourite mapping app. It shows all the locations I mention in this post. Click through to zoom in and explore (and to download the GPX file).

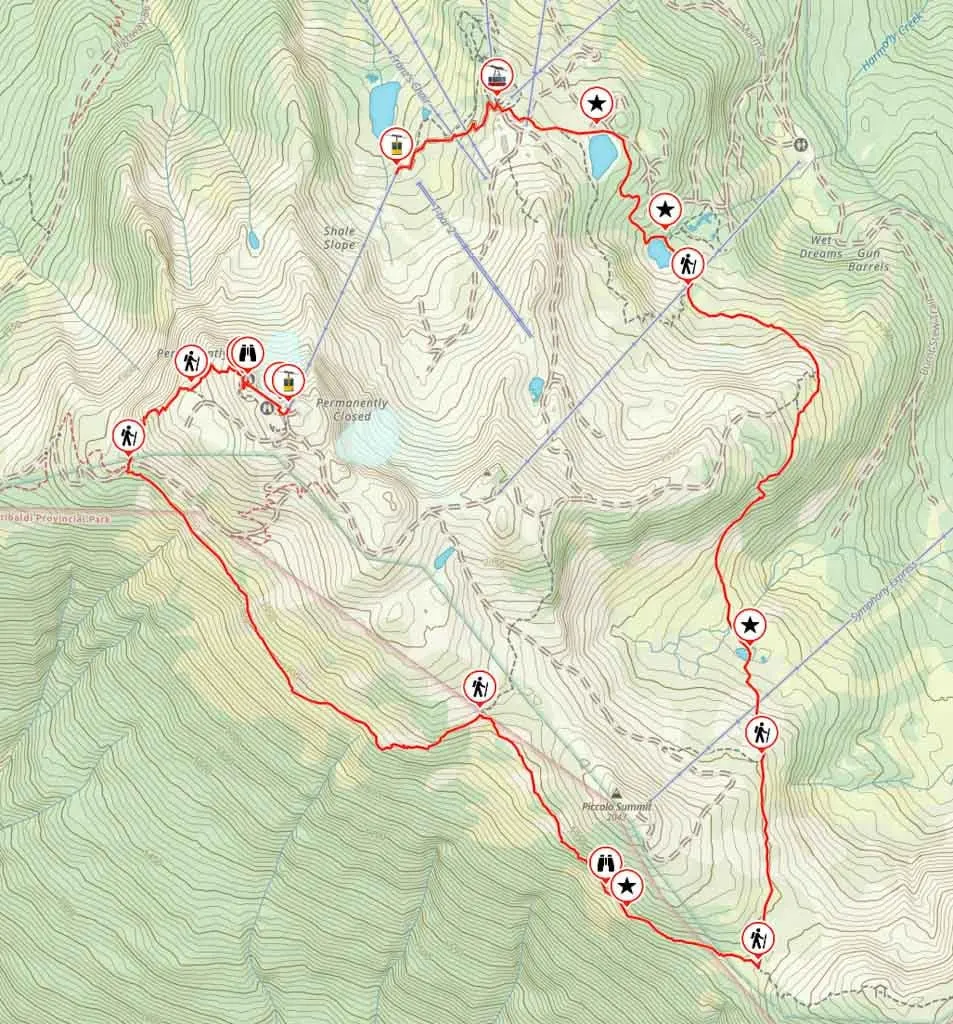
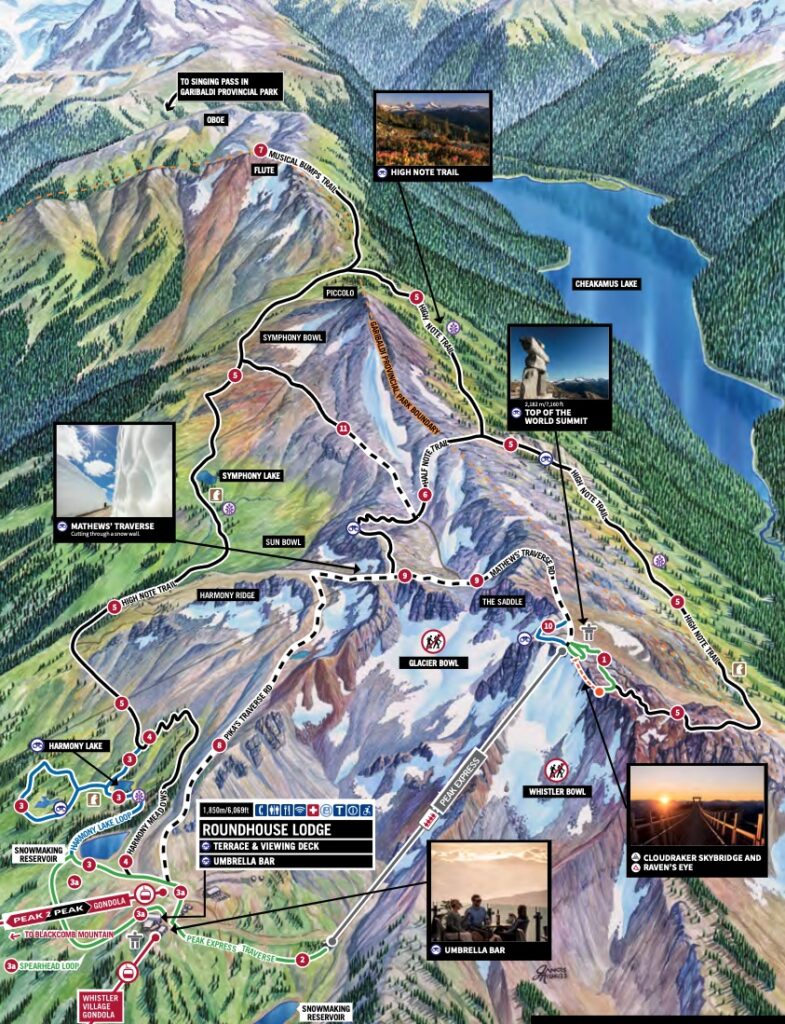
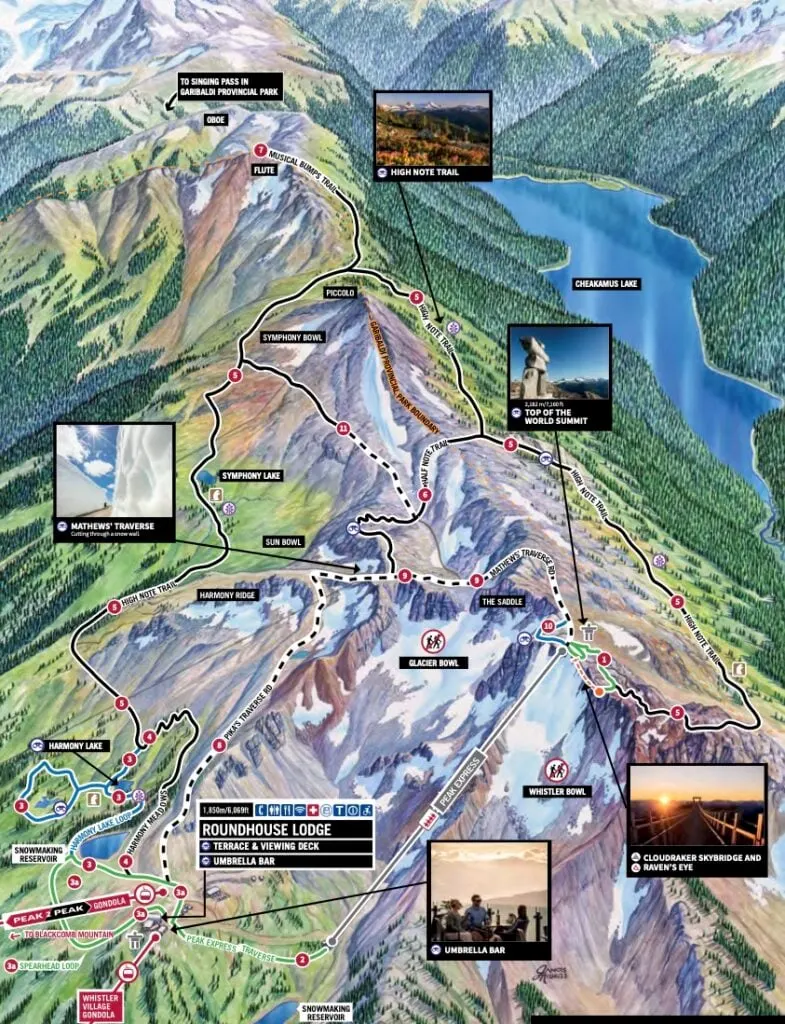
You can also use Whistler Blackcomb’s Alpine Trails Map – they will give you a paper copy when you buy your lift ticket. It’s a beautiful hand-drawn map, and it gives you a vague idea of the terrain. But I don’t find it nearly as helpful as a proper topographic map… which is why I use All Trails+ or Gaia GPS instead.
How to Get to the High Note Trail
Parking
Getting to Whistler is fairly straightforward: Drive Highway 99 north from Vancouver to Whistler. My Sea to Sky Highway Road Trip guide has lots of driving tips and suggestions for where to stop along the way.
Once you get to Whistler, head for the day-use parking lots on Backcomb Way. Here are Google Maps driving directions. From there, walk 5 minutes to the Whistler Village Gondola.
Day-use lot 1 is the closest parking to the Whistler Gondola Base. My budget tip: Park in lots 4 or 5. They are an extra 5-10 minute walk and a bit cheaper. Here is info on current parking rates and hours.
Gondola Ride
The High Note Trail starts at the top of Whistler Peak. To get there you, will need to ride a combination of gondolas and lifts from Whistler Village. You need to pay to take the gondola and lifts, but they only check your ticket at the bottom when you get on the first gondola.
Buy your lift tickets at Whistler Gondola Base at the south end of Whistler Village. Then take the Whistler Village Gondola to its end at Roundhouse Lodge. The takes about 20 minutes. The Roundhouse has a coffee shop, cafeteria, and bathrooms. The Peak 2 Peak Gondola to Blackcomb is next to the Roundhouse.
Peak Chair
From the Roundhouse, turn right and follow the Peak Express Traverse Trail downhill for 0.6 km to the Peak Chair. Keep in mind that the Peak Chair opens an hour later than the Whistler Village Gondola, so you may have to wait if you arrive early in the morning. Check current opening hours before your trip.
Ride the Peak Chair to the top of Whistler Peak. This is an open four-seat chairlift and passes some very steep cliffs, so it can be a bit daunting for those who are afraid of heights. However, it only takes about 4 minutes, so it’s over quickly.
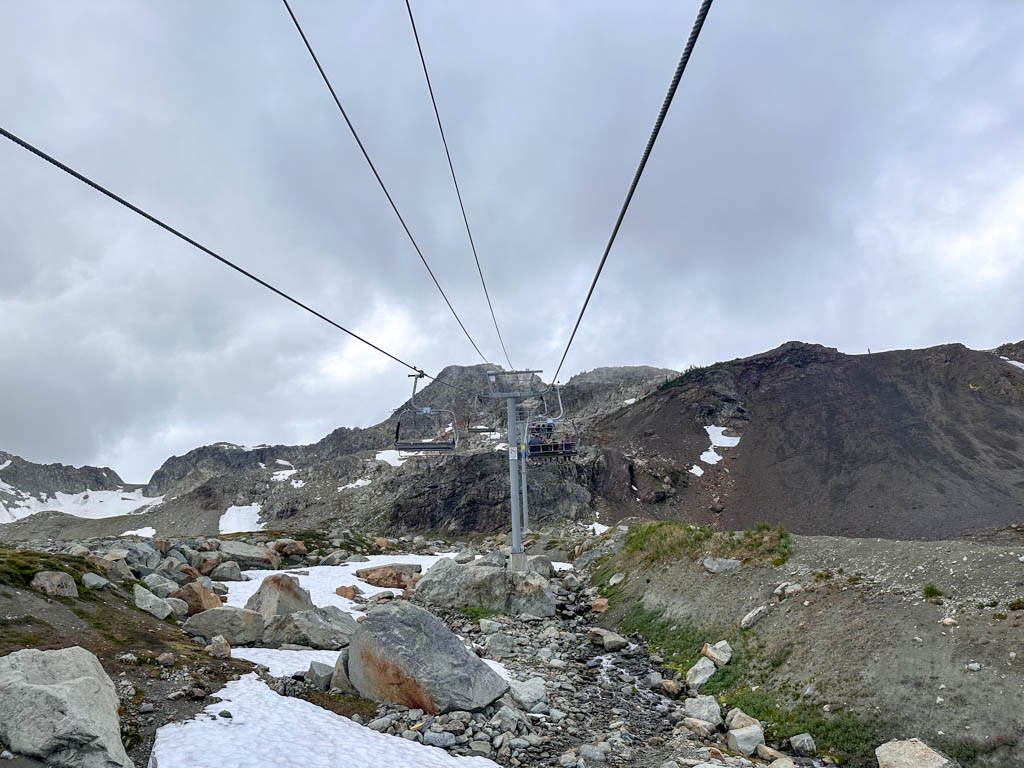
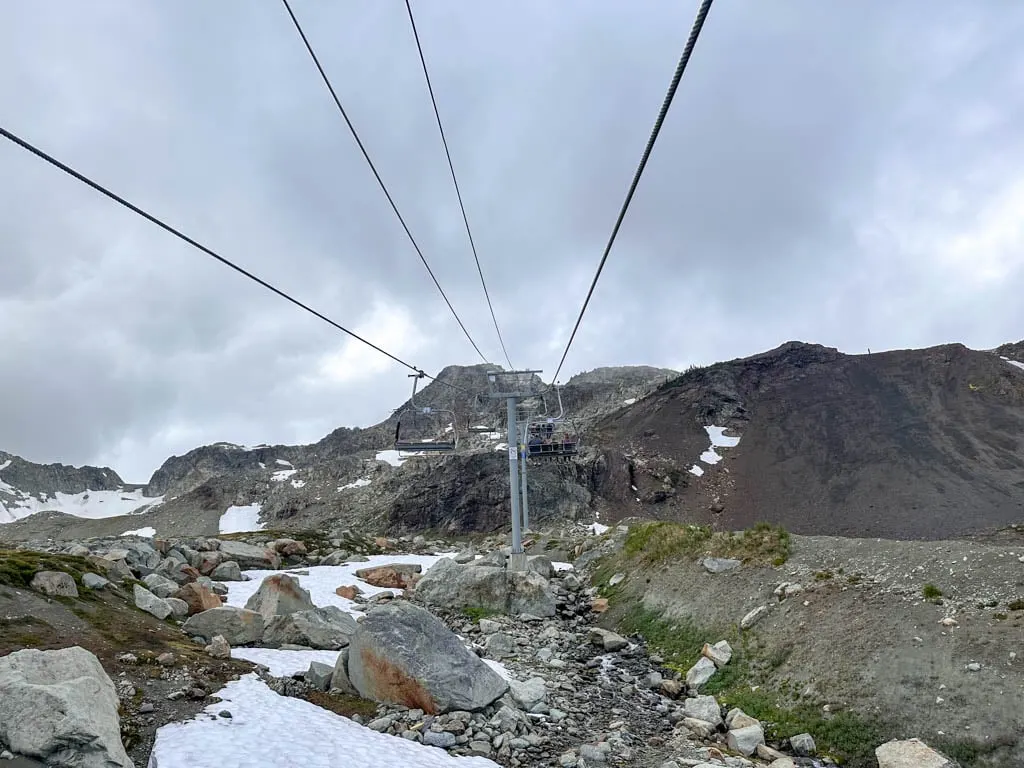
Note: The Peak Chair is not always open. It is usually closed in early and late season, especially on weekdays. If that is the case, you can walk up Pika’s Traverse and Matthews’s Traverse to Whistler Peak to start the High Note. This adds 3.3 km and 370 m of elevation gain to your hike.
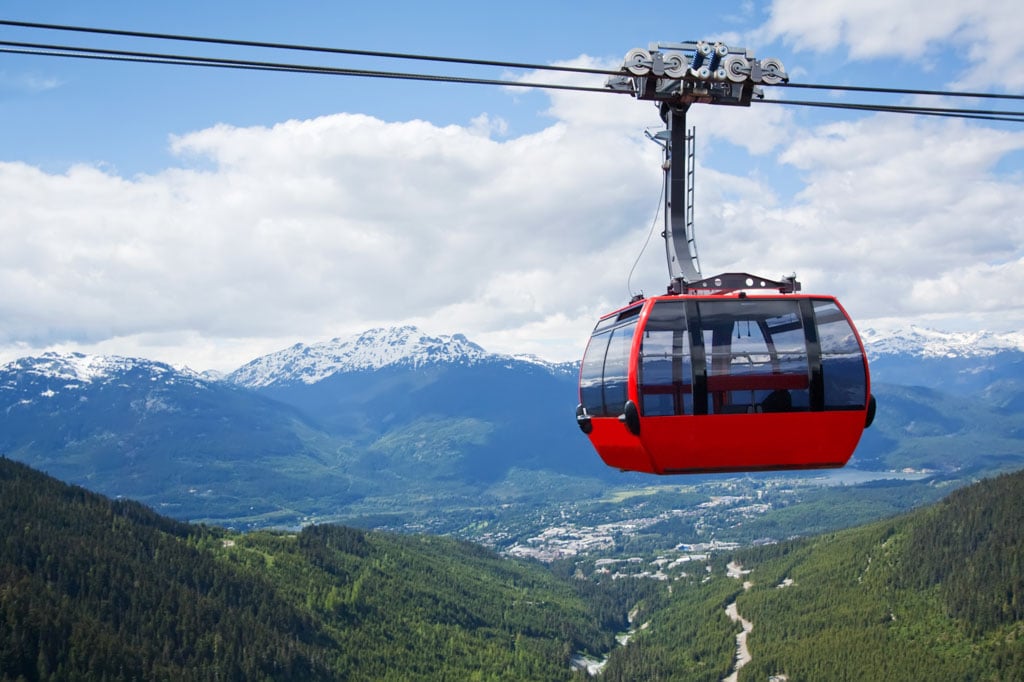
Adding the Peak 2 Peak Gondola to Your Hike
If you’ve paid for summer sightseeing lift ticket, you should make the most of it. And that means riding the Peak 2 Peak Gondola along with hiking the High Note Trail. (My guide to Whistler in the summer has details on everything you can see with your lift ticket.)
If you want to ride the Peak 2 Peak before your hike, walk to Blackcomb Base and take the Blackcomb Gondola to Rendevous Lodge. Then ride the Peak 2 Peak Gondola to the Roundhouse. From there, you can walk to the Peak Chair and ride it up to start your hike.
To ride the Peak 2 Peak after the High Note, finish your hike at the Roundhouse, but go next door and get on the Peak 2 Peak Gondola. Ride it to Rendevous Lodge on Blackcomb, then ride the Blackcomb Gondola to Blackcomb Base. Walk 10 minutes back to Whistler Village from there. Or if you have extra time, explore the Blackcomb Trails.
Keep an eye on gondola opening hours to plan your hike and decide when to ride the Peak 2 Peak Gondola. If you get an early start and are on the gondola when it opens, I recommend riding the Peak 2 Peak first. You will still arrive at the Peak Chair before it opens, even with the extra time spent on the Peak 2 Peak. That lets you maximize your hiking time.

High Note Trail Hiking Directions
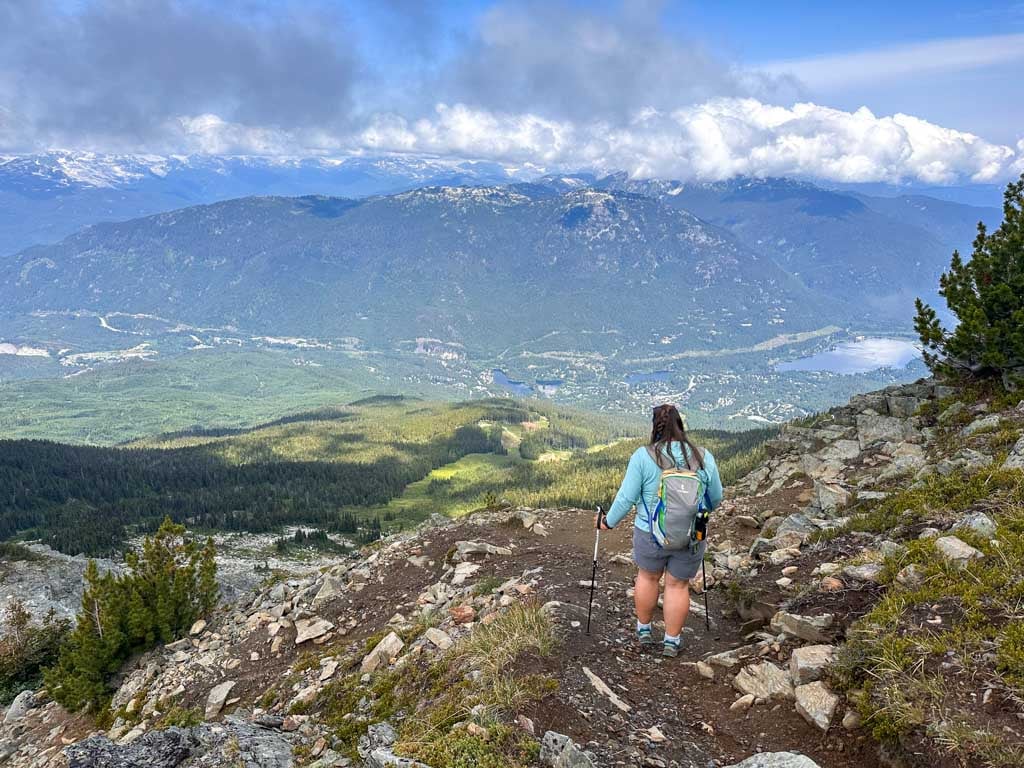
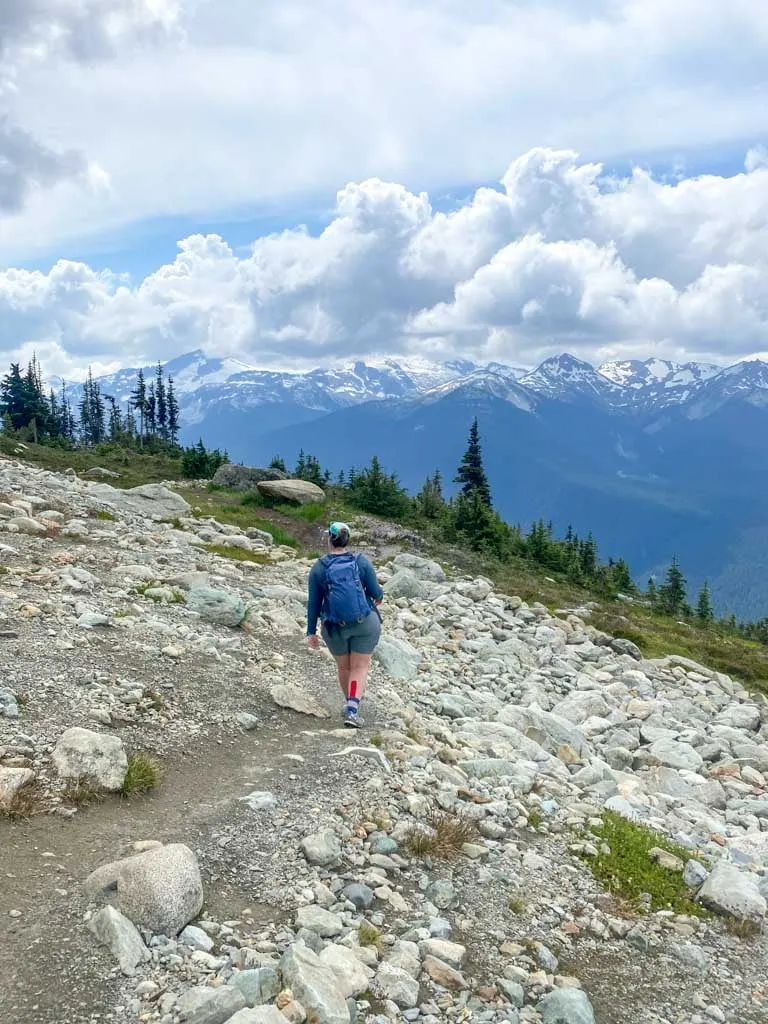
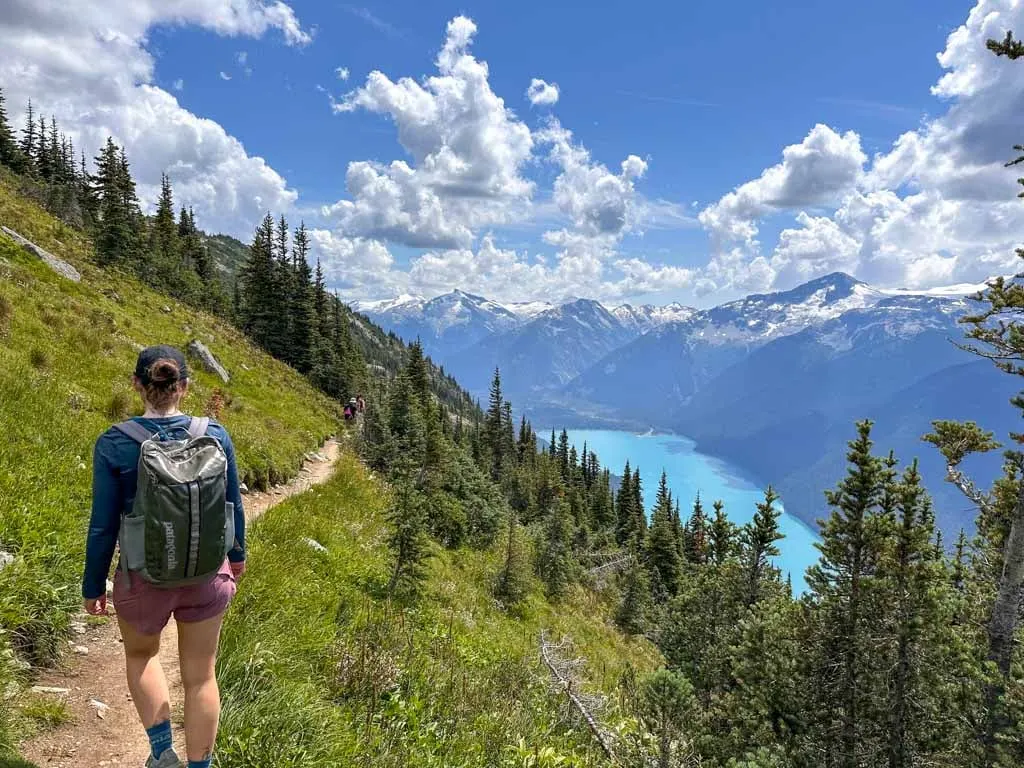
I recommend hiking the High Note Trail counter clockwise, starting at Whistler Peak. This means that most of the hike will be downhill. As well, you will be facing the views down to Cheakamus Lake, rather than having them behind you. Here are my step-by-step hiking directions for the High Note.
Starting the High Note Trail
Get off the Peak Chair and turn right to walk over the Cloudraker Skybridge and admire the view from the Raven’s Eye viewpoint. Walk down the stairs from the viewpoint and follow the wide path downhill. Look for the High Note Trail branching to the right.

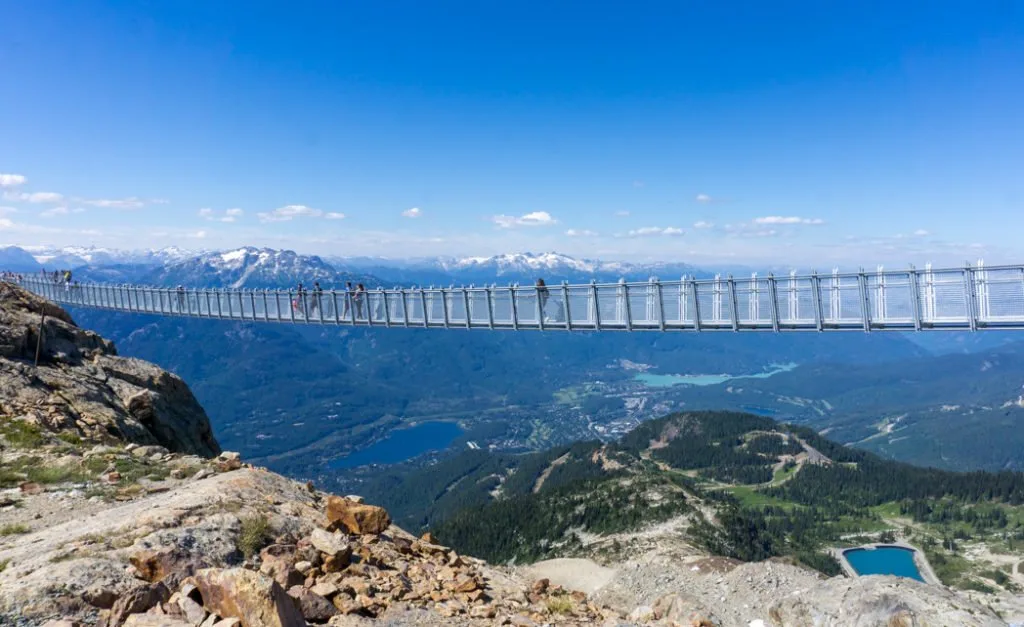
Note: If you’re afraid of heights, you can skip the Cloudraker Skybridge and Raven’s Eye viewpoint. When you get off the gondola, go straight instead of right to the bridge. Ignore right-hand path to the inukshuk, and take your next right. This is the return route from the Skybridge and will take you to the start of the High Note.
Whistler Peak to Half Note Junction
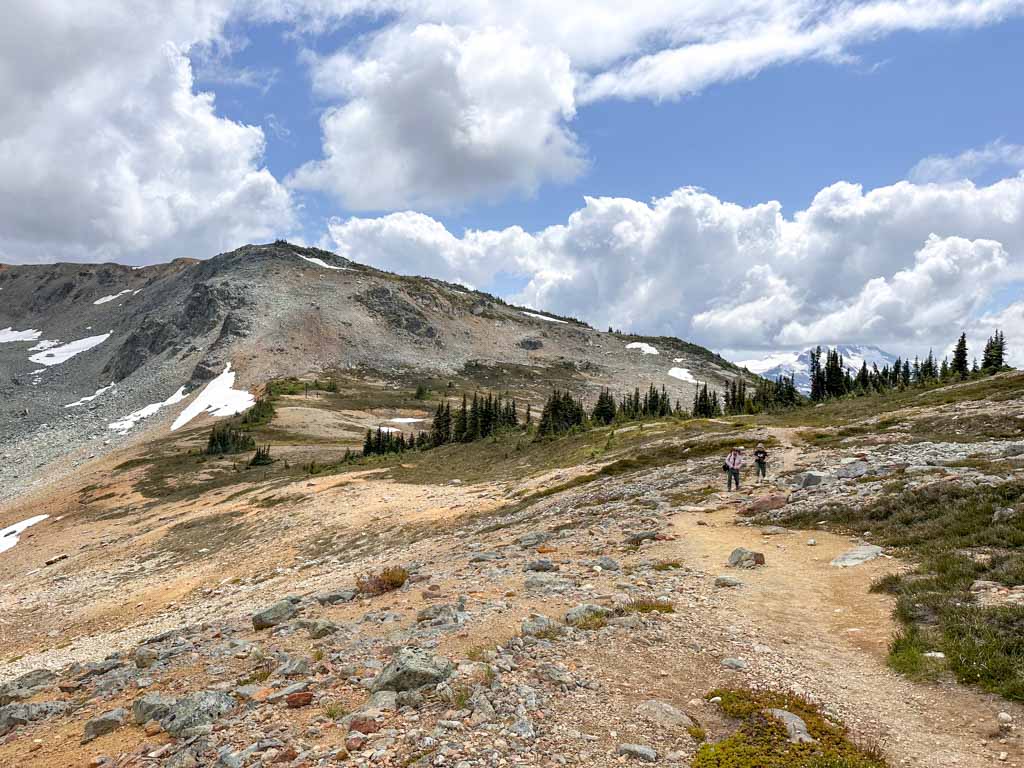
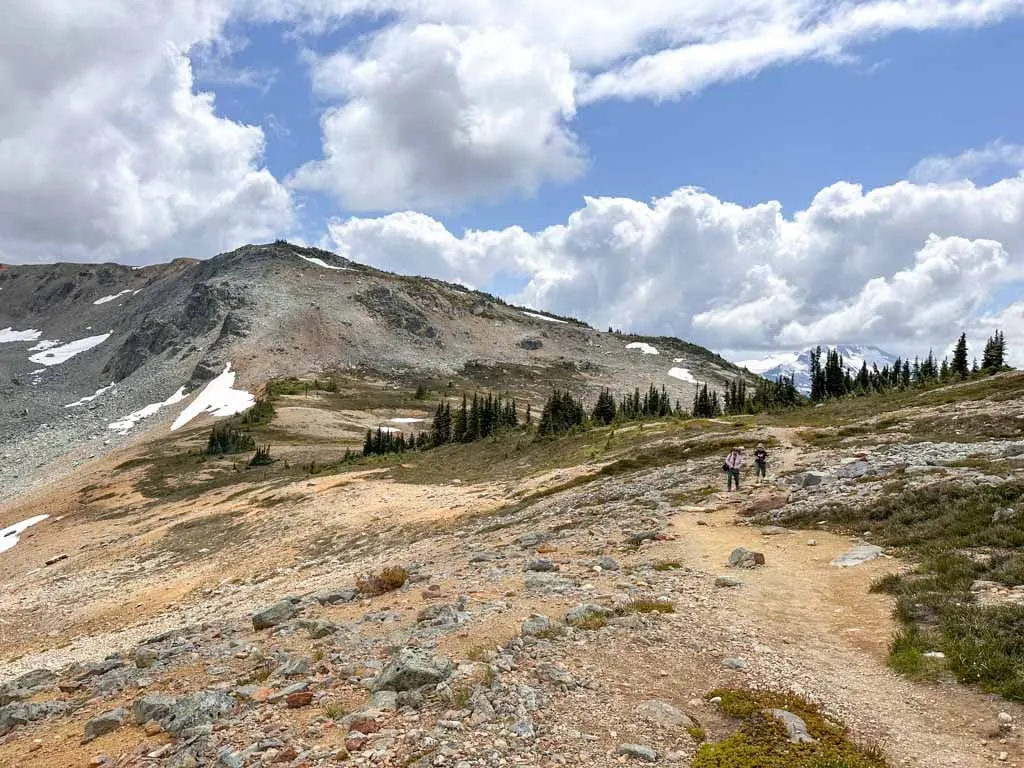
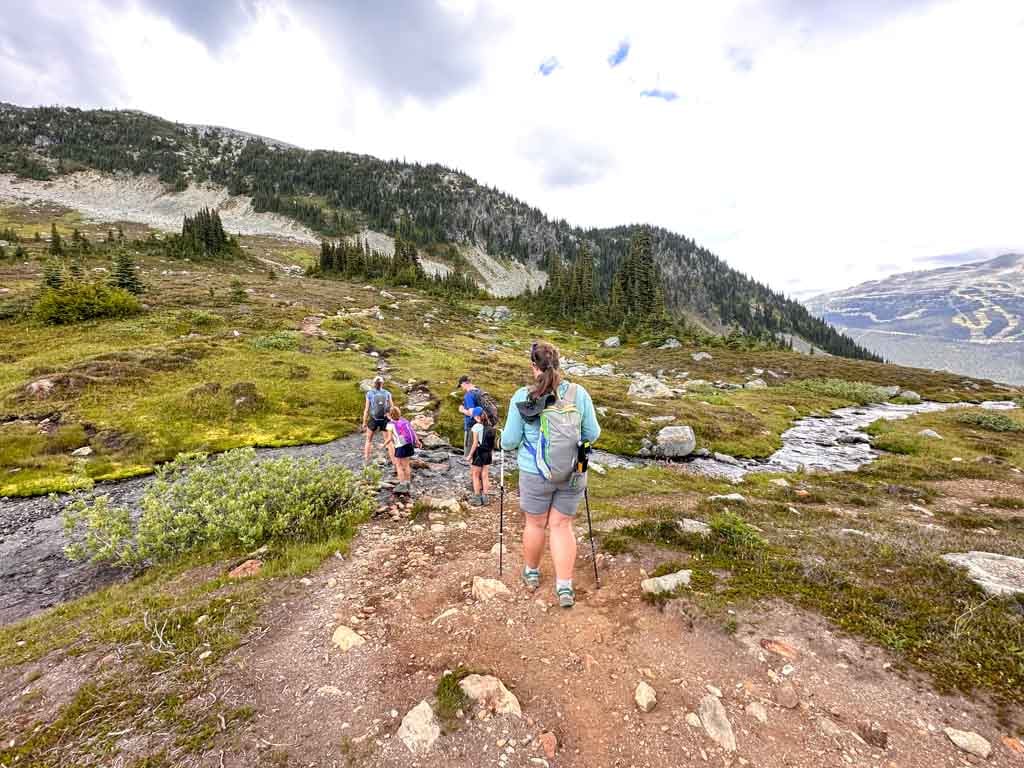
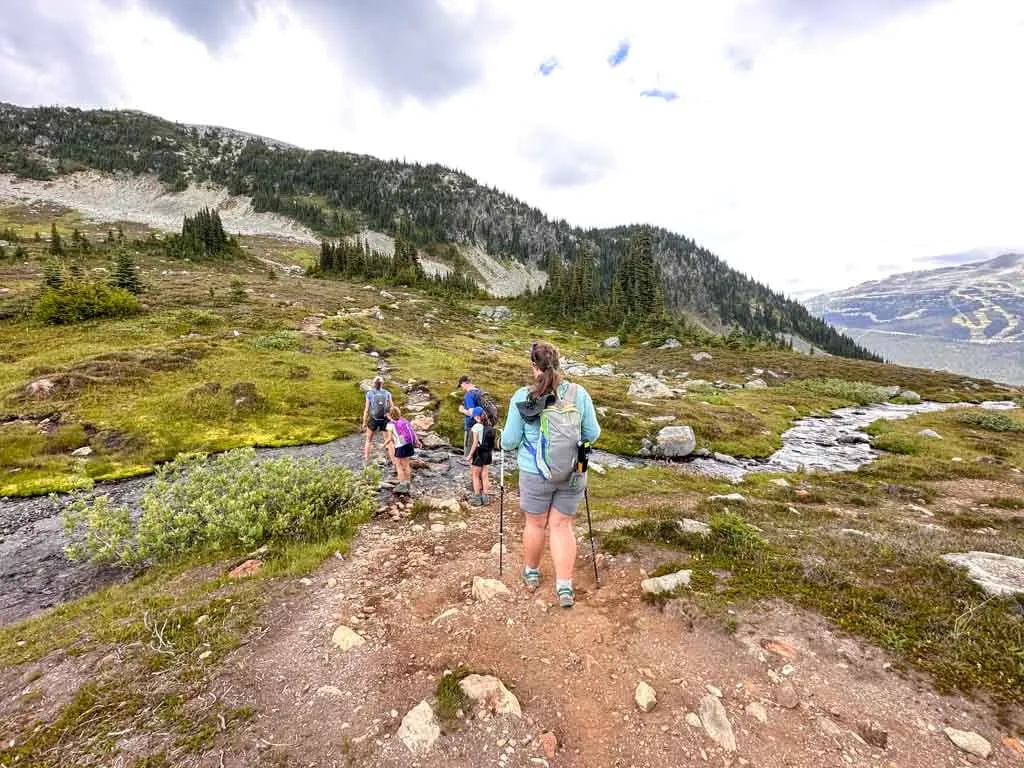
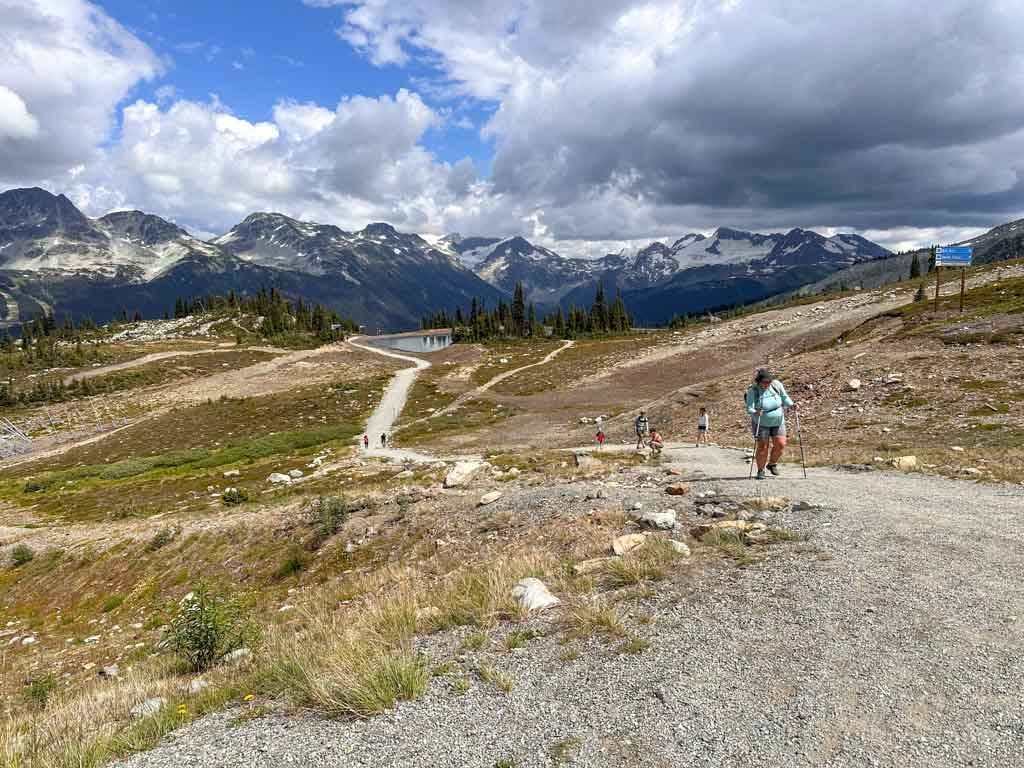
The first section of the High Note Trail goes steeply downhill through lots of rocky sections. Watch for trail markers carefully to make sure you stay on track through the twists and turns. After a few minutes, reach a junction with a sign. Keep right. (The route to the left goes back to Whistler Peak Chair.) Keep hiking downhill through the rocks. I love the great views of the Whistler Valley here.

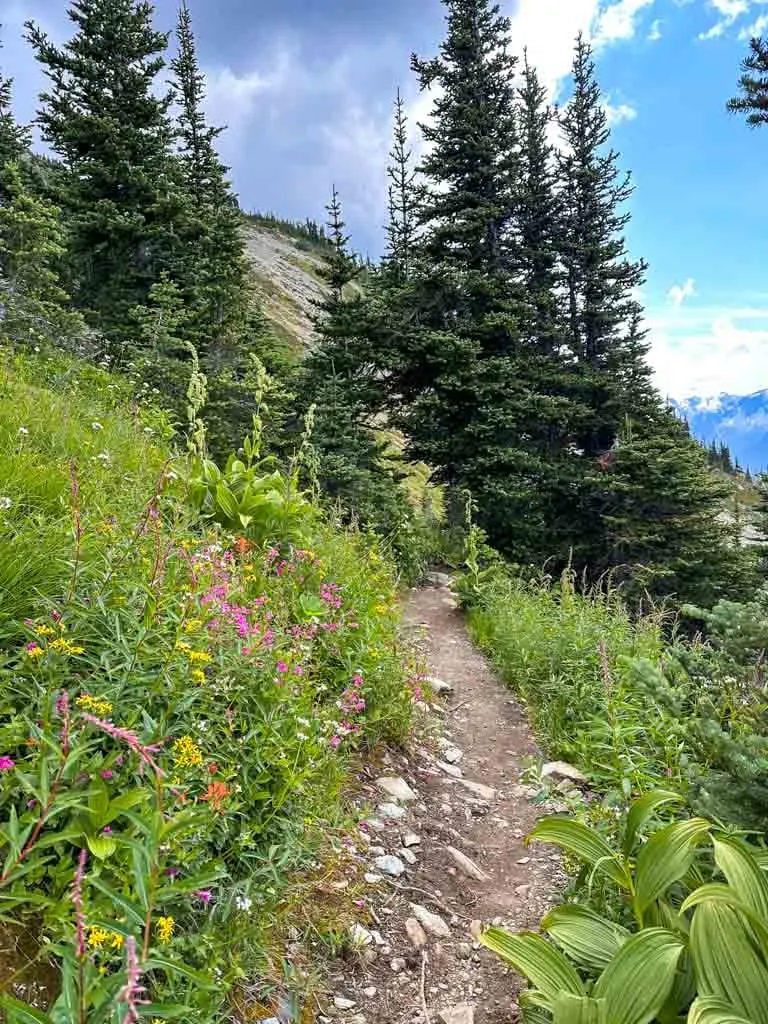
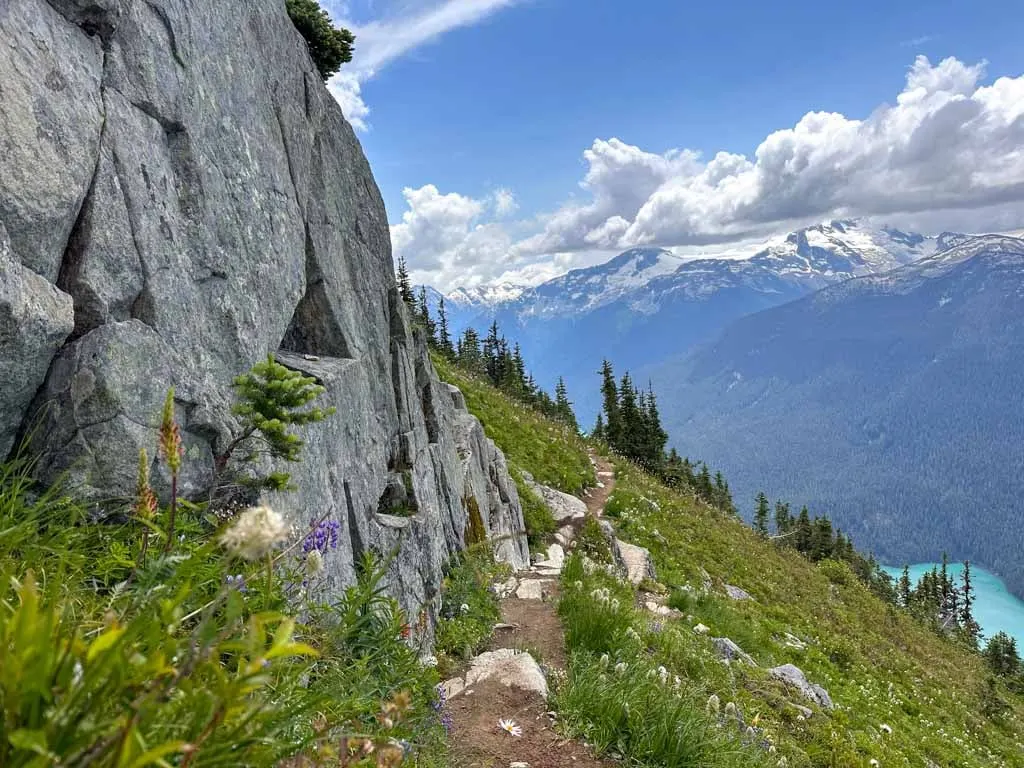
About 20 minutes after starting the hike, cross a gravel service road. On the other side, the trail turns to the left and begins to follow the side of the hill. The path trends slightly downhill through patches of gravel and grass. If you time it right, the grassy meadows on either side of the trail will be full of beautiful wildflowers.

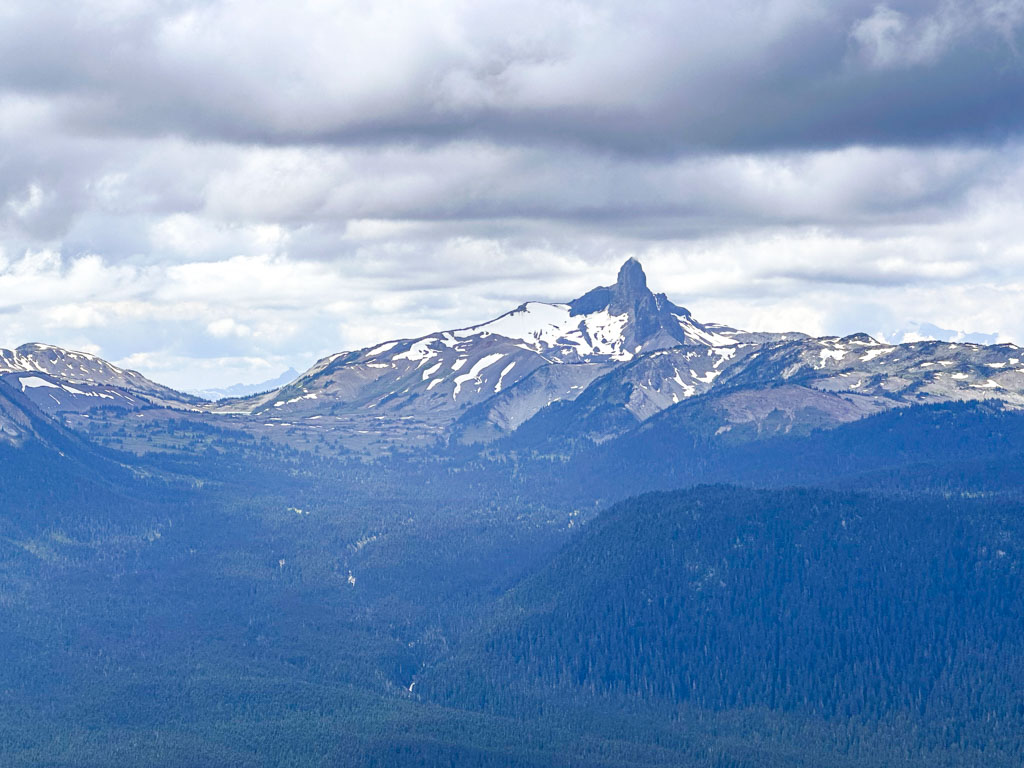
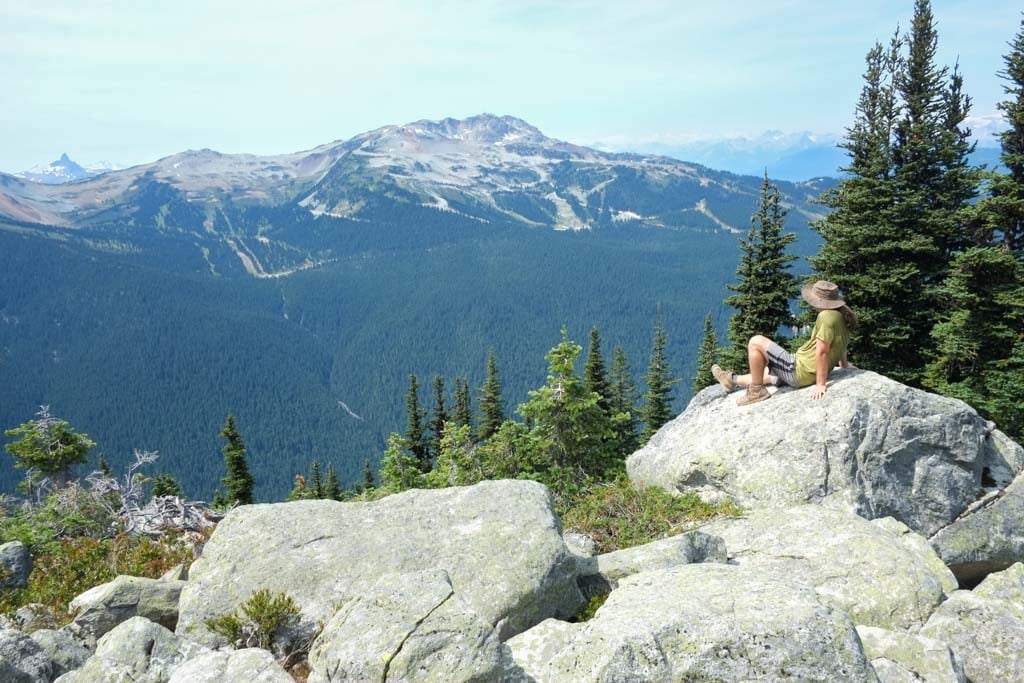
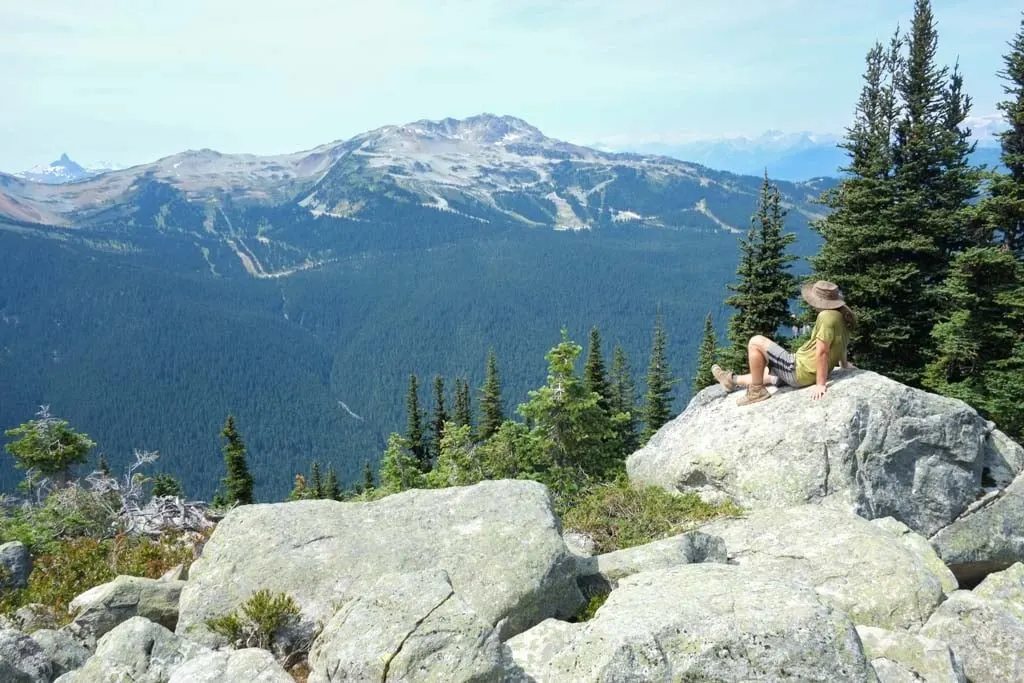
As you walk through the wildflower meadows you will also get great views of the mountains in Garibaldi Park on the other side of the valley. The pointy top of Black Tusk is particularly spectacular.

About 2.5 km from the chair lift, the trail starts to go gradually uphill again. Reach the junction with the Half Note Trail about 3 km from the Peak Chair. It is marked with a metal signpost. If you are tired or low on time, you may wish to cut your hike short here. But if you can manage it, I recommend continuing since the best views are yet to come. (See the Half Note Trail section below for more details.)
Half Note Junction to Flute Summit Junction
This is my favourite part of the High Note. It has the best views and the best wildflower meadows. If you do the shorter Half Note Trail instead, you miss this section, which is a shame.
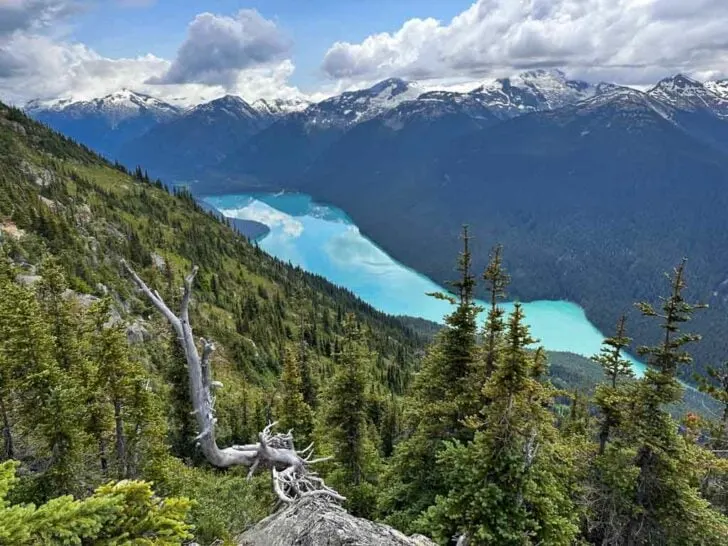
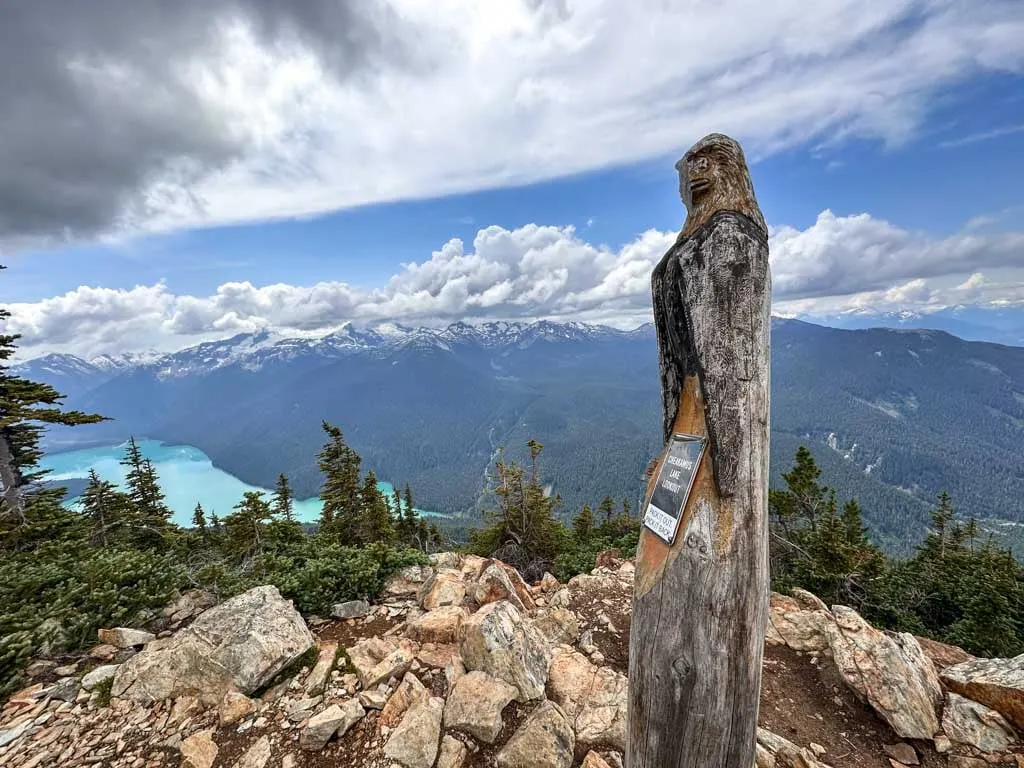
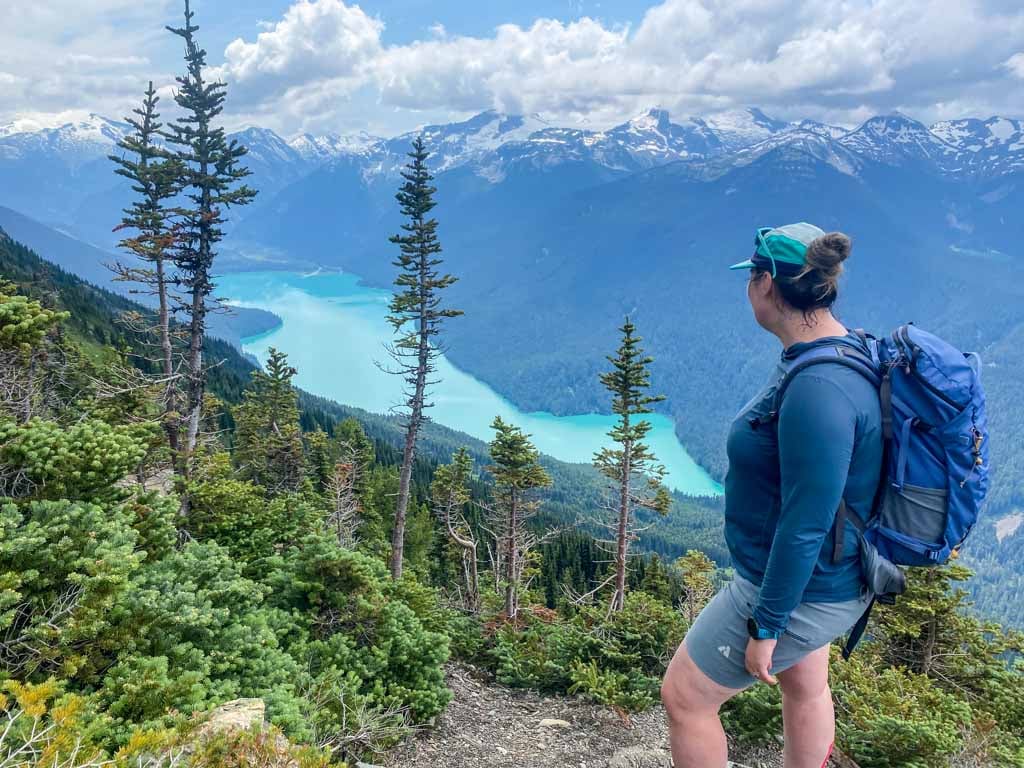
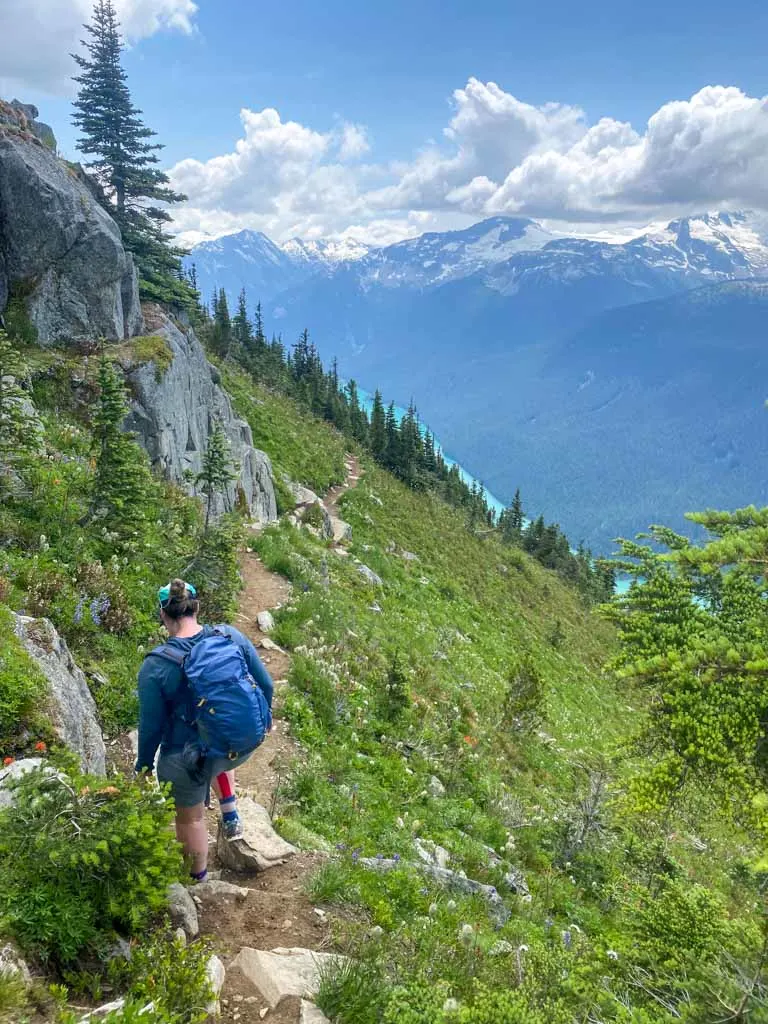
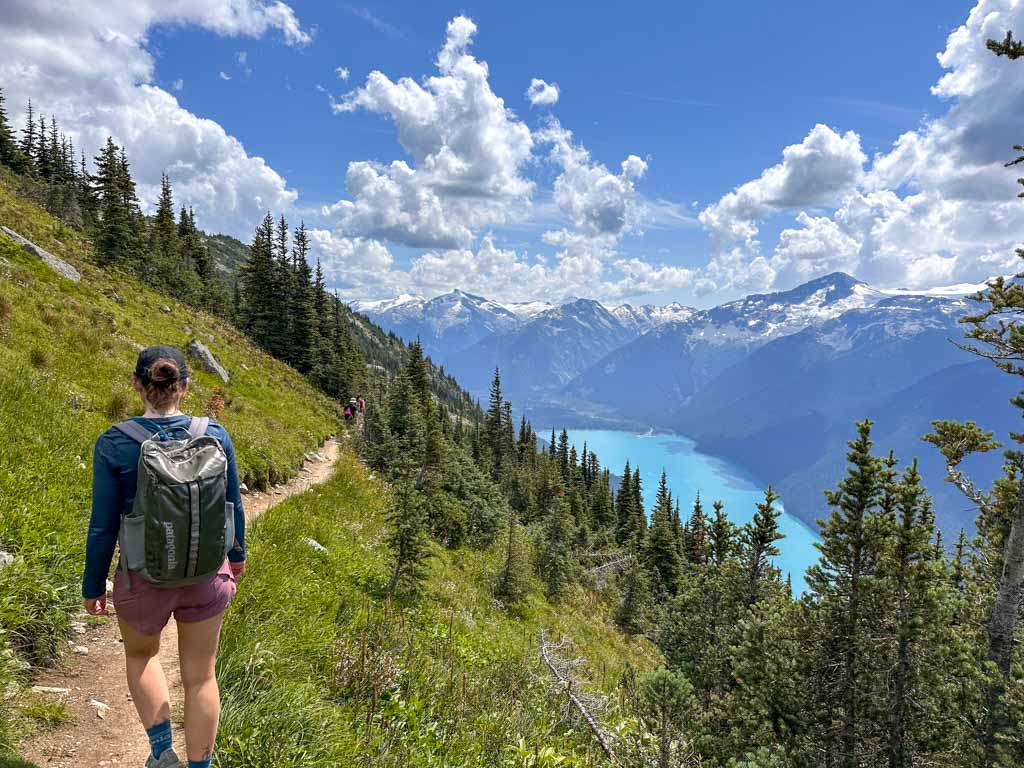
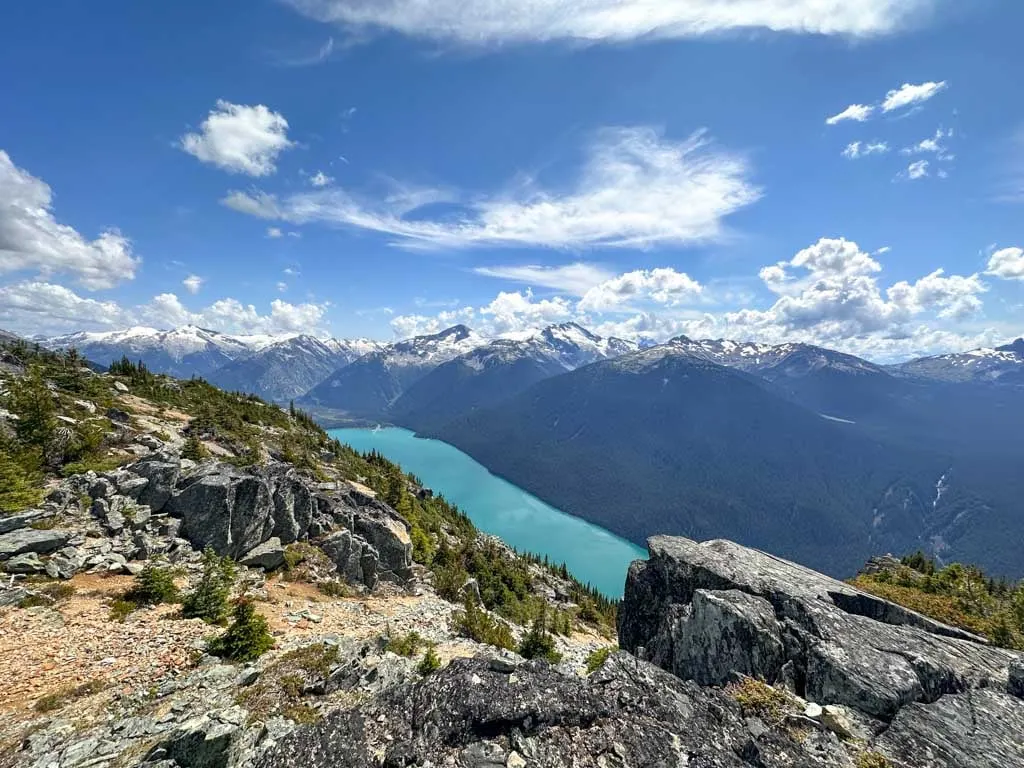
From the Half Note Junction, the High Note heads gradually back downhill through more meadows. Be sure to stop at the Cheakamus Lake Lookout, about 0.8 km past the junction. It is marked with a post with a carved raven on top. (But the raven is getting kind of weathered.)
This is the best place for photos on the whole High Note Trail since you can look down on Cheakamus Lake and across to Black Tusk.


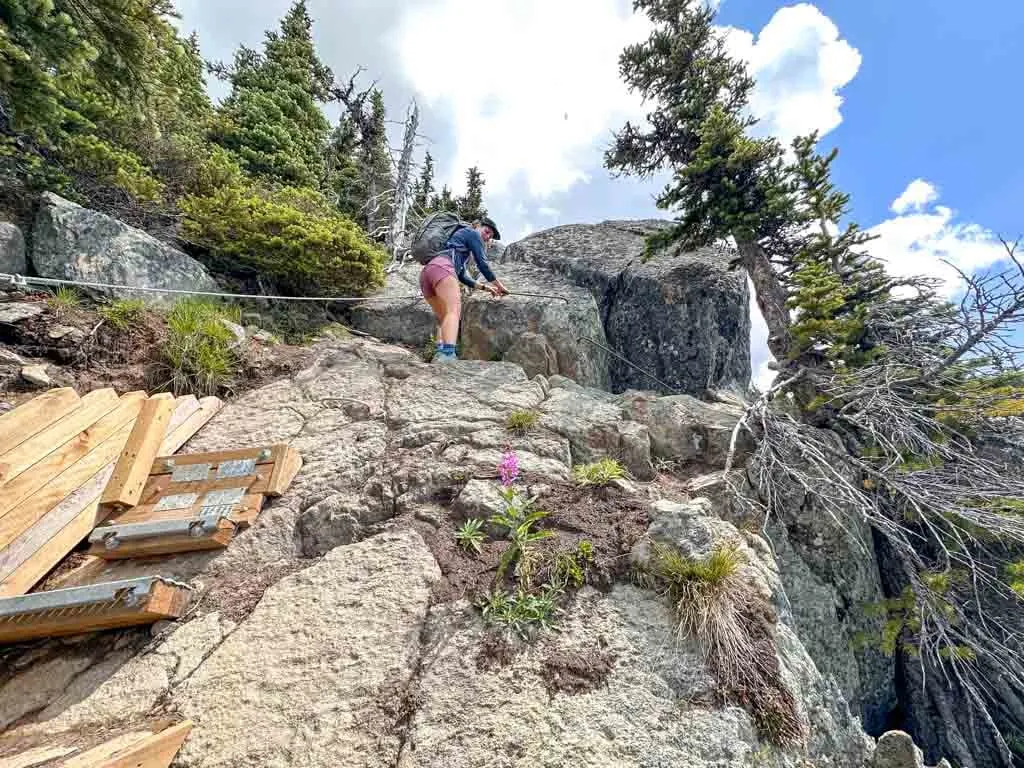
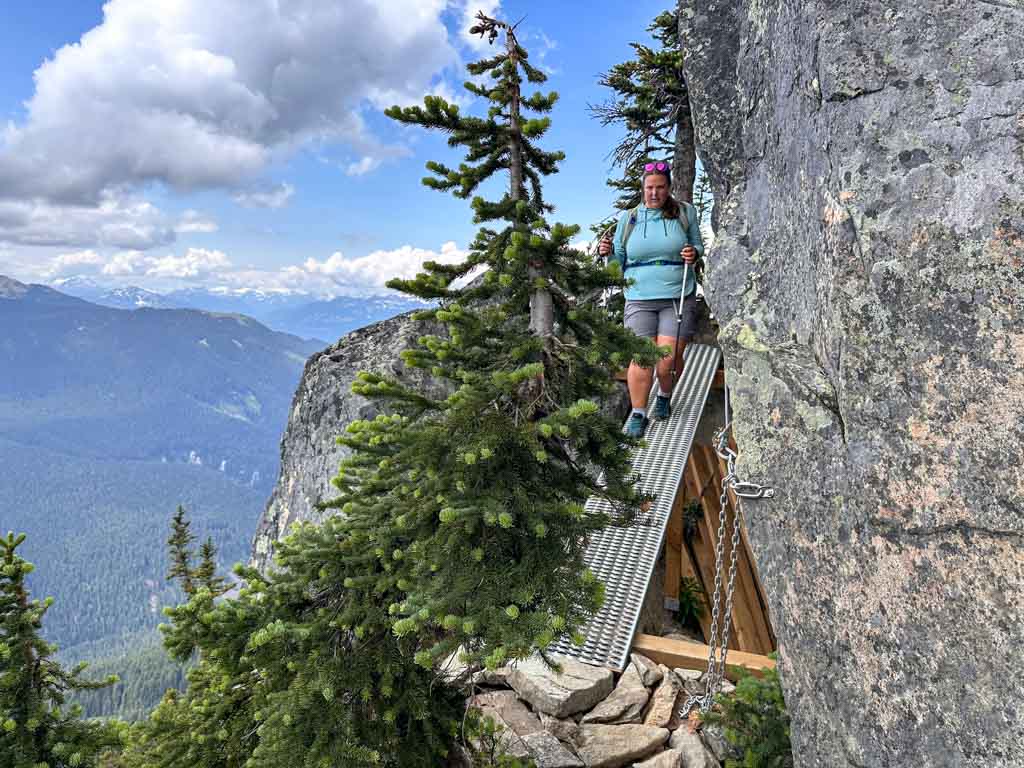
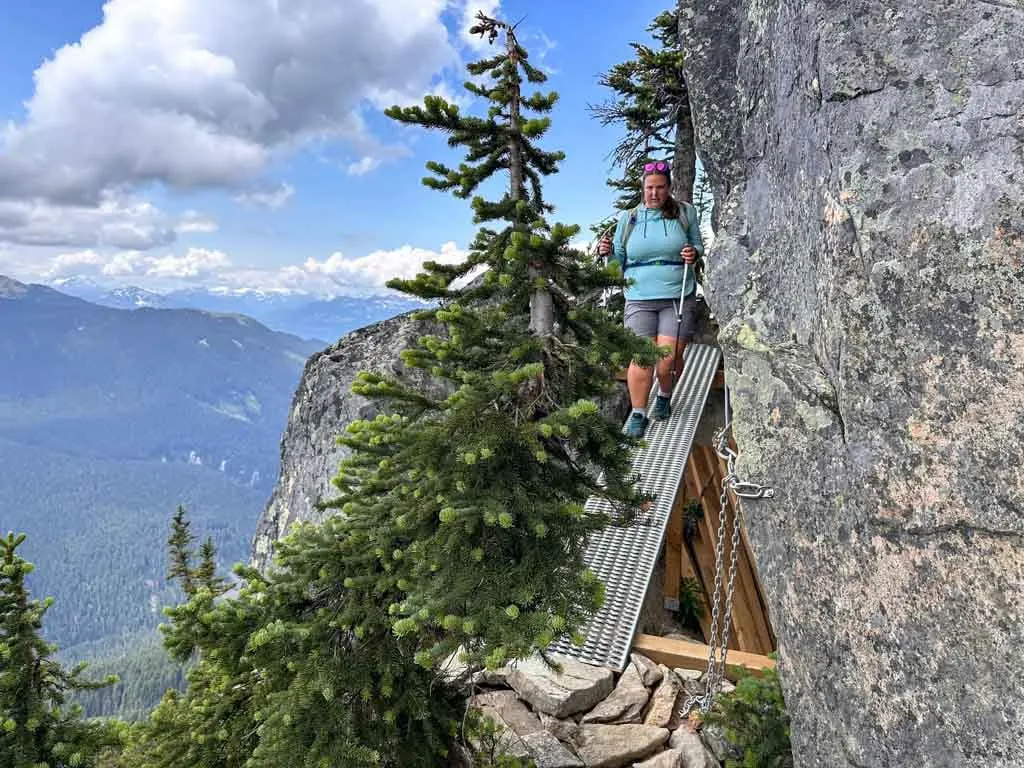
A few minutes after the lookout there is a short mini-scramble section with some ladder rungs and a ramp to get up and over a rock outcropping. You are never more than a few feet off the ground, there is a rope to hang on to, and it is very non-technical so it’s nothing to worry about.

Past the scramble, the trail continues rambling through gorgeous alpine meadows and patches of forest. Keep an eye out for marmots, large members of the ground squirrel family. You can often spot them munching on flowers or sunning themselves on rocks. They whistle when they are alarmed, which is how Whistler Peak got its name.

About 4.5 km after leaving Peak Chair, arrive at the junction with the Flute Summit Trail and the Musical Bumps Route into Garibaldi Park. If you have more energy, there is a great view from Flute Summit. More info on that trail is below in the Making Your Trip Longer section.
Flute Summit Junction to the Roundhouse
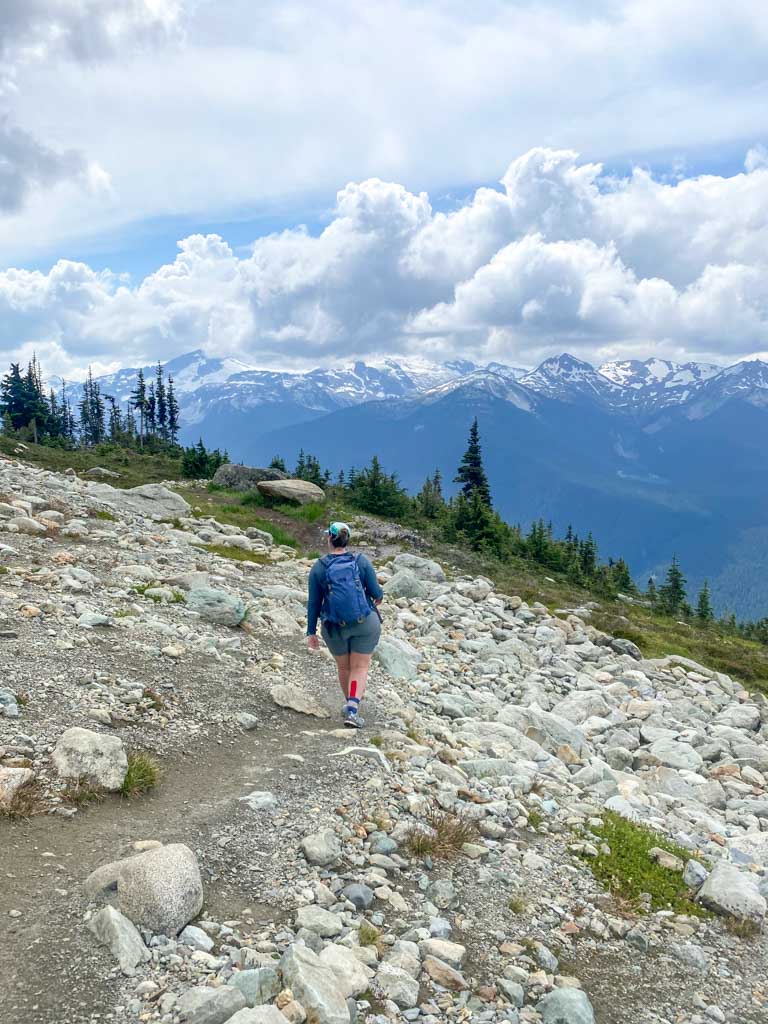
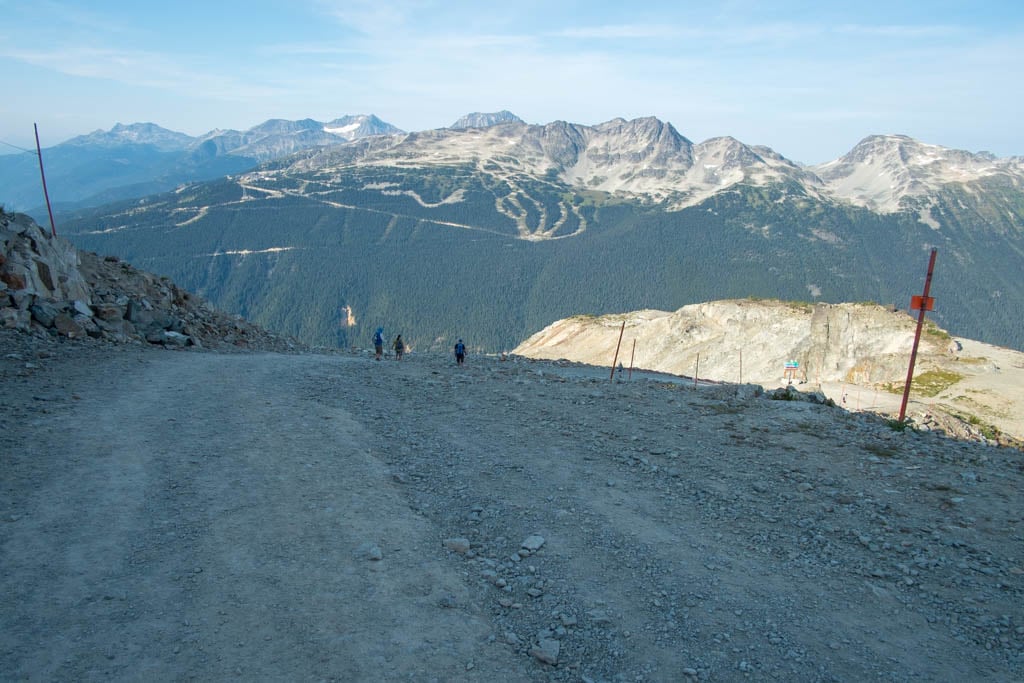
The short section after the Flute Summit Junction is quite flat as it works its way through a gravelly area. There are good views towards the red and brown rocks of Flute and Oboe Summits. You can also look east across the Fitzsimmons Creek Valley to the Blackcomb Peak.
A few minutes after the junction, reach another junction with Burnt Stew Trail on the left. Go straight to stay on the High Note. From there, head down a steep and loose slope as you cross underneath the Symphony Express Chairlift.
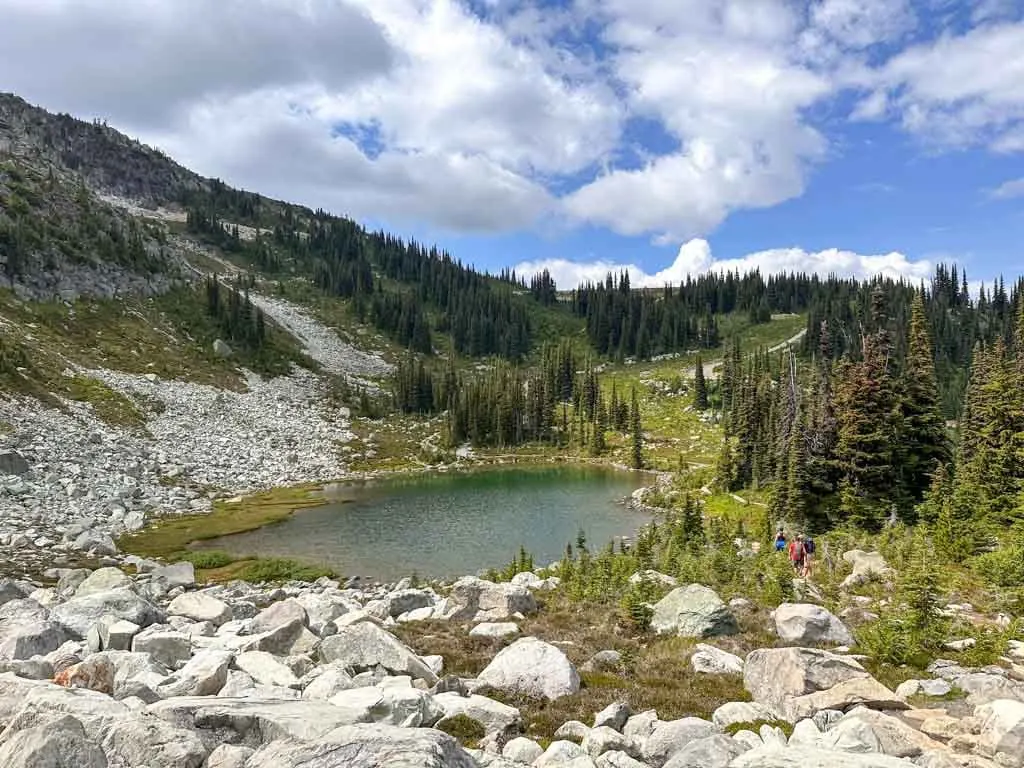
The trail heads into a pretty little bowl around Symphony Lake, which is more of a pond. This is the first place to get water on the trail. Keep in mind that you must filter or treat the water. I carry a Katadyn BeFree since it is lightweight and easy to use – just squeeze it.
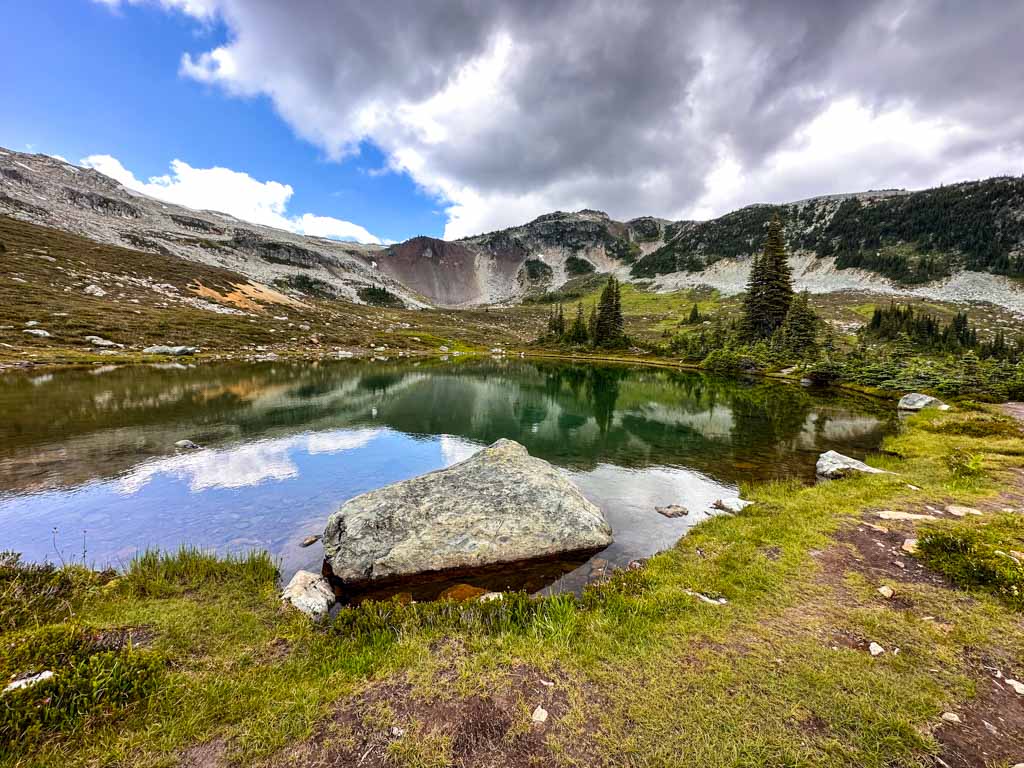

A minute later, cross Symphony Creek about 5.7 km from Whistler Peak. You may have to hop across on rocks to avoid getting your feet wet.
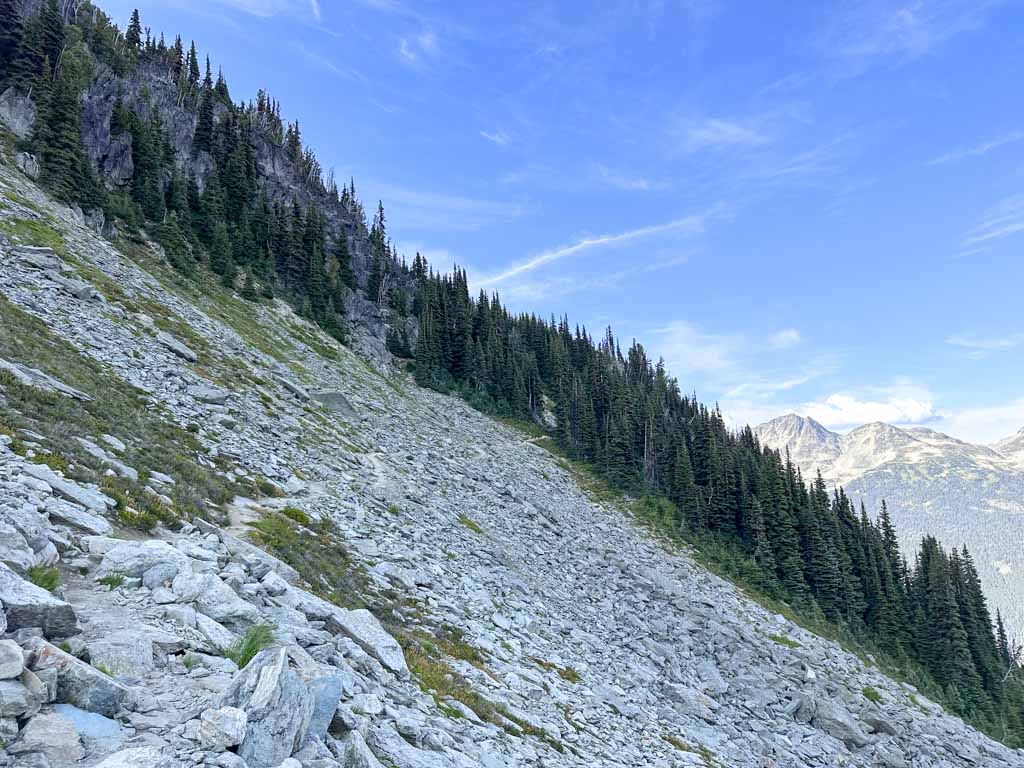
From here you have one of the toughest climbs of the hike. The route heads uphill across a rock slide and then through the forest to crest the ridge. In a few places it’s really steep! Thankfully, it’s short. Be sure to stop to enjoy the view as you catch your breath!


At the top, your trail briefly joins with a road-like gravel ski run as it heads downhill. Eventually, the road-like surface turns back into a trail as you continue working your way downhill through rocks and patches of trees.
Arrive at a junction with the Harmony Meadows Trail on your left just before you pass under the Harmony Chairlift. This is an alternative route back to the Roundhouse, but it is steeper, so I don’t recommend it. Instead, go straight on the High Note.
A few minutes later, arrive at Harmony Lake 7.8 km from Whistler Peak. The trail turns into an easy boardwalk around the lake. This area is a popular destination for short walks from the Roundhouse, so you will likely run into lots of other hikers. The trail past here is also much wider and better maintained.
As you reach the northeast corner of the lake, arrive at a signboard and junction with the Harmony Lake Loop on your right. This trail descends into some meadows, but the terrain you have already walked through is more spectacular, so stay left to continue back to the Roundhouse.

Follow the trail as it curves left around the lake, and then heads uphill on a winding path through the trees. You’ll gain about 100 m in the next kilometre, which will feel tough after a long hike. But it’s not too bad and the trees provide some shade.
At the top of the climb, follow the wide path left around the edge of the snow making reservoir, and then up short hill. Walk past the top of the Emerald Express Chairlift and the Peak 2 Peak Gondola. Continue through the plaza to finish the High Note Trail back at the Roundhouse.

Making Your Hike Shorter or Longer
I think that the High Note Trail definitely has the best views, but you have a few options for making your hike shorter or longer:
Half Note Trail
The Half Note Trail is the High Note’s little sister. It’s a little bit shorter since it splits off from the High Note Trail partway way along. It’s a good option if you are short on time, but unfortunately, it’s not nearly as scenic. I don’t recommend the Half Note since it misses the best parts of the High Note.
Here are the key stats for the Half Note Trail:
- Duration: 2.5-3.5 hours (Note: Whistler Blackcomb says it takes 75 minutes, but that’s just for the portion after you leave the High Note.)
- Distance: 6.8 km loop (Note: Whistler Blackcomb lists the distance as 3.2 km but that doesn’t include the part that is shared with the High Note.)
- Difficulty: Moderate (Whistler Blackcomb rates it as difficult, but that is in comparison to their other trails. Compared to hiking trails in the entire Whistler area, I would say it is moderate.)
- Elevation Change: 298 m elevation gain, 635 m elevation loss

The first 3-kilometre-long section of the Half Note Trail from the top of the Peak Chair to the Half Note/High Note Junction follows the High Note Trail description above.
From the spot where it splits from the High Note, the Half Note Trail climbs uphill out of the meadows into rock alpine terrain. About 400 m after the junction, cross the Burnt Stew service road and pick up the trail on the other side. Continue climbing uphill through intermittent trees and meadows as the trail swings around to head northwest.
Reach the top of the Harmony Chairlift and the junction with Matthews Traverse service road about 4 km from the start. This is your highpoint – it’s all downhill from here. Turn right to head downhill on Pika’s Traverse service road. A few minutes later there is a great viewpoint at the end of a hairpin bend.
The remaining 1.6 km back to the Roundhouse is on Pika’s Traverse. It’s a gravel road that has some loose and steep sections, so watch your step. In general, it isn’t very scenic since it travels through the heart of the ski resort. But it is an efficient way to get back to the Roundhouse.
Flute Summit
If you want to add another gorgeous viewpoint to your High Note Trail hike, I highly recommend Flute Summit since it’s not that far and the pay off-is great.
Here are the key stats for the add-on trip to Flute Summit from the High Note:
- Duration: 45 min to 1 hour (Note: Whistler Blackcomb says 3 hours but I have no idea how they came up with this number.)
- Distance: 1.5 km round-trip
- Difficulty: Moderate (Whistler Blackcomb rates it as difficult, but that is in comparison to their other trails. Compared to hiking trails in the entire Whistler area, I would say it is moderate.)
- Elevation Change: 120 m elevation gain, 120 m elevation loss
To get there, hike the High Note as described above as far as Flute Summit Junction. From there, turn right and climb up the steep and rocky slope. In a few places, the trail is eroded and indistinct, but if you stay on the most obvious path, you’ll find your way.
At the top there is a sign marking the summit, which has an elevation of 2012 metres. There is also a big sign welcoming you to Garibaldi Provincial Park. Both of these are very tall so they stick out of the snow in the winter.

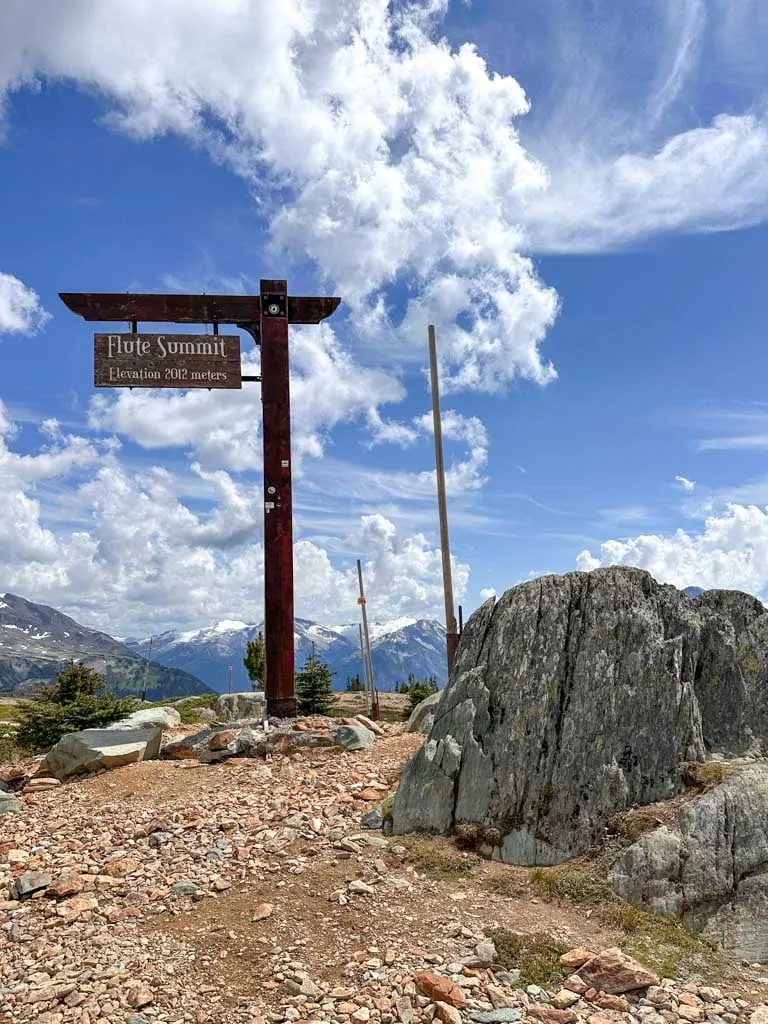
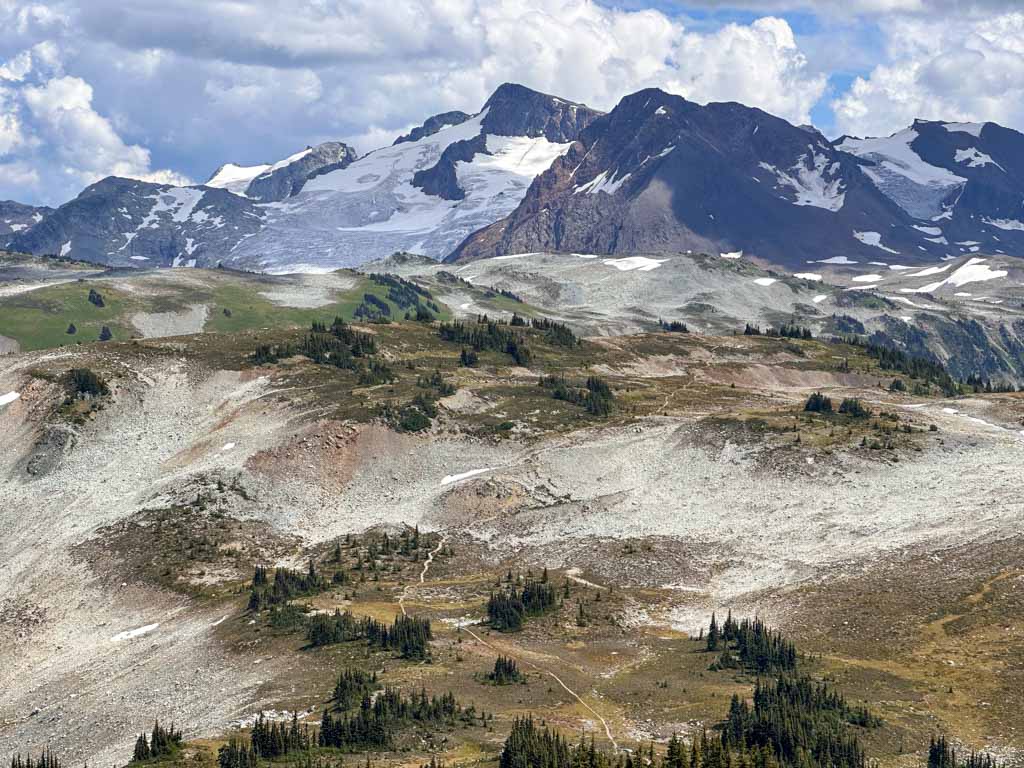
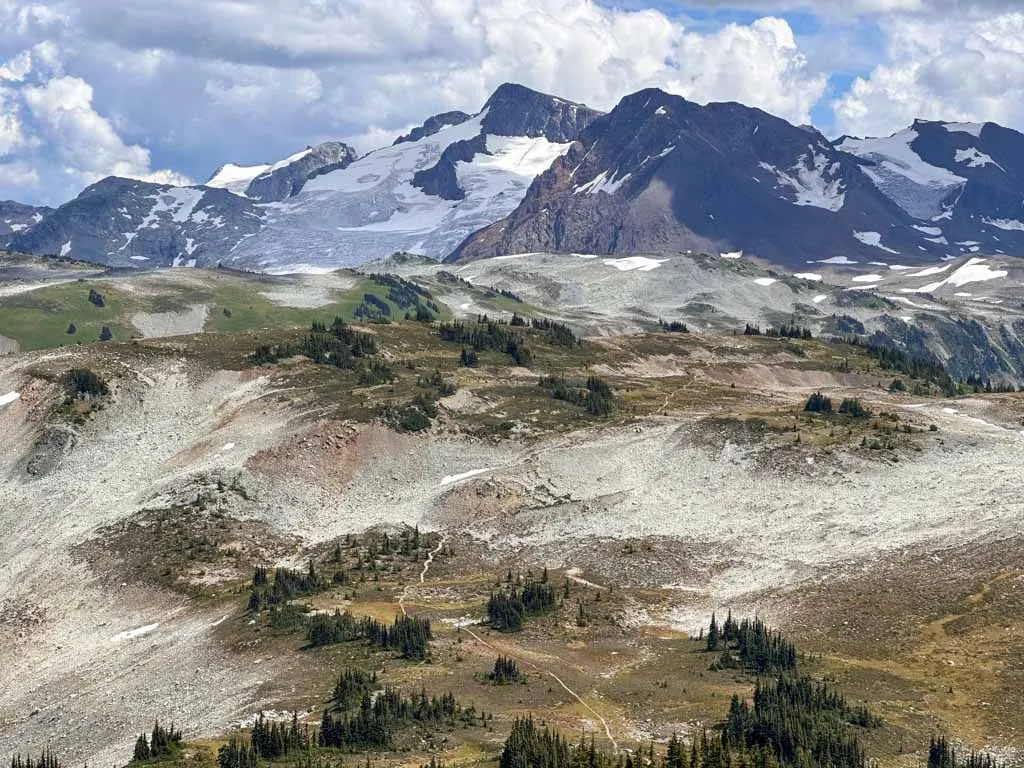
Be sure to wander around the broad summit. There are great views of Cheakamus Lake below you and the Cheakamus Glacier on the other side. You can also look east to Oboe Summit, Fissile Peak, and the Overlord Glacier.

When you are finished enjoying the view, retrace your steps back to the junction with the High Note, then turn right to follow the High Note Trail back to the Roundhouse.
Musical Bumps to Russet Lake
Russet Lake is gorgeous and the trip along the Musical Bumps goes through beautiful meadows along a ridge crest. But this is a tough trip to execute in a day since you will need to make sure you hike fast enough to be back before the gondola stops running.
I think it is better as an overnight trip since you can camp at the lake – It’s one of my picks for the best backpacking trips in BC. I’ve been there so many times that I have a separate guide to hiking and backpacking at Russet Lake.
Here are the key stats for hiking to Russet Lake and back along the Musical Bumps from the High Note Trail: (Keep in mind you’ll need to add these stats to the High Note stats above.)
- Duration: 4.5-6.5 hours
- Distance: 14.2 km round-trip
- Difficulty: Challenging
- Elevation Change: 905 m elevation gain, 905 m elevation loss
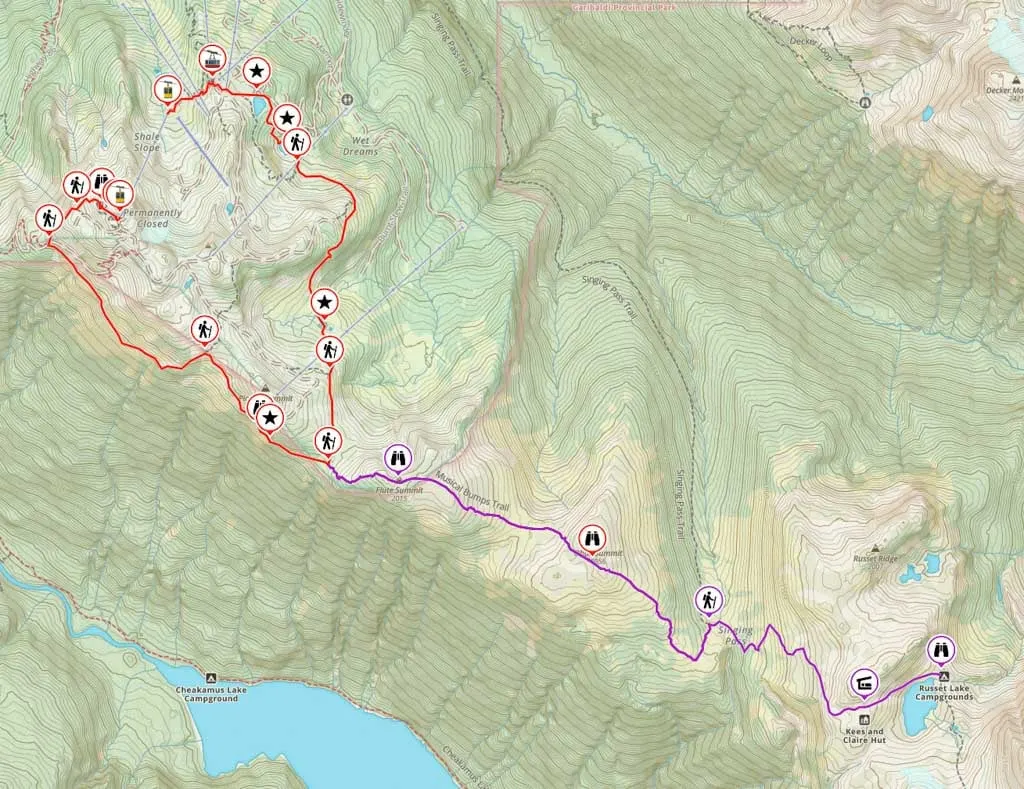
Follow the directions to Flute Summit (above). Continue along the trail through the alpine and drop down into the saddle between Flute and Oboe Summits. Climb back up and over rocky Oboe Summit 2.5 km from Flute Junction, they stay on the trail as it gradually descends through meadows and patches of trees.
Reach your low point, Singing Pass, 4.5 km from Flute Junction. From here, follow the Russet Lake trail as it switchbacks up the slope of Cowboy Ridge. The first part of the climb is in meadows with a few trees, but you break out into rocky alpine partway up.
Reach the high point about 6.5 km from Flute Junction near the Kees and Claire backcountry hut. You can see the lake below you to your left. If you are worried about time, this makes a good turnaround point.
Otherwise, follow the trail for another 0.5 km to the shoreline at the north end of the lake. There is a backcountry campsite and toilet here. You can also go for a very chilly swim. (For info on camping here, check out my guide to hiking and backpacking at Russet Lake or my book, Backpacking in Southwestern British Columbia.)

When you are ready to return, retrace your steps back over Oboe and Flute Summits to the Flute junction. Keep in mind that your route is all uphill from Singing Pass! Turn right at the junction and stay on the Half Note Trail to get back to the Round House.
Get My Book…
Backpacking in Southwestern British Columbia
A one-stop resource for backpackers in beautiful British Columbia.
- 40 backpacking trips within a few hours of Vancouver
- Info about permits, reservations, and campground facilities
- Detailed maps and photos
- Advice for extending your trip
- Points of cultural and natural history

Musical Bumps to Singing Pass to Whistler Village
If you want to extend your trip even further, you can hike into Garibaldi Park along the Musical Bumps Trail, then follow the Singing Pass Trail downhill all the way to Whistler Village. (This route skips the gondola ride on the way down.)
Here are the key stats for the route linking the High Note, Musical Bumps, and Singing Pass Trails:
- Duration: 7-9 hours
- Distance: 20.2 km loop
- Difficulty: Challenging
- Elevation Change: 486 m elevation gain, 1969 m elevation loss
- Note: Hiking this route in reverse is detailed in the section below about hiking the High Note Trail without taking the gondola.

This is a long and tough hike, but it is mostly downhill. However, the Singing Pass Trail is poorly maintained and has some washouts so use caution.
To hike this route, start by hiking the High Note as described above. Then go right at the Flute Summit junction and hike up and over Flute Summit. Follow the trail past Flute Summit up and over rocky Oboe Summit, and then down through the meadows to Singing Pass.
From there, turn left and follow the Singing Pass Trail for 11.7 km to Whistler Village. It hugs the side of a steep valley, so there isn’t much to see. The first part of the hike is a trail, but it eventually turns into an old gravel road. Be careful and pay attention to signs in the bottom section, which goes through the Whistler bike park.
Blackcomb Trails
Another option is to take the Peak 2 Peak Gondola over to Blackcomb and hike Blackcomb Alpine Trail network. The trails are pretty easy and have great views of Whistler Mountain and the surrounding glaciers.
Here are the key stats for the Blackcomb Trails:
- Duration: 30 min to 4.5 hours
- Distance: 1.5 to 9.9 km
- Difficulty: Easy to moderate
- Elevation Change: 70 to 560 m elevation gain
My recommended Blackcomb hiking route uses four trails to make a loop hike. It visits two lakes and some great viewpoints.
How to Hike the High Note Trail Without Taking the Gondola
I get it – the Whistler gondola is expensive. It’s possible to hike the High Note Trail without taking the gondola, but it’s a very long and challenging hike. As well, parts of it aren’t very scenic, so I don’t recommend it. (I think you should hike other free trails in Whistler instead.)
But if you really want to hike the High Note trail without taking the gondola, I’ll help you do it. Here are the key stats:
- Duration: 12-14 hours (You will have to leave very early in the morning to ensure you can take the last gondola down from the peak.)
- Distance: 20.5 km one-way
- Difficulty: Very Challenging
- Elevation Change: 2173 m elevation gain, 551 m elevation loss
- Map: See the map in the Singing Pass section above – it’s the same route but in reverse.
You can’t hike up through the ski area since it is part of the mountain bike park. Instead, you will start by hiking up the boring and poorly maintained Singing Pass Trail. From there, you have to hike the Musical Bumps trail over Oboe and Flute Summit to link up with the High Note Trail.
You will intersect the High Note halfway through, so you will only be able to do half of it unless you want to backtrack. I recommend turning left and hiking the High Note to Whistler Peak, since that is the most scenic section.
From Whistler Peak, you can get on the Peak Chair and take it down to the Roundhouse, then take the Whistler Gondola back to the village. They don’t check tickets once you are on the mountain, so you should be able to ride the gondola down for free.

Tips for Hiking for the High Note Trail
- Check the weather before you go. City weather forecasts are useless in the mountains. Use an algorithmic spot forecast for Whistler Peak like Spotwx. (Read my guide to weather apps for hikers for more tips.)
- Check gondola hours and trail status. Make sure the trail is open and the gondola and chairlifts are running by checking hours of operation and trail status online.
- Bring a rain jacket and warm clothing just in case. It can be much colder and rainier in the mountains than in the valley.
- Wear trail running shoes or hiking boots. The trail is steep, rocky, and loose in places. Regular running shoes don’t have enough grip or ankle support.
- Bring water and snacks. There is no drinking water along the trail. It is not safe to drink the water from the lakes without boiling, filtering, or treating it because you never know if people or animals have pooped or died upstream. Gross! (I use a Katadyn BeFree to filter water.)
- Bring the 10 Essentials. These are key safety items you should have on every hike.
- Bring a camera – it’s gorgeous and you will want tons of pics! But leave the drone at home. Drones aren’t allowed in Whistler without a commercial filming permit.
- Pack out all your garbage. There are garbage cans at the Roundhouse – please pack out your trash.
Fingers crossed that you get good weather when you hike the High Note Trail in Whistler. It’s by far my favourite Whistler hike since the scenery is so spectacular. If you’ve got questions about the trail, ask them in the comments.
READ NEXT:
- The Best Hikes in Whistler: A Guide to All the Trails
- Visiting Whistler, BC in Summer (By a Local)
- 80+ Things to Do in Whistler (By a Local)
- Russet Lake Hiking and Backpacking Trail Guide
- Blackcomb Hiking Trails in Whistler (By a Season’s Pass Holder)
- Joffre Lakes Hike (By a Local)
- Whistler Train Wreck Hike
- Al’s Habrich Trail at the Sea to Sky Gondola (By a Local)
- 31 Best Backpacking Trips in BC


- Best Sun Hoodies for Hiking - June 3, 2026
- Lower Stein Valley Trail Hiking and Backpacking Guide - May 27, 2026
- The Best Things to Do in Vernon, BC - May 21, 2026
cheryl wuschke
Monday 27th of April 2026
Planning to do this hike this summer. Is the Peak Express Chair included in the Whistler gondola lift ticket?
cheryl wuschke
Tuesday 28th of April 2026
@Taryn Eyton, Sorry, I meant August.
cheryl wuschke
Tuesday 28th of April 2026
@Taryn Eyton, Thank you so much for the info. I plan to do the hike in the first week of July. Hopefully it will be running by then.
Taryn Eyton
Tuesday 28th of April 2026
Yes. If you buy a Whistler summer alpine ticket, it gives you access to all lifts and gondolas that are open that day including the peak chair. (Keep in mind that the Peak chair doesn't run early in the summer or late in the fall.)
Marta
Saturday 11th of April 2026
Is high note trail mostly snow free in late June/early July or do you need spikes or special gear?
Taryn Eyton
Saturday 11th of April 2026
It really depends on the year. Some years it is snow free in mid to late June and some years it isn't snow-free until mid July. However, Whistler Blackcomb keeps the trail closed until it is snow-free since there are several slopes that would be a serious slip and fall hazard in the snow.