

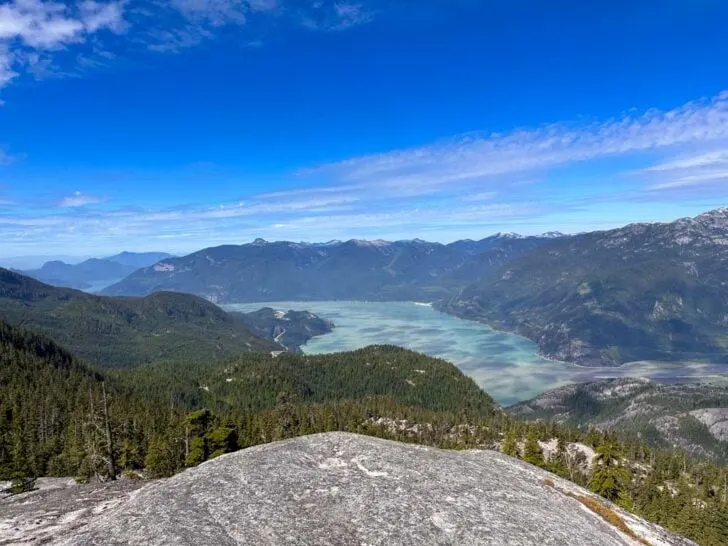
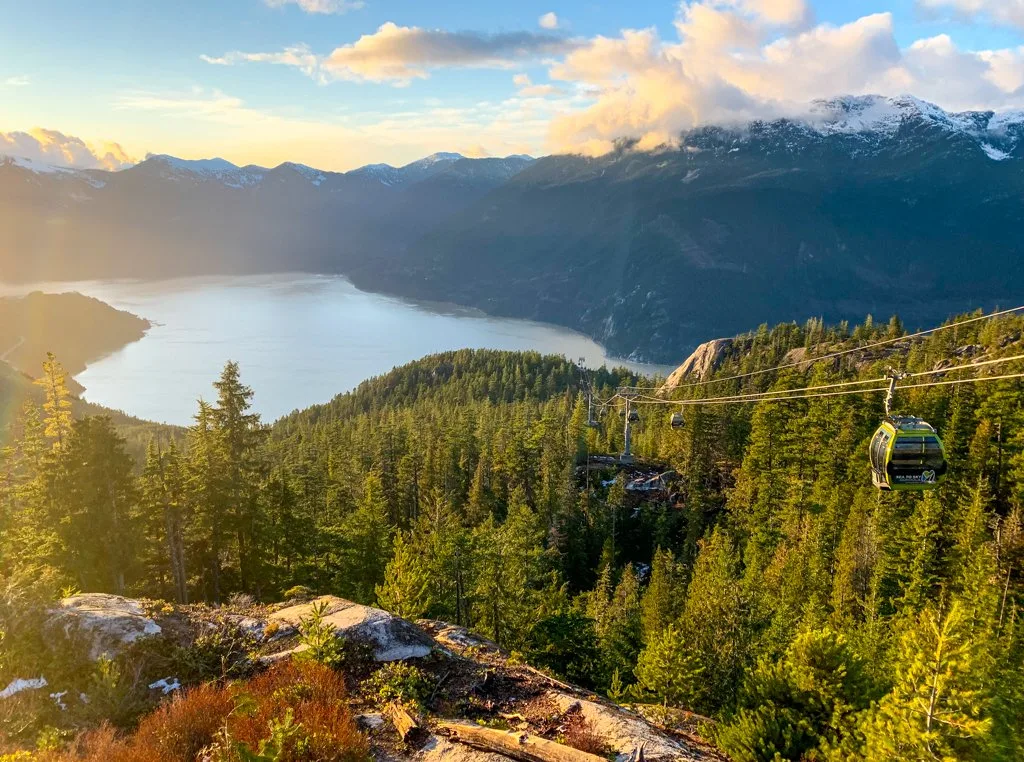
The Al’s Habrich Trail is one of my favourite hikes in Squamish. It has an excellent effort-to-reward ratio since the hike has spectacular views all the way along. And since it starts from the top of the Sea to Sky Gondola, you get up high in the mountains without working too hard.
I live in Squamish and have a Sea to Sky Gondola annual pass so I’ve hiked the Al’s Habrich Ridge Trail more times than I can count. I often take visiting friends here since we have a great hike and enjoy the views but still have time to sit on the patio at the Summit Lodge afterward and enjoy the sunshine while eating poutine!
In this post, I’ve got everything you need to know about the Al’s Habrich Trail hike. This guide includes:
- Trail stats including how long it takes, difficulty, best time to go, and more
- Tips for the Al’s Habrich Ridge hike including what to pack and how to prep
- Trail map that shows all the key locations I mention in this post
- How to get to the Al’s Habrich Ridge Trail – driving directions plus tips for going without a car
- Step-by-step hiking directions so you know what to expect
- Extending your trip – my picks for hikes you can add on
- Snowshoeing and winter hiking – info on the Al’s Habrich hike when it’s snowy
This is a sensitive wilderness area. Learn how to Leave No Trace to keep the wilderness wild. Make sure you are prepared by bringing the 10 Essentials. Get ready for adventure with this checklist of things to do before every hike.
Hey there: Some of the links in this post are affiliate links, which means I earn a small commission at no cost to you. Thanks for your support. -Taryn
Al’s Habrich Trail Stats
Here are the basic stats that you need to know about hiking the Al’s Habrich Ridge Trail at the Sea to Sky Gondola in Squamish:
Location: The trail starts at the top of the Sea to Sky Gondola. You can ride the gondola to get to the trailhead or hike the Sea to Summit Trail first. More details about that in the Getting There section below.
Duration: 3 to 4.5 hours
Distance: 7 km return
Difficulty: Moderate
Elevation Change: 545 m
Cost: $65.95 to $72.95 per adult (depending on day of the week)
Best Time to Go: July to early October when the trail is snow-free. I also recommend picking a clear day so you can enjoy the views.
Caution: Check gondola opening hours so you don’t get stuck without a ride down.
Toilets: There are toilets at the top of the Sea to Sky Gondola. There are no toilets on the trail.
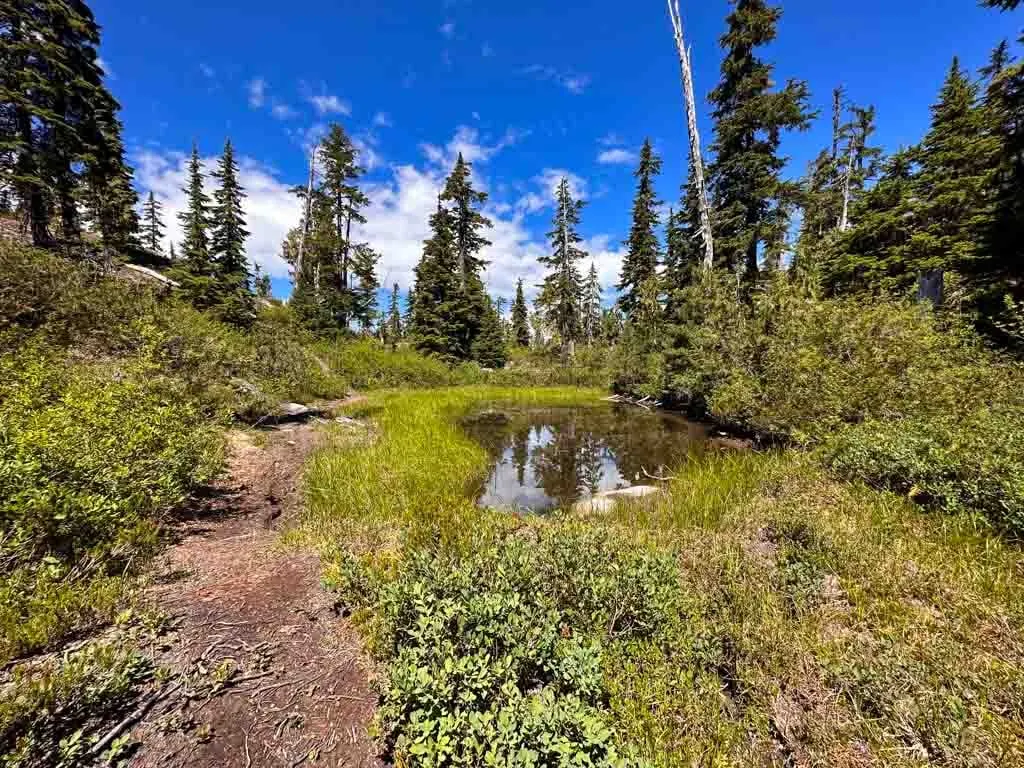
Drinking Water: You can fill your bottles at Neverland Lake at the end of the trail. Pack plenty of drinking water. Since you don’t know if humans or animals have pooped or died upstream, you need to filter or treat all water before you drink it.
Dogs: Dogs are not allowed to upload on the Sea to Sky Gondola. However, you can hike the Sea to Summit Trail with your dog, and then hike the Al’s Habrich Trail. Dogs may struggle on both of these trails due to steep sections with fixed ropes. Dogs are allowed to download on the gondola for $20 each.
Indigenous Context: The Al’s Habrich Ridge Trail is in the traditional territory of the Skwxwu7mesh (Squamish) Nation. To learn more about Skwxwu7mesh history and culture, visit the Squamish Lil’wat Cultural Centre.
Al’s Habrich Ridge Hiking Tips
- Check the weather before you go. City weather forecasts are useless in the mountains. Use an algorithmic spot forecast for Al’s Habrich Trail like Spotwx. (Read my guide to weather apps for hikers for more tips.)
- Check trail conditions on the Sea to Sky Gondola Daily Conditions page. This is especially important in the spring or fall when the trail can be icy or snowy.
- Check gondola hours on the Sea to Sky Gondola hours page. You don’t want to miss the last ride down!
- Buy tickets online – you’ll save $4! Local’s tip: If you plan to go up the gondola 3 or more times in a year, it’s worth buying an annual pass.
- Bring a rain jacket and warm clothing just in case. It can be much colder and rainier in the mountains than in the city.
- Wear trail running shoes or hiking boots. The trail is steep and loose in places. And there are sections of travel on slick granite slabs. Regular running shoes don’t have enough grip or ankle support.
- Bring water and snacks. It is not safe to drink the water from the creeks or ponds without boiling, filtering, or treating it as you never know if people or animals have pooped or died upstream. Gross! (I use a Katadyn BeFree.)
- Bring the 10 Essentials. These are key safety items you should have on every hike.
- Pack out all your garbage. There are no garbage cans here so you must take your garbage back to the gondola with you. Leaving it in on the trails attracts animals.
- Be Bear aware: It is common to encounter black bears on this trail in late summer and fall especially near Neverland Lake, Neverland Loop, and Yuko’s Ponds. Hike in a group, make noise, and carry bear spray. Read my bear safety tips for more info.
- Leave some time for the patio: The patio at the Summit Lodge is incredible and you don’t want to miss it. Allow enough time after your hike to sit awhile and have a drink. Or a huge plate of poutine.

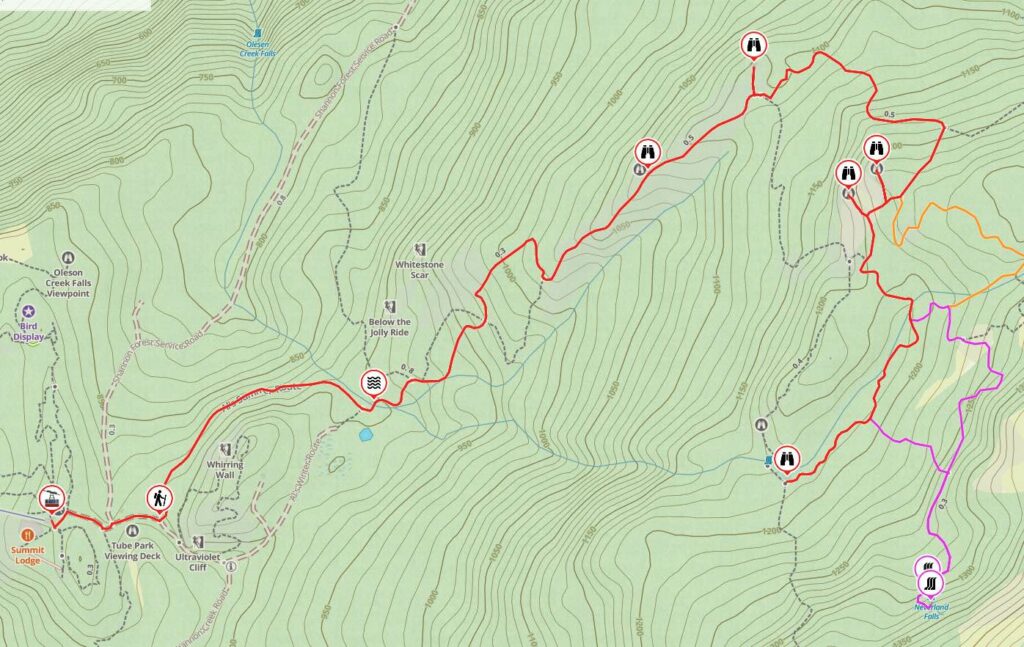
Al’s Habrich Trail Map
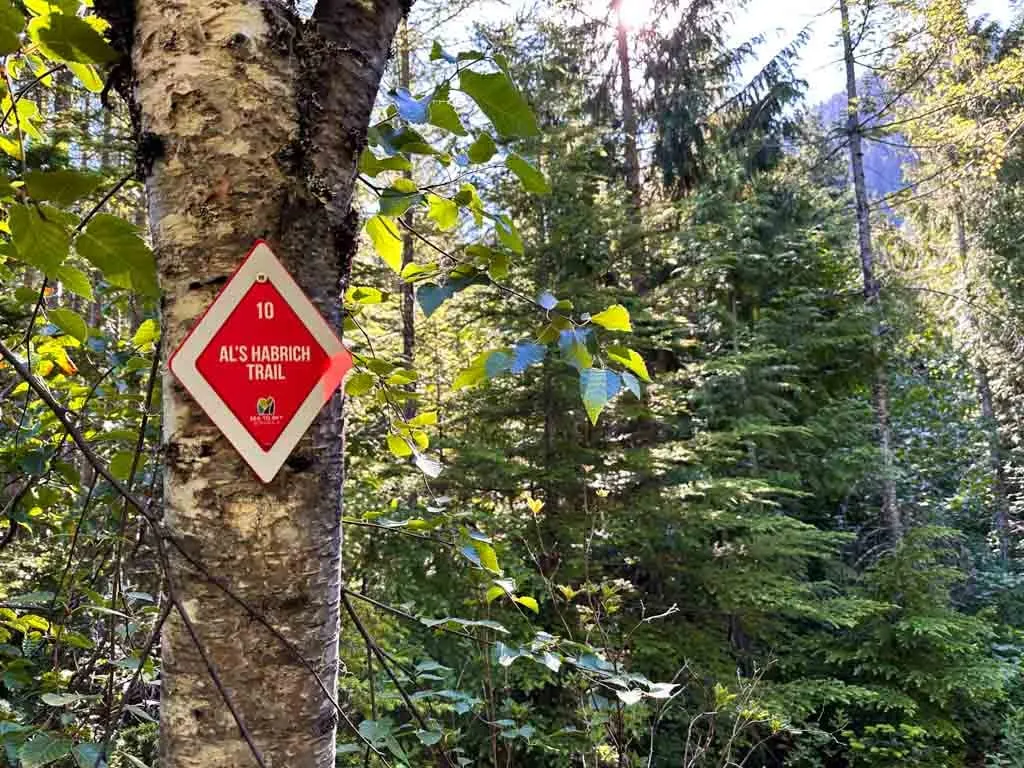
In most places, the Al’s Habrich Ridge Trail is easy to follow with lots of markers. The trail has coloured markers that are numbered so you can stay on track. But it has a few areas where it gets indistinct.

I made you a custom trail map using Gaia GPS, my favourite mapping app. It shows all the locations I mention in this post. Click through to zoom in and explore (and to download the GPX file).
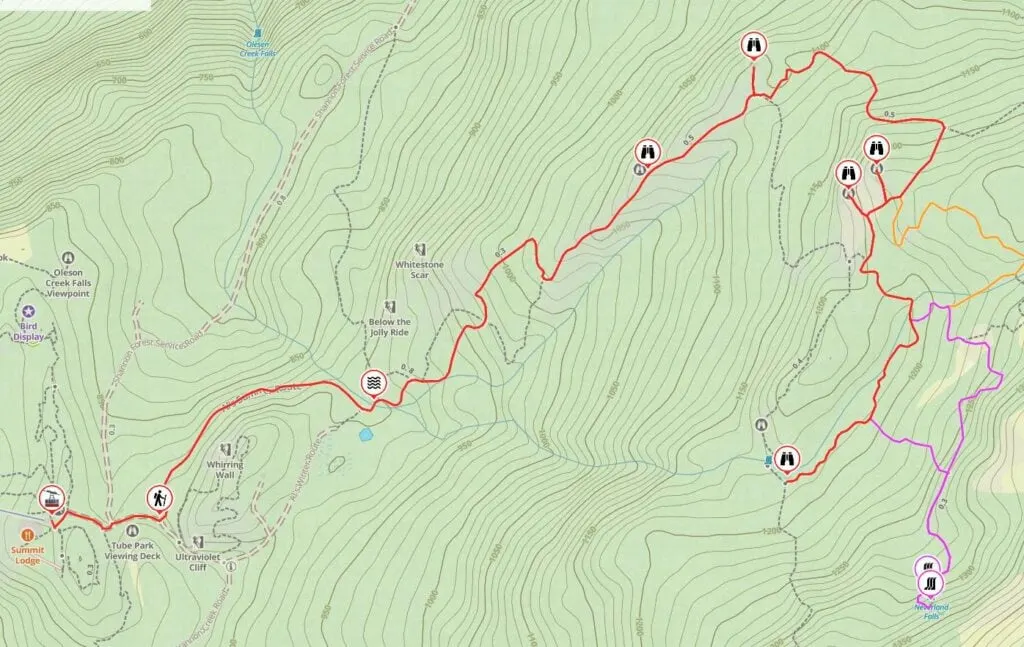
You can also use the Sea to Sky Gondola Trails Map. It’s available via their app. It’s a beautiful artist-rendered map, and the GPS locating feature on the app tells you where you are. But since it only gives you a vague idea of the terrain and doesn’t show the other unofficial trails (more on those below), I don’t find it nearly as helpful as a proper topographic map… which is why I use All Trails+ or Gaia GPS instead.
How to Get to the Al’s Habrich Trail
Driving Directions
Al’s Habrich Ridge Trail starts at the top of the Sea to Sky Gondola in Squamish. To get there, drive Highway 1 west from Vancouver, then switch to Highway 99 north. Drive through the communities of Lions Bay, Furry Creek, and Britannia Beach. Just after the traffic light at Shannon Falls, turn right into the signed Sea to Sky Gondola parking lot. Here are Google Maps driving directions.
Getting There By Bus
If you don’t have a car, you can also get to the Sea to Sky Gondola by using the Squamish Connector bus. They offer service from downtown Vancouver to the Sea to Sky Gondola several times a day.
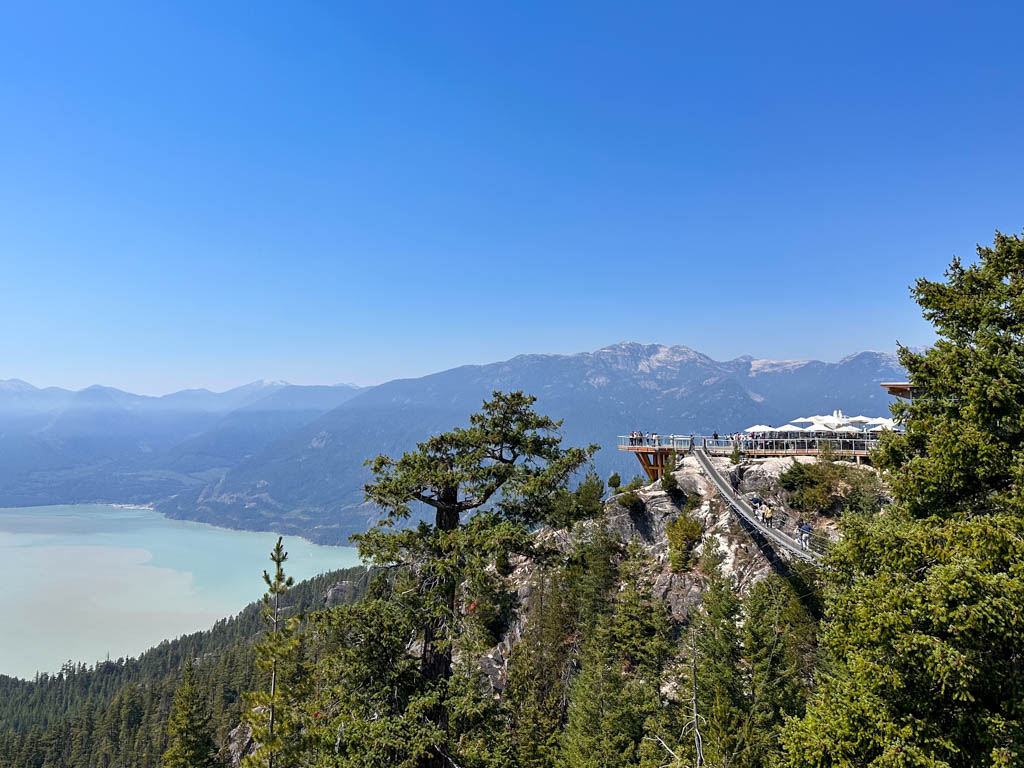
Sea to Sky Gondola
The easiest way to get to the start of Al’s Habrich Trail is to ride the Sea to Sky Gondola. Check opening hours before you go. It’s incredibly scenic and takes about 10 minutes. My tip: Choose the seats that face backwards for the best view.

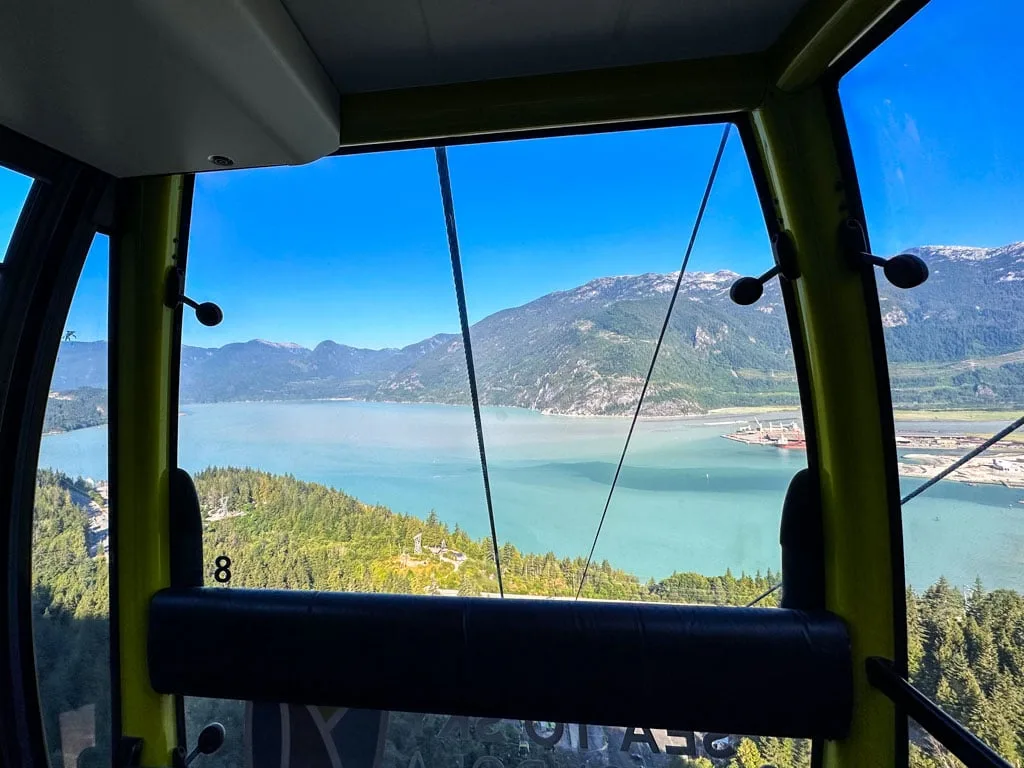
Gondola tickets are not cheap (About $68 per adult as of 2024) but I think it’s worth it since the views are so good. Once you are at the top you can hike (of course), sit on their gorgeous patio, and walk across the suspension bridge.

Sea to Summit Trail
If you don’t want to pay for the gondola, you can also hike up via the Sea to Summit Trail. This is a steep and challenging trail that takes most hikers 3-4 hours. Unless you are a strong hiker, I don’t recommend hiking the Sea to Summit Trail to access Al’s Habrich Ridge because you won’t have enough energy or time to complete both hikes.
If you hike up the Sea to Summit Trail you can ride the gondola down for just $20.
Al’s Habrich Trail Hiking Directions
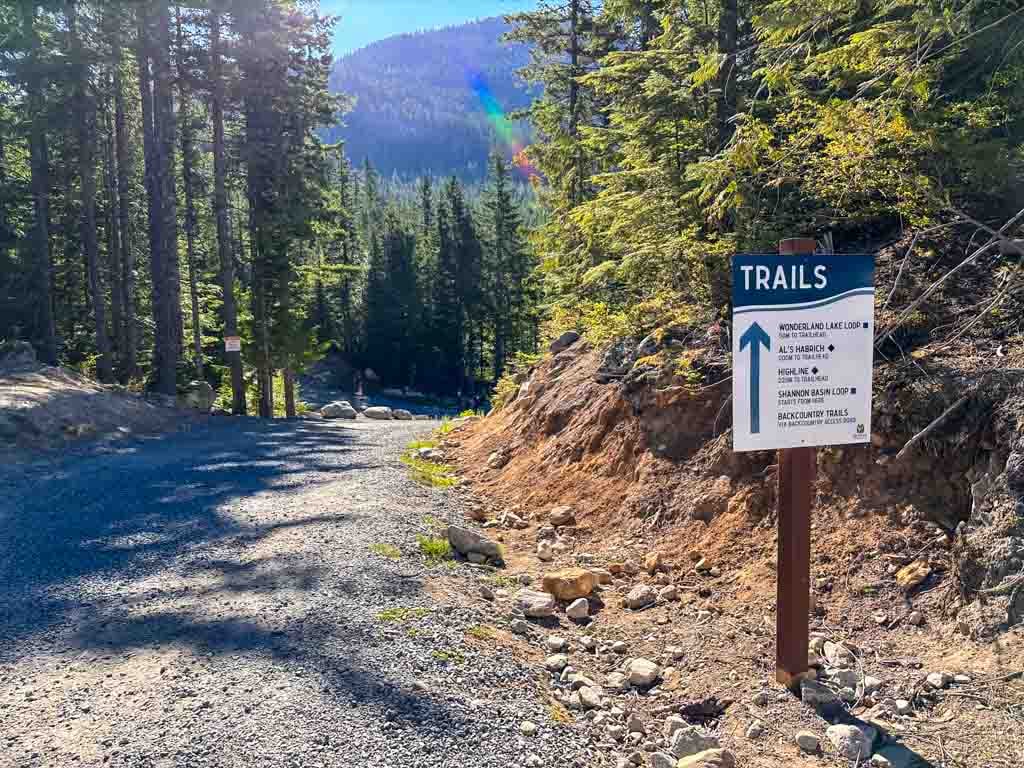
To start the hike, get off the gondola and head down the stairs from the lodge. Walk left through the plaza, then follow the gravel road downhill to the east. About 2 minutes from the gondola, arrive at a junction. The service road down to the valley goes hard left, the Wonderland Lake Loop trail goes right and your route goes to the left up the hill on the road.

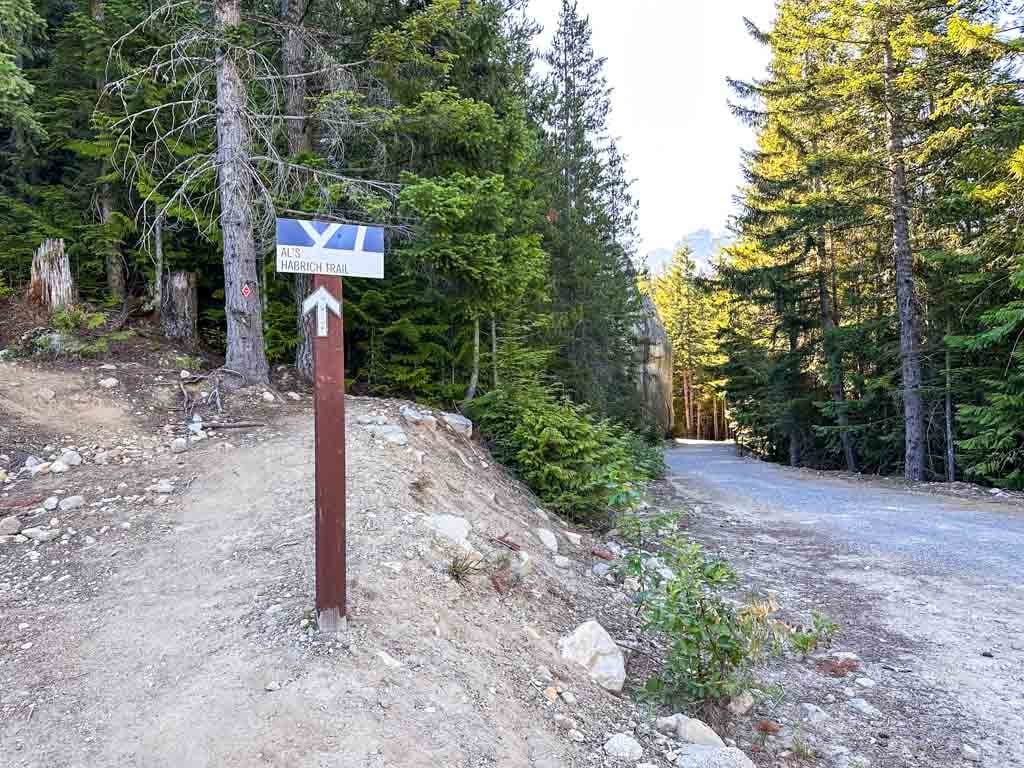
Walk up the hill on the road passing the gondola generator (which you can hear humming behind the fence). Just as the road starts to curve right, look for the trailhead for Al’s Habrich Ridge Trail on the left next to an open area.
Follow the trail into the trees. The path descends slightly and passes below some cliffs as it curls around a bluff. About 10-15 minutes after leaving the gondola, arrive on the banks of Olesen Creek. (The winter route joins from the right here, but it is roped off in the summertime.)
Cross the creek by hopping across on rocks. There is a rope to hang on to for balance if you need it. In the spring or after heavy rains the creek may be deep enough that your feet might get wet, but usually, there is just a trickle of water.
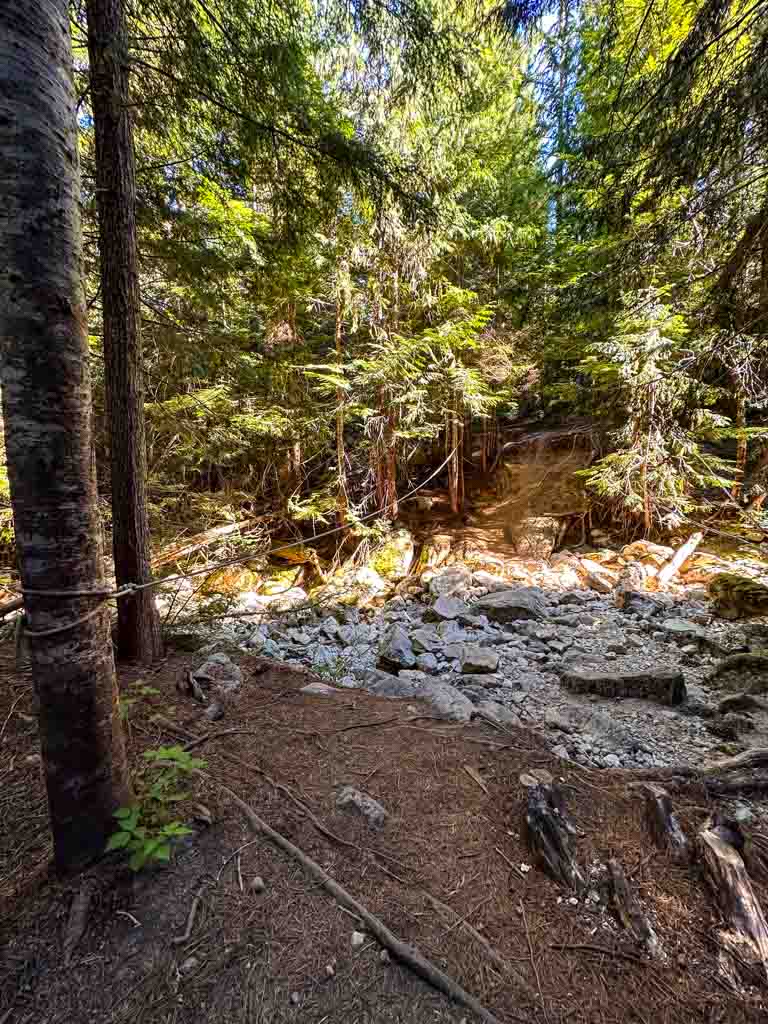

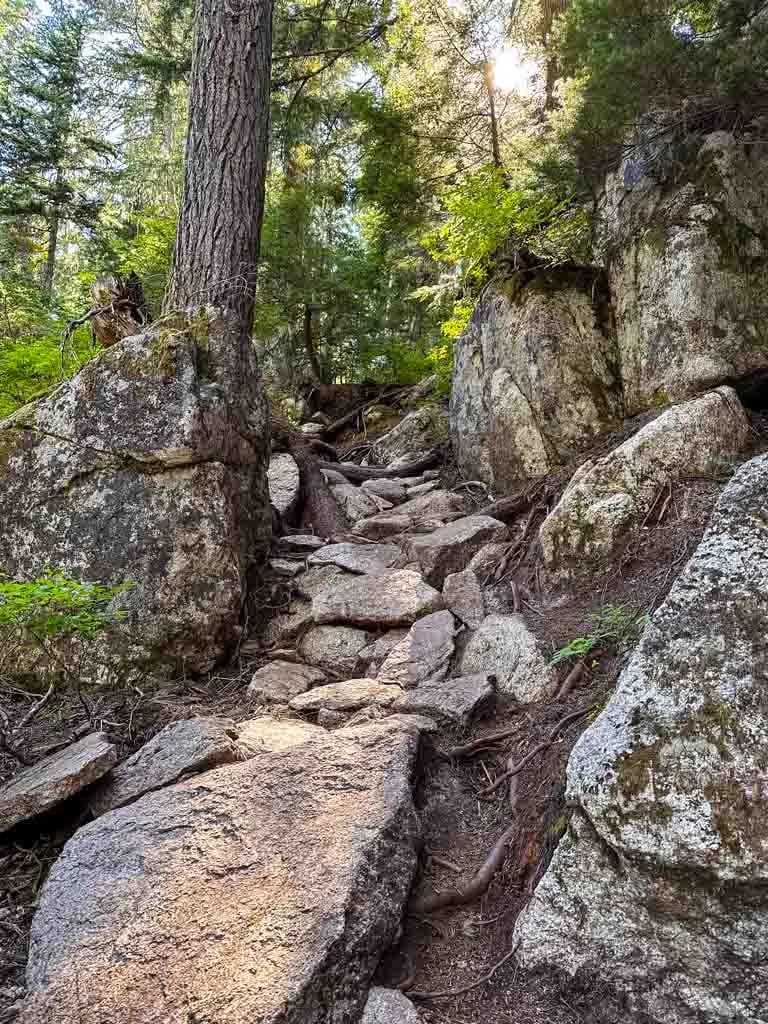
On the other side of the creek follow the trail uphill through the trees and across rock slabs. There are a few places where you will need to use fixed ropes to help you up slopes. But the ropes are short and fairly easy to navigate.

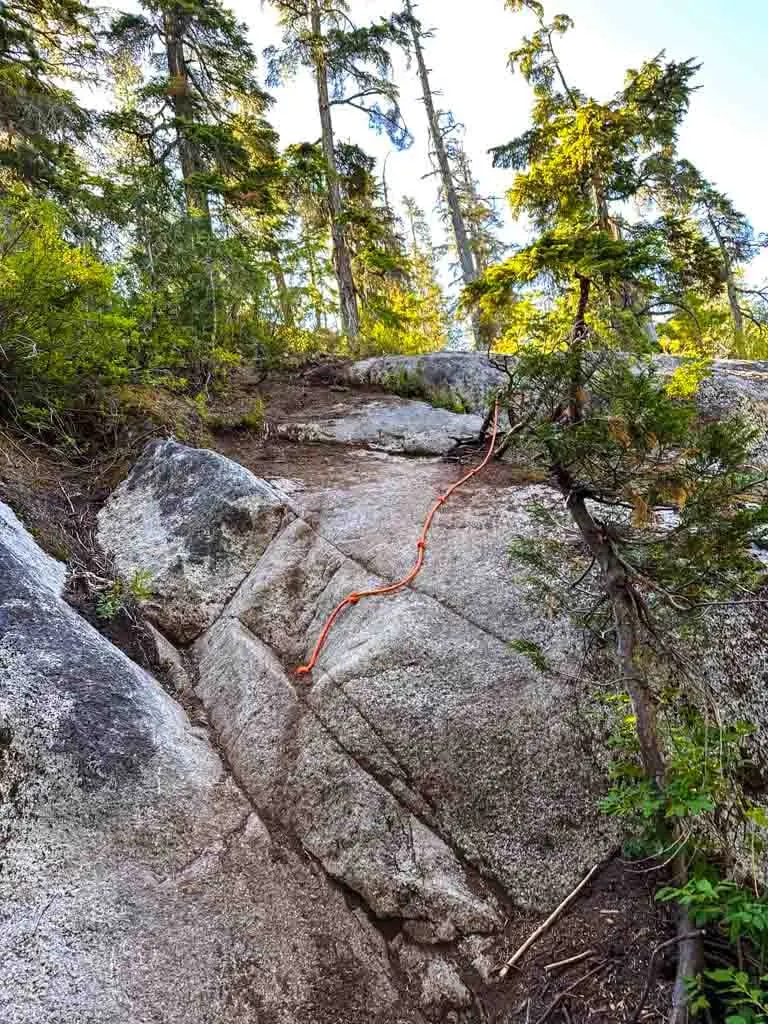
The trail braids a few times in this section, but if you stay on the widest trail and look for the diamond markers, you will go the right way.
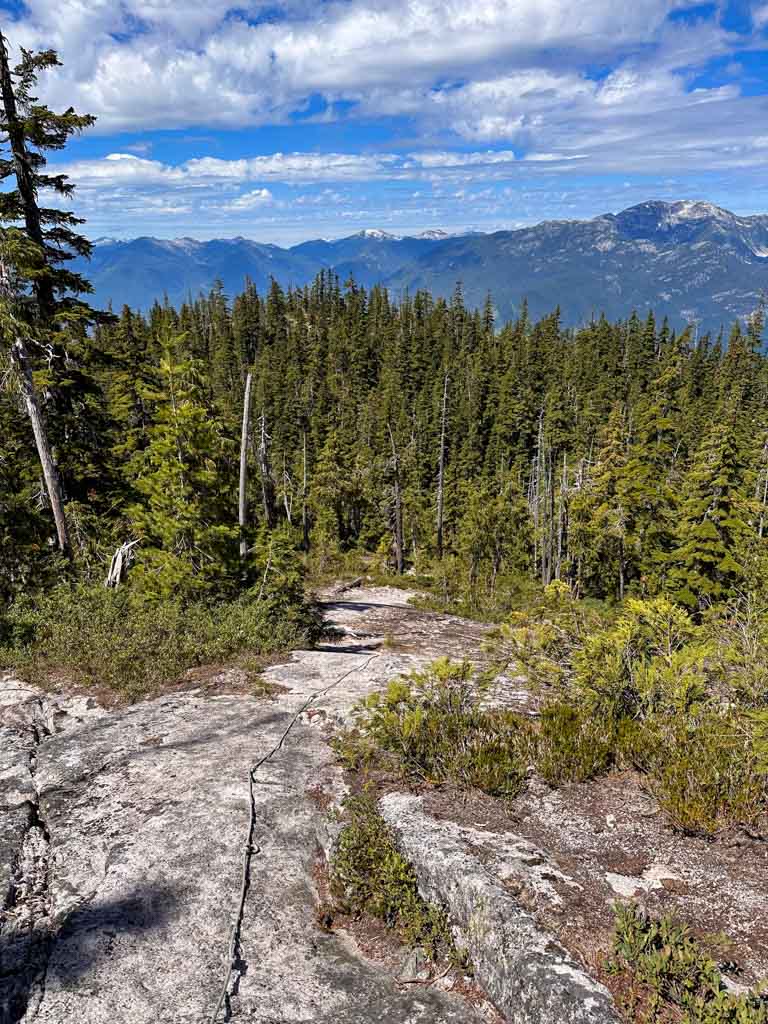
About 30-40 minutes from the gondola you will begin to break out of the forest. The route takes you up along the spine of a wide granite ridge. The route is indistinct here so again, follow the markers and keep to the middle of the ridge to stay on course.

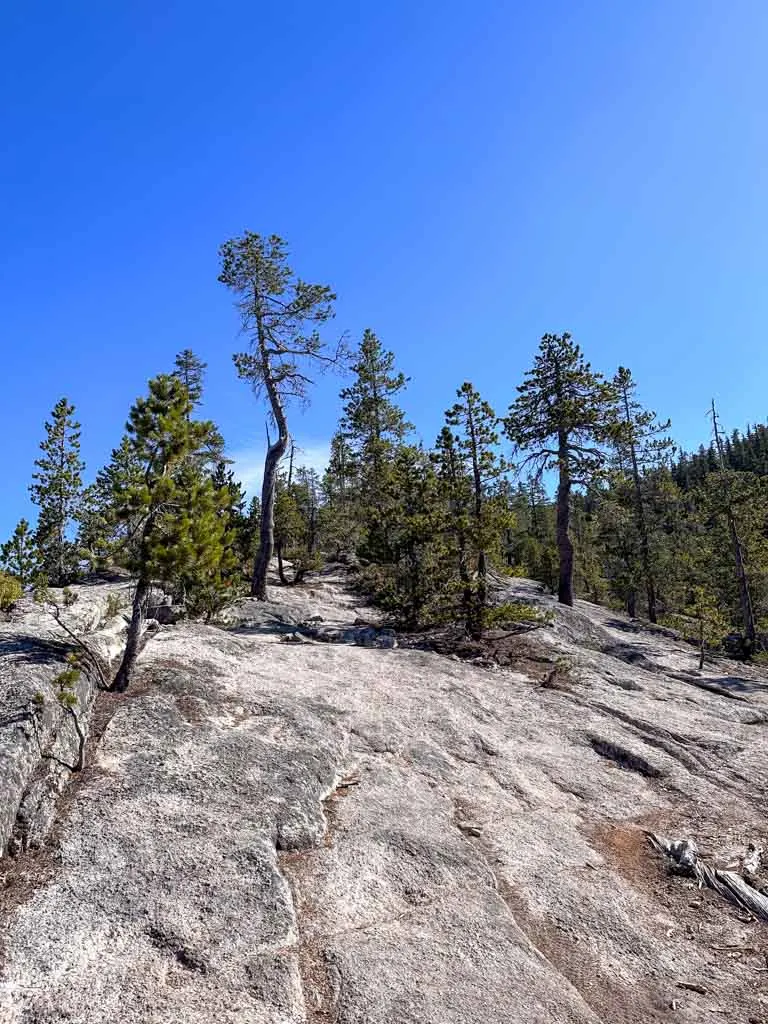
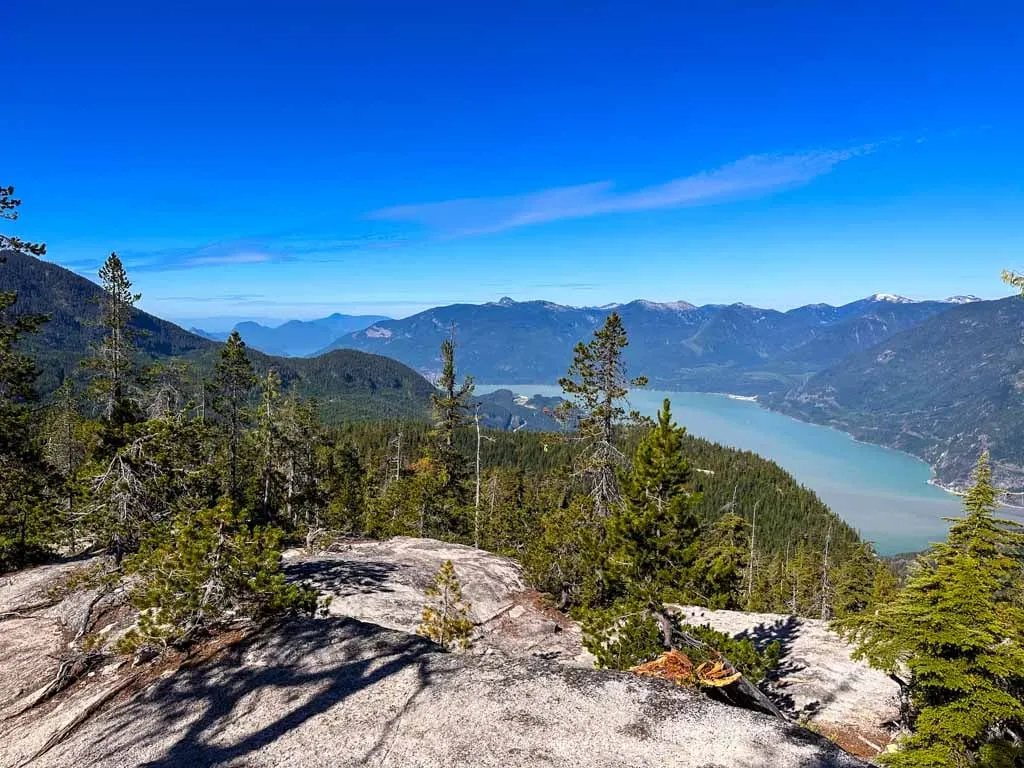
A few minutes later, the views really start to open up to your left. You can look down to Howe Sound below you.
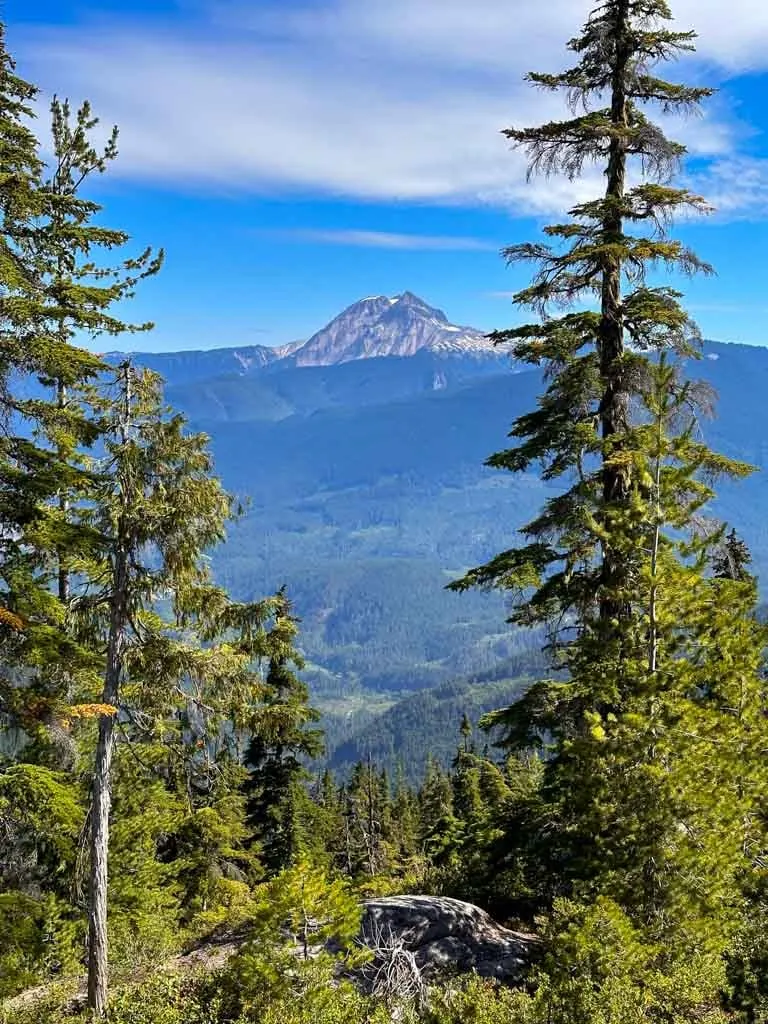
Keep hiking along the ridge. As the granite slabs come to an end, look for cairns showing you the way to your right down into the forest. But before you go into the forest, follow a path across the granite to a small knoll with a great view of Mount Garibaldi/Nch’kay to the north.

When you are ready, follow the cairns into the forest and slightly downhill. Stay on the main trail and follow the markers as the path makes a hard left (and older faint trail goes straight).
From here, you have a short but steep climb up through the forest on a very rooty and rocky trail. Watch for diamond trail markers to stay on track.

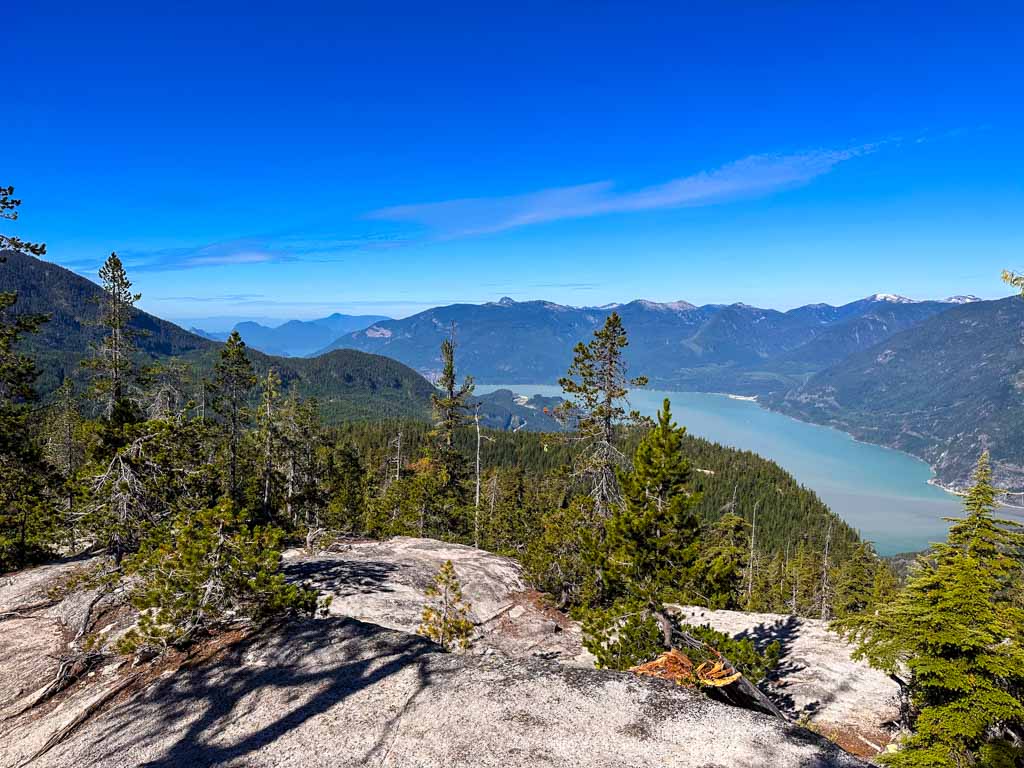
When the trail begins to level out, you have almost reached the viewpoints. There will be a large granite bluff to your right and a barely marked side trail for Yuko’s Ponds to your right (more on that below). Go straight towards the main viewpoint on the big granite slab.
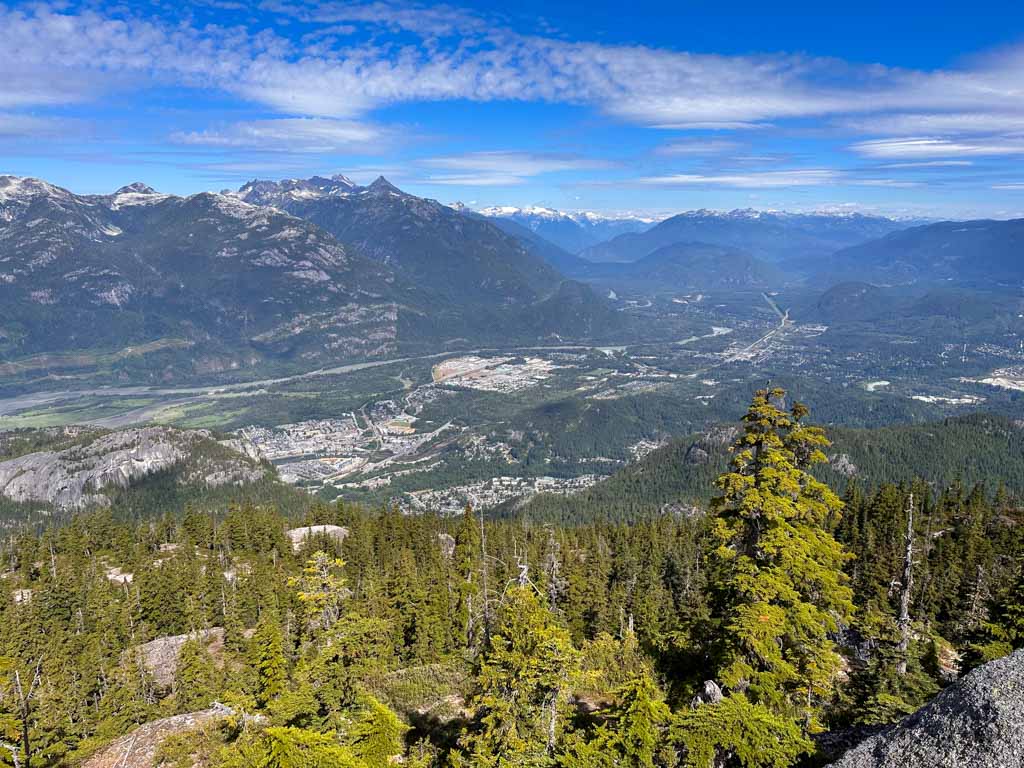
This is the best view on the whole trail. You can look down to the waters of Howe Sound and the Sea to Sky Highway snaking its way south.

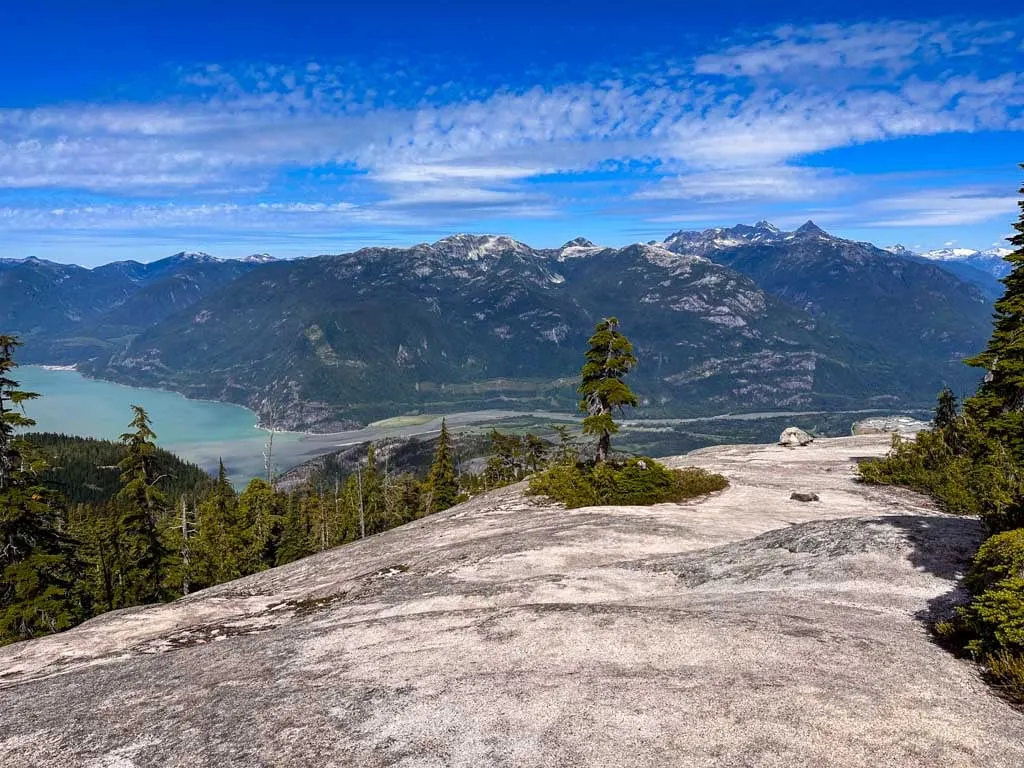
If you want more views, scramble up the granite bluff behind you. The first part of the ascent is very steep, but the granite provides lots of friction on your boots so it’s doable. You can wander around the top of the bluff to get views down to the town of Squamish and the Squamish River Valley. Take care on the descent as it is steep!

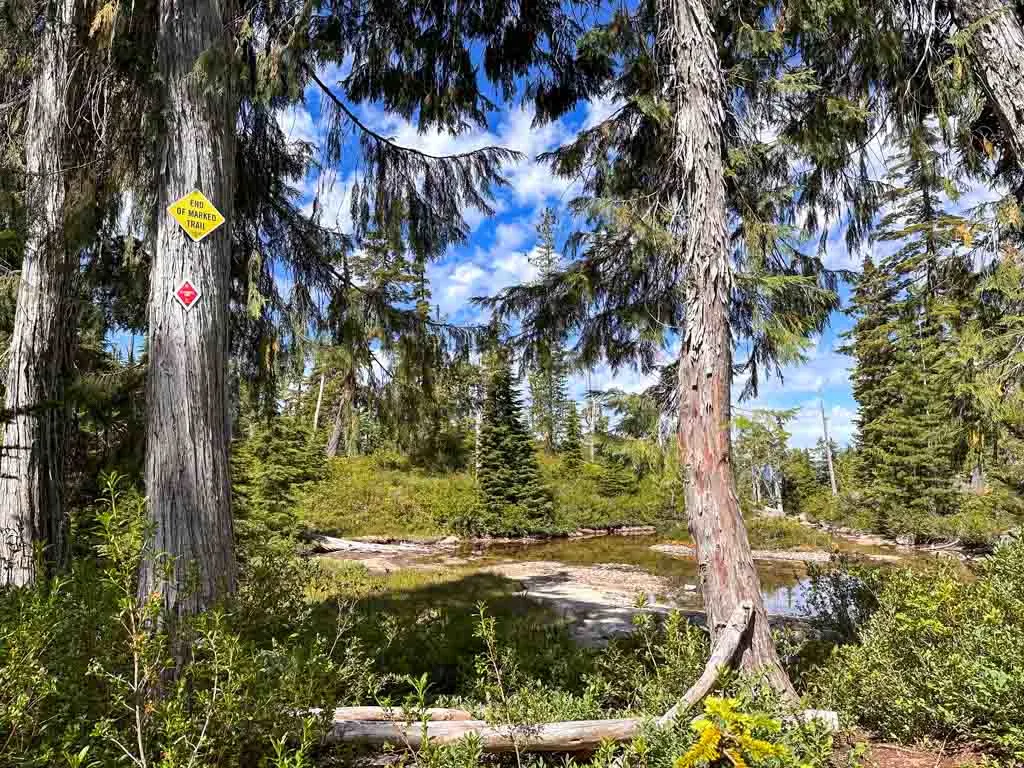
You might choose to make the viewpoints your turn around, and honestly, I think that’s not a bad idea since you have already seen the most spectacular part of the trail. But if you want, you can continue for another 0.8 km to the official end of the trail.
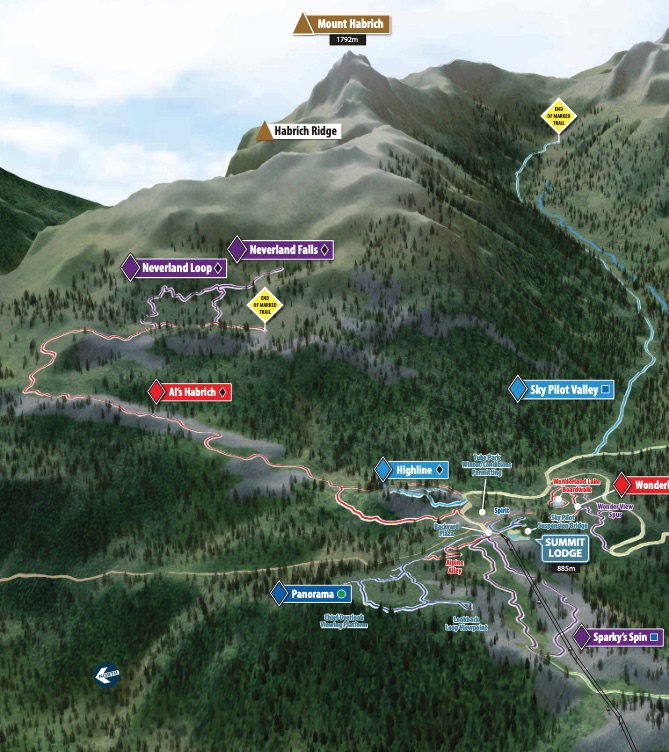
To head to the end of the trail, follow the markers to the right across the rock slabs, then down into the meadows. The trail undulates through pockets of forest and blueberry bushes and past two junction with the Neverland Loop Trail before ending at Neverland Lake.
While Neverland Lake may sound like a picturesque destination and maybe even a place to swim, it’s actually a seasonal pond that dries up into a puddle by late summer. Unfortunately, it’s a bit underwhelming. When you are done at the lake, retrace your steps back to the gondola. Or see the Extending Your Trip section below for more options.

Extending Your Trip
If you have extra time and energy, it’s worth adding some extra distance on to your hike. Here are the best options.
Neverland Loop and Neverland Falls
The Neverland Loop and Neverland Falls Trail makes a great add-on to the Al’s Habrich Ridge Trail since it visits a waterfall and some interesting rock slab areas. It adds about 1 km and 150 m of elevation gain to your trip. But it is a much rougher trail so expect it to take 30 min to an hour.
From Neverland Lake, backtrack to the Neverland Loop junction. Head steeply uphill through the forest. A rope helps you climb up a steep section just below a cliff. At the top of the rope, reach a junction. Go right to get to Neverland Falls.
The trail to Neverland Falls goes through thickets of blueberry bushes as it trends slightly uphill. Reach the base of Neverland Falls about 300 m from the junction.
In early summer the falls will have lots of water and a small pool underneath that you can swim in. But for most of the summer, the falls dry up to a trickle and the pool is too small to be inviting.


If you want to explore further, follow a rough unofficial trail uphill to the right of the falls for about 100 m. It scrambles over rocks and is quite steep. At the top, you can check out Upper Neverland Falls.
After you are finished at the falls, retrace your steps back to the junction with the rope, then go straight. The trail rambles through more forest and blueberry bushes with a cliff on your right. At one point, the path takes you under the overhang of a huge boulder.
After the boulder, the path begins to head downhill on some granite slabs. There is a rope to assist you on the steep part. As you approach a creek (which looks like a rock water slide), the trail switchbacks to the left and heads down to meet back up with the Al’s Habrich Trail. A faint trail goes right up the creek to Yuko’s Ponds (see below).

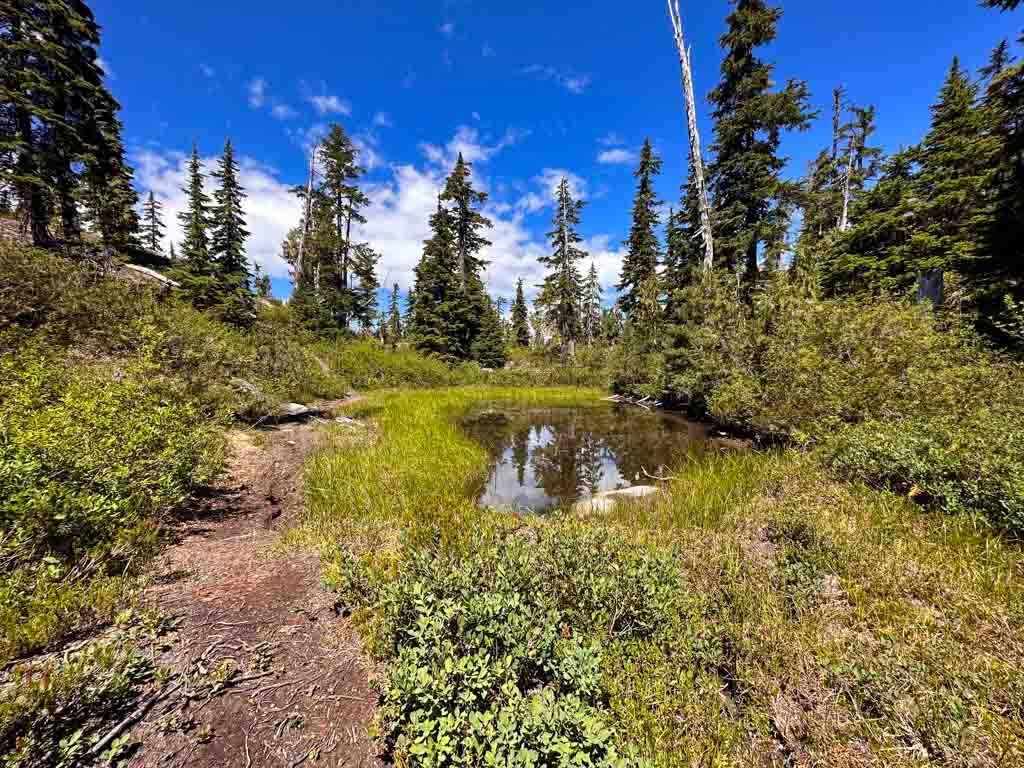
Yuko’s Ponds
This short trail visits a few small ponds and heads through some pretty patches of sub-alpine meadows. Since it is not on the list of official Sea to Sky Gondola trails, it’s a bit quieter up here, which I like.
The Yuko’s Ponds route adds 0.6 km and 50 m of elevation gain to your trip. Allow an extra 20-30 minutes for this add-on. Since this is an unofficial trail, it isn’t marked with big diamond markers. But it isn’t that hard to follow (there are occasional square orange markers). It’s also easy to stay on track if you use All Trails+ or Gaia GPS.
My preferred route is to pick up the Yuko’s Ponds trail from the north end of the Neverland Loop. Where that trail comes close to a creek flowing across a granite slab, turn uphill and follow sporadic markers and flagging tape up the creek.
At the top where it flattens out next to a pond, go left and slightly uphill. (If you continue straight the trail deadends at a marsh.) Stay on the trail past another tiny pond and through more meadows. The trail curls left and heads downhill.
Follow markers carefully as the path drops down a granite bluff, turn makes a hard right. The terrain gets steep and a bit scrambly for a few moves as you work your way downhill to meet up with the main trail in the forest just before the viewpoints.
Further Along the Ridge and Robin’s Connector
The official Al’s Habrich Trail doesn’t go anywhere near the top of Al’s Habrich Ridge. However, several unofficial and poorly marked trails do go higher on the ridge.
A rough trail continues uphill from Neverland Lake through the forest higher on the ridge. Another trail, called Robin’s Connector, branches off from Yuko’s Ponds and the north part of Neverland Loop. It heads east through the forest, then curls back south through some bluffs to head up the ridge.
Both trails join partway along the ridge, then continue southeast to a high point. These trails are poorly marked and unmaintained. In places they seem to disappear. There have been lots of Search and Rescue incidents here due to lost hikers. Please don’t attempt these trails without good fitness and off-trail navigation skills.
It’s also worth noting that there are no trails to the top of Mount Habrich. The summit is a shear rocky cliff that can only be scaled by rock climbers.
Snowshoeing and Winter Hiking the Al’s Habrich Trail
With easy access via the Sea to Sky Gondola, Al’s Habrich Ridge Trail is one of the best places to snowshoe in Squamish. However, it is a much more challenging and potentially dangerous trip in winter. The trail markers are harder to see, so it is easy to get off track. You will need to be comfortable with navigation. I use the Gaia GPS app.
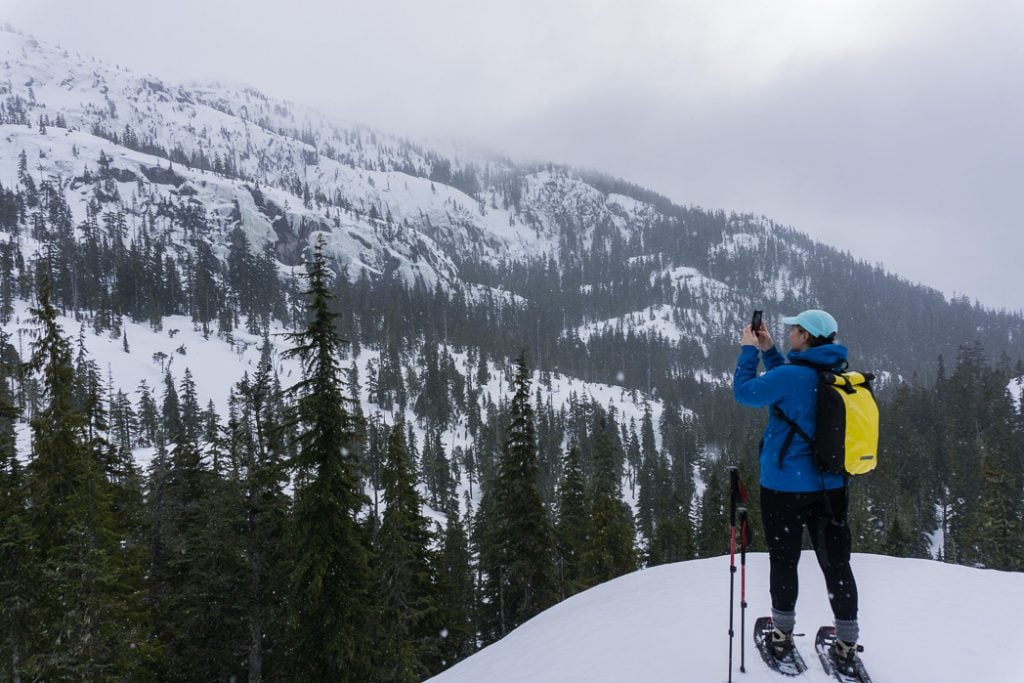
The steep terrain can also make travel very challenging with a mix of both snow and ice. Depending on trail conditions, you will need snowshoes and/or microspikes. I recommend microspikes in May and November and both snowshoes and microspikes between December and April – you may need to switch to microspikes on the steeper stuff because your snowshoes won’t have enough grip. (Read my guide for tips on how to choose snowshoes and my guide to the differences between snowshoes and microspikes).
For the most part, the trail stays out of avalanche terrain since it doesn’t cross or travel below steep slopes. The exception is the steep ascent in the trees just before the main viewpoint and the Neverland Loop Trail, both of which travel on or below avalanche-prone slopes. In any case, you should still have avalanche training and rescue gear. Check the avalanche forecast before your trip.
It’s worth noting that the winter route is slightly different than the summer route. Instead of turning off the access road near the generator, you stay on the road to a fork where you go left. Then you follow that road for another 0.2 km to its end where you join the regular route at the creek crossing. As well, the Sea to Sky Gondola recommends doing only the first half of the trail in winter (the part along the granite ridge) since it is the easiest to follow, isn’t as steep, and avoids all avalanche terrain.
If you do just one hike at the Sea to Sky Gondola, it should definitely be Al’s Habrich Trail. It’s one of my favourite trails that I return to over and over. Do you have questions about this hike? Ask them in the comments.
READ NEXT:
- The Best Hikes in Squamish, BC (By a Local)
- Where to Go Snowshoeing in Squamish
- 70+ Things to do in Squamish (By a Local)
- High Note Trail in Whistler Hiking Guide (By a Season’s Pass Holder)
- Joffre Lakes Hike (By a Local)


- Best Sun Hoodies for Hiking - June 3, 2026
- Lower Stein Valley Trail Hiking and Backpacking Guide - May 27, 2026
- The Best Things to Do in Vernon, BC - May 21, 2026