Over the years, I’ve done a lot of coastal hiking trips. I recently added it up, and I’ve been on 18 different beach backpacking trips in British Columbia and Washington. Coastal trails are in a totally different environment than the mountains or the forest, and they come with their own set of challenges. In this post, I’m using my years of experience to give you all the advice you need to make your next coastal hiking trip a success. I’ve got advice for gear, prep, safety, and attitude. Here are my top tried and tested coastal hiking tips.
Hey there: Some of the links in this post are affiliate links, which means I earn a small commission at no extra cost to you if you make a purchase. Thanks for supporting my website! -Taryn
This is a sensitive wilderness area. Learn how to Leave No Trace to keep the wilderness wild. Make sure you are prepared by bringing the 10 Essentials. Get ready for adventure with this checklist of things to do before every hike.
My Coastal Hiking Experience
My first ever backpacking trip was a 5-night blitz of the West Coast Trail. I’d say it was a baptism by fire, but it was more like a baptism by sand, mud, and rain. And it was sooo gorgeous. I was hooked!
Since then I’ve done over 18 more overnight and multi-day trips on the coast. In British Columbia, I’ve done the West Coast Trail (twice), Juan de Fuca Trail (twice), North Coast Trail (twice), Wild Side Trail (twice), Nootka Trail, Tatchu Peninsula, San Josef Bay (twice), and Cape Scott Trail (three times). In Washington, I’ve hiked the North Olympic Coast Route, the Ozette Loop (twice), Shi Shi Beach, and Toleak Point.
I’ve learned a lot of lessons about coastal trails on these trips and now I’m passing that wisdom and my best coastal hiking tips along to you.
Wear Gaiters
In case you didn’t know, gaiters are fabric covers that bridge the gap between your boots and your pants. I have friends who never wear gaiters on coastal hikes, but I swear by them. They keep the sand out of your boots, which can cause painful blisters. (Read my guide to preventing blisters for more info.)
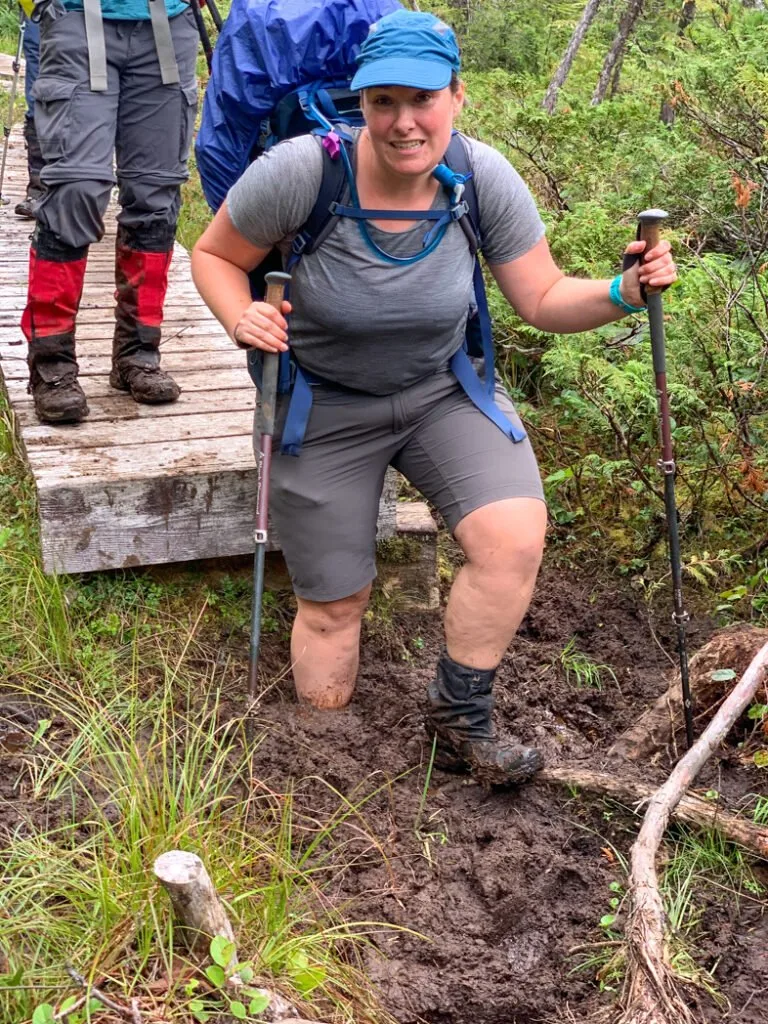
Gaiters also help on muddy trails, which are common on the coast. If the mud is deeper than your boots (which happens a lot!) you will have an added layer of protection. Waterproof gaiters can also be great for short stream crossings – that way you don’t have to take your boots off.
On my last West Coast Trail hike, I wore short water-resistant gaiters (like these) just to keep the mud and sand out. But wearing them on the North Coast Trail was a big mistake – they weren’t tall enough for the epic mud on that trail! I ended up with mud and water over the top of my gaiters within the first two hours. I should have brought these tall Gore-Tex gaiters that I had already worn on lots of other trips. (This pair are similar).
Use Hiking Poles
Coastal trails are very uneven with lots of mud, roots, slippery rocks, and creek crossings. Poles help you keep your balance on tricky terrain. You can also use them to probe mud bogs to find the driest spots. If you’ve hiked with poles before and hated them, don’t bring them on a coastal trip. But otherwise, I think poles are a must. (The only time they are a disadvantage is when you encounter ladders or fixed ropes and you have to stow them.)
I use Black Diamond Alpine Carbon Cork trekking poles. They are definitely the Cadillac of trekking poles. If you want something a bit more budget-oriented, the Black Diamond Trail Explorer poles are really great quality for the price.
Join the Backpacking in BC Facebook Group
Don’t Stress About Sand
On coastal trips, sand gets into everything. Even months after a beach trip, I still find sand in my boots, tent, and backpack. It’s easy to let the sand drive you crazy… but just chill out. For the most part, it’s not a big deal. To protect sensitive gear like camera lenses or food, lay down your rain jacket, a pack cover, a small tarp, or your tent footprint as a sand-free area.
There is only one time when I stress about sand: when it’s getting in my boots. That’s because it can cause blisters. Prevention is key here. Wear gaiters. Avoid shoes with mesh panels. And carry a small travel towel to wipe down your feet before you put your socks on.
Prep for Tea-Coloured Water
Most water sources on coastal backpacking trips have dark tea-coloured water. This is due to tannins from the vegetation in the swamps and bogs. As well, these water sources are often a trickle so you won’t have much choice on where you can fill up.
Bring a water filter or purifier to treat your water. The silt and tannins in the water can clog filters and add to processing times for chemical purification like Pristine and Aquamira. Some people prefer to strain the water through a bandana, clean t-shirt, or coffee filter first, then treat it or filter it.
If you bring a filter, make sure you know how to clean it in the field, as that’s the only way to get it unclogged. We use a Platypus GravityWorks water filter since it doesn’t require pumping and you can clean it easily by backflushing it with clean water. Be prepared to have your filter run very slowly when filtering coastal water, especially if it’s not new. We replaced our filter cartridge after a recent coastal trip and were surprised to see how much better it ran!
The tannins in the water give it a dark colour that many people find unappealing. Some also say that they don’t like the taste (although I usually don’t notice it). If that bothers you, bring juice powder to mask the taste and colour. My favourite for backpacking is Nuun, a sports drink with electrolytes. I love that it comes in tablets rather than loose powder so it’s less messy.
Waterproof Everything
Even if the forecast doesn’t call for rain, waterproof everything. Everything! The weather on the coast is notoriously fickle and rainstorms can blow in unexpectedly. Coastal fog can also create damp camping conditions. (And sometimes the forecast is just for rain. On my first North Coast Trail hike we had torrential rain EVERY. SINGLE. DAY.)
READ NEXT: The Best Weather Apps for Hiking
Bring good quality waterproof breathable jacket and pants. I wear the MEC Synergy Jacket, which is Gore-Tex, and the MEC Hydrofoil Stretch pants. Another great option is the Patagonia Torrentshell 3L. It’s pretty durable for the low price.
READ NEXT: Why Do Rain Jackets Wet Out?
Bring a good quality backpacking tent with a full-length rainfly. We use the MSR Hubba Hubba NX or the Zpacks Triplex.
Pack a lightweight silnylon tarp and some cord so you can set up a kitchen shelter. We have a RAB siltarp 2 that scrunches down to the size of a burrito and comes on every coastal trip.
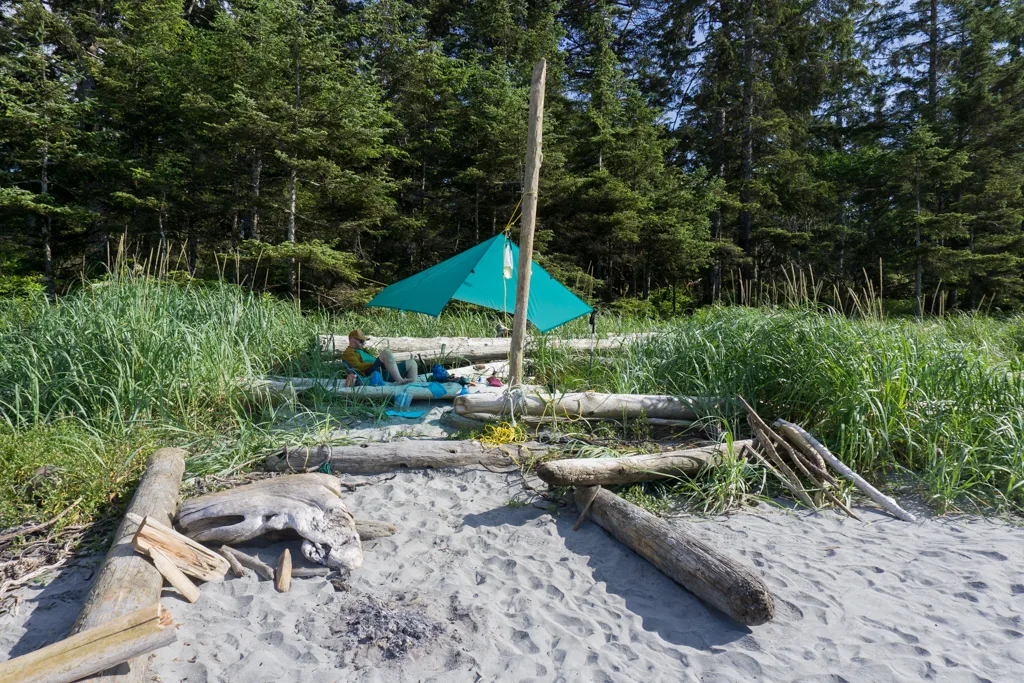
It’s also important to keep your gear dry when you’re hiking on the coast. My Gregory Amber backpack came with a pack cover, but if yours didn’t, buy a lightweight sil-nylon pack cover.
I also use lightweight dry bags inside my pack for things that absolutely need to stay dry like my sleeping bag and warm clothing. For smaller things like maps, toilet paper, etc., I use Ziploc freezer bags, which are thicker and more durable than their regular ones. Don’t throw them away after your trip – I reuse mine over and over again.
On longer trips, or when there’s rain in the forecast, I also use a pack liner. You can buy sil-nylon pack liners, but you can also just line your pack with a garbage bag. I actually use trash compactor bags. They are thicker and more durable than regular garbage bags, so they last longer – I can usually use one for a whole year.
READ NEXT: 40+ Tips for Hiking in the Rain
Keep Your Sleeping Bag Dry
One of the most common coastal hiking tips you will hear is that you need to use a synthetic sleeping bag. Unlike down, synthetic insulation will keep you warm even if it gets wet from rain, fog, or condensation. BUT… synthetic bags are bulky and heavy compared to down. If you are already own a synthetic sleeping bag, then go ahead and bring it. But if you already own a down sleeping bag, DON’T go out and buy a synthetic bag specifically for your coastal hike. It’s not necessary!
That’s right… I’m here to tell you that you can definitely use a down sleeping bag on a coastal hike. I only use down sleeping bags since they are so much lighter and more compact. I’ve spent more than 30 nights sleeping in coastal environments, all in down sleeping bags, without any problems. Here’s how I do it:
- I store my sleeping bag inside a water-resistant compression sack.
- Then I wrap the sleeping bag inside a garbage bag.
- The garbage bag -wrapped sleeping bag goes inside my pack, which is lined with a pack liner.
- And when it rains, I put a rain cover over top.
- I always use a good quality waterproof tent and make sure to vent it to avoid condensation.
- I also use sleeping bags with water-resistant outer fabric and water-resistant down fill.
- And when it’s sunny, I spread my sleeping bag out on a log or the top of my tent to let it air out.
On my coastal hikes, I’ve had days of torrential rains, tons of fog, and 100% humidity. And I’ve fallen into streams with my backpack on. My sleeping bag has never gotten more than a tiny bit damp. If you take care of your sleeping bag, you can definitely bring a down sleeping bag on a coastal hiking trip. Right now my favourite sleeping bag for beach backpacking is the Therm-a-rest Ohm 32F/0C which is super warm but packs down really small.
Beware of Blisters
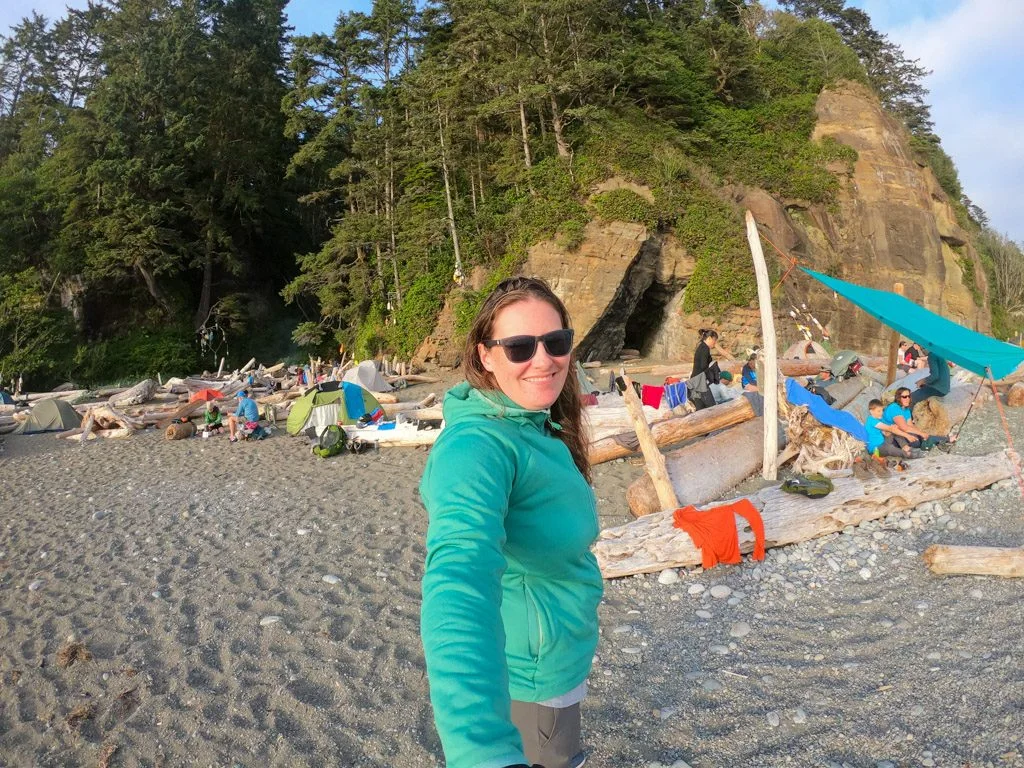
I’ve said it a few times already, and I’ll say it again: coastal hikes are terrible for blisters. All the water, sand, and rough terrain can lead to unhappy feet. I’ve got a whole guide to preventing and dealing with blisters. It’s a must-read before a coastal hike. Honestly, if you are going to take just one piece of advice from this post, make it this one. Preventing blisters is the most important of my coastal hiking tips.
Embrace the Mud
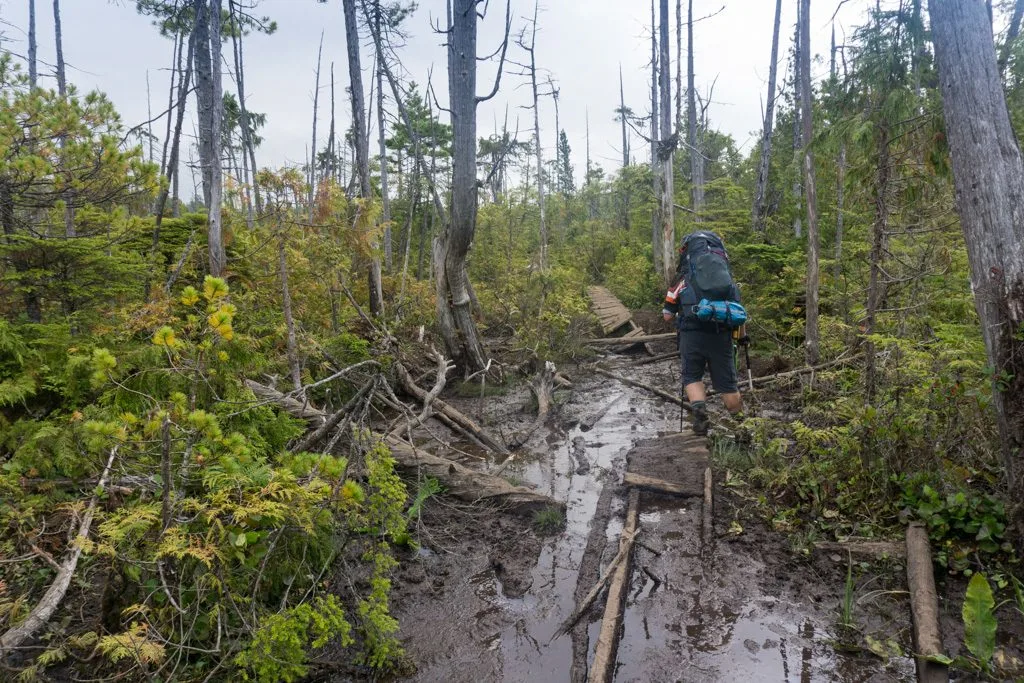
You’ll encounter a lot of mud on coastal trails. But rather than avoiding it, embrace it. Walk through the middle of the mud bogs instead of skirting around the side. The mud is usually wetter and deeper on the sides. Often there is drier ground just below the surface since the middle of the trail is usually designed for the best drainage. (Sometimes you’ll even find boardwalk or rocks hidden under that mud!) Plus, you avoid erosion and damaging vegetation by going through the center, which is a key part of Leave No Trace.
Carry a Tide Table
Knowing the timing of high tide is super important on a coastal hike for a few reasons. You want to make sure your tent is high enough up the beach to avoid waves at night. Some trails also have beach sections that are impassable at high tide or at tides of a specific height, and you’ll need to time your hike around that. Knowing the low tide can also be helpful so you know when the best times for exploring tide pools and sea caves. (Don’t miss the incredible offshore sea caves and tide pools at Shi Shi Beach and Toleak Point.)
You can find Canadian tide tables on the Fisheries and Oceans Canada website and American ones on the Tides and Currents section of the NOAA website. Be sure to select the correct table for the region you’ll be hiking in. I carry a printout of the table inside a Ziploc bag. Make sure you print out the version with the hourly predicted heights, not just the highs and lows.
Join the Backpacking in BC Facebook Group
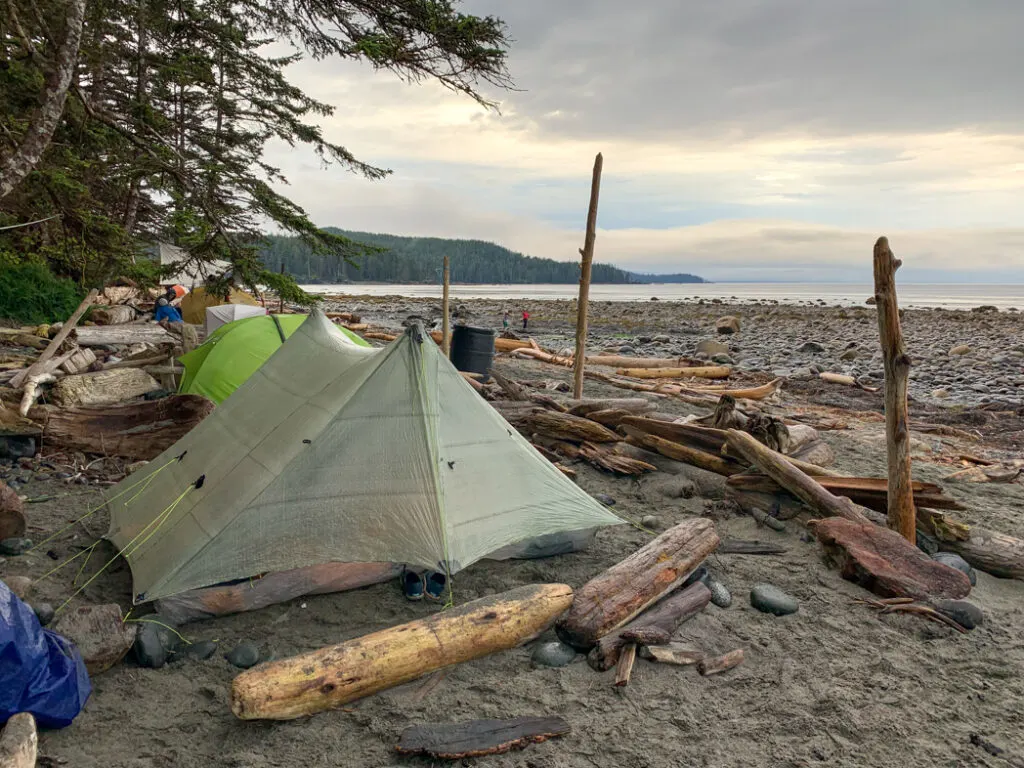
Learn to Pitch Your Tent in the Sand
Regular tent pegs will just slide out of soft sand. This leads to a saggy rain fly that droops against the interior of your tent and causes condensation to build up. In windy weather, it could also mean that your tent will blow all over the place. You can use a few different strategies to anchor your tent in the sand.
The easiest way is to peg out your tent, then place rocks on top of the pegs. This works ok sometimes but doesn’t usually hold up that well.
You can also opt for beefier tent pegs with more holding power. We often bring a few snow stakes since they work well in sand too. They are longer and have holes in them to let the sand leak through and lock into place.
Another option is to fill stuff sacks or plastic bags with sand and tie the tent out to them. For even more holding power, bury the bags in the sand.
You can also bring some lengths of guy line and tie your tent out to driftwood logs or large rocks. The trick can be finding logs that are in the right place, are light enough to move, and that have a place to loop the guy line around.
Since I use a non-freestanding Zpacks tent on many of my trips, I need to make sure my tent really stays put or it will fall down. I’ve started bringing a handful of screw-in eyelets from the hardware store on beach hikes. I screw them into driftwood and tie out my tent. When it’s time to go home, I unscrew them and bring them with me.
Secure Your Food
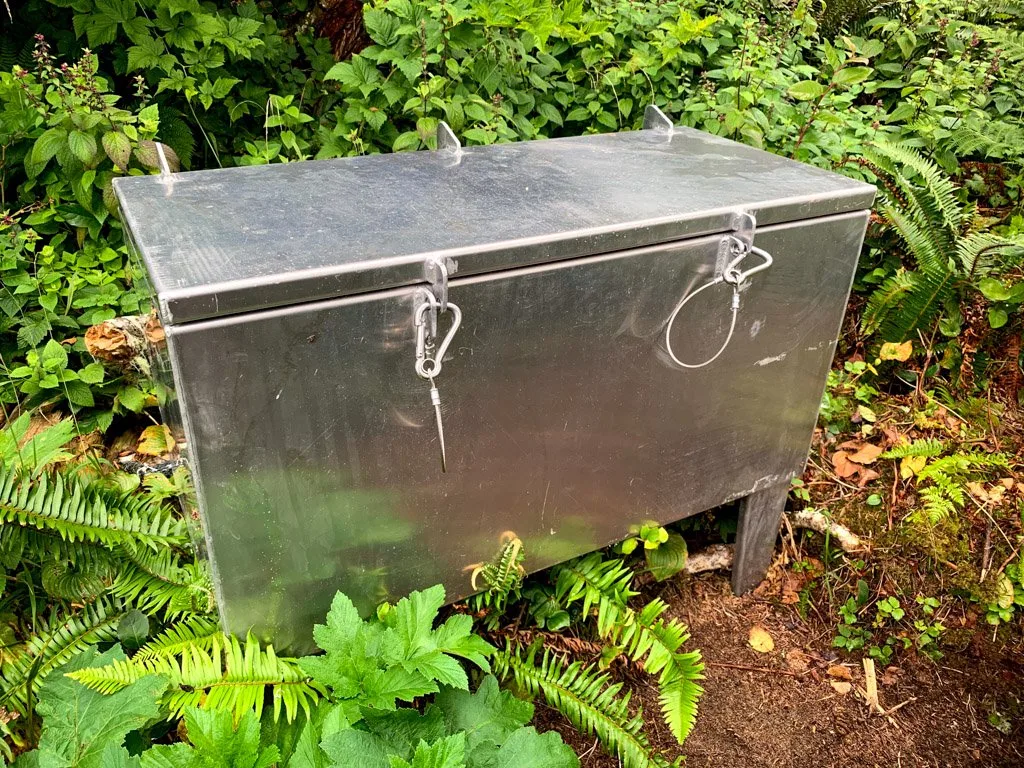
Coastal ecosystems are home to lots of critter like birds, mice, raccoons, and bears. And they all want your food. You need to secure your food away from animals or risk losing it. While losing your food might be an inconvenience to you, it can be very dangerous for other backpackers who camp there in the coming weeks and months. It’s easy for bears to progress from raiding poorly stored food to approaching people or flattening tents looking for food.
Do some research to find out what food storage options are available on your trip. On some trails, like the West Coast Trail, the Cape Scott Trail, and the North Coast Trail there are metal food storage lockers at every campsite. In other areas, like on Washington’s Olympic Coast, you will need to pack your food inside bear canisters. (There it’s mostly for the very bold raccoons.) And some places like the Nootka Trail have no food storage at all so you will need to bring rope to rig a food hang in a tree. (Read more about bear safety here.)
Respect Indigenous Land
Being respectful of indigenous land isn’t just a coastal hiking tip – it’s good practice for anywhere you hike. And really, it’s just the right thing to do.
Indigenous people have lived in what is now Canada and the US since time immemorial. When you hike, you traverse land that has a cultural history that predates European contact. On many coastal hikes, you will find shell middens, village sites, petroglyphs, and other cultural artefacts. Some trails, like the West Coast Trail, Wild Side Trail, Nootka Trail, North Coast Trail, Tatchu Trail, and Shi Shi Beach, cross indigenous reserve land. No matter which trail you hike, be respectful of indigenous land and culture – you are a guest here. Leave what you find. Native-land.ca is a great resource for researching which indigenous peoples’ land you are on.
Bring Gloves
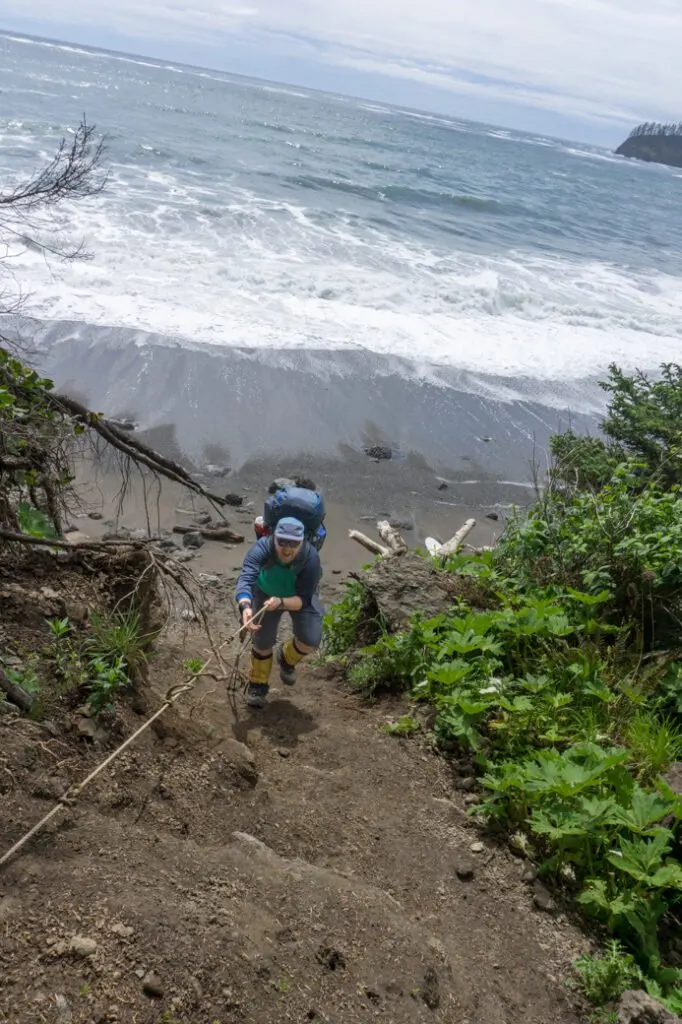
Gloves can be helpful on some coastal trails. Some people like to wear gloves to protect their hands and add grip on cable cars, ladders, and fixed ropes. Others like the added abrasion resistance that gloves provide from barnacles and sharp rocks when you’re boulder hopping or navigating technical sections of coastline.
I brought cheap nitrile-coated work gloves from the hardware store when I did the North Coast Trail. They were really helpful for the fixed ropes. I’ve had lots of people tell me they like to hike in lightweight wind gloves for the West Coast Trail ladders and cable cars or the coastal route around Owen Point. I think gloves aren’t necessary for the WCT, but if you want some, cheap work gloves are a better option. They are much less expensive too!
Wear Good Boots
There’s a lot of debate in the hiking community about whether hiking in boots or trail runners is better. I do both, so I understand both sides of the argument. However, when it comes to coastal hiking, I always wear boots.
I wear waterproof hiking boots for beach hiking. The waterproof membrane inside the boots is great for keeping your feet dry, but the bigger benefit is keeping sand out. I’ve done day hikes on the beach in trail runners with mesh panels. You end up with a shoe full of sand, which can cause blisters. No good!
If you aren’t used to carrying a heavy backpack, or you have weak ankles, you should also choose a hiking boot with ankle support. Coastal hikes involve lots of uneven terrain, roots, slippery rocks, and unstable sand. Sprained ankles are one of the most common injuries on the West Coast Trail and other beach hikes.
I wear Salomon X Ultra Mid GTX boots which are waterproof, fairly lightweight, and offer moderate ankle support. My husband wears the Salomon Quest 4D GTX boots which are similar, but a little beefier with more ankle support.
Plan Trailhead Transportation in Advance
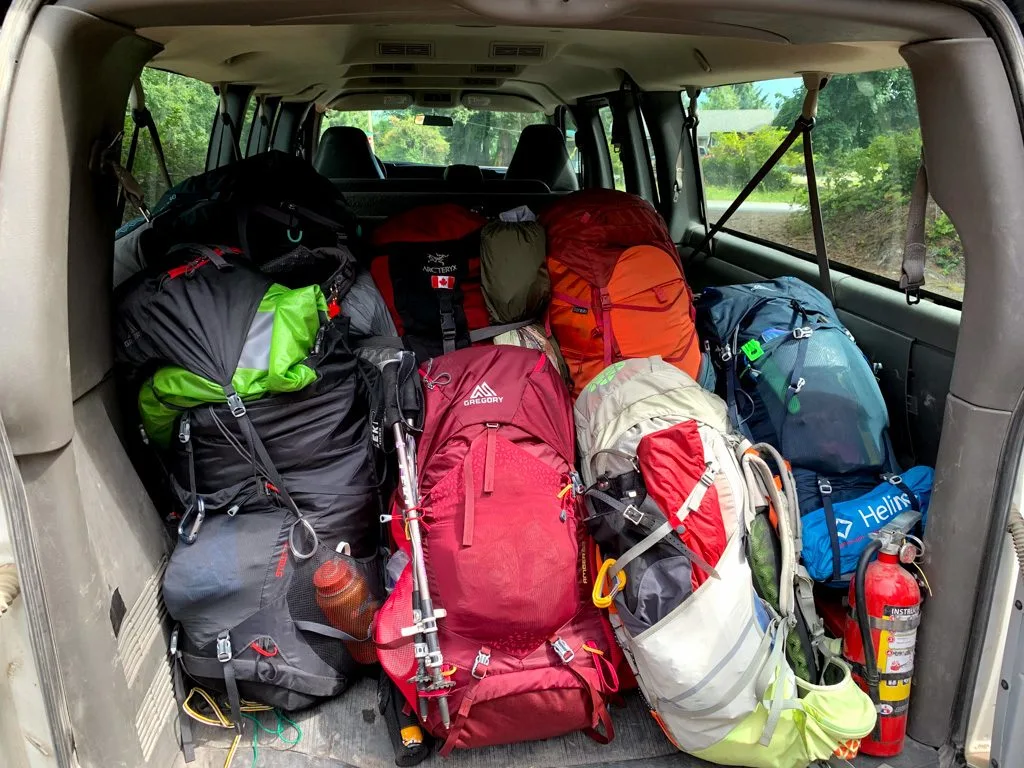
Getting to and from the trailhead for a coastal hike can be an adventure in itself. Most trailheads are in remote locations without public transportation and where hitchhiking is difficult. Some trails like the Juan de Fuca Trail and West Coast Trail have a scheduled bus. Others like the North Coast Trail, Tatchu Trail, and Nootka Trail require you to book a water taxi or charter a floatplane.
Make reservations for transportation far in advance. I’ve heard lots of stories of people who waited until the last minute to reserve, then found out the bus or boat was fully booked for their dates. And don’t rely on just showing up at the trailhead and hoping you can get on the bus. On my first West Coast Trail trip, we didn’t book transportation. On our last day we showed up at the trailhead got the last seats on the bus. A group who arrived behind us had to camp and wait a full day for the next bus!
Prep for Hot AND Cold Weather
Coastal weather is notoriously fickle. It can be sunny and smokin’ hot one minute, then cool off to a few degrees above freezing. Bring warm clothes for wearing around camp as it gets chilly in the evenings, especially when the wind kicks up. And don’t forget sun protection (sunscreen, sun hat, sunglasses) for the warm days – I’ve gotten some wicked sunburns on coastal trips.
Bring Your Gear Inside
It can be tempting to leave wet or stinky gear out overnight to let it dry off or air out. Don’t do it! As soon as the sun sets, the dew and condensation starts. The coast is a humid environment and any gear you leave out will get soaking wet. Bring everything inside your tent or vestibule, or store it under a tarp. I like to put extra gear inside my pack at night, put the pack cover on, then stow my pack inside my vestibule, under a log, or under my kitchen tarp. Of all the coastal hiking tips on this list, this one is the one that most people forget about (even me!). It’s so easy to think that your gear will dry overnight, when really it will just get wetter.
So there are all of my coastal hiking tips. Did I miss anything? What advice would you give someone heading out for a backpacking trip on their first beach trail? Tell me in the comments.
READ NEXT:
More hiking advice:
- 40+ Tips for Hiking in the Rain
- Why Do Rain Jackets Wet Out?
- 20+ Ways to Reduce Your Backpack Weight
- How to Stay Warm in a Tent: Over 40 Tips
My trail guides for British Columbia coastal hikes:
- West Coast Trail
- Juan de Fuca Trail
- North Coast Trail
- Cape Scott Trail
- Nootka Trail
- Wild Side Trail
- Tatchu Trail
My trail guides for Washington (Olympic National Park) coastal hikes:
- Grasslands National Park Travel Guide - February 4, 2026
- The Best (and Worst) Backpacking Meals Reviewed - December 16, 2025
- My Favourite Hiking Gear of 2025 - December 9, 2025


Michel
Friday 21st of January 2022
Loved your guide (all seven sections) and it gave me some ideas before I booked my trip for this August (this morning, I got the last July/August spot!) I noticed that you use the ZPacks Triplex, which is my go to tent - absolutely love the size and weight (lack thereof ;-) especially when backpacking in the Rockies. However, I had actually planned on taking a heavier but double walled tent on the West Coast Trail, as I was concerned about condensation. How did you find the Triplex handled the humidity? Thanks for the great postings, information and pictures.
Taryn Eyton
Friday 21st of January 2022
Condensation was definitely a concern with the triplex, but we decided it was worth the weight savings on a trip this long where food weight begins to be a problem. We were fortunate enough to have fairly dry conditions for most of our trip on the WCT with no significant rain and not that much fog. Since then we have hiked Cape Scott and the North Coast Trail with our triplex and I took our Zpacks Plexamid on the Juan de Fuca trail. We experienced wetter and foggier weather on those trips and definitely had some condensation inside the tent. However, were careful on all of those trips to spend a lot of time getting the pitch nice and taut so the floor vents were nice and exposed. I also find bringing a small quick dry towel to sponge down the inside of the tent helps a lot. Using a single wall tent is a lot more work and can be a little less pleasant due to the condensation, but for me the weight savings are usually worth it.
Edu Erre
Tuesday 6th of July 2021
Great article! Informative, inspiring and written from the heart; thank you very much for sharing your experience with us!
Happy trails!
Ash
Thursday 31st of December 2020
I really appreciate this comprehensive guide! I’m planning on hiking the lost coast trail this upcoming season so I’ll be sure to bookmark this for future reference! Thanks, Taryn and happy trails.