

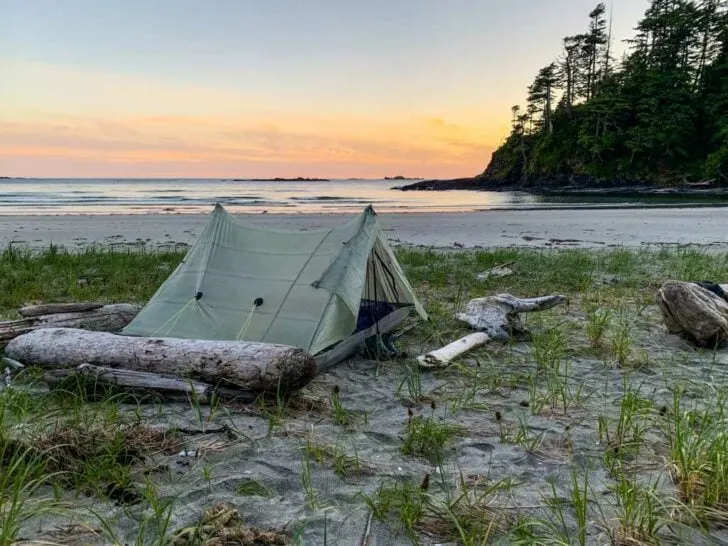
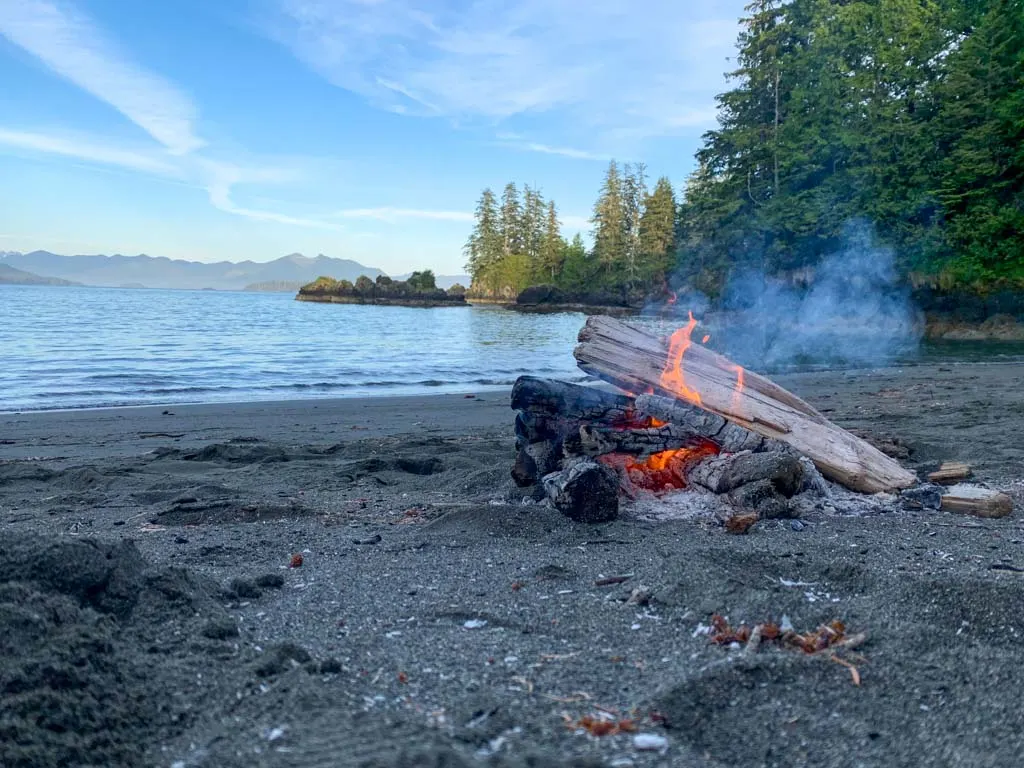
If you’re looking for a challenging and remote coastal hike on Vancouver Island, check out the Tatchu Trail. It’s a rough route along the Tatchu Peninsula where you are unlikely to encounter other hikers.
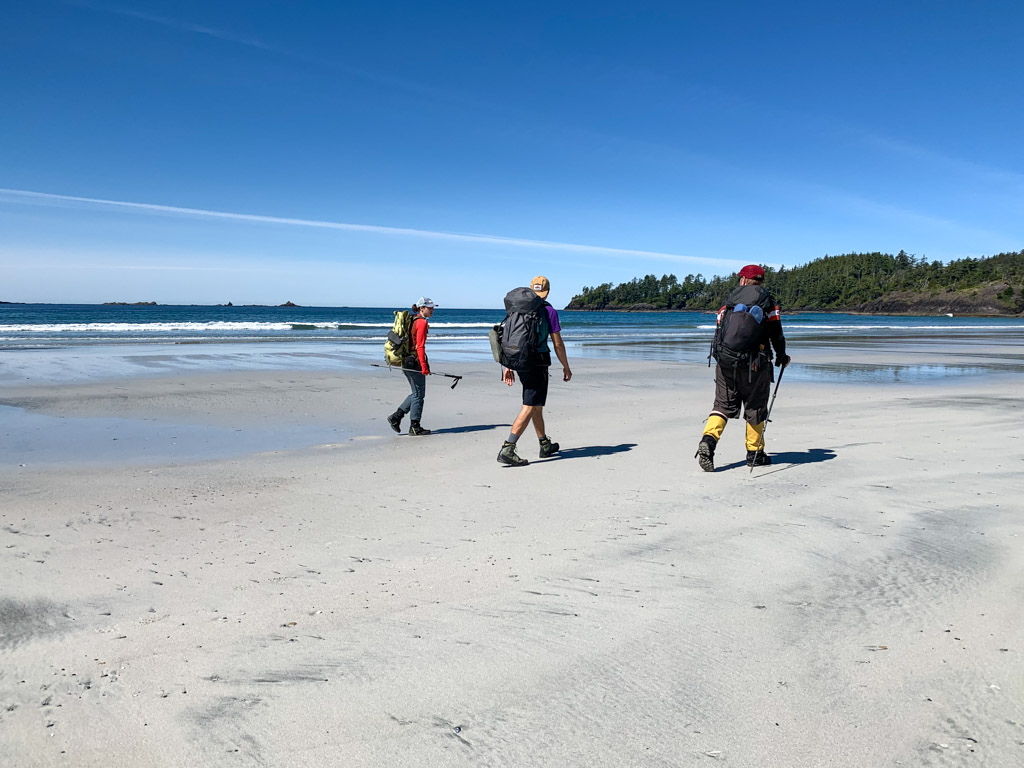
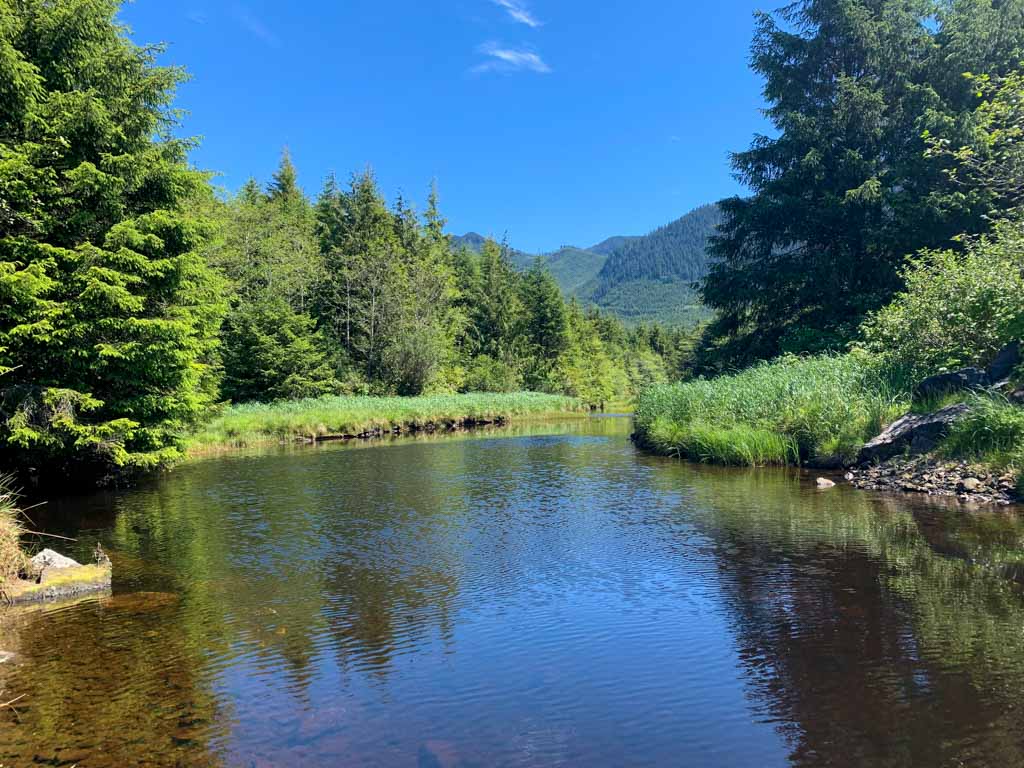
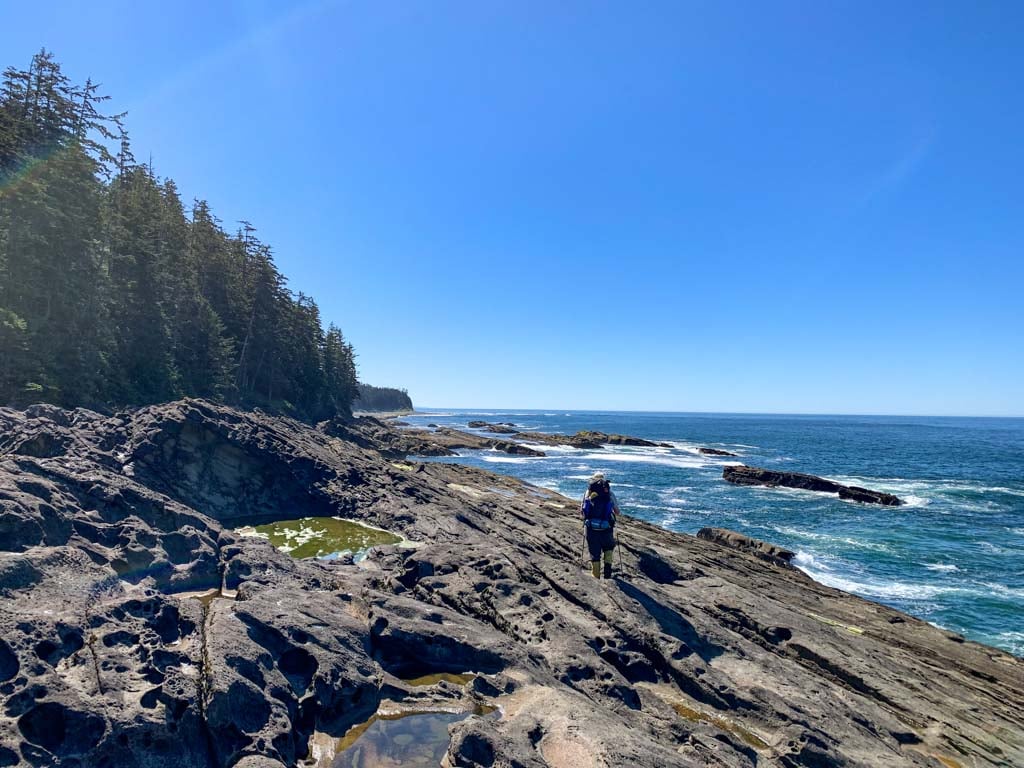
Most of the route is on the coast, with a few rough inland sections. The highlights are sandy beaches, fascinating geology and plentiful wildlife, including endangered sea otters. I thought it had some of the most beautiful scenery of any of the coastal trails in BC that I’ve hiked (and I hiked a ton of them to research my book Backpacking on Vancouver Island).
Completing the entire trail from Rugged Point to Port Eliza (32 km) is tough and best left for experienced hikers who can contend with scrambles, heights, and bush-whacking. Most hikers will prefer an out-and-back route from Rugged Point (28 km).
Keep in mind that this is a remote and challenging hike. It shouldn’t be your first coastal backpacking trip. Tackle tough trails like the West Coast Trail, North Coast Trail, or Nookta Trail first.
I hiked the Tatchu Trail in June 2022 so I’ve put together a full guide for you. It includes:
- Quick facts about the Tatchu Trail
- Tatchu Trail itineraries including distances and difficulty
- How to get to the Tatchu Trail by float plane or water taxi from four different towns
- Key distances on the Tatchu Trail in an easy-to-read chart
- Tatchu Trail description, broken up into sections
- Tatchu Trail FAQ including questions about distance, difficulty, bears, water, weather, and more
This is a sensitive wilderness area. Learn how to Leave No Trace to keep the wilderness wild. Make sure you are prepared by bringing the 10 Essentials. Get ready for adventure with this checklist of things to do before every hike.
Hey there: Some of the links in this post are affiliate links, which means I earn a small commission at no cost to you. Thanks for your support. -Taryn
Tatchu Trail Quick Facts
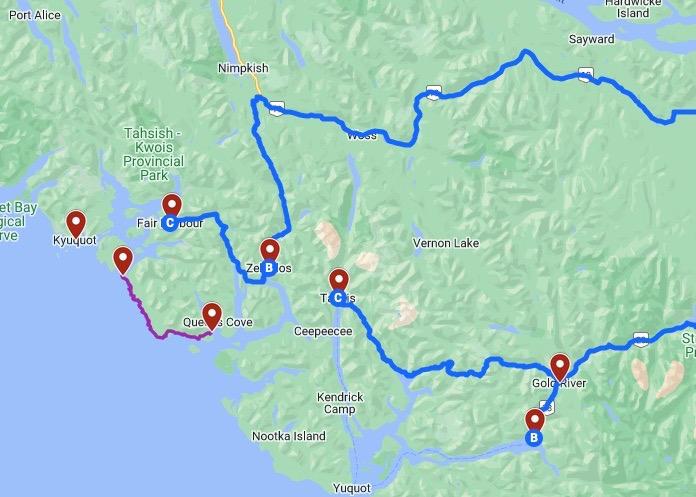
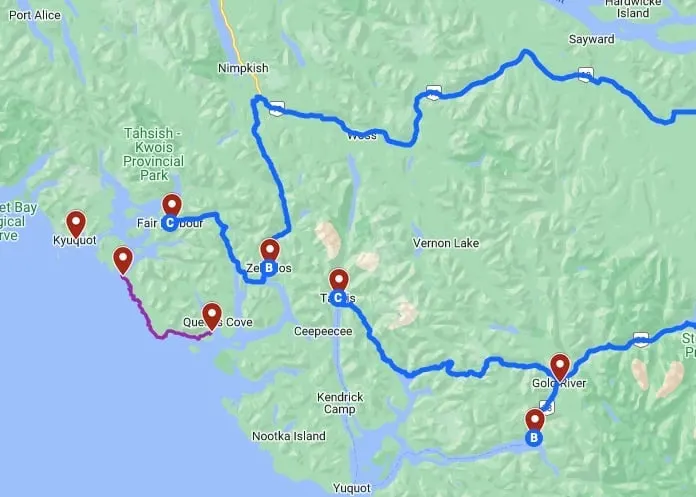
Location: The west coast of Vancouver Island north of Gold River and Nootka Island. The Google Map (above) gives you a good idea about where it is.
Distance: 20-40 km
Difficulty: Moderate to Very Challenging
Time: 4-5 days
Cost: No trail fees, but water taxis or float planes will cost you a few hundred dollars per person for a group of four. (Prices depend on how many people are in your group and where you leave from. See Getting There, below.)
Best time to go: Late June to early September
Indigenous context: The Tatchu Trail is in the traditional territory of the Ehattesaht and Ka:’yu:’k’t’h’/Che:k:tles7et’h Nations, two of the 14 nations in the Nuu-chah-nulth Tribal Council. The word Tatchu comes from a Nuu-chah-nulth word meaning “to chew”, likely after a beach near Tatchu Point that was used as a feasting and fishing location by the Ehattesaht Nation.
Join the Backpacking in BC Facebook Group
Tatchu Trail Itineraries
There are several different ways to complete the Tatchu Trail. The itinerary you choose depends on a few things: 1) budget – water taxis are cheaper than float planes; 2) skill level and comfort with heights – the middle section of the trail includes some very challenging terrain with cliffs; 3) the amount of time you want to spend both on the trail and travelling to the trail.
While there are several different float plane and taxi companies, they each will only pick up and drop off at certain locations due to their vessel types and ocean conditions. See the Getting There section below for more info.
In general, the northern part of the trail is the most scenic and the least challenging. The middle includes the most challenging terrain. The southern end is an overgrown road walk with a challenging scramble. I’ve outlined the itinerary options below.
Rugged Point to Tatchu Creek (Return)
Distance: 28 km
Time: 2-5 days
Difficulty: Moderate
This out-and-back hike is the best option for most parties as it includes the best scenery and skips the challenging scramble and road walk. I recommend doing a day hike from Tatchu Creek to Sandstone Point (5 km each way) to explore the rock formations and tidepools at Sandstone Point.
There are two transportation options for this itinerary: Water taxi from Fair Harbour or floatplane from Gold River.

Rugged Point to Yellow Bluff Bay (Return)
Distance: 40 km
Time: 3-6 days
Difficulty: Very Challenging
This is the option that I used. It lets you complete most of the trail (including the challenging scramble and cliff), but skip the road-walk section. You can start from either Rugged Point or Yellow Bluff Bay.
It also has the cheapest and easiest transportation logistics as you just need to get a water taxi from Tahsis or Fair Harbour. We chose Tahsis since it was a shorter drive from Nanaimo than Fair Harbour.
Rugged Point to Yellow Bluff Bay (One-way)
Distance: 20 km
Time: 2-3 days
Difficulty: Very Challenging
You can complete this one-way hike in either direction. While this itinerary is shorter than completing the same trip as an out-and-back, the transportation logistics are much more complicated.
To do this as a one-way hike, you will need a water taxi from Tahsis to Yellow Bluff. On the other end, you can get a float plane from Rugged Point to Gold River or a water taxi from Rugged Point to Fair Harbour.
Then you will need to arrange a car shuttle between either Fair Harbour and Tahsis (6 hours drive one-way) or Gold River and Tahsis (1.5 hours one-way).
Rugged Point to Port Eliza (One-Way)
Distance: 32 km
Time: 3-5 days
Difficulty: Very challenging
This option is for completionists who will only be content after hiking the entire Tatchu Peninsula. The southern 12 km of the hike is on an overgrown road with a bad wash-out, so I opted to skip this section after talking to people who had hiked it.
Transportation for this option is easiest if you take a float plane from Gold River to Port Eliza, then have the float plane pick you up at Rugged Point. That way you don’t have to do a car shuttle.
If you want to save some money, you can take a water taxi from Zeballos to Port Eliza. At the other end, book a water taxi from Rugged Point to Fair Harbour. Then arrange a car shuttle between the Zeballos and Fair Harbour (1 hour drive one-way).
You can also cut down on costs and logistics by doing an out-and-back trip (64 km) from either Rugged Point or Port Eliza.

How to get to the Tatchu Trail
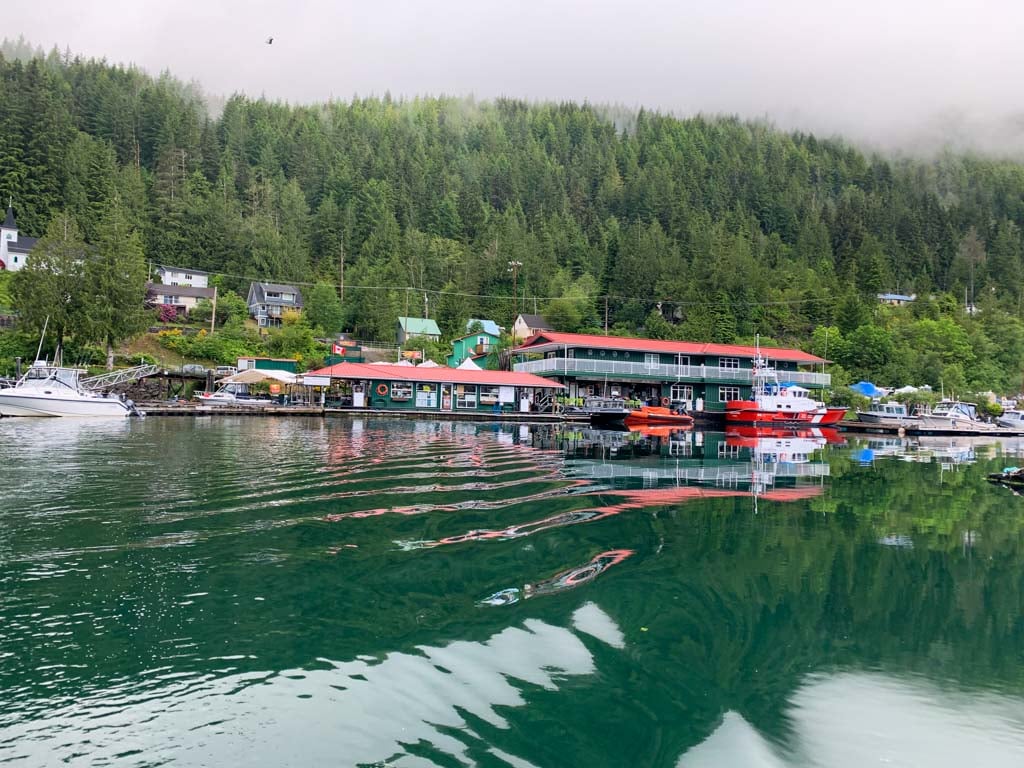
As mentioned in the itinerary section, you can get to the Tatchu Trail from Gold River, Tahsis, Zeballos and Fair Harbour. Details on how to get to each place and water taxi/float plane providers are below.
Many of these options involve forest road driving. A GPS with a backroad map layer (I recommend Gaia GPS) or the Vancouver Island BC Backroad Mapbook is helpful.

From Gold River to Rugged Point or Port Eliza
Head north on Highway 19 from Nanaimo to Campbell River. Take Highway 28 west through Strathcona Park past the town of Gold River to its end at the Muchalaht Marina. It’s a 3-hour drive from Nanaimo.
Air Nootka offers charter flights to Rugged Point and Port Eliza on their Cessna (max 3 passengers) or Beaver (max 6 passengers). Prices are per flight. Check their website for the latest prices. You can save some money by taking their scheduled flights to Port Eliza which run a few days a week.
At Port Eliza, they land at an old logging dock. At Rugged Point, they drop-off in shallow water or on the rocks (tidally dependent) so plan to get wet on landing. They can’t land anywhere else along the trail as the waters are too rough.
Plan to stay overnight in Gold River before your flight. The Gold River Chalet gets good reviews. You can also camp at the first-come, first-served Gold River Municipal Campground just west of town.
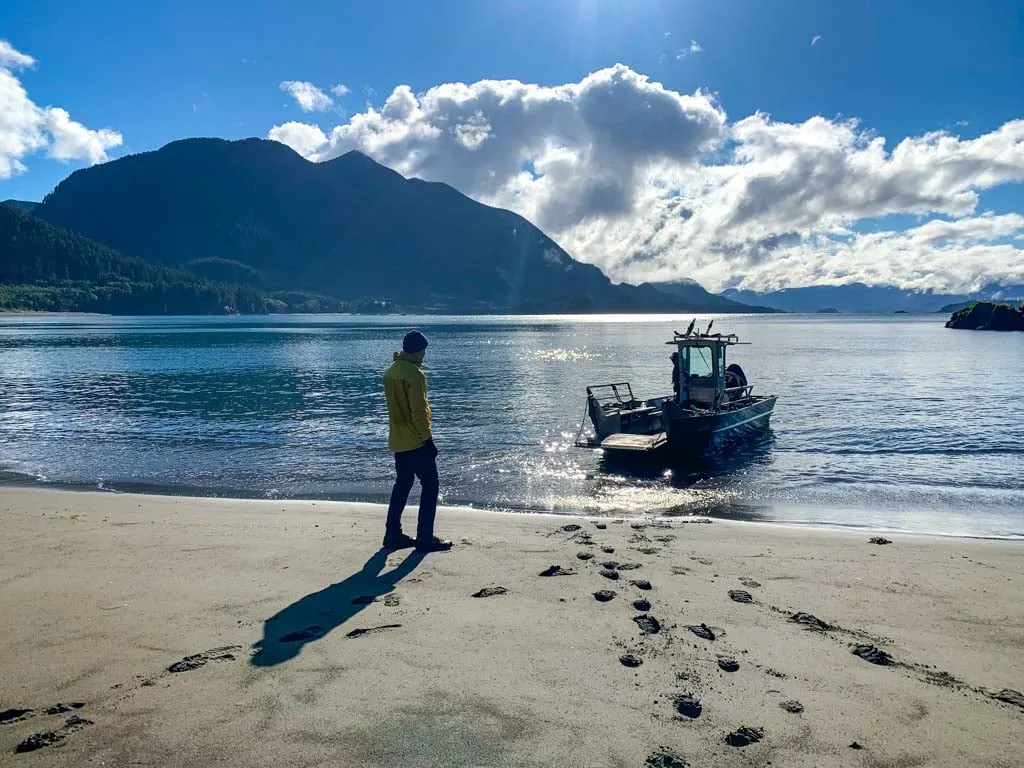
From Tahsis to Yellow Bluff
Follow the driving directions above to the village of Gold River, then turn right onto Gold River Road. Continue for 3 km, then turn left onto a bridge.
After the bridge, follow the sign for Tahsis, going left onto Head Bay Road. Stay on this gravel road for another 62 km into Tahsis. The road is bumpy but fine for 2WD vehicles.
In Tahsis, cross the bridge over the river, then follow South Maquinna Drive to Westview Marina, where there is pay parking. It is a 4.5-hour drive from Nanaimo.
Shorebird Expeditions water taxis leave from the marina for pickups and drop-offs at Yellow Bluff Bay west. They don’t drop-off at Port Eliza and other locations along the trail are too far away from their base in Tahsis.
Their water taxi seats up to 10 and is a landing craft, which means it can pull right up to the beach – you won’t get wet when you land. Contact them for pricing, which is per trip.
Water taxis go out early in the morning to take advantage of calmer water. Plan to stay overnight in Tahsis before your trip.
The Westview Marina (where the water taxi leaves from) has hotel rooms and vacation home rentals. If you want to camp, stay at the Leiner River Rec Site between Gold River and Tahsis.

From Zeballos to Port Eliza
Go north from Nanaimo past Campbell River. A few minutes north of Woss, just after a bridge over Steel Creek, turn left onto Zeballos Forest Service Road. Watch for signs for Fair Harbour and Zeballos.
The next 42 km are on 2WD-accessible gravel roads. Follow signs for Zeballos at all major junctions. It is a 4-hour drive from Nanaimo.
Zeballos Expeditions offers water taxi service from the Zeballos marina to the old dock at Port Eliza. They don’t have a landing craft so they won’t drop off at Yellow Bluff and other locations along the trail are too far away for them to go. Their boat seats up to 12 passengers. Contact them for pricing, which is per trip.
Water taxis go out early in the morning to take advantage of calmer water. Plan to stay in Zeballos before your trip. The main hotel is the Cedars Inn, which is run by the same people as the water taxi. You can also camp at Cevallos Campsite in town.
From Fair Harbour to Rugged Point
Use the directions above to get to Zeballos. Continue past the town on Zeballos Main, which becomes Fair Harbour Main. Follow signs for Fair Harbour for another 34 km. It’s a 5-hour drive from Nanaimo.
Fair Harbour is a private resort with cabins, a campground, and a marina. Plan to stay there before your trip.
Both Voyageur Water Taxi and Siiqaa Water Taxi operate out of the nearby boat-in Indigenous community of Kyuquot. They ferry passengers between Fair Harbour and Rugged Point. Contact them for pricing, which is per trip.
At Rugged Point they drop-off on the rocks or in shallow water (depending on the tide) so be prepared to get wet.
READ NEXT: Coastal Hiking Tips: Advice for Beach Backpacking
Key Distances on the Tatchu Trail
| KM | Location |
| 0 | Rugged Point Camp |
| 2.5 | Gross Point |
| 3 | Sandpiper Creek Camp |
| 4 | Kapoose Creek |
| 5 | Brecciated Point |
| 6.5 | Mushroom Point |
| 8 | Porritt Creek Camp |
| 10 | Surge channel |
| 11 | Unnamed Creek |
| 14 | Tatchu Creek Camp |
| 16.5 | Sandstone Point Scramble Route South End |
| 16.7 | Sandstone Point Scramble Route North End |
| 19 | Cliff with rope |
| 20 | Road Junction Camp and route to Yellow Bluff Bay West Camp |
| 21 | Logging road spur junction |
| 23.5 | Road washout and Yellow Bluff Bay East Camp |
| 32 | Port Eliza dock |
Join the Backpacking in BC Facebook Group
Tatchu Trail Description
As I said in the Tatchu Trail Itineraries section (above) there are several ways to hike the trail starting at Rugged Point, Yellow Bluff, and Port Eliza. As well, you can do the trail as a point-to-point or as an out-and-back.
The most scenic part of the trail is at the northern end. It’s the easiest too. For that reason, I’ve chosen to begin this description in the north at Rugged Point.
Rugged Point Camp
Your water taxi from Fair Harbour or float plane from Gold River will drop you off at Rugged Point Marine Provincial Park.
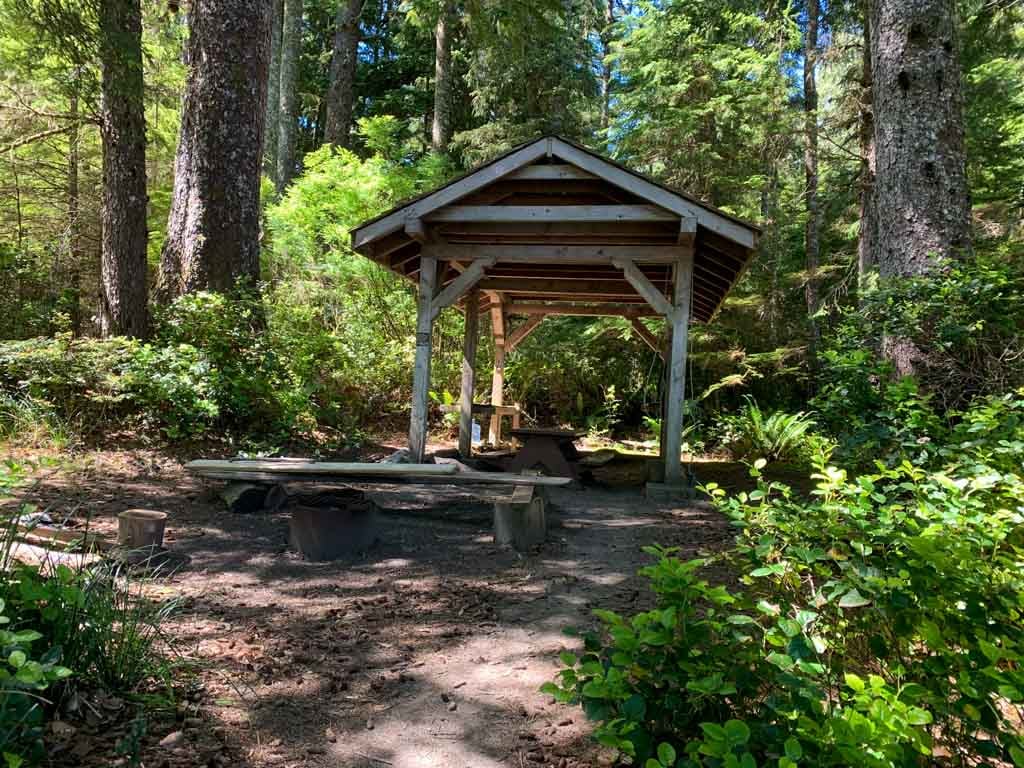
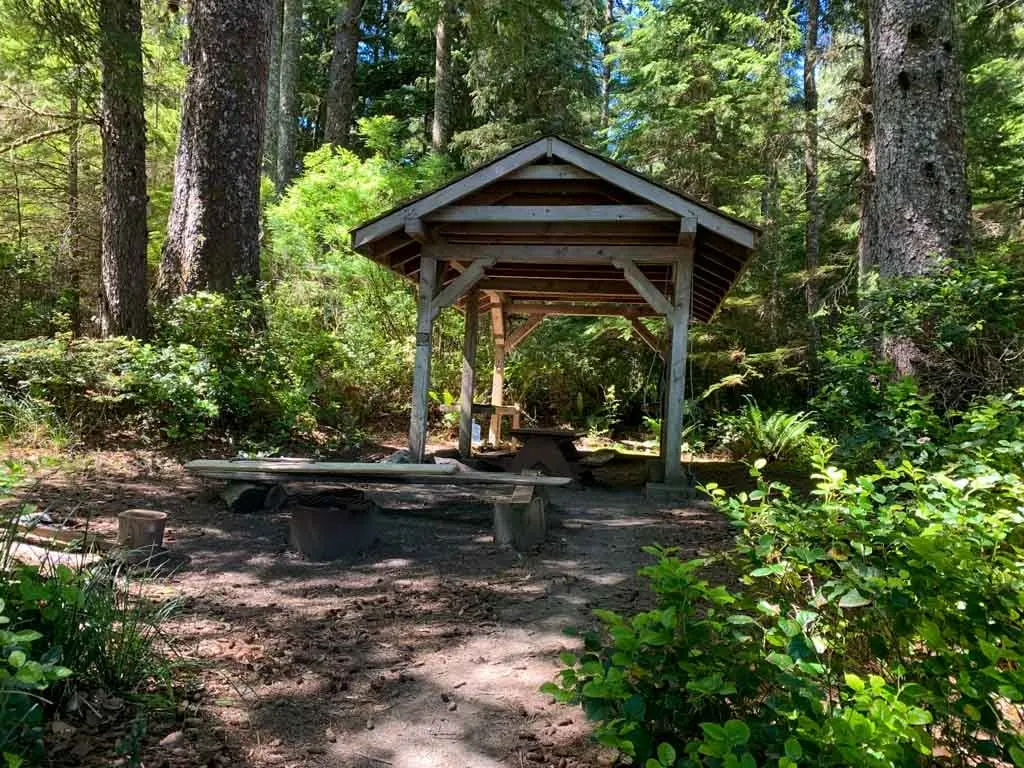
Located, right at the trailhead, this is the only designated campground on the Tatchu Peninsula and the only one with facilities. It has a beautiful sandy beach and can be busy with kayakers and pleasure boaters.

It has an open-sided cooking shelter with a picnic table. There are three wooden tent platforms and one clearing beside the cooking shelter. In an emergency, there are some marginal tent sites on the sand above the high-tide line.
There is a metal food locker behind the cooking shelter. Follow the trail for a few minutes to a composting toilet.
There is no water at this campground. Plan to bring your own on the water taxi or float plane. The closest reliable water source is at Sandpiper Creek 3 km away. You may be able to find seasonal streams on the beach between Rugged Point and Gross Point, but they will likely be dry in summer.
Get My Book…
Backpacking on Vancouver Island
Discover Vancouver Island’s best day hikes and overnight trips
- 25 backpacking trips and 10 day hikes throughout Vancouver Island
- Info about permits, reservations and campground facilities
- Detailed maps and photos
- Advice for extending your trip
- Points of cultural and natural history
Rugged Point to Sandpiper Creek
Distance: 3 km
Time: 1 hour
Difficulty: Moderate
To start your hike, look for the trail just to the left of the cooking shelter. This is the only maintained path on the entire Tatchu Trail. In the first few minutes, it passes the side trail to the outhouse.
Follow the trail through an old-growth forest with several large Douglas fir trees. There are boardwalks across boggy sections.
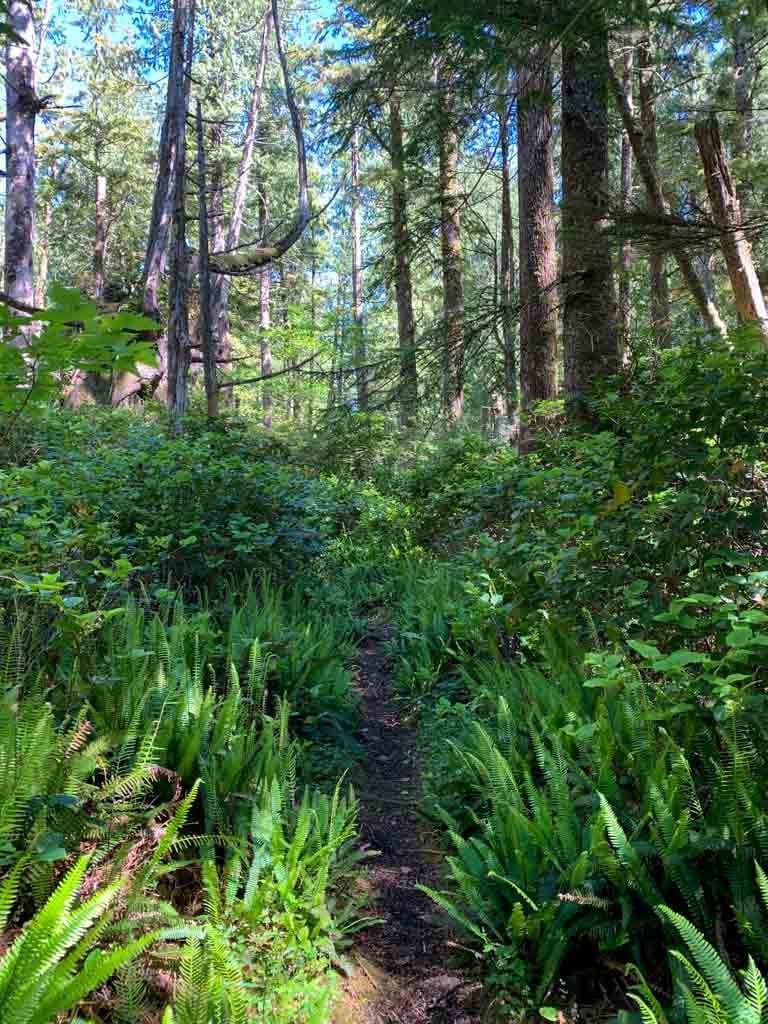

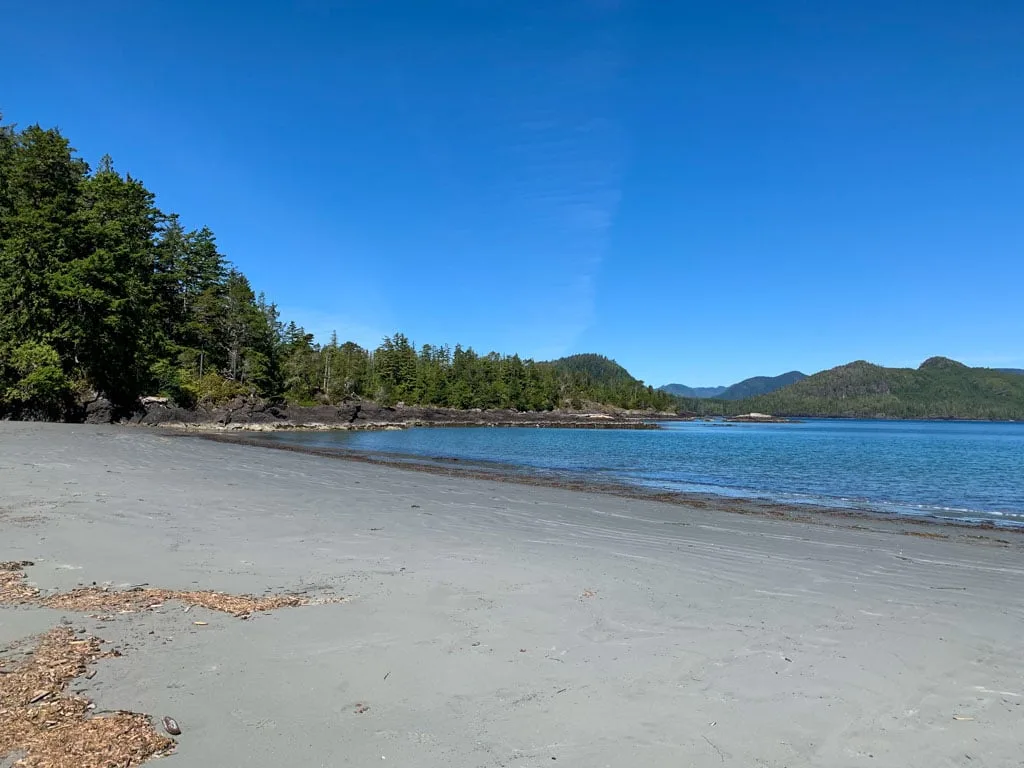
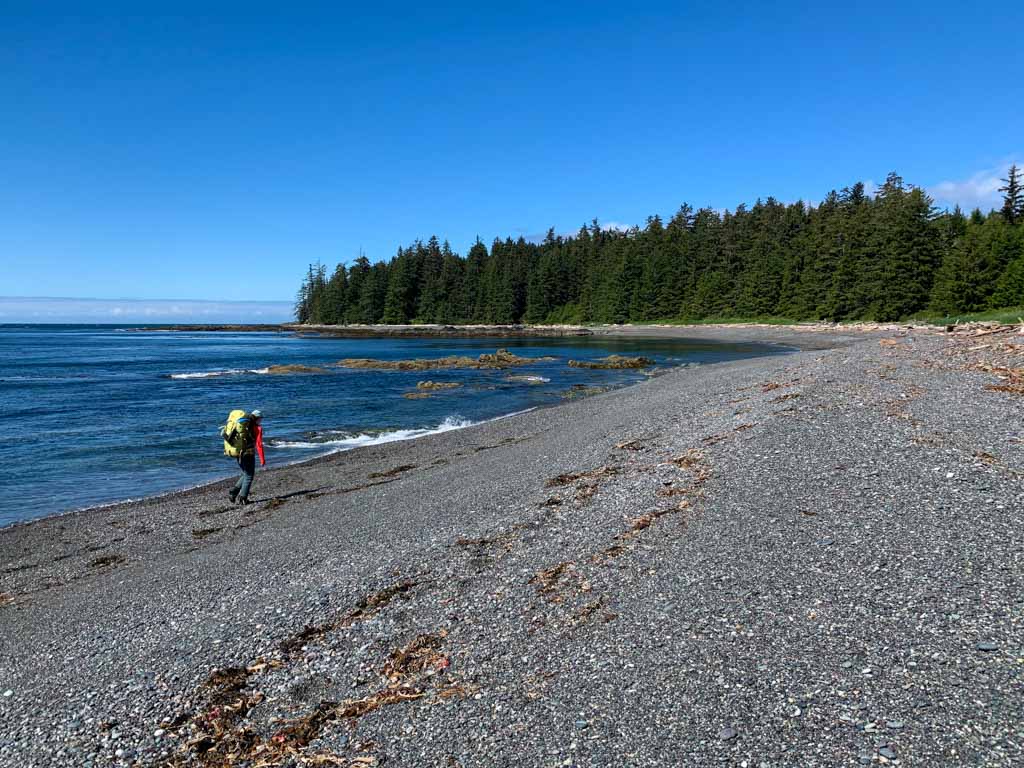
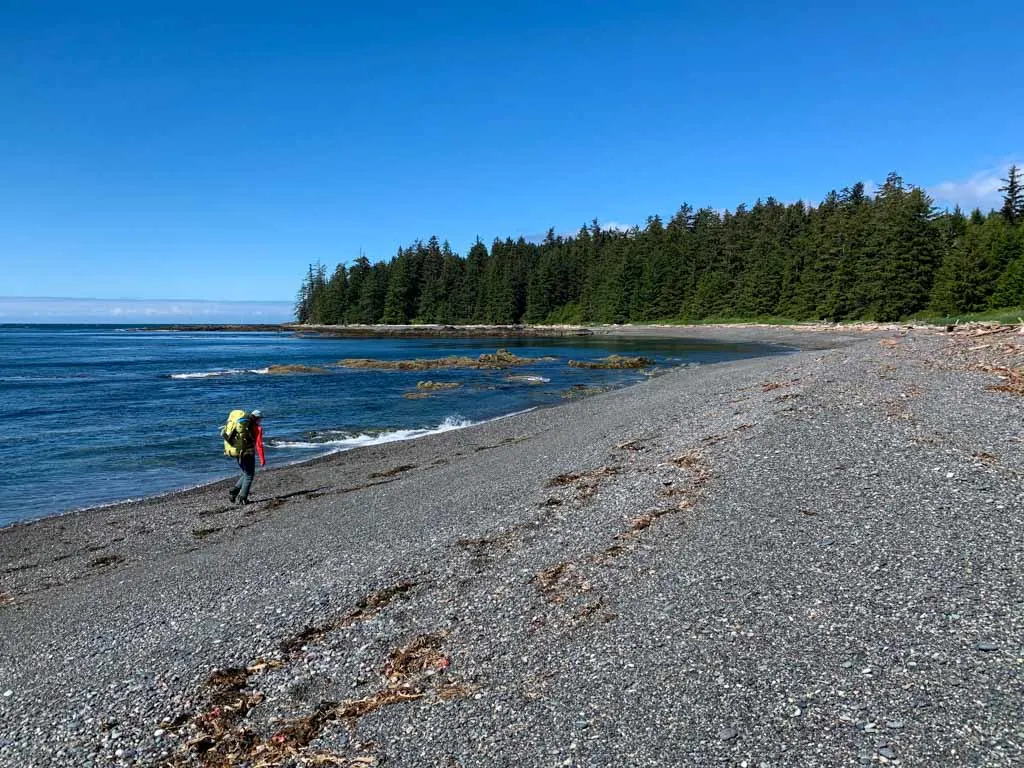
Emerge back onto the beach about 0.4 km from Rugged Point. This is the first of several gorgeous white sand beaches in small coves.
From here, your next move is determined by the tide. If it is below 2 m (6.6 ft) go left on the beach around the first rocky headland. If the tide is up, go left a few minutes down the beach to a trail entrance.
This trail, like other overland trails on the Tatchu Peninsula, may be marked with a fishing buoy hanging in a tree. However, unlike other more popular coastal trails like the Juan de Fuca Trail, West Coast Trail, and North Coast Trail which feature well-marked overland trails, on the Tatchu Trail the buoys may be missing or hard to spot.
The two routes come together in a tiny, steep-sided cove. At the northeast corner of the cove, follow a rugged trail uphill with the help of a fixed rope and a wooden ladder. At the top, use another set of ropes to descend to a sandy cove.
Stay on the beach and walk left around the next headland at tides below 2 m (6.6 ft). At higher tides, use the trail in the northeast corner of the cove. It heads back from the beach and around a large outcropping.
Arrive on a beautiful sandy beach that stretches for over 1 km southeast to Gross Point. In the center of the beach, look for a trickle of a stream. However, it is not reliable and runs dry by early summer.

Continue along the beach as it curves behind the rocks of Gross Point and dips into a smaller cove. From there, a short, rough trail leads through the salal over the headland. Find it on the far side of the cove just before the cliffs begin.
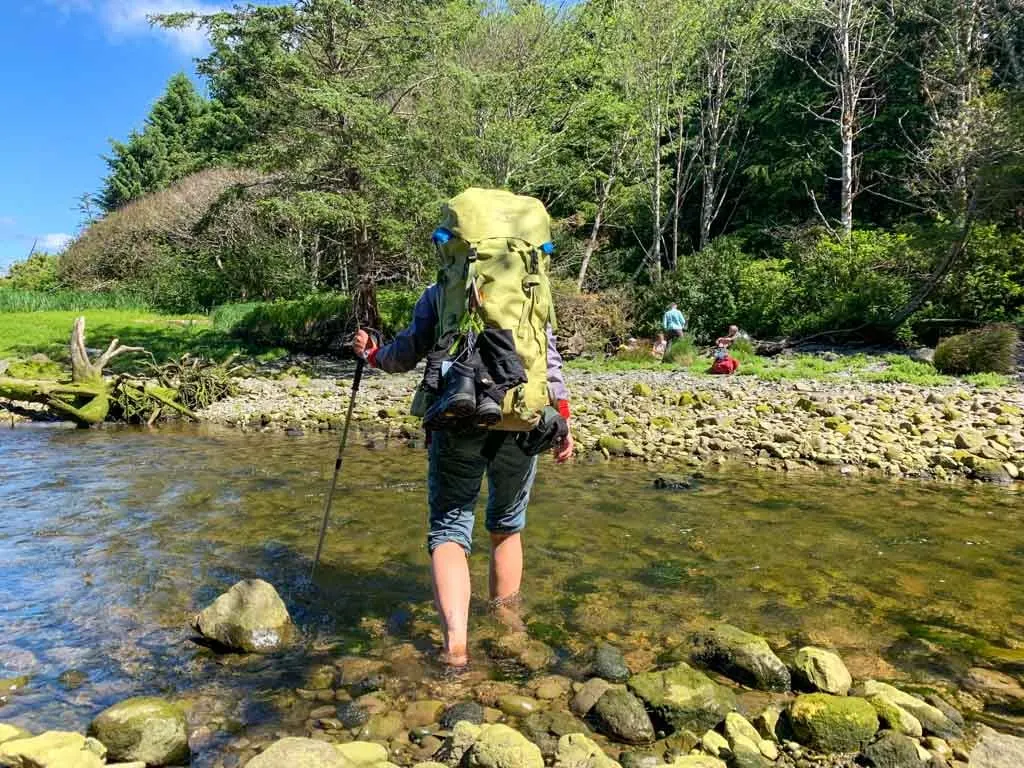
On the other side of the headland, the trail comes out of the forest next to a large tree atop a rock. You have arrived at Sandpiper Creek. At lower tides, you can hop across the creek, but at higher tides, you’ll need to remove your boots and wade.
Sandpiper Creek Camp
This is a beautiful campsite set at the back of the long white sand beach on the south side of Sandpiper Creek. It is the first reliable water source if you are hiking from Rugged Point. However, it is close to the development at Kapoose Point, a small portion of which is visible from camp.
There are lots of flat campsites amongst the driftwood at the back of the beach. You can also camp a few minutes away near Gross Point.
Collect drinking water from Sandpiper Creek. At high tide, follow a rough trail upstream on the south bank to avoid saltwater contamination.
There is no toilet here. Dig a cat hole in the forest in the centre of the beach, avoiding Sandpiper Creek to the north and Kapoose Creek to the south.
There is also no food cache. Bring a rope to hang your food in a tree. The best hanging options are on the north side of the creek.

READ NEXT: Bear Safety for Backpackers
Sandpiper Creek to Porritt Creek
Distance: 5 km
Time: 1.5-2.5 hours
Difficulty: Moderate/Challenging
From Sandpiper Creek, walk south along the fine-sand beach for nearly 1 km to Kapoose Creek. At low tide, Kapoose Creek is another good water source but it can get contaminated with salt water.
At low tide, wade across the creek. However, it is worth detouring to the edge of the forest to cross on a sturdy floating bridge, part of the Kapoose Creek development.

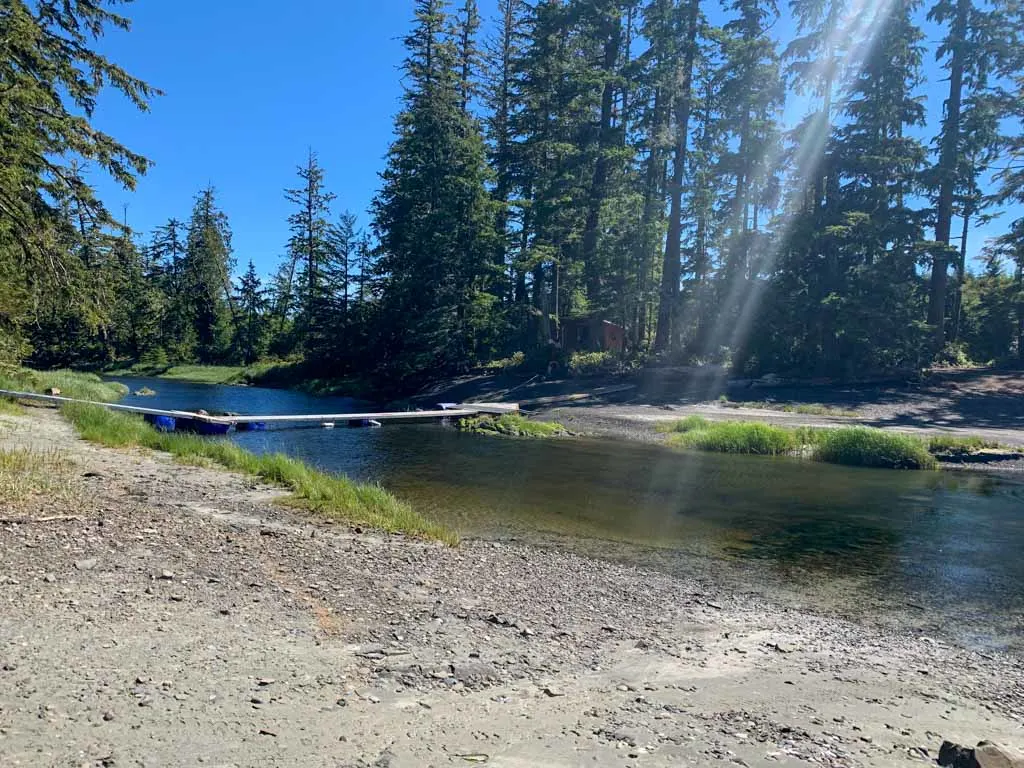
There is lots of development happening on private property near Kapoose Creek. From talking to people who live and work there, it seems to be mostly an off-grid housing development and a medicinal mushroom research facility. The construction takes away from the wilderness feel, but thankfully, you will pass through the area quickly.
Past the bridge, follow the grassy shoreline behind the rocks and back towards the ocean. Look for a short trail through the brush to cross a headland. Walk across a brief stretch of sandy beach, then clamber around a rocky point.
There is a rock jetty in the small cove here. It is the main supply point for the Kapoose Creek development. Cross the jetty and follow the beach as it transitions to a volcanic rock outcropping at Kapoose Point. Look for a triangular sea stack just offshore.

Descend off the rocks and walk across a sandy beach for a few minutes. To your left, you might be able to see clearings in the forest that lead to roads and construction at the Kapoose Creek development.
There is actually a huge abandoned logging road system on the peninsula. One branch of it parallels the coast from Kapoose Point to Tatchu Creek. On my trip, we met a group who had hiked some of the roads to avoid walking along slippery coastal cliffs in the rain.
They reported that the roads were very overgrown with berry bushes and they spotted a lot of bears. The roads aren’t marked on any maps, but you can see them easily with a satellite photo overlay on a GPS app like Gaia GPS.
I haven’t walked the roads, but they sound less pleasant than the coast due to lots of vegetation and lack of views. However, if you don’t want to walk on the coast through the easy scramble sections around Brecciated Point and Mushroom Point, you could try the road option.
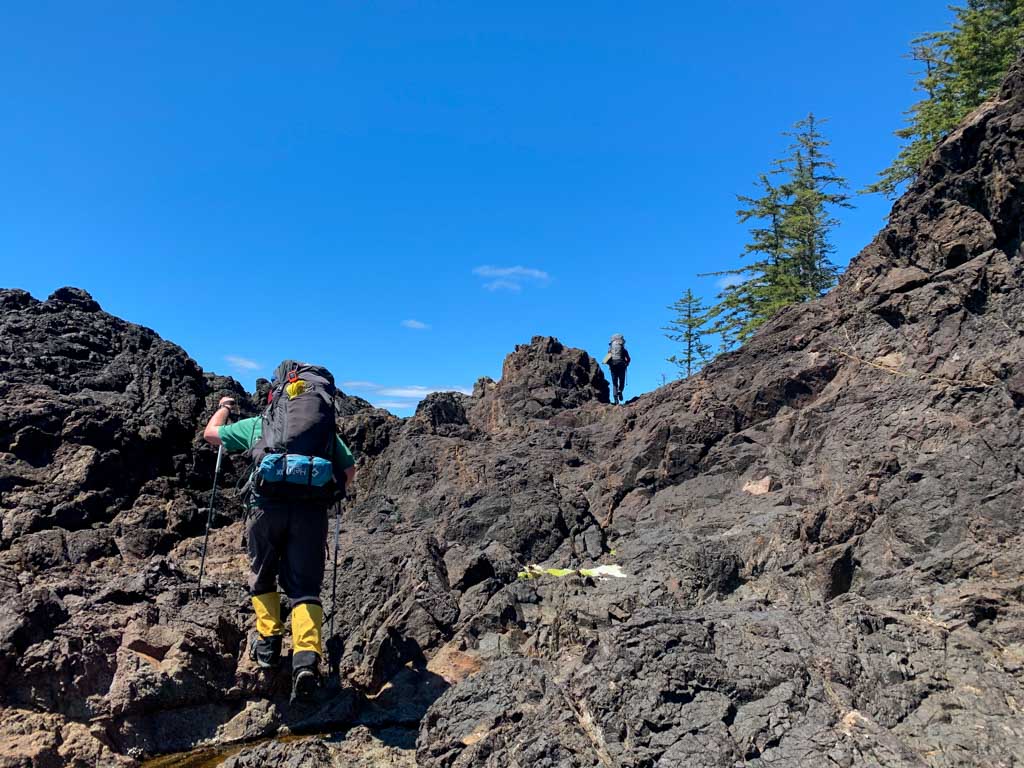
Continue hiking along the coast to Brecciated Point, which is made up of more interesting volcanic rocks broken up by small pockets of sandy beach.
Breccia is a type of rock made of up pieces of other rocks cemented together. This is volcanic breccia composed of blocks of lava that have solidified, broken apart, been reincorporated into the liquid magma, then solidified again.

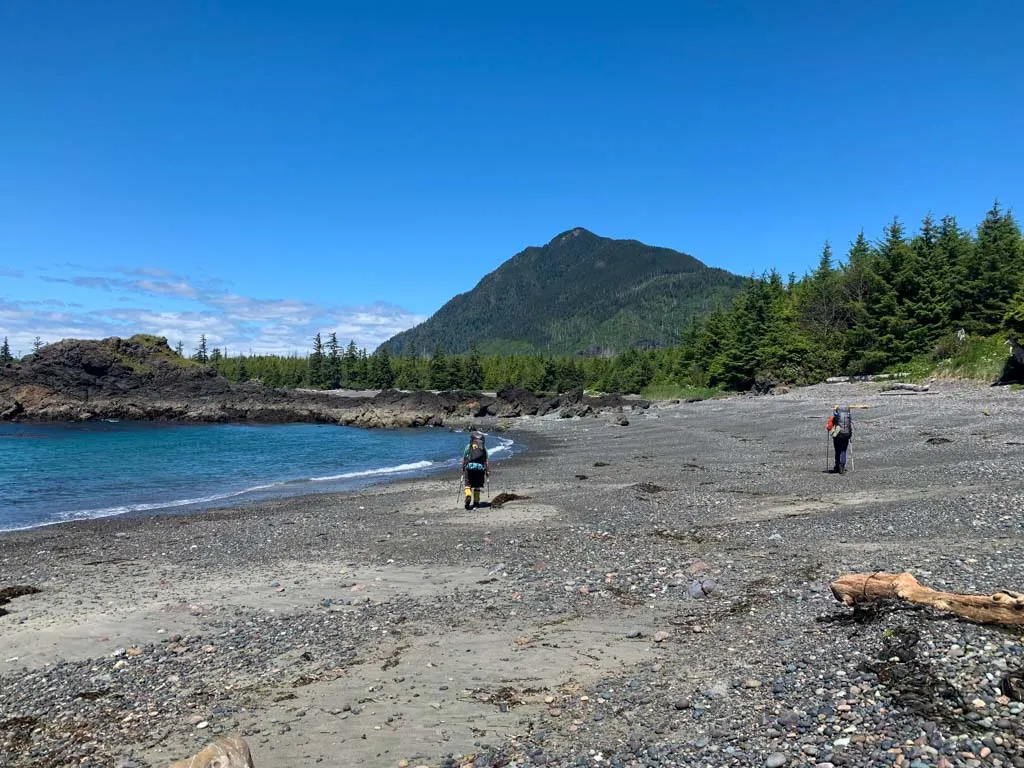
Walk across a few fine gravel beaches to arrive at Mushroom Point, which kind of looks like a mushroom from the air. Look for a vague trail through the bushes to a grassy area with wildflowers behind the point.
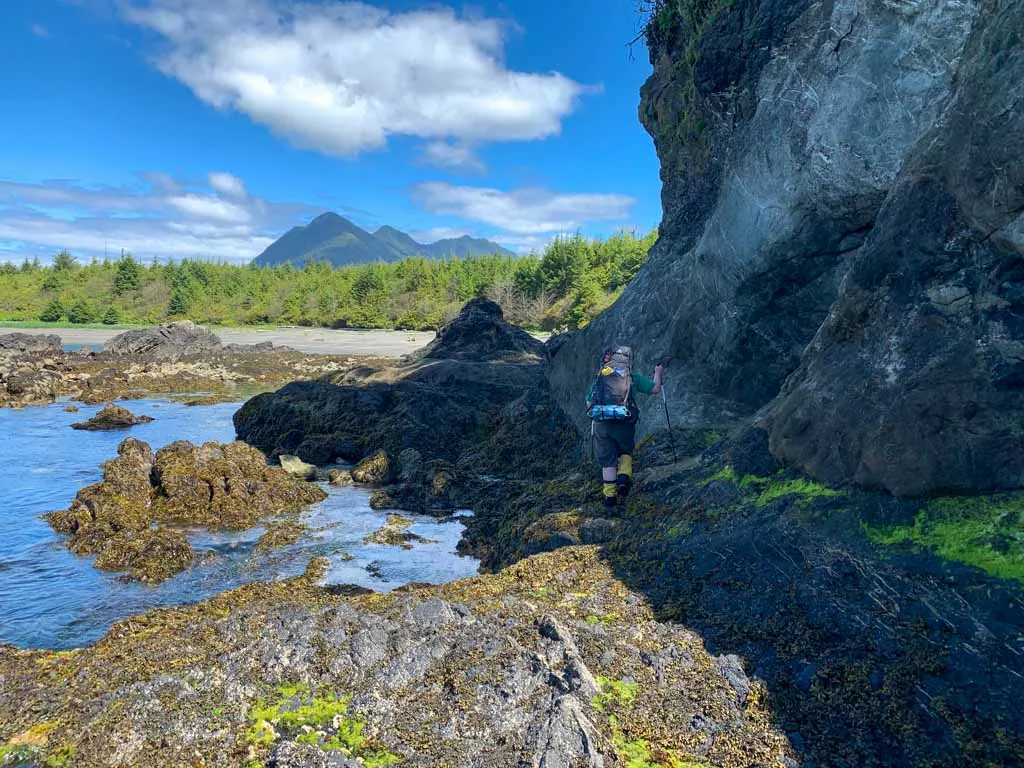
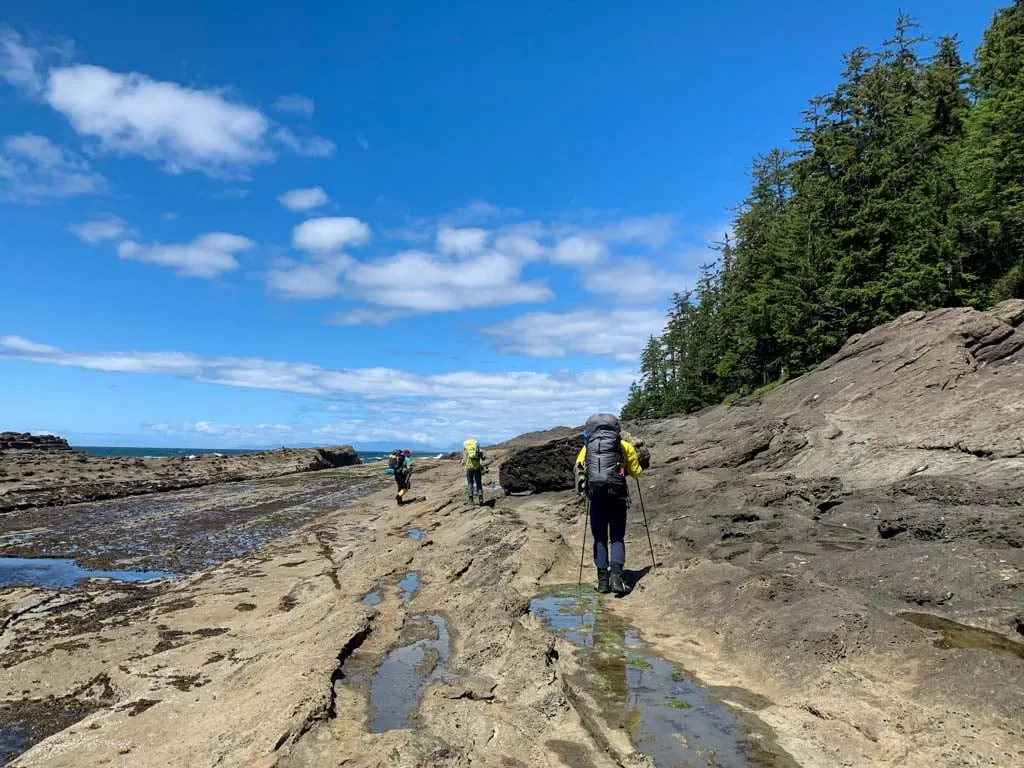
Head south along the tops of the red and black jagged volcanic rocks. This section can be a bit scrambly and is sometimes high above the ocean. Take your time to find the path of least resistance and you will never be in any danger.

On the other side of the point, follow the trail into a small gravelly cove, then traverse another rocky shelf. Keep an eye out for a rough trail through thick salal to get around a rocky headland.
The trail spits you out on a steep gravel beach in a bay. A brief lessening of slope angle a few minutes along provides a good camping area. Porritt Creek empties into the other side of the bay.
Porritt Creek Camp
Many groups choose to camp at Porritt Creek thanks to the reliable water source. You may have to head slightly upstream to collect water at high tide.
A pool in the creek at the site of a former road bridge is a good place to swim. Look for a brief band of alder and a set of weathered logs in the streambed to find it.
The camping area is on the gravel terrace at the northwest corner of the bay. It has room for a few tents. There is no food storage here so you will need to bring a rope to create a bear hang.
There is no toilet so use Leave No Trace best practices and dig a cat hole. Go into the forest on the west side of the bay or use the beach below the high-tide line.

READ NEXT: How to Leave No Trace (And Why it’s Important!)
Porritt Creek to Tatchu Creek
Distance: 6 km
Time: 2-3 hours
Difficulty: Moderate
Follow the steep gravel bank of Porritt Creek upstream for a few minutes to wade across. You may need to wait for tides below 3 m (9.8 ft) to avoid getting too wet.
Head south from the creek to round a rocky outcropping. Step carefully across the slippery seaweed-covered rocks. At tides above 2.5 m (8.2 ft), this area may be impassable. Once around the rocks, hike along a series of gravel beaches.

Around 10 km (6.2 mi) from Rugged Point arrive at a surge channel. At tides below 2.5 m (8.2 ft), hike through the surge channel, picking your way across the rocks. At higher tides, use a rough bear trail over the headland.
There are more gravel beaches past the surge channel and a section of sandstone shelf that is easy to walk on at low tide.
Approximately 11 km (6.8 mi) from the northern trailhead, arrive at an unnamed creek. Head inland along the creek for a few minutes. Wade across at a wide and shallow spot.

On the other side, scramble up the steep and undercut bank to an opening in the trees. From there, hike a rough trail for a few meters. It follows the top of the bank and emerges on the beach.
Continue hiking south from the creek to Gregoire Point. There is strenuous walking from here to Tatchu Creek, as the gravel here sinks with every step.
Arrive at Tatchu Creek and the campsite on top of the flat gravel spit about 14 km from Rugged Point.
Tatchu Creek Camp
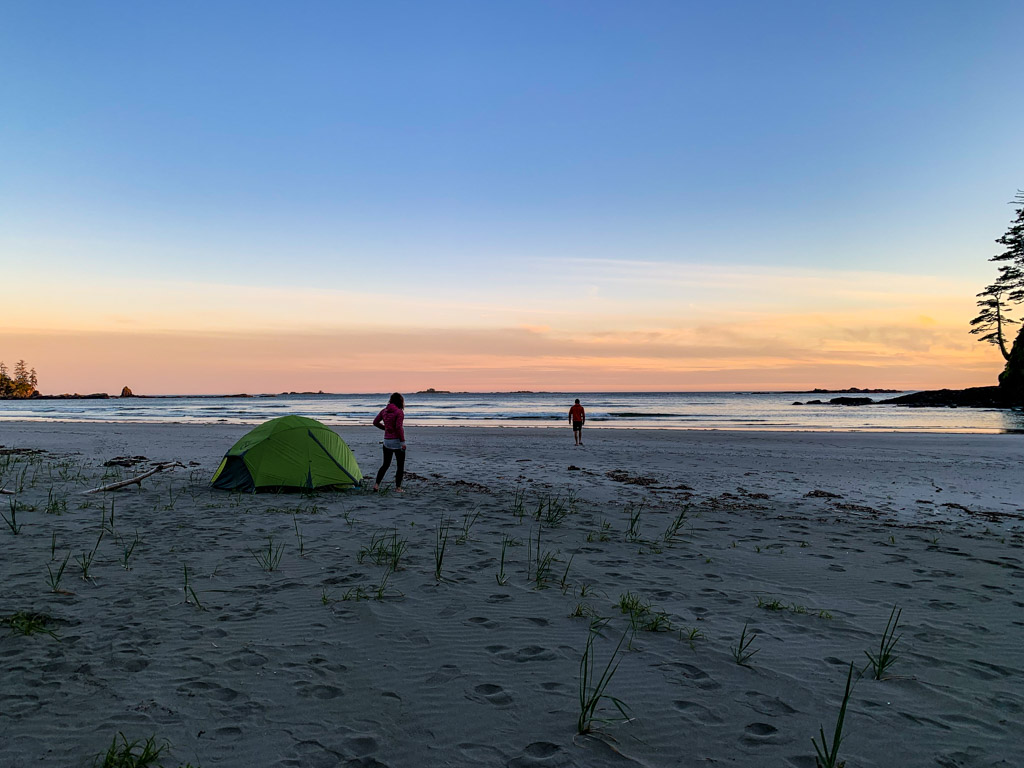
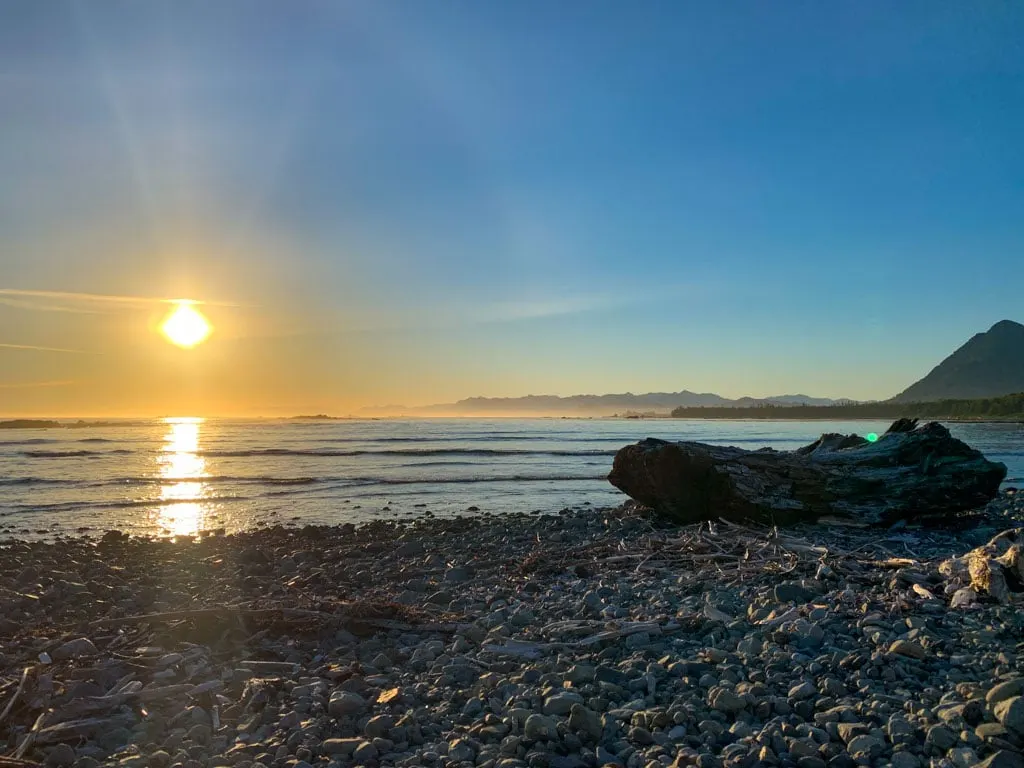
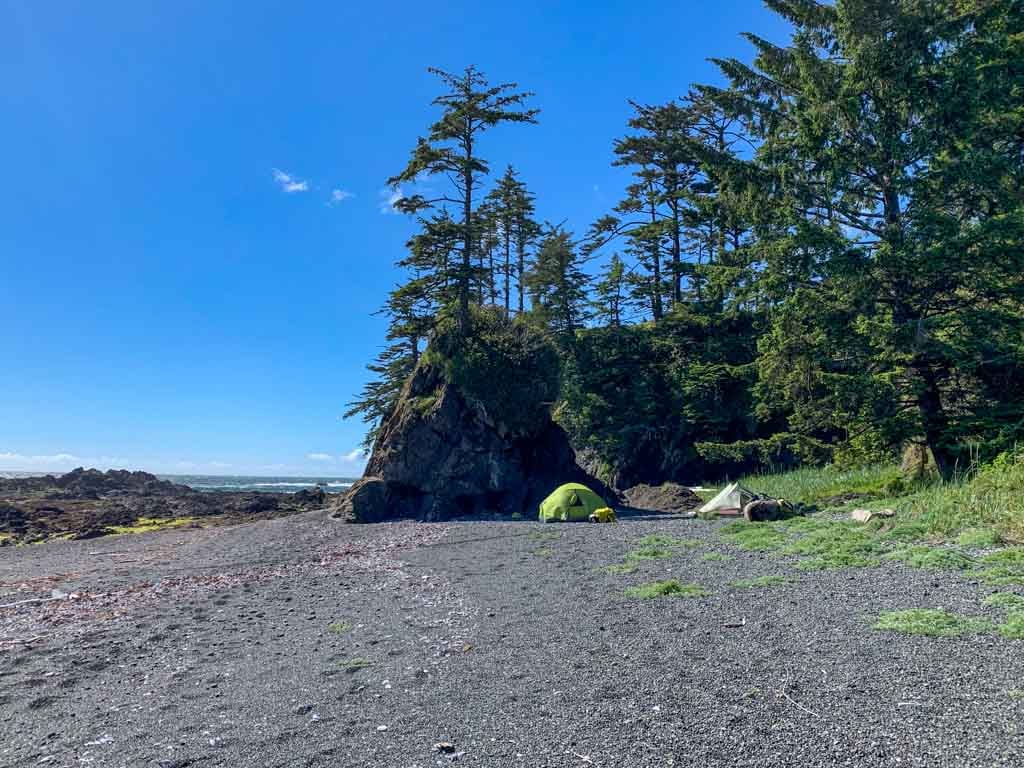
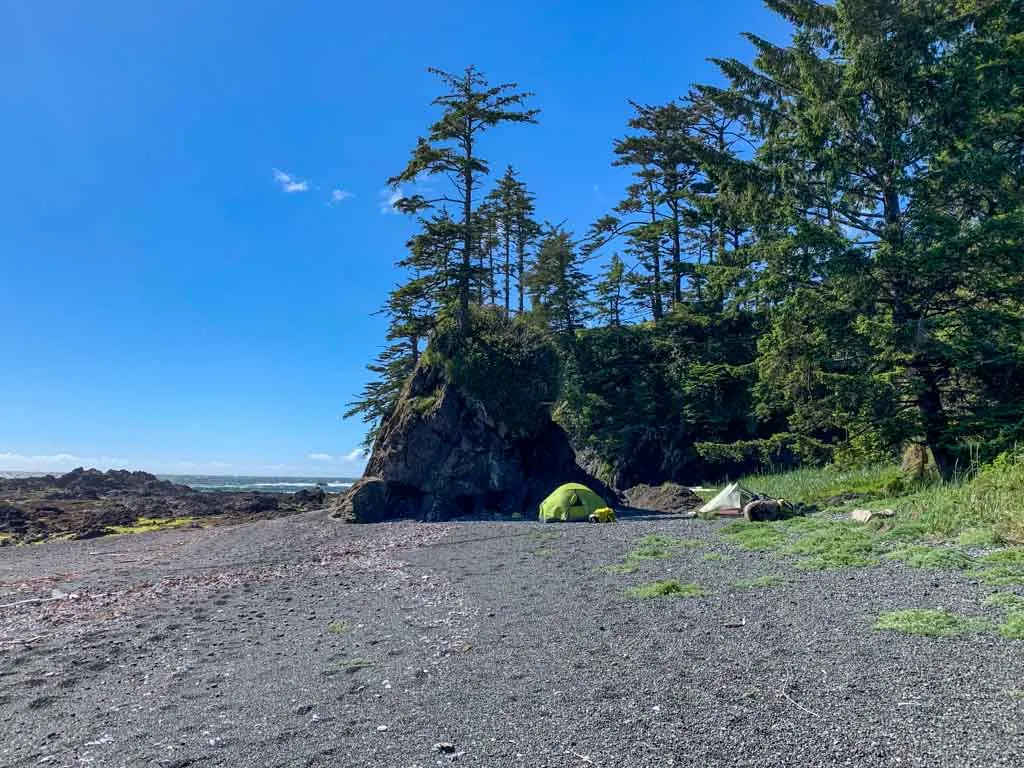
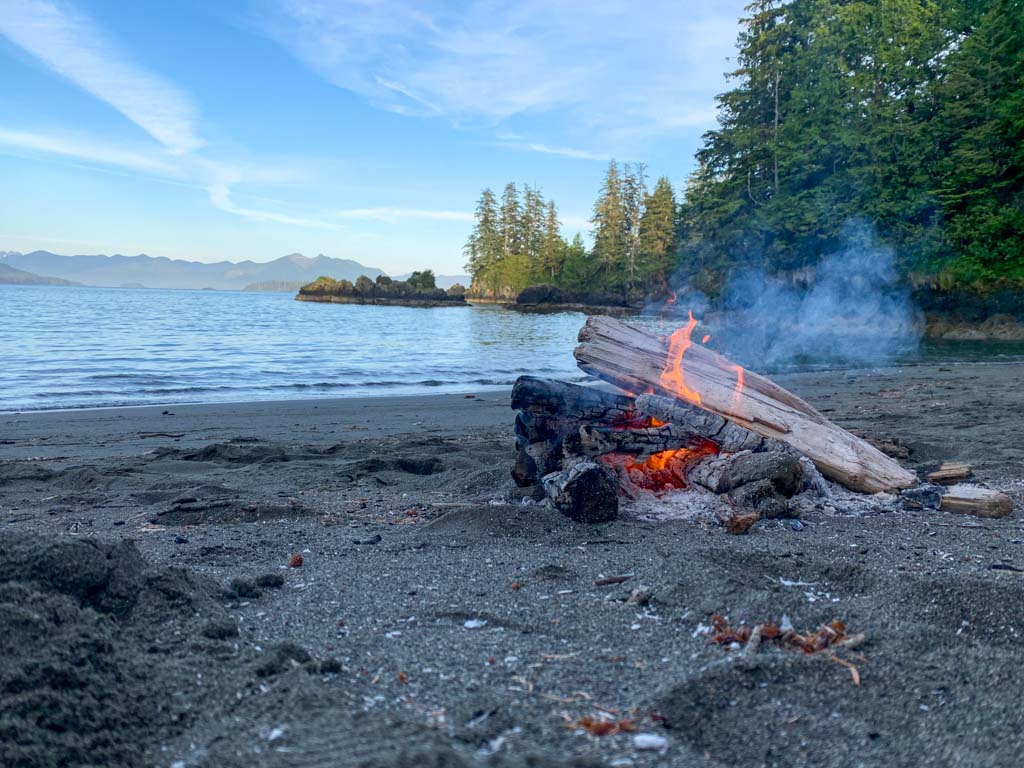
This campsite has one of the best views on the Tatchu Peninsula: there are lots of offshore rocks and the sun sets over the Brooks Peninsula to the northwest. However, since it is set out on the spit, it can get windy.
There is room for several tents amongst huge stumps at the end of the gravel spit. There is also a forest clearing that will fit one tent.
Collect water from Tatchu Creek. Be sure to go upstream at high-tide to avoid saltwater contamination.
There is no food storage here. Bring a rope to hang it in a tree. The large alders alongside the creek are your best bet for a good hang.
There is also no toilet here. Dig a cat hole in the forest behind the beach, being careful to stay away from the creek. You can also go on the beach well below the high-tide line.

Tatchu Creek to Sandstone Point
Distance: 2.5 km
Time: 30-45 minutes
Difficulty: Moderate
Cross Tatchu Creek where the gravel spit meets the forest. On the other side, follow vague paths through the hip-high grass back to the beach.
Watch your step navigating around the slippery rocks of Jurassic Point. It is impassible at tides above 2.8 m (9.2 ft) and may require a bit of scrambling. There are fossils and petrified wood in the sandstone rocks here. They are from the Jurassic period, between 145 and 160 million years ago.
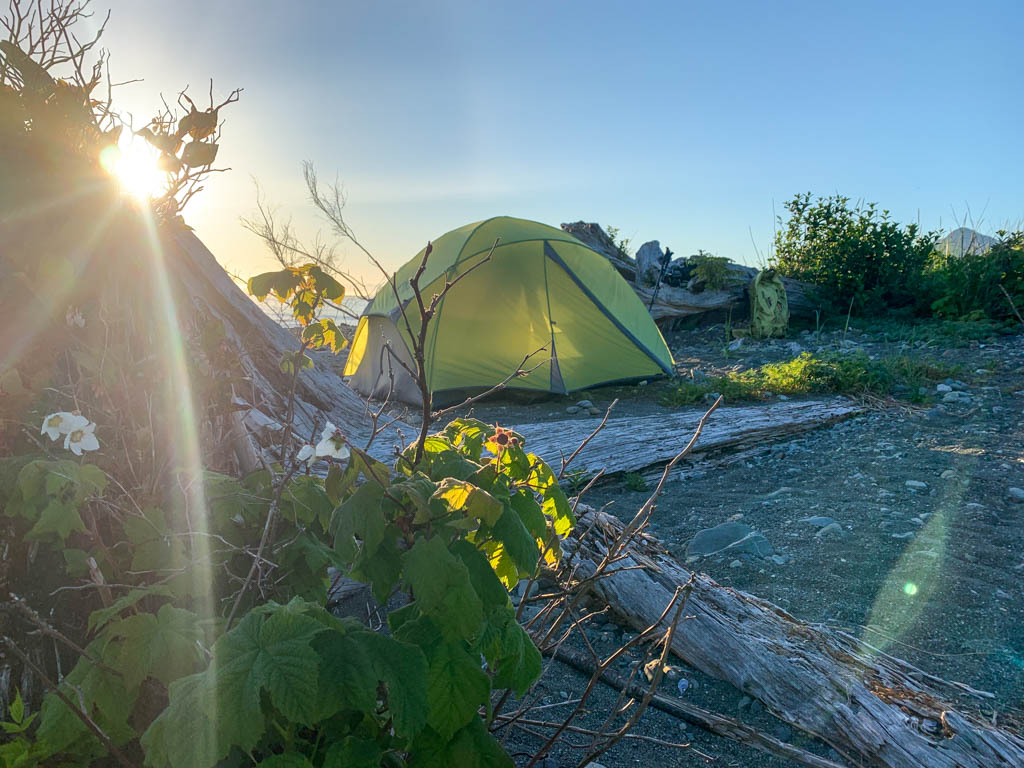
On the south side of the point there is a sea stack topped with windblown trees. We actually camped in the driftwood here on one night as the only other group we met was camping at nearby Tatchu Creek and there wasn’t room for us.
Continue down the gravel beach for a few minutes. In the middle of the beach, there is an opening in the forest that leads to a small waterfall, a good water source.
There is another small stream on the south end of the beach, but it is less reliable. If you want to camp, there are a few small campsites at the southeast end of the bay amongst the driftwood. However, it is so close to Tatchu Creek camp that most parties stay there instead.
At the end of the beach, head around the corner into a small cove. If you arrive at low tide, take time to explore the tide pools.
The rocks of Sandstone Point rise ahead of you. If you are uncomfortable with scrambling or do not like heights, this is your turn-around point.
Backpackers who have camped at Tatchu Creek and are day hiking to Sandstone Point can explore a bit further to get a taste of the terrain without a fully loaded pack.
Sandstone Point to Yellow Bluff Bay
Distance: 3.5 km
Time: 2-3 hours
Difficulty: Very Challenging
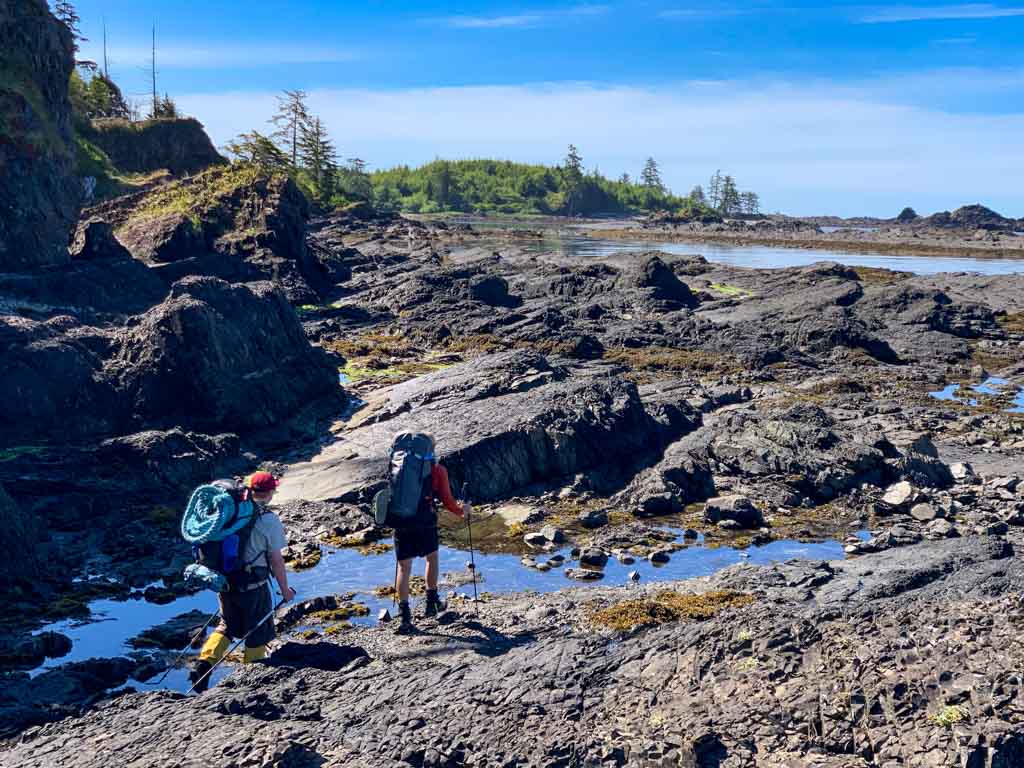
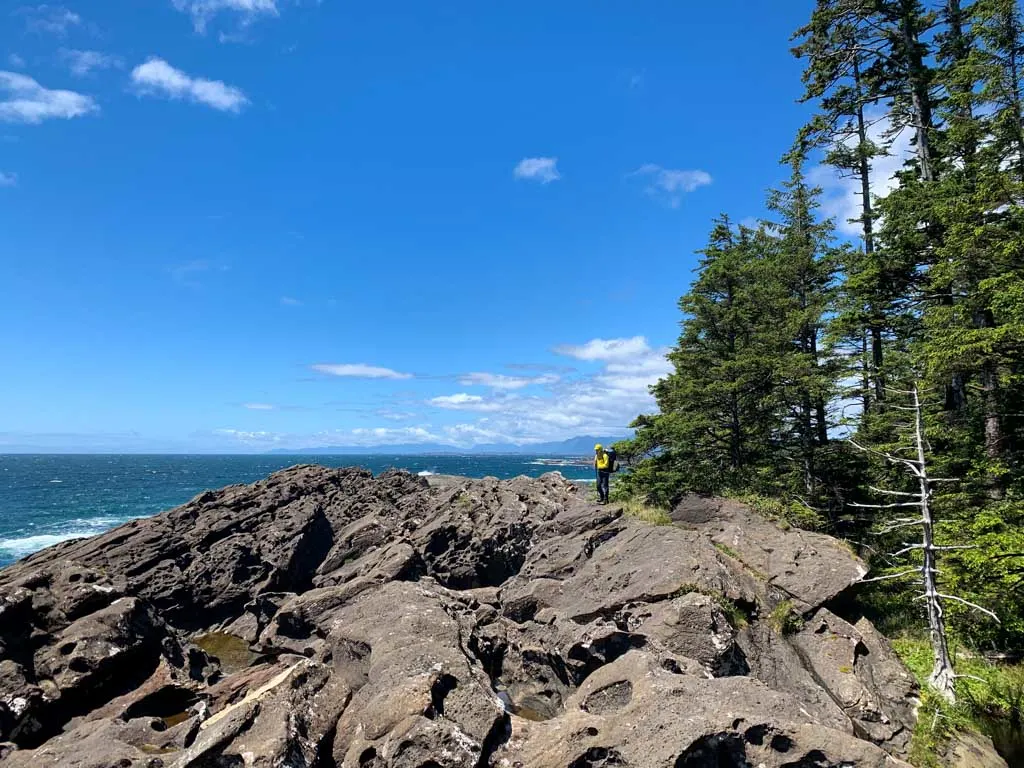
If you choose to carry on, clamber up onto the scoured sandstone rocks, following the path of least resistance to the crest. Watch for unique scoured pockets in the rock as well as embedded fossils. Scramble across the rocks, keeping close to the edge of the trees.
Eventually, a faint path appears behind the rocks at the edge of the forest. Follow it as it crosses a slippery section above a waterfall that cascades down towards the ocean. If you are day hiking, this is a good place to turn around.

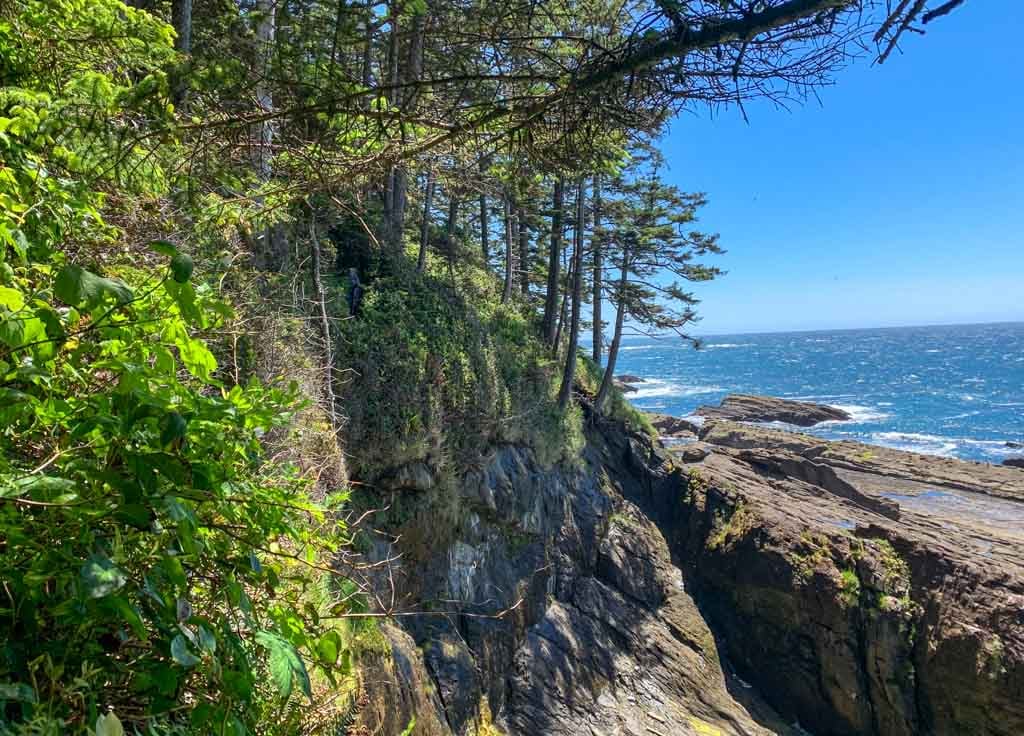
The trail turns inland and runs through thick salal directly along the cliff edge. Use extreme caution here as the cliffs are sheer and the trail is precipitously close to it.
In places, the cliff edge is crumbling beneath the footbed. I’ve heard stories of it disintegrating underneath hikers’ boots, leaving them clinging to the salal. Fortunately, there haven’t been any accidents here yet.
The rough and overgrown trail passes above a dangerous surge channel that can be crossed by experienced parties with ropes and climbing skills at tides below 2.5 m (8.2 ft). Crossing the surge channel involves negotiating a drop of about 3 m (9.8 ft).
While the cliff-top trail is dangerous, I felt that it was far safer than crossing the surge channel.

Past the surge channel, the trail dips slightly. Openings in the brush may tempt you to descend the steep slope to the rock shelf below.
This route leads you onto the sandstone shelf and then down around a rocky point underneath a tube-shaped overhang. It is passable at tides below 2 m (6.6 ft).
But a safer option is to stay on the overgrown trail as it ascends to a high point away from the cliff, then drops through thick salal to the beach.
The next section features a wonderful flat sandstone shelf that is exposed at low tide, making for fast travel. You will pass through the Tatchu Indian Reserve in this area, so please be respectful and do not camp here.

About 19 km (11.8 ft) from Rugged Point, arrive at a rocky outcrop with a small islet just offshore. Watch for a faint trail heading into the trees just before the cliff. Just inside the forest, the trail forks. Take the wider right fork to arrive at the top of the cliff.
(The left fork is a very overgrown bear trail that peters out atop the cliffs. Perhaps with some serious trail maintenance, this route will become usable, but as of summer 2022, it is impassable. I tried my best to make it through, even going down on my hands and knees, but without a machete, I became tangled in the thick salal, which stripped off my hat, sunglasses, and ponytail holder.)
From the top of the cliff, scramble down to a wide series of ledges that trend northeast above the water. At tides below 1 m (3.3 ft), you may be able to scramble down seaweed-covered ledges to reach the beach.


At tides between 1 and 2 m (3.3 to 6.6 ft), you must traverse across the face to a narrow ledge using careful toe holds. From there, lower yourself down a 1.8 m (6 ft) drop to the beach. In summer 2022, a weathered fixed rope was in place above the traverse to act as a handline.
A second handline above the 1.8 m drop may also be helpful – if you go, bring one to tie off to one of the trees at the top of the cliff. At tides above 2 m (6.6 ft), the beach is underwater and you will not be able to descend from the cliff.
Use extreme caution in this section. If possible, have your strongest climber go first to scout the route, coach others, and act as a spotter. Climb with your packs off and hand them down the cliff or lower them on a rope.
Just past the cliff, peer inside two small sea caves, clogged with driftwood. Navigate a section of beach covered in basketball-sized rocks, then round the point into a bay with a gravel beach. The rocks of Yellow Bluff are directly opposite you to the east.
Two streams flow into the bay at the northwest corner at the eastern boundary of the Indian Reserve. Collect water here if you plan to camp nearby. The best camping is in the centre of the bay. The trail to the logging road and beyond to Port Eliza also leaves from the middle of the bay.
If you used the water taxi from Tahsis, continue to the far east side of the bay and into a small gravel-dammed lagoon. Early in the season or after heavy rain the lagoon may be full of water, perhaps up to your thighs.
Wade through the lagoon and pick up trail through the salal to Yellow Bluff Beach. There is a good campsite a few meters north along this gorgeous sandy beach.
Road Junction Camp and Yellow Bluff Bay West Camp
There are two campsites a few minutes apart here. One where the trail leaves the beach to start the road walk and one across a small headland on the west shore of Yellow Bluff Bay.
Road Junction Camp is on a steep gravel beach. It makes a logical campsite before or after the road walk to Port Eliza. There is space for a few tents amongst the driftwood above the high-tide line.
There is no toilet here. Follow the trail into the forest to dig a cat hole or go on the beach well below the high-tide line. There is also no food storage. The best options for hanging are along the forest trail.
Collect drinking water from the streams on the west side of the bay.
Yellow Bluff Bay Camp is just a few minutes from Road Junction camp and is much nicer with a beautiful view of the bay. On my trip, we watched sea otters playing in the water all evening. This is also the pickup location for the Tahsis water taxi, which arrives early in the morning.
There is space for a few tents amongst the driftwood on the west side of the bay. Go to the bathroom below the high-tide line or head into the forest behind the beach since there is no toilet here. There is also no food storage, so plan to build a bear hang.
The main disadvantage of this campsite is that it has no water source. Haul water in from the streams just before road junction camp. It’s a 15-minute walk.
Yellow Bluff Bay to Port Eliza
Distance: 12 km
Time: 5-7 hours
Difficulty: Challenging
Disclaimer: I haven’t hiked this section. We opted to do an out-and-back from Yellow Bluff Bay as the road walk didn’t sound that appealing.
But I did a ton of research and talked to other hikers about the route between Yellow Bluff and Port Eliza before my trip since we were considering it. The description below is the best overview I can write of this section.
I’ve heard that the road between Yellow Bluff and Port Eliza is very overgrown since there is no more active logging in the area. Some groups use a machete throughout this section.
If you are continuing to Port Eliza, take the trail from the centre of the beach, which soon meets up with an overgrown logging road.
Go left on the road as it heads north and ascends gently. A little over 1 km later, reach a junction and turn right on a much wider logging road.
Stay on the road as it trends southeast and heads back towards the coast. The road runs across the top of a cliff at the back of Yellow Bluff Bay about 1.8 km (1.1 mi) from the junction. There are great views from here.
A short distance later, the road descends towards the beach. The road is badly washed out here at a creek crossing. Previous hikers have hacked a short but difficult detour through thick vegetation down to the beach, then back up the other side. Watch your step here as it is very steep, rough, and unmarked.
The beach near the washout makes a good campsite since you can get water from the creek. Back on the road, you will pass an abandoned building and several clearings, part of an old logging camp.
Stay on the main road, ignoring overgrown sideroads as it heads east and climbs slightly to curl around the north side of Leading Hill. The road crosses a few creeks through this stretch if you need to fill up on water.
The road turns to the north, then drops down to the old dock and former log dump at Port Eliza where you can meet your float plane to Gold River or water taxi to Zeballos.
Port Eliza is named for Francisco de Eliza y Reventa, a Spanish sailor who explored the coast of what is now British Columbia and Alaska in the 1790s, attempting to claim Nootka Sound for the Spanish.
Tatchu Trail FAQ
The entire Tatchu Trail is 32 km long from Rugged Point to Port Eliza. However, I recommend that most hikers do an out-and-back trip from Rugged Point to Tatchu Creek for a total length of 28 km. Another option is an out-and-back from Yellow Bluff Bay to Rugged Point, which is 40 km long.
The trail ranges from moderate to very challenging, depending on how far you hike. The northern section between Rugged Point and Tatchu Creek is moderate.
If you go further to Yellow Bluff Bay or Port Eliza, it is very challenging. The southern end of the trail involves scrambling across steep rocks with big drop-offs, a cliff you must descend with a fixed rope, and an overgrown and washed-out logging road.
Most hikers will spend 4-5 days hiking the Tatchu Trail, but itineraries of 2-6 days are possible.
The summer months of June, July, August, and September have the warmest weather and the least rain. Early June and late September can be a bit colder and wetter.
It can be hiked in either direction. There is no advantage to going south to north versus the other way. However, it is wise to time your trip with the tides.
There are no fees to hike the Tatchu Trail. The only cost is transportation by water taxi or float plane. See the Getting There section for more info.
You will need to be totally self-sufficient on the Tatchu Trail and carry in everything you will need for your trip. See my West Coast Trail packing guide for a full list of everything you will need.
In general, choose lightweight backpacking gear. The weather on the coast is also often very wet so be sure to pack accordingly.
There are five large, reliable water sources on the Tatchu Trail: Sandpiper Creek, Kapoose Creek, Porritt Creek, Tatchu Creek, and the creek on the east side of Yellow Bluff Bay. There are also smaller creeks every few kilometres (as described above) but they may run dry.
Plan to filter or purify all water. Most streams have a dark tea colour from tannins in the soil. It can clog filters, so make sure you know how to clean yours.
There are several tidal obstacles on the Tatchu Trail where you will have to wait for the tide to go out to get around cliffs and rocky points. See the trail description above for details.
Use the Kyuquot tide table. Make sure you print out the predicted tide height for each hour of the day. It’s much more helpful than just using the daily highs and lows.
In general, the weather is typical west coast: chilly and a bit wet, even in the summer. Check the weather for Kyuquot and Tahsis before you go. Or use a pinpoint forecast from Spotwx.
The average temperature between June and September are 14-16°C. Average rainfall is lowest in July (79mm) but August (99 mm) is also dry. June (147mm) and September (145mm) are a bit wetter, but nothing compared to the winter months (467mm in January).
Yes, this is a remote part of Vancouver Island with a high wildlife population. You are most likely to see bears, but you can also see wolves and cougars. To minimize the risk of a negative encounter, hike in groups, make lots of noise, and carry bear spray just in case. At camp, hang your food securely and cook well away from your tent. Read my bear safety tips.
If you are prepared, no. While the southern section has some very challenging terrain, experienced hikers can safely navigate the trail. Consider bringing a satellite messenger such as a Garmin inReach Mini for emergencies. Be careful on cliff edges, scrambles, slippery rocks, and when crossing streams.
I used the Gaia GPS app, which was very helpful. I also brought John Baldwin’s Tatchu Peninsula Map. National Topographic System (NTS) Map 092E14 covers the trail, but isn’t very helpful.
READ NEXT: The Best Weather Apps for Hiking

Join the Backpacking in BC Facebook Group
Get My Book…
Backpacking on Vancouver Island
Discover Vancouver Island’s best day hikes and overnight trips
- 25 backpacking trips and 10 day hikes throughout Vancouver Island
- Info about permits, reservations and campground facilities
- Detailed maps and photos
- Advice for extending your trip
- Points of cultural and natural history
That’s everything you need to know to hike the Tatchu Trail. If you have questions about backpacking on the Tatchu Peninsula, ask in the comments. I’m happy to help.
READ NEXT:
- Coastal Hiking Tips: Advice for Beach Backpacking
- Coastal Backpacking Packing List: Everything You Need to Bring
- 20+ Ways to Reduce Your Backpack Weight
- Guide to the West Coast Trail
- North Coast Trail: Backpacking on Vancouver Island
- Nootka Trail Trip Report
- Juan De Fuca Trail Guide: Backpacking on Vancouver Island
- Cape Scott Trail Guide: Hiking and Camping on Northern Vancouver Island


- Things to Do on Newfoundland’s Great Northern Peninsula - July 29, 2026
- Best Sun Hoodies for Hiking - June 3, 2026
- Lower Stein Valley Trail Hiking and Backpacking Guide - May 27, 2026
Matt
Saturday 17th of December 2022
Excellent write up. There are caves to explore along the beach at the washout junction beach. Careful consideration to bears should be taken as we saw 13 bears in our through hike of Tatchu
Taryn Eyton
Sunday 18th of December 2022
What time of year did you hike? We hiked in late June and saw one bear up close and another at a distance on the beach. One of our group saw more when exploring the roads at Kapoose Point. I was honestly surprised we didn't see more bears as we saw plenty of both bear tracks and wolf tracks.