

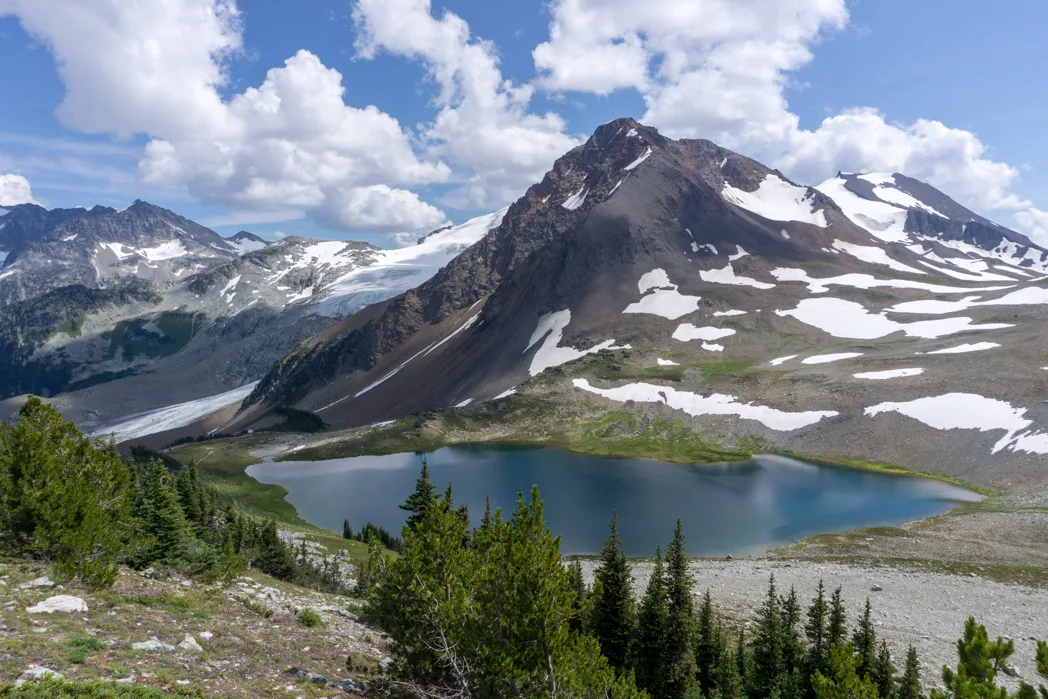
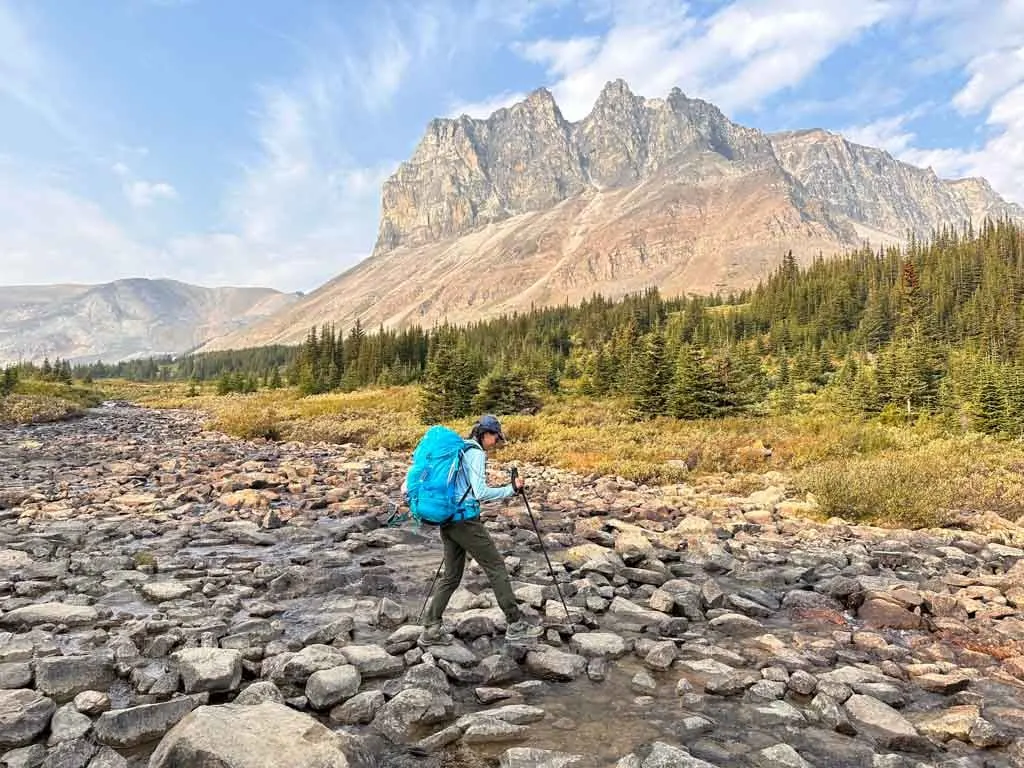
British Columbia has tons of incredible places to go backpacking and multi-day hiking. Unfortunately, most of them require a car to get to. However, it is possible to go backpacking in BC without a car. I’ve got a list of over 35 car-free backpacking trips across BC.
You can get to these overnight and multi-day hikes by public transit bus, shuttle bus, ferry, or water taxi. I’ve done the legwork of figuring out how to get to these fabulous destinations. All info about transportation was correct at the time of writing, but things change, so please let me know if anything is out of date so I can update it.
This guide to backpacking in BC without a car includes:
- A map of car-free places to go backpacking in BC
- Tips for backpacking in BC without a car
- Trips near Vancouver
- Trips on the Sunshine Coast
- Trips on Vancouver Island
- Trips in the Okanagan and Rockies
This is a sensitive wilderness area. Learn how to Leave No Trace to keep the wilderness wild. Make sure you are prepared by bringing the 10 Essentials. Get ready for adventure with this checklist of things to do before every hike.
Hey there: Some of the links in this post are affiliate links, which means I earn a small commission at no cost to you. Thanks for your support. -Taryn
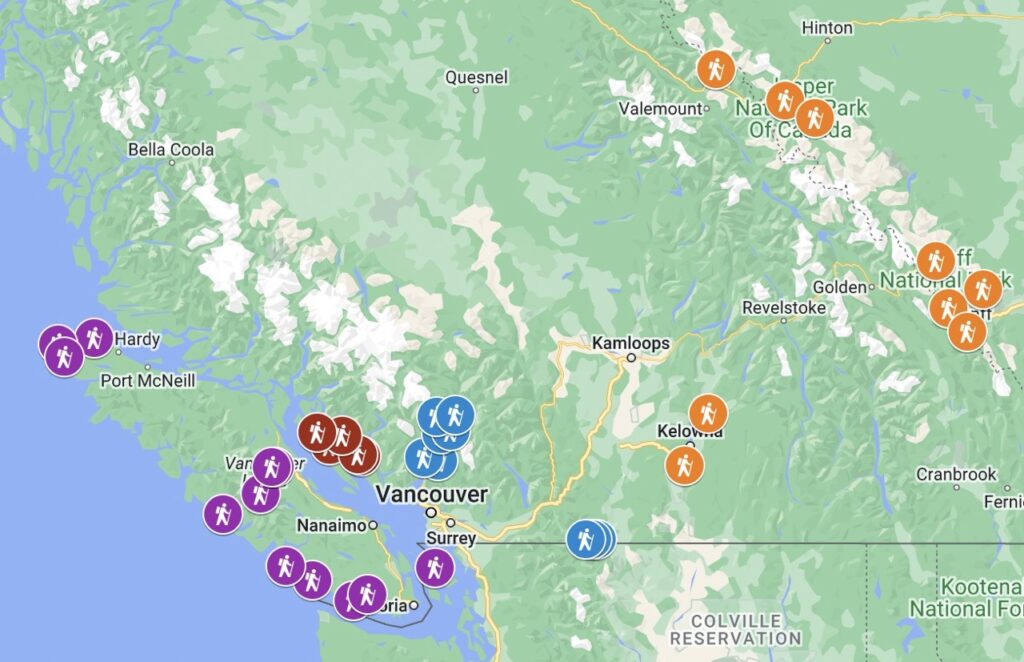
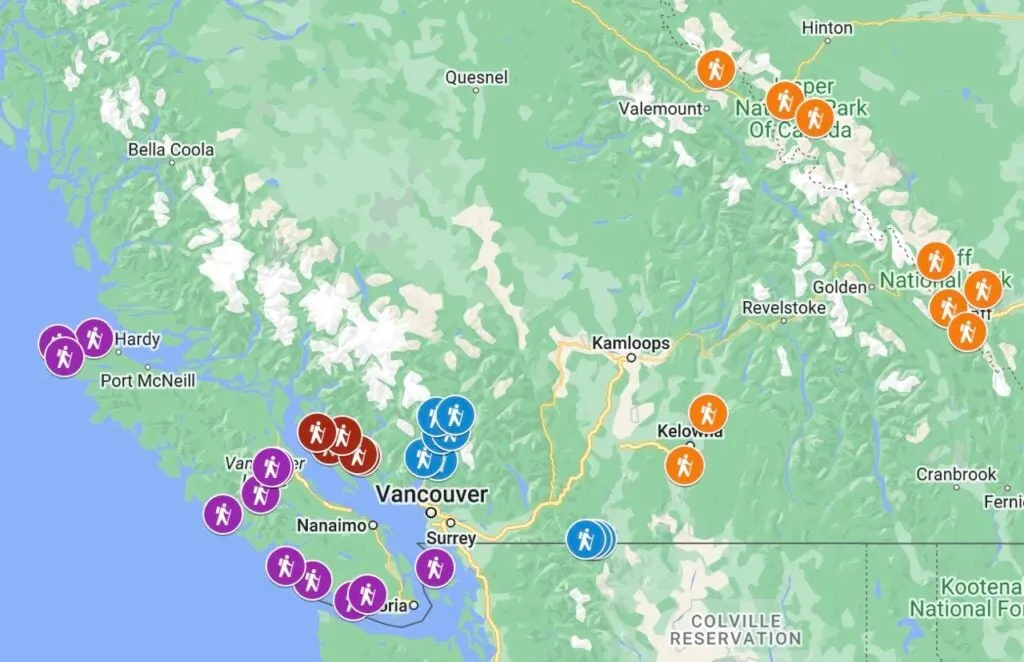
Map of Car-Free Places to Go Backpacking in BC
I made a custom Google Map for you that shows the location of each of the car-free backpacking trips I mention in this post. Click to zoom in.
Tips for Backpacking Without a Car in BC
I’m not going to lie – it’s a lot easier to get around in BC if you have a car. Bus service here is not frequent and it’s often not cheap.
But it is definitely possible to go backpacking in BC without a car. Here are a few tips:
- Leave a trip plan with a friend so someone knows where you are going and when you expect to be back. This is especially important when travelling by bus as you won’t be leaving a car at a trailhead, which otherwise would be a clue for search and rescue about where you went.
- Check schedules carefully. Bus schedules change and some buses don’t run very frequently.
- Book tickets in advance. Buses can fill up or they may not stop at some locations if they don’t know in advance that someone wants to be picked up there.
- Be flexible with dates and times when booking on-demand shuttle services. Many shuttle companies will try to pair you up with other groups to make the per-person cost of the shuttle cheaper.
- Be prepared for some extra kilometres. Without a car, you might have to walk a bit to get to the trailhead. I’ve included walking directions and distances for each backpacking trip on this list. The distance stat at the start of each trip includes any extra kilometres you will need to walk from the bus stop.
- If the bus schedules don’t work for your trip, consider using a carpooling app like Poparide.
- Look into renting a car. The cost split between three or more people can often work out cheaper than taking the bus. I use Discover Cars to search for car rentals since it compares prices across tons of different companies.
- Make camping reservations in advance. Many of the backpacking trips on this list require advance reservation and sell out quickly. See my guide to BC backpacking reservations for more info.
- Is this your first backpacking trip? Read my guide to Backpacking for Beginners. It includes a run-down on gear, trip planning, fitness, and key skills like navigation and bear safety.
- Not sure what to pack? I’ve got a super-detailed Backpacking Gear Checklist that explains it all.
- Worried about bears? If you are prepared and responsible, you don’t have to worry. Read my guide to Bear Safety for Backpackers.
Backpacking Trips Near Vancouver Without a Car
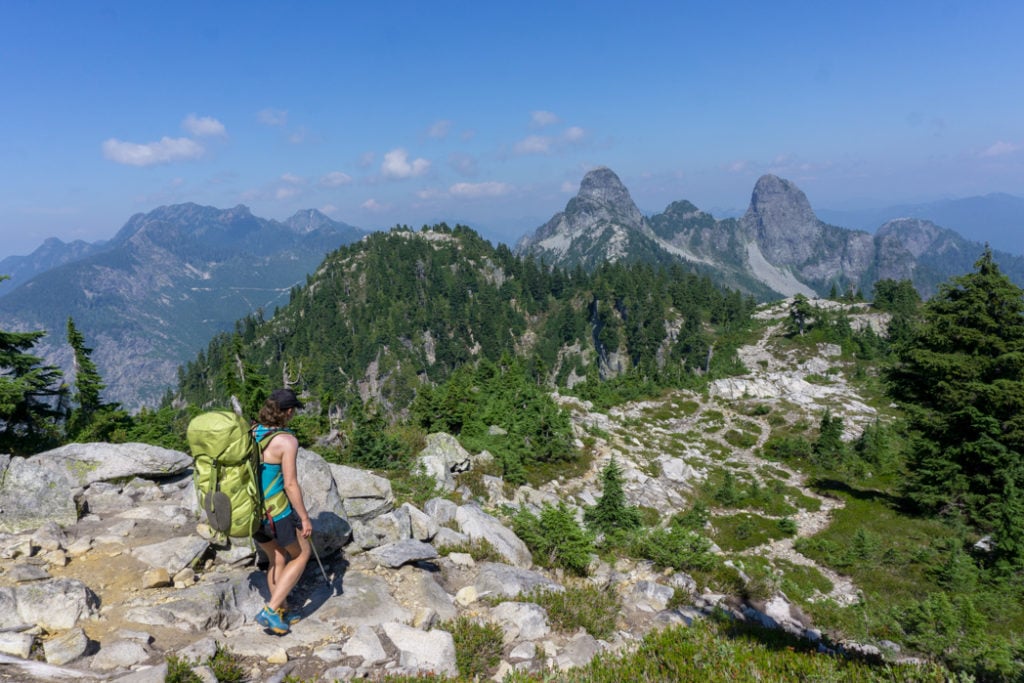
Howe Sound Crest Trail

Duration: 2 to 4 days
Difficulty: Very challenging
Distance: Up to 31.7 km one way
Elevation Gain: 660 m
Best Months: Mid-July to September
Fees and Reservations: Camping is free and all campsites are first-come, first-served.
Trail Description: This tough backpacking trip in Cypress Provincial Park is best for experienced backpackers. The first part of the hike is on the well-worn trail to St. Mark’s Summit. But past there you will need route-finding and scrambling skills to stay on track as you follow the spine of the ridge over several summits. It is typically hiked as a one-way traverse from the Cypress Mountain ski hill to Porteau Cove, but you can bail out part-way on the trail to Lions Bay.
Getting There Without a Car: From downton Vancouver, take Translink bus 250 or 257 to Park Royal, then take the Cypress Mountain Shuttle to Cypress Mountain. (Note: The summer schedule is limited and some years it doesn’t run at all. If there is no shuttle, you can take a taxi from Park Royal.)
You can do and out-and-back trip from Cypress Mountain or do a one-way trip to Lions Bay or Porteau Cove. If you get off trail at Lions Bay, you can take bus Translink bus 262 to West Vancouver, and then bus 253 to to downtown Vancouver. To complete the whole route to Porteau Cove, you will need to arrange a taxi.
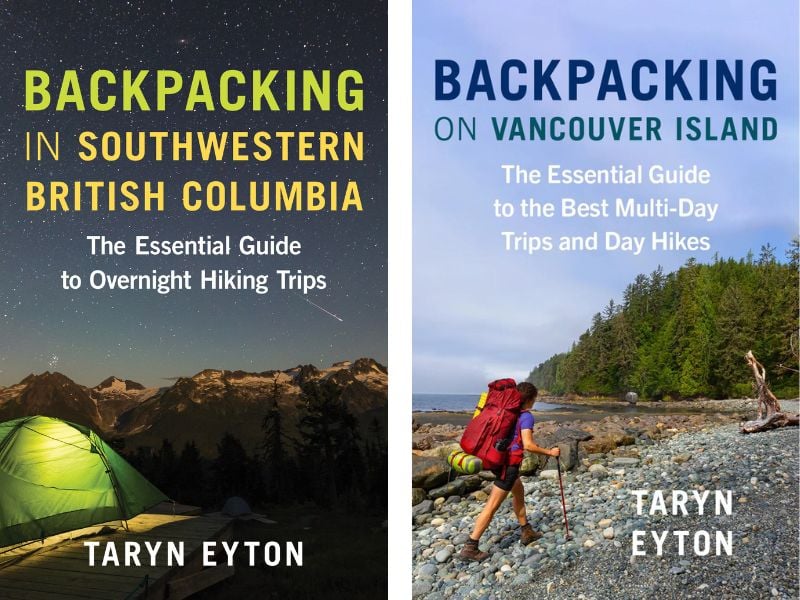
More Info: Find details on this hike in my book, Backpacking in Southwestern British Columbia.
Sea to Sky Trail

Duration: 4 days
Difficulty: Moderate
Distance: 107.4 km
Elevation Gain: 2,435 m
Best Months: May to October
Fees and Reservations: There are no fees required to hike the trail. There are several first-come, first-served campgrounds along the trail, some of which are free. You can also opt to stay in reservable campgrounds or hotels near the trail.
Trail Description: This trail goes from downtown Squamish to downtown Pemberton in a route that parallels the Sea to Sky Highway. It’s a multi-use trail open to hikers and bikers that includes some urban trail, some gravel roads, and some wilderness single track trail.
Getting There Without a Car: From Vancouver, take the YVR Skylynx or Squamish Connector buses to downtown Squamish.
More Info: Find details on this hike in my Sea to Sky Trail hiking guide.
READ NEXT: Sea to Sky Trail from Squamish to Pemberton
Elfin Lakes and Rampart Ponds
Duration: 2 to 4 days
Difficulty: Moderate
Distance: 22 to 42 km
Elevation Gain: 610 m
Best Months: July to September
Fees and Reservations: Reservations are required and fees are charged for both tent pads and the hut. (See my guide to making backcountry camping reservations in BC for more info.)
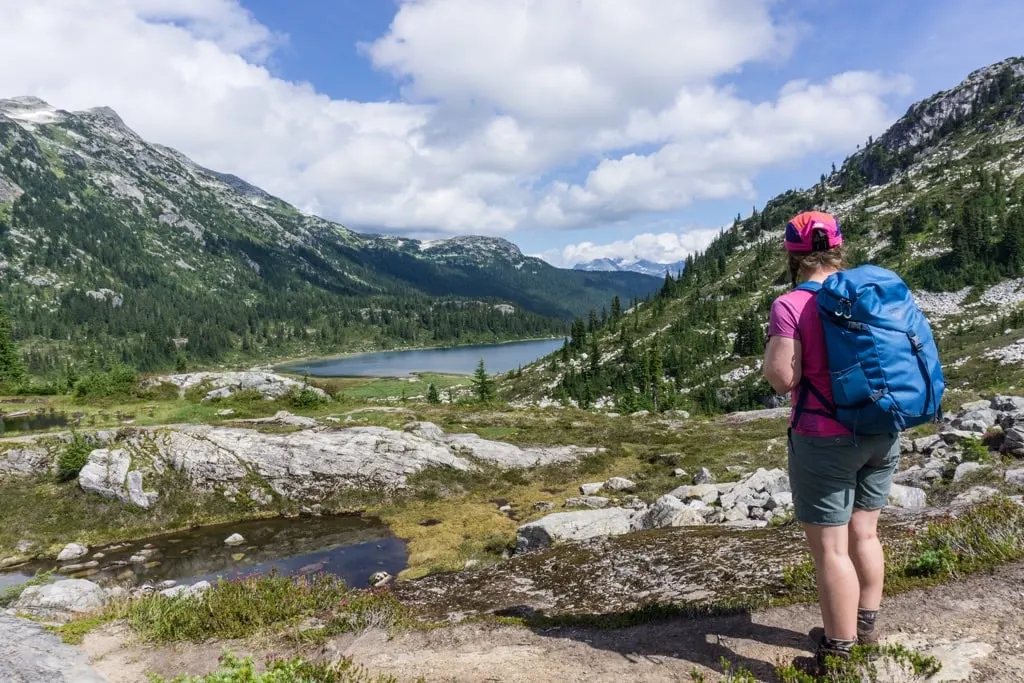
Trail Description: This trip in Garibaldi Provincial Park takes you up into the subalpine to stroll along a ridge with incredible views. You can camp or stay in the hut at Elfin Lakes, which is a great place to base yourself for day hikes. Or continue further into the backcountry to say at Rampart Ponds campground. This hike is just a few minutes from my house in Squamish, so I’ve done it tons of times.
Getting There Without a Car: From Vancouver, take the YVR Skylynx or Squamish Connector buses to downtown Squamish or Garibaldi Estates. From there, Howe Sound Taxi can take you 30 minutes to the trailhead. (Call ahead to confirm that they will go up the gravel road to the trailhead – some dispatchers get confused as to where this is.)
You may also be able to get a ride with Shred Shuttle from downtown Squamish or Garibald Estates. It is a mountain bike shuttle service that stops about 0.5 km from the hikers trailhead.
More Info: Find details on this hike in my Elfin Lake hiking guide and my book, Backpacking in Southwestern British Columbia. For info on camping fees and reservations, see Garibaldi Provincial Park.
READ NEXT: Elfin Lakes Hike in Squamish (By a Local)
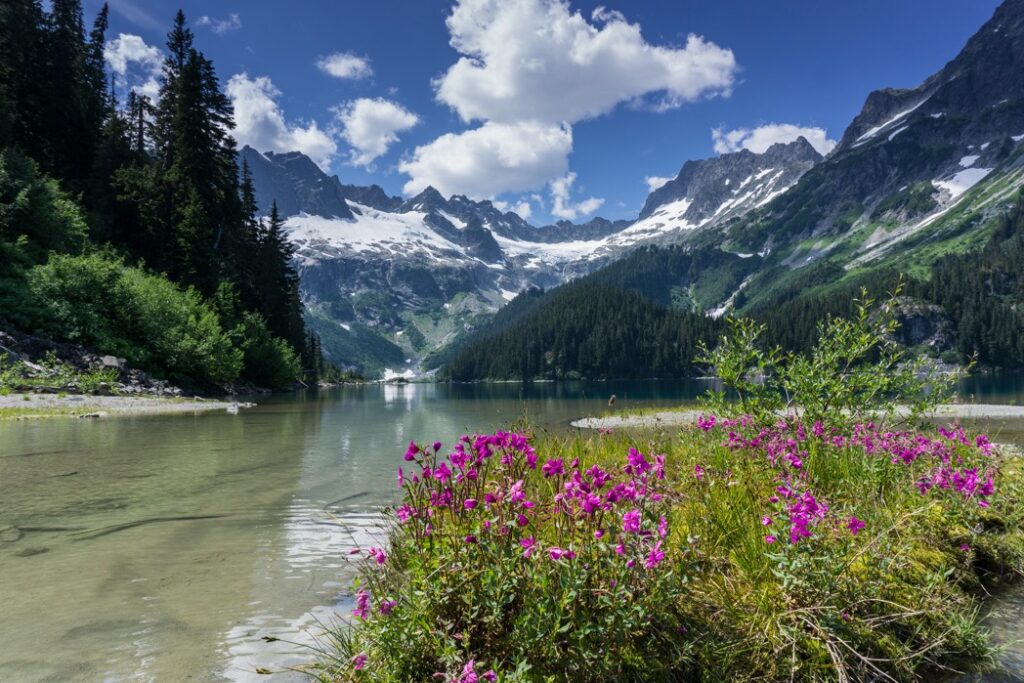
Lake Lovely Water

Duration: 2 to 3 days
Difficulty: Very Challenging
Distance: 11 km round trip
Elevation Gain: 1135 m
Best Months: Late June to early October
Fees and Reservations: Camping is free and all campsites are first-come, first-served. The hut requires reservations and fees.
Trail Description: The trail to Lake Lovely Water begins on the other side of the Squamish River, so crossing it by boat is your first obstacle. The trail is incredibly steep and rugged as it grinds uphill through the forest. Your reward is a gorgeous alpine lake ringed with mountains. You can stay at the backcountry campground or book the rustic hut. From there, take day hikes to meadows or scramble to the tops of the peaks. I spent a memorable birthday here one year and it was so pretty!
Getting There Without a Car: From Vancouver, take the YVR Skylynx or Squamish Connector buses to downtown Squamish. From there, Squamish Watersports can shuttle you to the trailhead via jetski. Alternatively, you can take a taxi for 15 minutes to the Squamish airport, then take a helicopter or floatplane directly to the lake.
More Info: Find details on this hike in my book, Backpacking in Southwestern British Columbia. For hut reservations, see the Alpine Club of Canada Vancouver section.
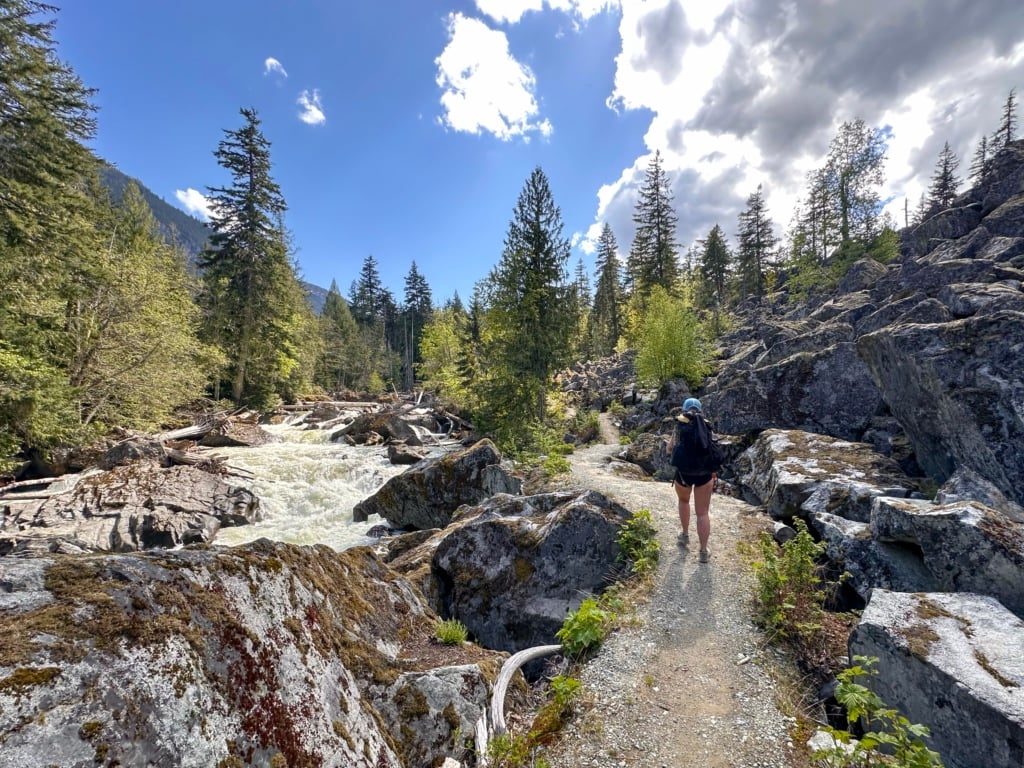
Cheakamus Lake

Duration: 2 days
Difficulty: Easy
Distance: 7 to 14 km round trip
Elevation Gain: 50 m
Best Months: May to early November
Fees and Reservations: Reservations are required and fees are charged for camping. (See my guide to making backcountry camping reservations in BC for more info.)
Trail Description: This is one of the easiest trails in Garibaldi Provincial Park and one of the easiest places to go backpacking in BC without a car. The trail to the lake is flat and easy. The lake is an incredible turquoise colour. You can camp at the lake outlet or continue along the lakeshore to a second campground at Singing Creek.
Cheakamus Lake is one of my favourites since it has such a beautiful location but it’s an easy hike – it’s on my lists of the best spring backpacking trips in BC and the best beginner backpacking trips in BC.
Getting There Without a Car: From Vancouver, take the YVR Skylynx or Epic Rides bus to Whistler. From there, you can take a taxi for 25 minutes to the trailhead.
If you are up for adding 8 km and 200 m of elevation gain each way, you can skip the taxi and take BC Transit bus 10 from Whistler Village to the stop on Cheakamus Lake Road just after to turnoff from the Highway. From there, take the Valley Trail south to the Cheakamus Lake FSR. For a nicer hike, use the Farside Trail instead of the road for the first 3km.
More Info: Find details on this hike in my book, Backpacking in Southwestern British Columbia. For info on camping fees and reservations, see Garibaldi Provincial Park.
Get My Book…
Backpacking in Southwestern British Columbia
A one-stop resource for backpackers in beautiful British Columbia.
- 40 backpacking trips within a few hours of Vancouver
- Info about permits, reservations, and campground facilities
- Detailed maps and photos
- Advice for extending your trip
- Points of cultural and natural history

Helm Creek

Duration: 2 to 3 days
Difficulty: Moderate
Distance: 17 km return (plus more for day hikes from camp)
Elevation Gain: 700 m
Best Months: July to September
Fees and Reservations: Reservations are required and fees are charged for camping. (See my guide to making backcountry camping reservations in BC for more info.)
Trail Description: The trail to Helm Creek provides a lesser-known backdoor route into the core of Garibaldi Provincial Park by leaving from the same trailhead as Cheakamus Lake. The trail switchbacks uphill through the forest to a subalpine campground. From there you can day hike to Panorama Ridge (14 km return), which has great views of Garibaldi Lake.
Getting There Without a Car: From Vancouver, take the YVR Skylynx or Epic Rides bus to Whistler. From there, you can take a taxi for 25 minutes to the trailhead. If you are up for adding 8 km and 200 m of elevation gain each way, you can skip the taxi and take BC Transit bus 10 from Whistler Village to the stop on Cheakamus Lake Road. From there, take the Valley Trail south to the Cheakamus Lake FSR. For a nicer hike, use the Farside Trail instead of the road for the first 3km.
More Info: Find details on this hike in my book, Backpacking in Southwestern British Columbia. For info on camping fees and reservations, see Garibaldi Provincial Park.
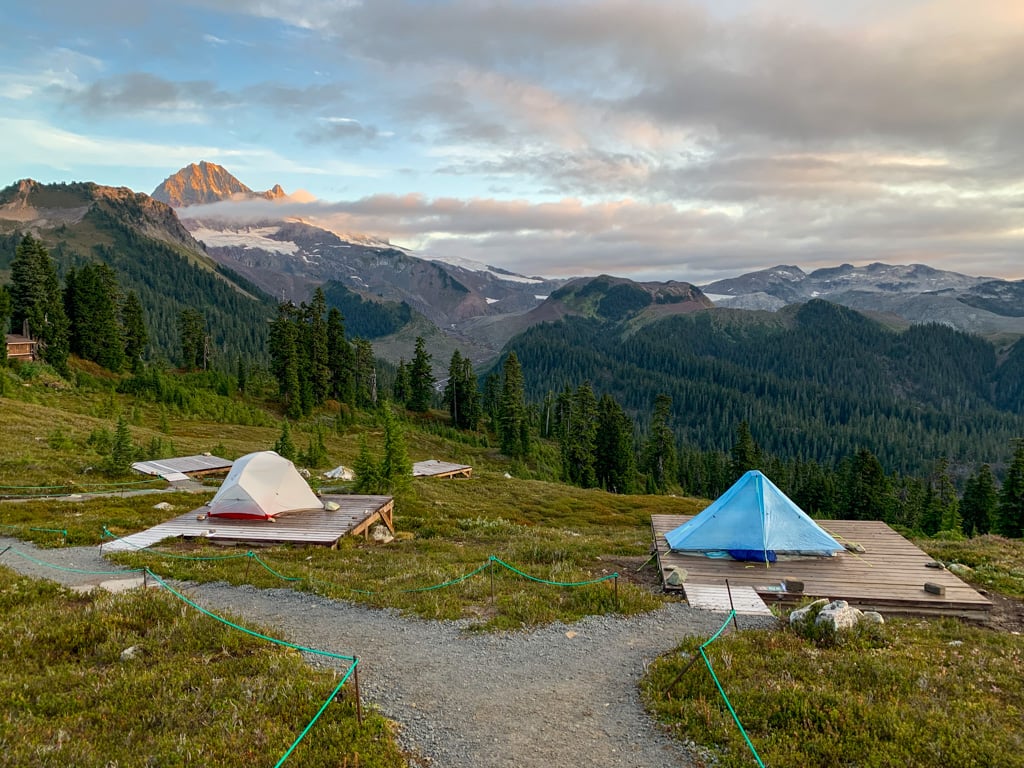
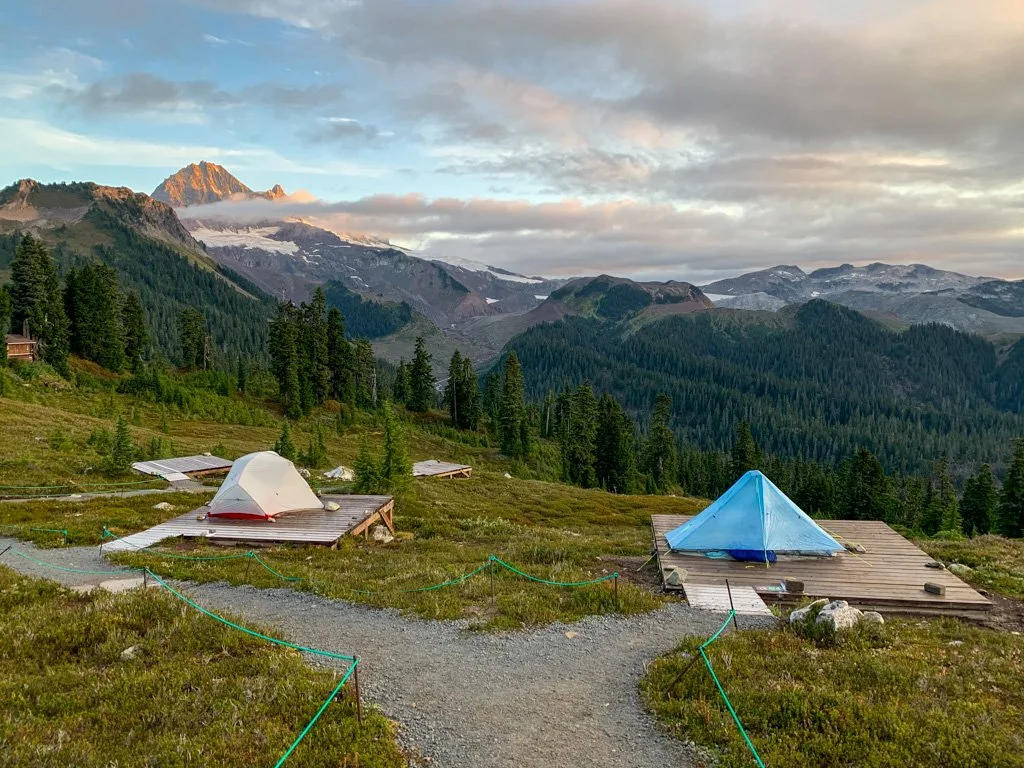
Russet Lake

Duration: 2 days
Difficulty: Challenging
Distance: 25 to 29 km
Elevation Gain: 305 to 1280 m
Best Months: Mid-July to September.
Fees and Reservations: Reservations are required and fees are charged for camping. (See my guide to making backcountry camping reservations in BC for more info.) The hut also requires reservations and fees.
Trail Description: Tiny Russet Lake has a gorgeous backcountry campground and a beautiful new hut in the mountains above Whistler inside Garibaldi Provincial Park. There are two ways to get there: You can hike up the steep Singing Pass trail directly from Whistler Village. Or you can pay to take the Whistler Gondola, then hike along an undulating ridge on the High Note and Musical Bumps Trails. It’s also one of the easiest backpacking trips in BC to get to without a car.
This trip is one of my favourites since the views are so good – it’s on my list of the best backpacking trips in BC.
Getting There Without a Car: From Vancouver, take the YVR Skylynx or Epic Rides bus to Whistler. Then walk through the village to the Singing Pass trailhead or the bottom of the Whistler gondola.
More Info: Find details on this hike in my Russet Lake hiking and backpacking guide and my book, Backpacking in Southwestern British Columbia. To make camping reservations, see Garibaldi Provincial Park. For hut reservations, see the Spearhead Huts Society.
Rainbow Pass and Hanging Lake

Duration: 2 to 3 days
Difficulty: Moderate
Distance: 20.6 km round trip
Elevation Gain: 890 m
Best Months: June to October
Fees and Reservations: None. Camping is free and all campsites are first-come, first-served.
Trail Description: Hike up into the mountains on the west side of the Whistler Valley to gorgeous Rainbow Lake. From the lake, ascend to Rainbow Pass and find the campground at Hanging Lake on the other side. It’s a great spot to base yourself for day hikes up Rainbow Mountain or to nearby Ninja Lakes.
Getting There Without a Car: From Vancouver, take the YVR Skylynx or Epic Rides bus to Whistler. From there, you can take a taxi for 15 minutes to the trailhead.
If you are up for adding 3 km and 50 m of elevation gain each way, you can skip the taxi and take BC Transit bus 6 from Whistler Village to the stop on Crabapple Drive at Cedar Grove. From there, walk north then west on the Valley Trail to Rainbow Park. Then walk north on Alta Lake Road to the trailhead.
More Info: Find details on this hike in my book, Backpacking in Southwestern British Columbia.
Join the Backpacking in BC Facebook Group
Wedgemount Lake


Duration: 2 days
Difficulty: Very Challenging
Distance: 13 km round trip
Elevation Gain: 1160 m
Best Months: July to September
Fees and Reservations: Reservations are required and fees are charged for camping. (See my guide to making backcountry camping reservations in BC for more info.)
Trail Description: This hike in Garibaldi Provincial Park is really steep, especially the final push to the top. But it’s worth it! The beautiful turquoise lake is surrounded by snow-capped mountains. And you can hike past the end of the lake right up to the toe of the glacier. See it while you can as the ice has retreated nearly half a kilometre in less than 30 years.
Wedgemount Lake is on my list of the best backpacking trips in BC thanks to the spectaclar scenery and the opportunity to hike to a glacier.
Getting There Without a Car: From Vancouver, take the YVR Skylynx or Epic Rides bus to Whistler. From there, you can take a taxi for 15 minutes to the trailhead.
More Info: Find details on this hike in my book, Backpacking in Southwestern British Columbia. To make reservations, visit Garibaldi Provincial Park.
Get My Book…
Backpacking in Southwestern British Columbia
A one-stop resource for backpackers in beautiful British Columbia.
- 40 backpacking trips within a few hours of Vancouver
- Info about permits, reservations, and campground facilities
- Detailed maps and photos
- Advice for extending your trip
- Points of cultural and natural history
Frosty Mountain

Duration: 2-3 days
Difficulty: Challenging
Distance: 29 km round trip
Elevation Gain: 1140 m
Best Months: July to September
Fees and Reservations: Camping fees are charged. Reservations are required between late July and late October.
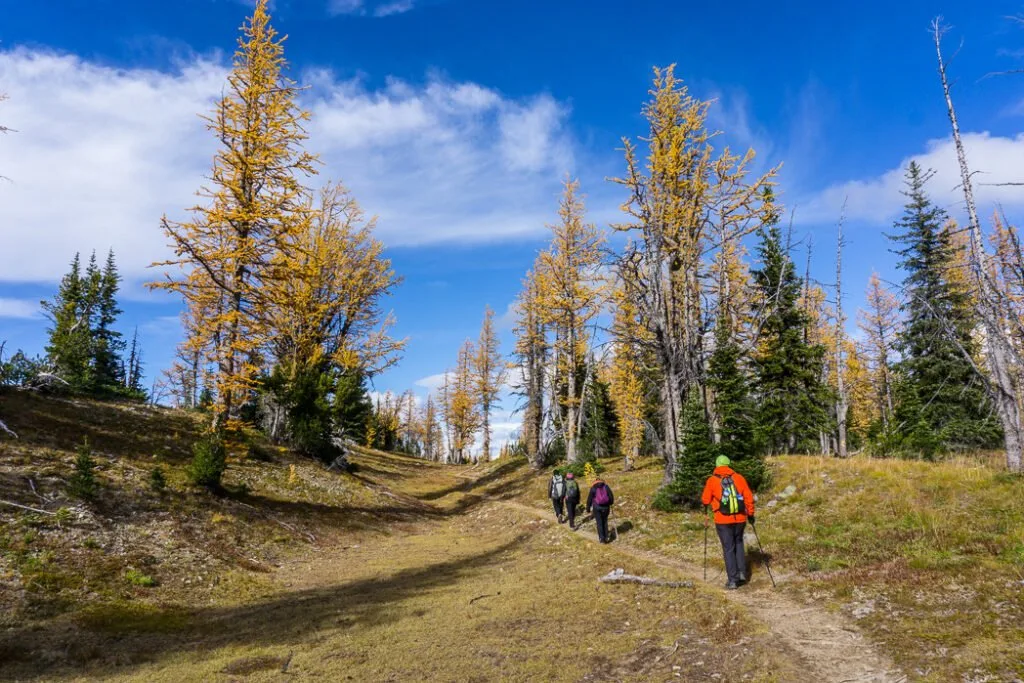
Trail Description: This trail climbs up the slopes of Frosty Mountain, the highest peak in Manning Provincial Park. You can camp at Frosty Creek, partway up, then head to the summit with day packs. Try to time your visit for the fall to see the larches change colour.
Getting There Without a Car: From Vancouver, take Mountain Man Mike’s shuttle to the Manning Park Lodge. From there, hike 3.5 km on the Little Muddy Trail to the trailhead.
More Info: Find details on this hike in my Frosty Mountain trail guide and my book, Backpacking in Southwestern British Columbia. For info on camping fees see Manning Provincial Park.
READ NEXT: Frosty Mountain Larches Fall Hiking Guide
Lightning Lakes

Duration: 2 days
Difficulty: Easy
Distance: 20 km round trip
Elevation Gain: none
Best Months: June to October
Fees and Reservations: Camping fees are charged. All campsites are first-come, first-served.
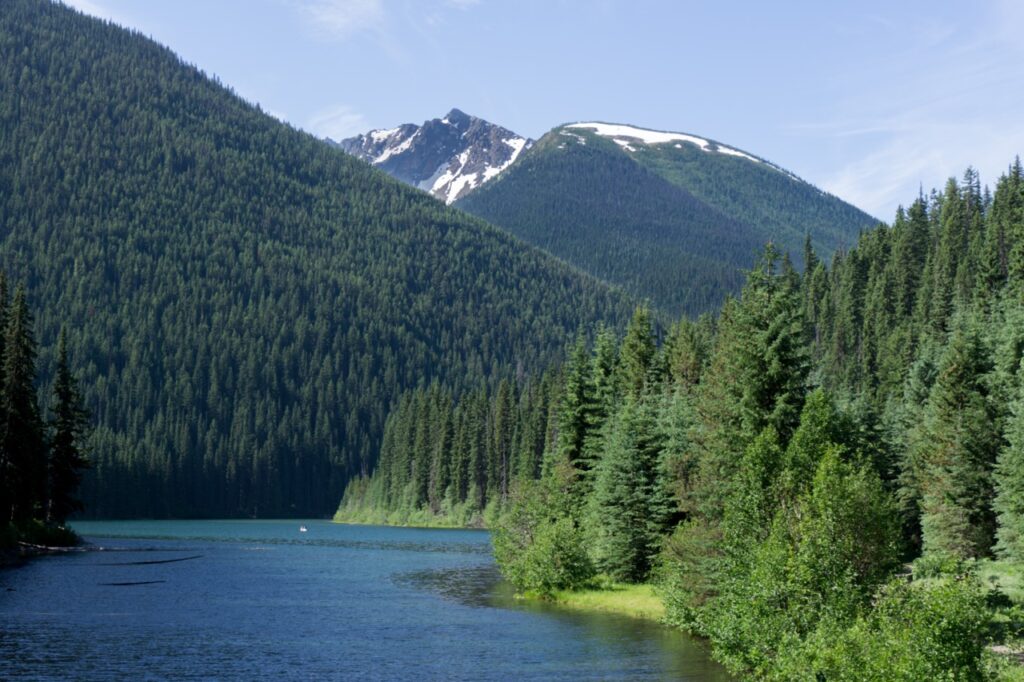
Trail Description: The easy trail along the shores of Lightning Lake is perfect for beginners or families. The flat trail has great views of the lakes. Leave the day hikers behind and camp at Strike Lake.
Getting There Without a Car: From Vancouver, take Mountain Man Mike’s shuttle to the Manning Park Lodge. From there, hike 3.5 km on the Little Muddy Trail to the trailhead.
More Info: Find details on this hike in my book, Backpacking in Southwestern British Columbia. For info on camping fees see Manning Provincial Park.
Skyline Trail (Manning Park)

Duration: 2 days
Difficulty: Challenging
Distance: 42 km round trip
Elevation Gain: 520 m
Best Months: July to September
Fees and Reservations: Camping fees are charged. All campsites are first-come, first-served.
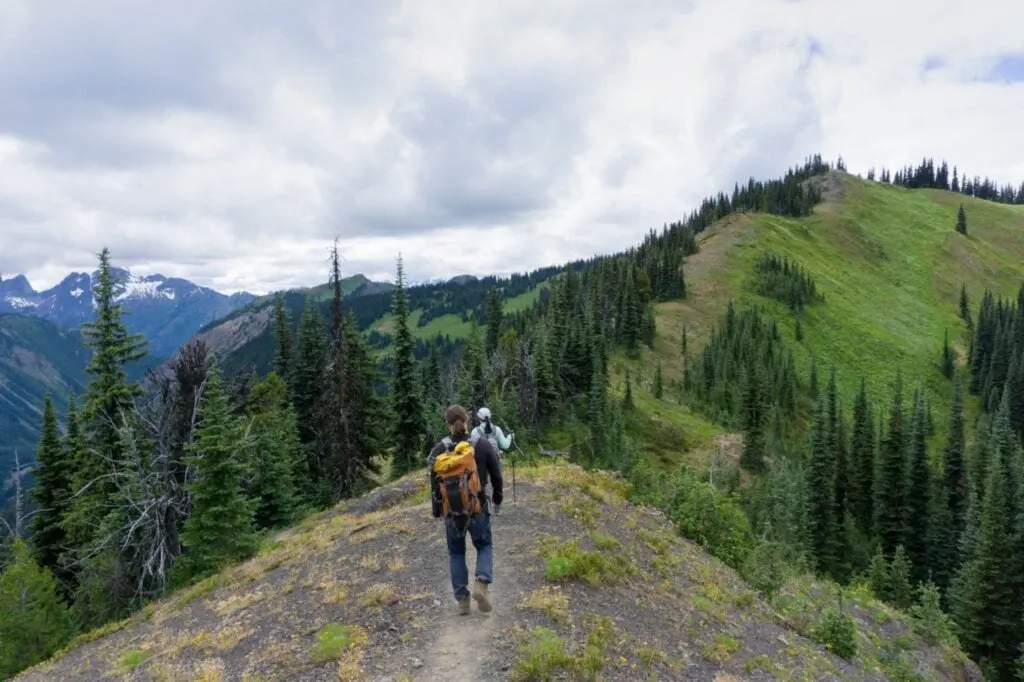
Trail Description: The views from this trail are incredible. You start the hike along the shores of Lightning Lake, then ascend to a ridge top viewpoint. From there, the trail follows the top of the ridge through wildflower meadows and you can look waaay down below you to the Lightning Lakes chain. Stay the night at Mowich Camp, which is often visited by deer.
Getting There Without a Car: From Vancouver, take Mountain Man Mike’s shuttle to the Manning Park Lodge. From there, hike 5.5 km on the Little Muddy Trail, then the Lightning Lakes trail over the Rainbow Bridge to the trailhead.
More Info: Find details on this hike in my book, Backpacking in Southwestern British Columbia. For info on camping fees see Manning Provincial Park.
Backpacking Trips on the Sunshine Coast Without a Car
Sunshine Coast Trail

Duration: 7 to 12 days
Difficulty: Challenging
Distance: 178 km one-way
Elevation Gain: 1300 m
Best Months: June to October
Fees and Reservations: None. Camping and staying in the huts is free and all campsites and huts are first-come, first-served.
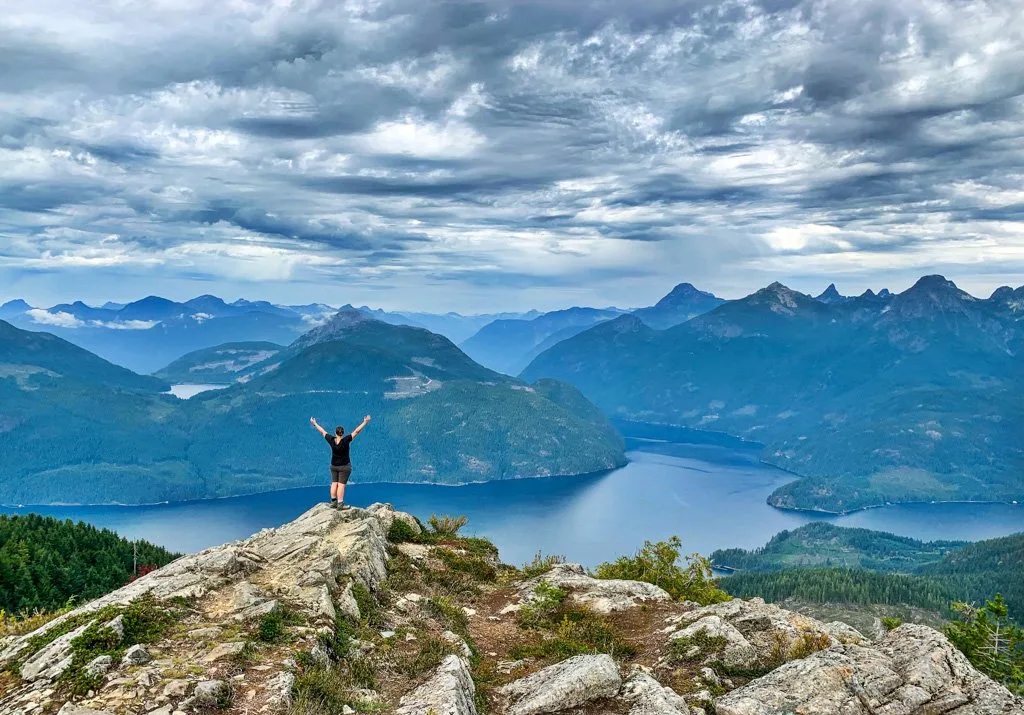
Trail Info: The 178-km-long Sunshine Coast Trail is a great backpacking trip to do without a car. The hike includes 14 huts along the way, plus dozens of campgrounds so lots of itineraries are possible. The trail starts and finishes on the ocean, but the bulk of the hike is inland up and down mountains and alongside lakes. If the whole trail is too long for you, I also have some options for car-free backpacking trips on shorter sections of the Sunshine Coast Trail below.
The Sunshine Coast Trail is a bucket list hike thanks to the hut-to-hut experience. It’s on my list of the best backpacking trips in BC.
Getting There Without a Car: You can fly to Powell River from Vancouver or Victoria, then take the Sunshine Coast Shuttle bus to the north trailhead. You can also take BC Transit bus 12 from Powell River to the south trailhead.
If you don’t want to fly, take Translink bus 250 or 257 from Vancouver to Horseshoe Bay, then a BC Ferry from there to Langdale where you catch the Sunshine Coast Connector bus to Earl’s Cove to get your final BC Ferry to Saltery Bay. From there you can start the trail or take the Sunshine Coast Shuttle Bus to the other trailhead.
If you want to save some money, you can also take BC Transit bus 12 from Saltery Bay to Powell River, then the Sunshine Coast Shuttle bus to the trailhead.
If you are coming from Vancouver Island, you can take a BC Ferry to Powell River from Comox.
More Info: Get all the details on the Sunshine Coast Trail website.
Fairview Bay/Saltery Bay Loop


Duration: 2 to 3 days
Difficulty: Moderate
Distance: 12 km round trip or 18 km loop
Elevation Gain: 150 to 570 m
Best Months: April to November
Fees and Reservations: None. Camping and the huts are free and all campsites and huts are first-come, first-served.
Trail Info: The section of the Sunshine Coast Trail is easy to hike without a car since you start right at the ferry. You can hike along the ocean to Fairview Bay Hut. Or you can hike up to Rainy Day Lake, then back around via Fairview Bay to make a loop. If you want to go further, you can tack on the summit of Mount Troubridge for an extra 15 km round trip with 900 m of elevation gain. All three locations have campsites and huts.
I love the coastal views on the way to Fairview Bay – it’s on my lists of the best spring backpacking trips in BC and best easy backpacking trips in BC.
Getting There Without a Car: From Vancouver, take Translink bus 250 or 257 to Horseshoe Bay ferry terminal, then take the BC Ferry to Langdale on the lower Sunshine Coast. From there, take the Sunshine Coast Connector Bus to Earl’s Cove ferry terminal. Take the BC Ferry to Saltery Bay. Once you get off the ferry, the trailhead is a few minutes walk away.
More Info: Find details on this hike in my book, Backpacking in Southwestern British Columbia and on the Sunshine Coast Trail website.
Saltery Bay to Lang Bay

Duration: 2 to 4 days
Difficulty: Challenging
Distance: 45.8 km one-way
Elevation Gain: 1300 m
Best Months: June to October
Fees and Reservations: None. Camping and the huts are free and all campsites and huts are first-come, first-served.
Trail Info: The southernmost section of the Sunshine Coast Trail offers a good mix of terrain. You’ll hike to the top of Mount Troubridge, the highest point on the Sunshine Coast Trail. The section also includes one of the longest coastal sections between gorgeous Fairview Bay and the trailhead at Saltery Bay.
Getting There Without a Car: From Vancouver, take Translink bus 250 or 257 to Horseshoe Bay, then take the BC Ferry to Langdale on the lower Sunshine Coast. From there, take the Sunshine Coast Connector Bus to Earl’s Cove ferry terminal. Take the BC Ferry to Saltery Bay. Once you get off the ferry, the trailhead is a few minutes walk away.
To finish the trail, walk along Dixon Road to the Sunshine Coast Highway, then catch the BC Transit bus 12 from Lang Bay back to the ferry terminal.
More Info: Get all the details on the Sunshine Coast Trail website.

Powell River to Lang Bay

Duration: 4 to 7 days
Difficulty: Challenging
Distance: 84.5 km one-way
Elevation Gain: 1100 m
Best Months: June to October
Fees and Reservations: None. Camping and the huts are free and all campsites and huts are first-come, first-served.
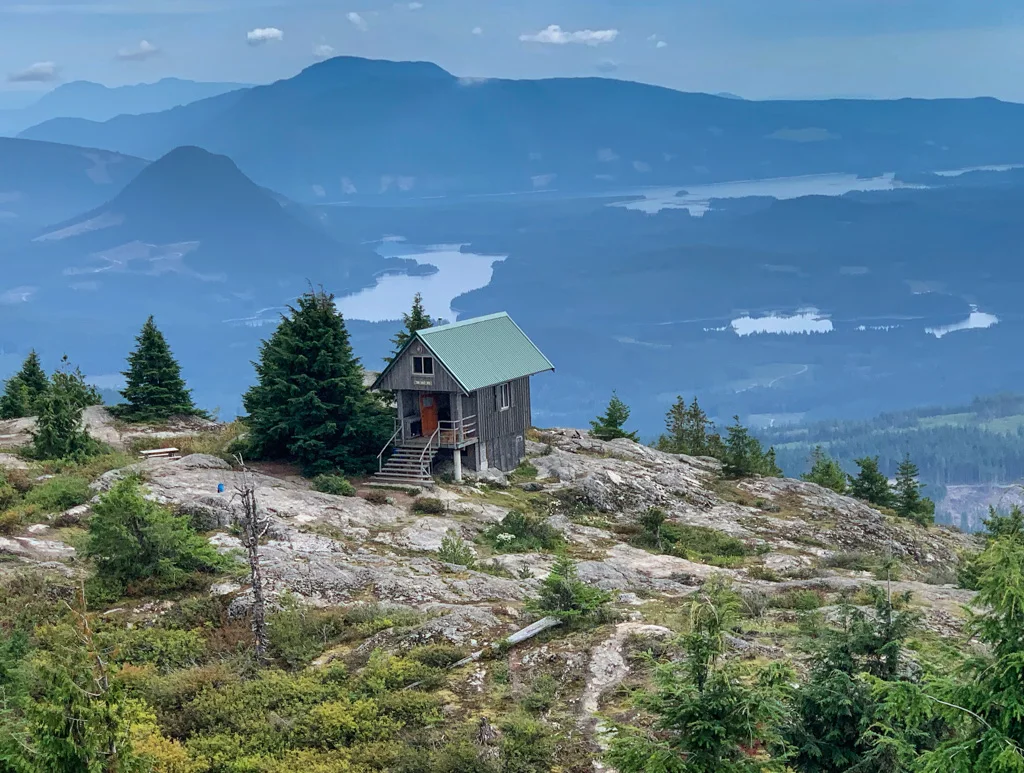
Trail Info: The middle section of the Sunshine Coast Trail includes some of the most spectacular views on the entire trail from the summits of Tin Hat Mountain and Walt Hill Hut. Since it is an 84 km stretch, it’s a great way to take in a big chunk of the SCT if you don’t have time to do the whole thing.
Getting There Without a Car: You can fly to Powell River from Vancouver or Victoria, then take a BC Transit bus 1 to the trailhead.
If you are coming from Vancouver Island, you can take a BC Ferry to Powell River from Comox.
You can also take Translink bus 250 or 257 from Vancouver to Horseshoe Bay, then a BC Ferry from there to Langdale where you catch the Sunshine Coast Connector bus to Earl’s Cove to get your final BC Ferry to Saltery Bay. From there you can take BC Transit Bus 12, then Bus 1 to the trailhead in Powell River.
To finish the trail, walk out along Dixon Road to the Sunshine Coast Highway, then catch the BC Transit bus 12 from Lang Bay back to the ferry terminal or to Powell River.
More Info: Get all the details on the Sunshine Coast Trail website.
Sarah Point to Powell River
Duration: 3 to 4 days
Difficulty: Moderate
Distance: 50.2 km one-way
Elevation Gain: 370 m
Best Months: March to November
Fees and Reservations: None. Camping and the huts are free and all campsites and huts are first-come, first-served.
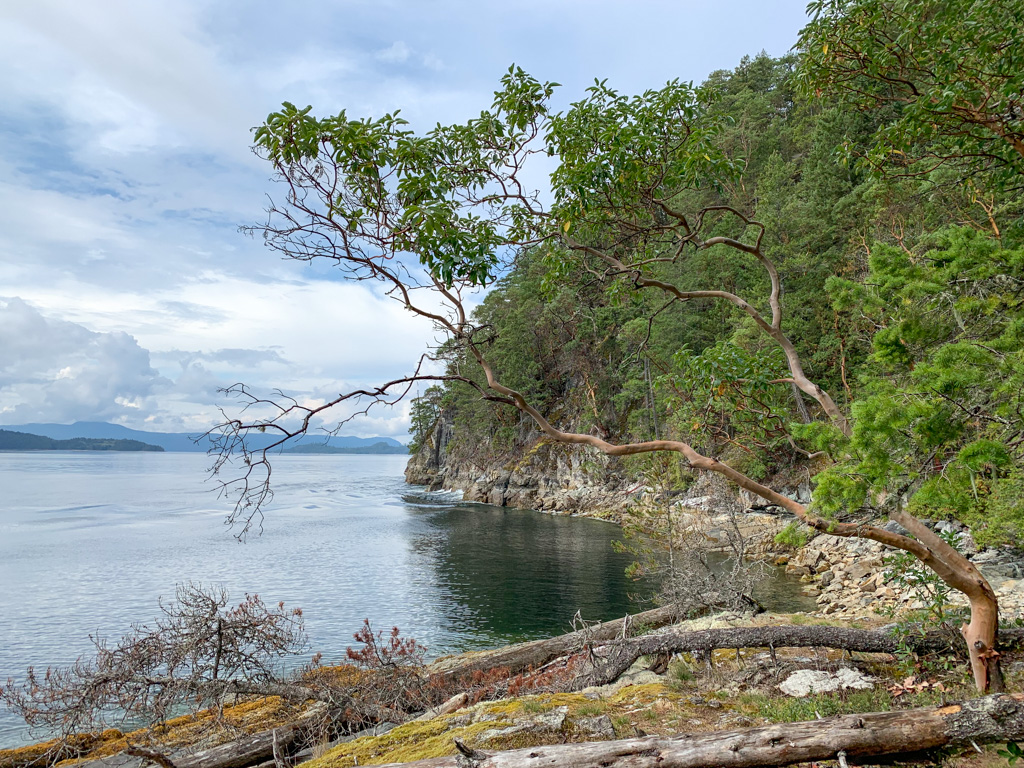
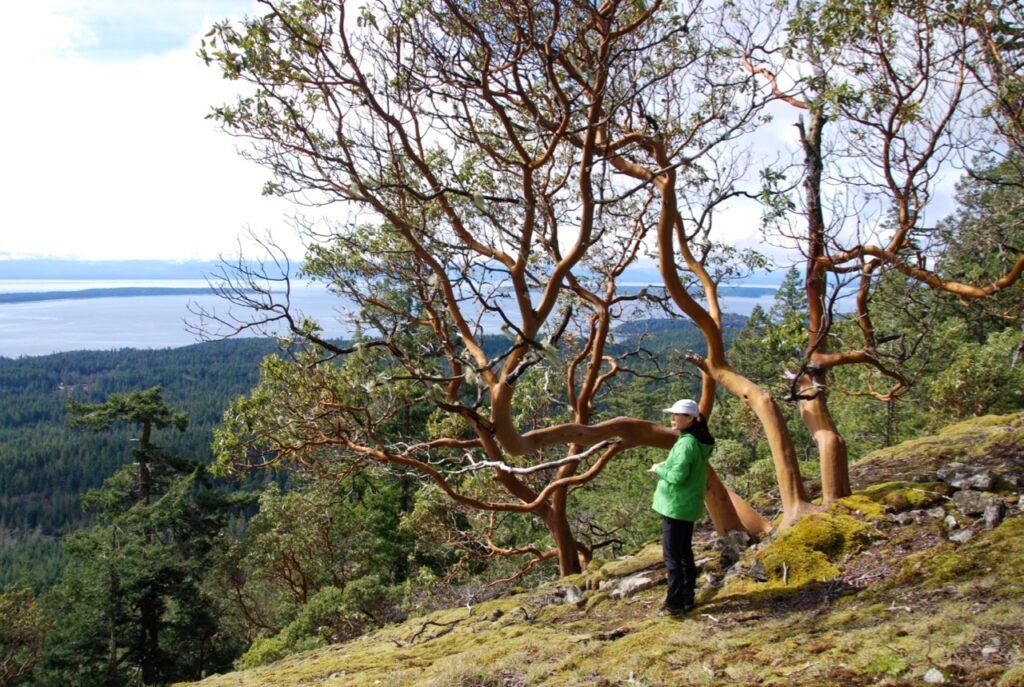
Trail Info: The low-elevation section at the north end of the Sunshine Coast Trail is a great car-free backpacking option for spring and fall. It has gorgeous views of the ocean from Manzanita Bluff and the campsite on Little Sliammon Lake is a great spot for a swim.
The hike to Manzanita Bluff was the first part of the SCT that I hiked and remains a favourite – it’s on my list of the best spring backpacking trips in BC.
Getting There Without a Car: You can fly to Powell River from Vancouver or Victoria, then take the Sunshine Coast Shuttle bus to the Sarah Point Trailhead.
If you are coming from Vancouver Island, you can take a BC Ferry to Powell River from Comox.
You can also take Translink bus 250 or 257 from Vancouver to Horseshoe Bay, then a BC Ferry from there to Langdale where you catch the Sunshine Coast Connector bus to Earl’s Cove to get your final BC Ferry to Saltery Bay.
From there you can take the Sunshine Coast Shuttle to the Sarah Point Trailhead. Or if you want to save some money, you can take a BC Transit bus 12 to Powell River, then the Sunshine Coast Shuttle.
The trail finishes in Powell River near the stop for BC Transit bus 1 which you can use to get back to the ferry at Saltery Bay.
More Info: Find details on this hike in my book, Backpacking in Southwestern British Columbia and on the Sunshine Coast Trail website.
Backpacking Trips on Vancouver Island Without a Car
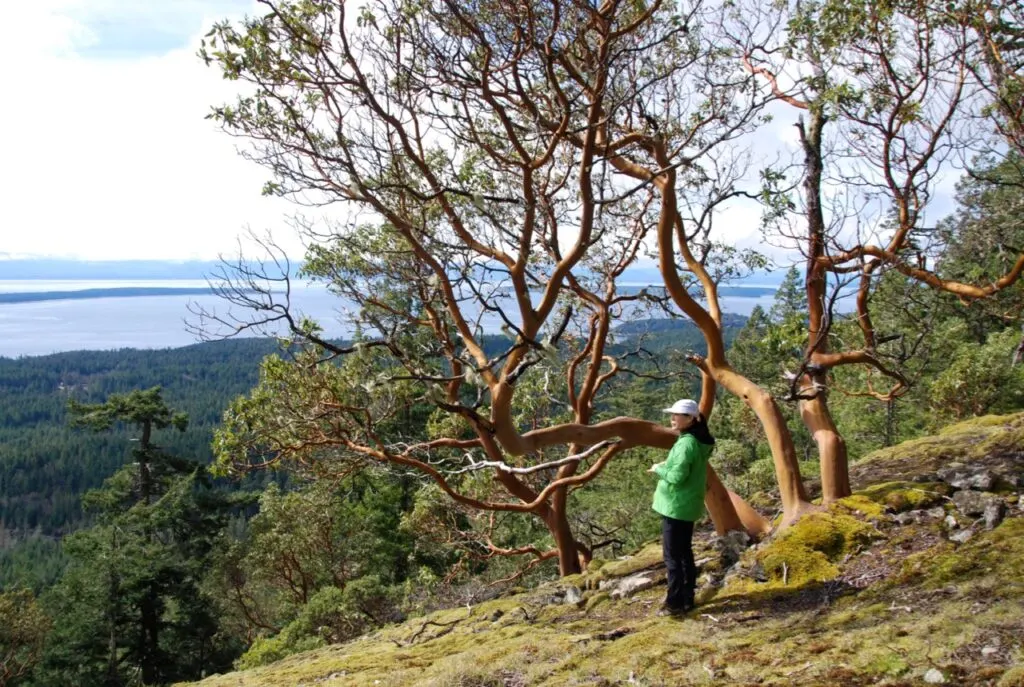
Narvaez Bay


Duration: 2 days
Difficulty: Easy
Distance: 18 km round trip
Elevation Gain: 140 m
Best Months: Year-round
Fees and Reservations: Reservations are required in the summer and camping fees are charged. (See my guide to making backcountry camping reservations in BC for more info.)
Trail Info: This oceanfront campground is located in Gulf Islands National Park on Saturna Island. It’s an easy hike along a quiet road and then a short trail to the campground. Unfortunately, there is no water here so you will have to bring your own.
Narvaez Bay is a gorgeous spot – it’s on my lists of the best spring backpacking trips in BC and best easy backpacking trips in BC.
Getting There Without a Car: From Vancouver take Translink bus 620 to the Tsawwassen ferry terminal, then take the BC Ferry to Saturna Island.
From Victoria, take the BC Transit bus 70 to the Swartz Bay ferry terminal, then take the BC Ferry to Saturna Island.
Once on the island, walk along East Point Road then Narvaez Bay Road to the park. If you want to save some time, bring a bike for the road section.
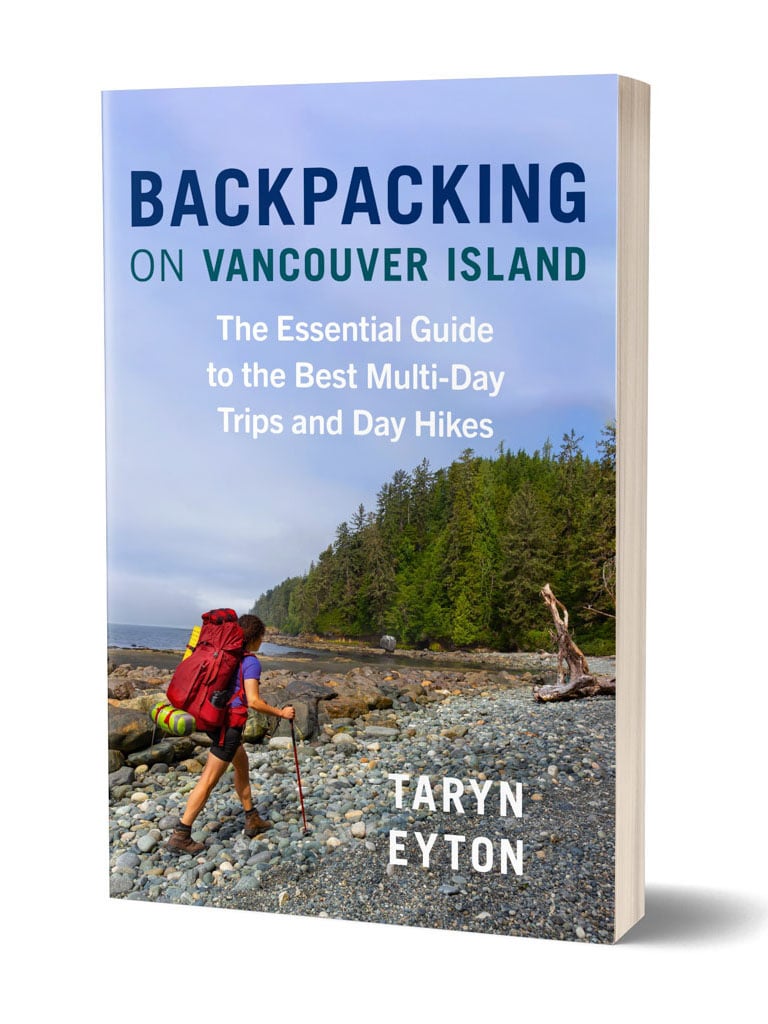
More Info: Find details on this hike in my book, Backpacking on Vancouver Island. See Gulf Islands National Park Reserve for camping reservations.
Join the Backpacking in BC Facebook Group
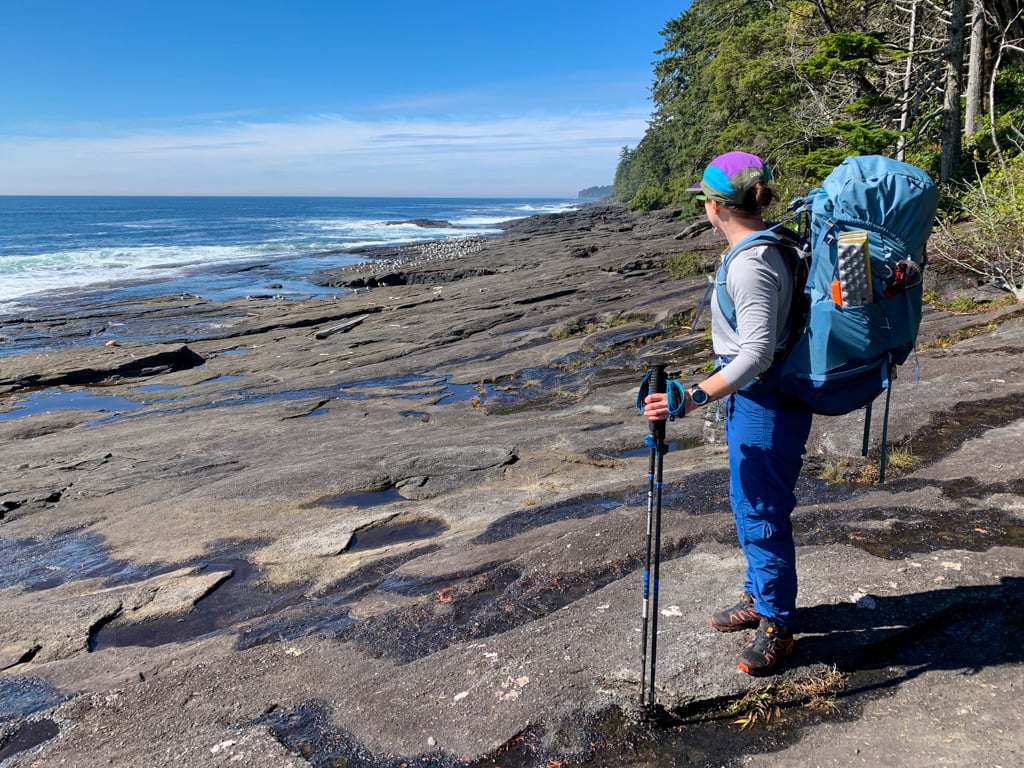
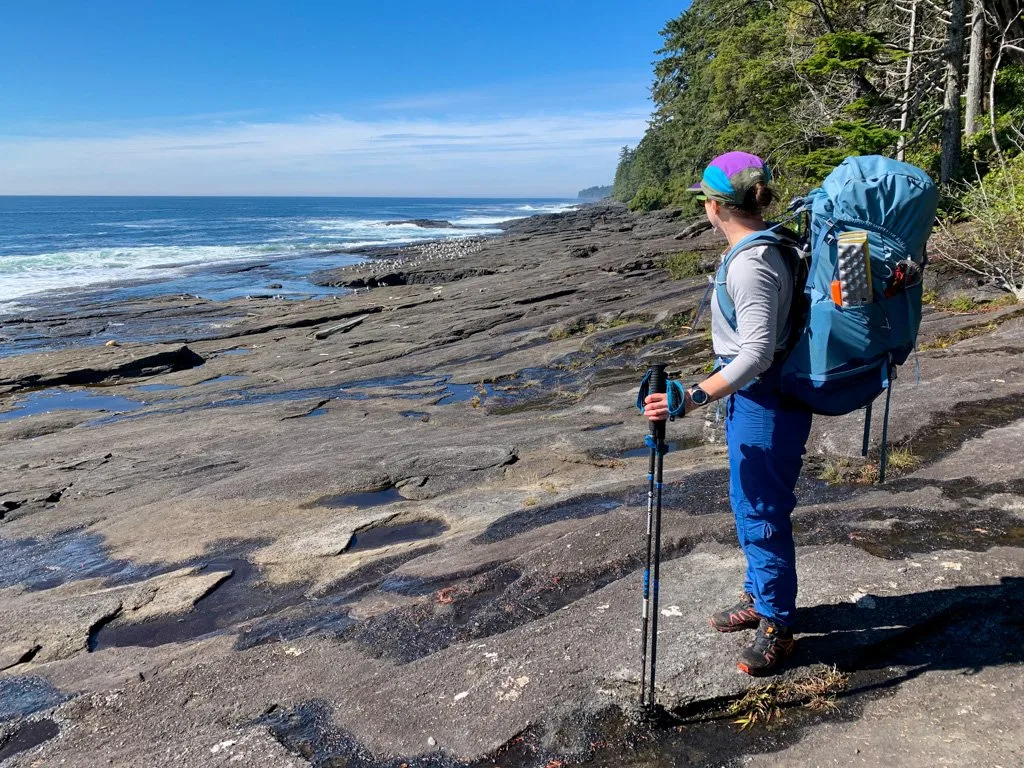
Juan de Fuca Trail
Heads up: The Juan de Fuca Trail was closed in summer 2025 due to significant storm damage. Mystic Beach and East Sombrio Beach are currently open. The full trail will re-open on July 1, 2026.
Duration: 3 to 5 days
Difficulty: Challenging
Distance: 47 km one-way
Elevation Gain: 190 m
Best Months: Year-round
Fees and Reservations: Camping fees charged. All campsites are first-come, first-served.
Trail Info: Often considered the sister trail to the famous West Coast Trail, the Juan de Fuca Trail runs along the ocean at the southern end of Vancouver Island. It is a bit more rugged than the WCT with more inland sections and lots of hills. But it also has lots of beautiful beach campsites.
This trip is one of my favourites – I’ve done it twice! It’s on my lists of the best backpacking trips in BC, and best spring backpacking trips in BC.
Getting There Without a Car: From Victoria, you can take the West Coast Trail Express shuttle bus to all of the trailheads.
More Info: Read my Juan de Fuca Trail guide and see my book, Backpacking on Vancouver Island for full details. For info on camping fees, see Juan de Fuca Provincial Park.
READ NEXT: Juan De Fuca Trail Guide: Backpacking on Vancouver Island
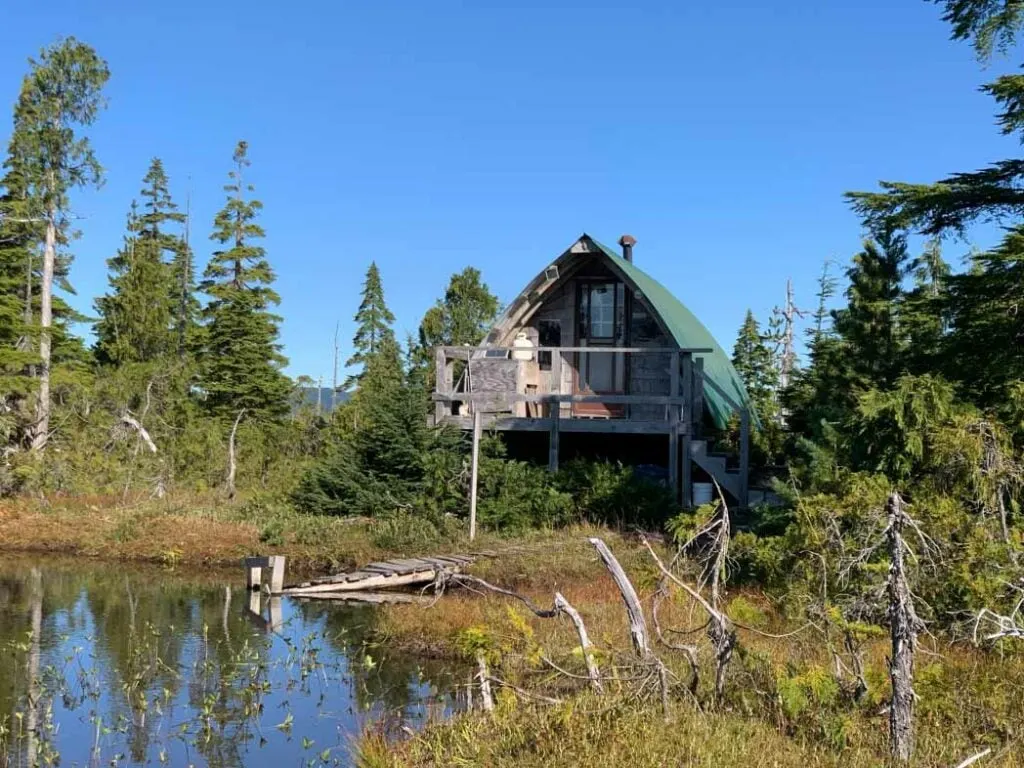
Kludahk Trail

Duration: 3 to 5 days
Difficulty: Moderate
Distance: 51.2 km one-way
Elevation Gain: 1000 m
Best Months: June to October
Fees and Reservations: None. Camping is free and all campsites are first-come, first-served.
Trail Info: This little-known trail follows the crest of the San Juan Ridge through gorgeous old-growth forest and unique sub-alpine bog. There are lots of viewpoints and tiny lakes along the way. The Kludahk Outdoors Club built the trail and has a series of huts along the trail, which are only open to club members. However, members of the public are welcome to use the trail and stay at the campsites near the huts.
Getting There Without a Car: It’s possible to get to and from the Kludahk Trail using the West Coast Express bus from Victoria.
The bus stops at the intersection of Highway 14 and Parkinson Creek Road, the western trailhead for the Kludahk Trail.
It also stops at the entrance to the China Beach day-use area, which is a 1 km (0.6 mi) walk along the highway from the start of North Main FSR. From there it’s a 10.2 km (6.3 mi) walk with 660 m (2165 ft) of elevation gain on logging roads to the eastern trailhead.
More Info: Find details on this hike in my book, Backpacking on Vancouver Island.
Get My Book…
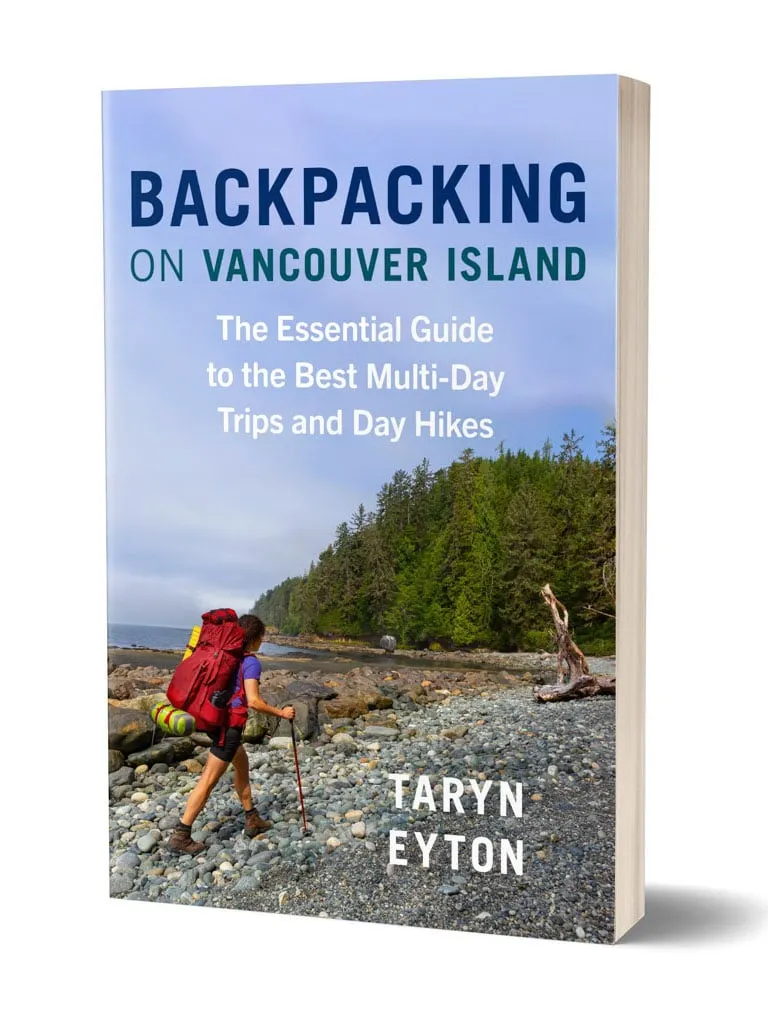
Backpacking on Vancouver Island
Discover Vancouver Island’s best day hikes and overnight trips
- 25 backpacking trips and 10 day hikes throughout Vancouver Island
- Info about permits, reservations and campground facilities
- Detailed maps and photos
- Advice for extending your trip
- Points of cultural and natural history
West Coast Trail

Duration: 5 to 8 days
Difficulty: Challenging
Distance: 75 km one-way
Elevation Gain: 225 m
Best Months: May to September
Fees and Reservations: Reservations, trail fees, and National Park entry fees required. (See my guide to making backcountry camping reservations in BC for more info.)
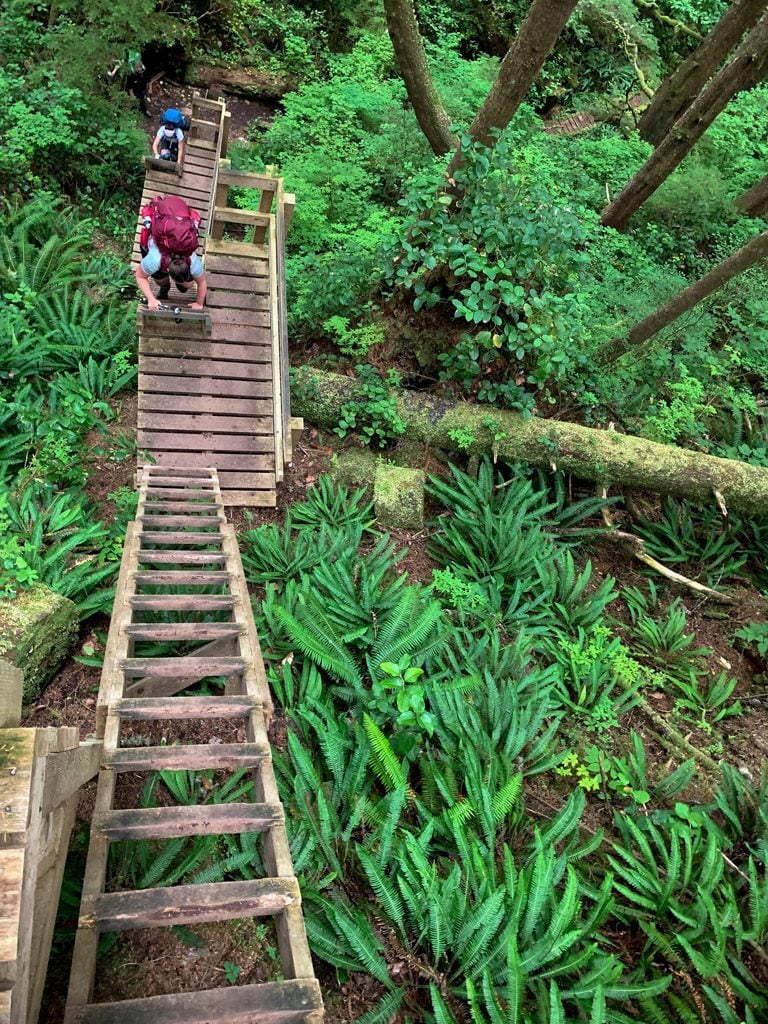
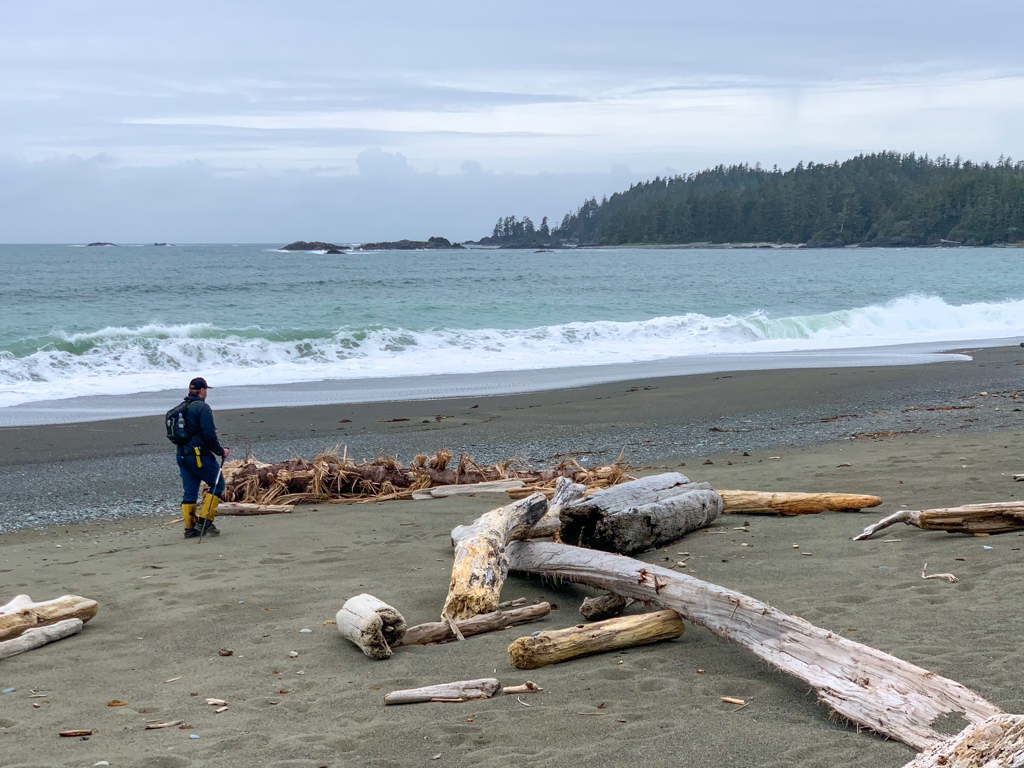
Trail Info: The West Coast Trail is a bucket list hike and is on lots of lists of the best trails in Canada. The tough trail follows the coast with lots of sections of beach walking and some inland old-growth forest. You will also challenge yourself on lots of ladders, bridges, and cable cars. The campsites are all on gorgeous beaches.
I love this trail – I’ve done it twice and it’s on my lists of the best backpacking trips in BC, and best spring backpacking trips in BC.
Getting There Without a Car: From Victoria, you can take the West Coast Trail Express shuttle bus to all of the trailheads.
More Info: Get details on this hike in my West Coast Trail guide and my book, Backpacking on Vancouver Island. For info on reservations, trail fees, and National Park fees, see Pacific Rim National Park.
READ NEXT: West Coast Trail Hiking Guide
Keeha Beach

Duration: 2 days
Difficulty: Moderate
Distance: 7 km round-trip
Elevation Gain: 45 m
Best Months: May to September
Fees and Reservations: Reservations, camping fees, and National Park entry fees required. (See my guide to making backcountry camping reservations in BC for more info.)
Trail Info: Remote Keeha Beach is located in Pacific Rim National Park just north of the West Coast Trail. It’s a gorgeous sandy beach with incredible views. The trail to get there is really rough, however, with tons of mud and slippery tree roots.
The beach here is so pretty – it’s on my list of the best spring backpacking trips in BC.
Getting There Without a Car: From Victoria, you can take the West Coast Trail Express shuttle bus to the town of Bamfield. From there, you can take a taxi to the trailhead or walk 2 km on Bamfield Road and South Bamfield Road.
More Info: Find details on this hike in my book, Backpacking on Vancouver Island. For fees, and reservations, see Pacific Rim National Park.
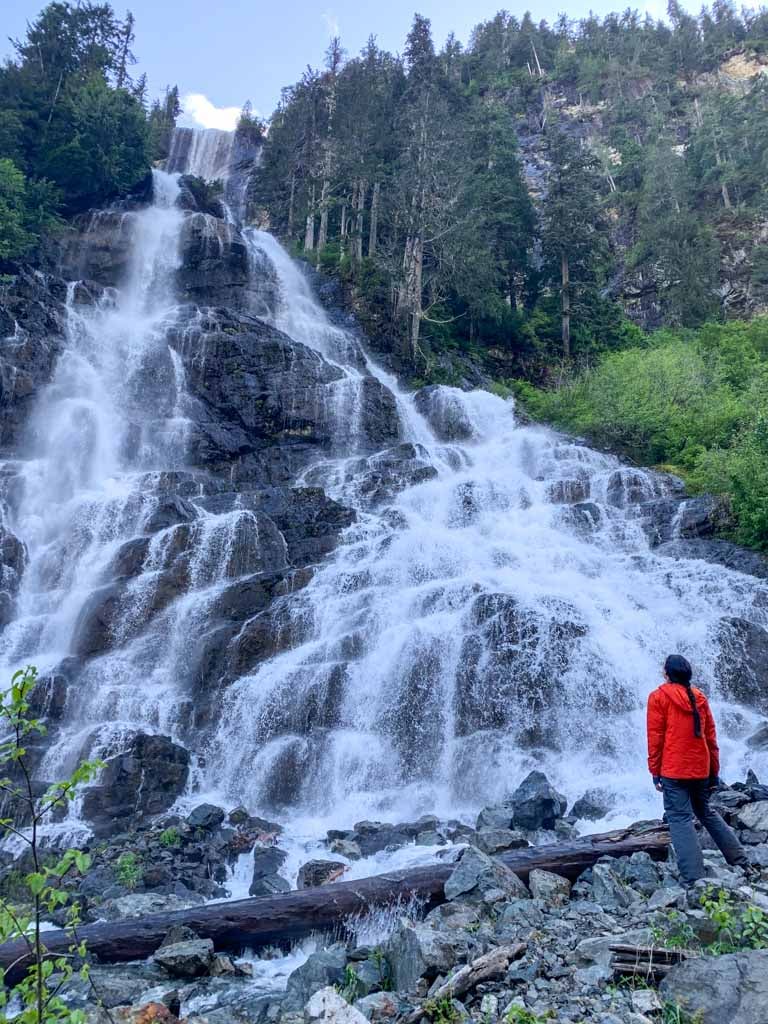
Della Falls

Duration: 2 to 5 days
Difficulty: Moderate
Distance: 32 km round-trip
Elevation Gain: 540 m
Best Months: Mid-May to September
Fees and Reservations: None. Camping is free and all campsites are first-come, first-served.
Trail Info: Della Falls is one of the tallest waterfalls in Canada with a total height of 440 m. The trail heads up a picturesque river valley to the base of the falls. From there, you can take a side trail up to Love Lake for an even better view.
This trip is one of my favourites – it’s on my lists of the best backpacking trips in BC, and best spring backpacking trips in BC.
Getting There Without a Car: From Nanaimo, take the Tofino Bus to Port Alberni. From there you can take a taxi for 20 minutes to the Great Central Lake Marina to catch the Della Falls water taxi to the trailhead.
More Info: Get all the details in my Della Falls Trail guide and my book, Backpacking on Vancouver Island. Join the Della Falls Facebook group to get the latest trail conditions.
READ NEXT: Della Falls Trail Hiking Guide (Vancouver Island Backpacking)
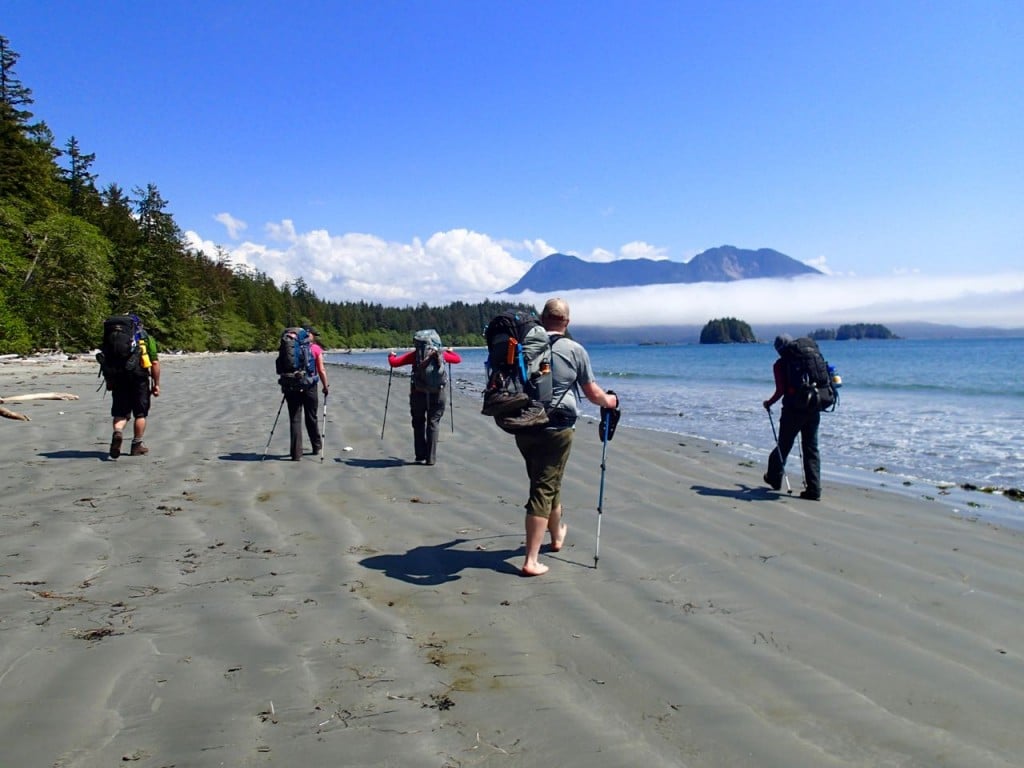
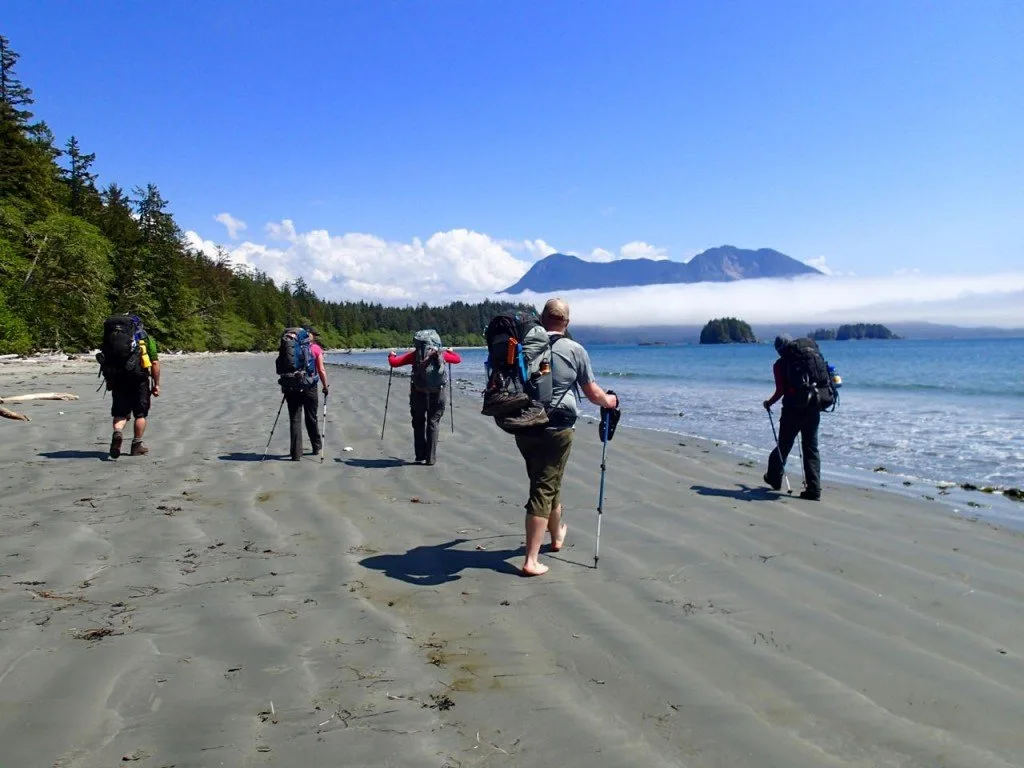
Wild Side Trail
Duration: 2 days
Difficulty: Easy
Distance: 22 km round-trip
Elevation Gain: 30 m
Best Months: May to October
Fees and Reservations: Trail fees charged. All campsites are first-come, first-served.
Trail Info: This is one of my favourite trails on Vancouver Island. Almost the entire trail is on beautiful sandy beaches. The campsite at Cow Bay has a spectacular view. The Wild Side Trail is an easy hike so it’s great for kids or beginners.
I’ve done this hike twice and it’s on my lists of the best backpacking trips in BC, best easy backpacking trips in BC, and best spring backpacking trips in BC.
Getting There Without a Car: From Nanaimo, take the Tofino Bus to Tofino, then catch a water taxi to the town of Ahousaht. The trail starts at the fuel dock in Ahousaht.
More Info: Get details on this hike in my Wild Side Trail guide and in my book, Backpacking on Vancouver Island.. For info on trail fees and camping fees, see the Wild Side Trail website.
READ NEXT: Wild Side Trail: Hiking and Camping Guide
Get My Book…
Backpacking on Vancouver Island
Discover Vancouver Island’s best day hikes and overnight trips
- 25 backpacking trips and 10 day hikes throughout Vancouver Island
- Info about permits, reservations and campground facilities
- Detailed maps and photos
- Advice for extending your trip
- Points of cultural and natural history
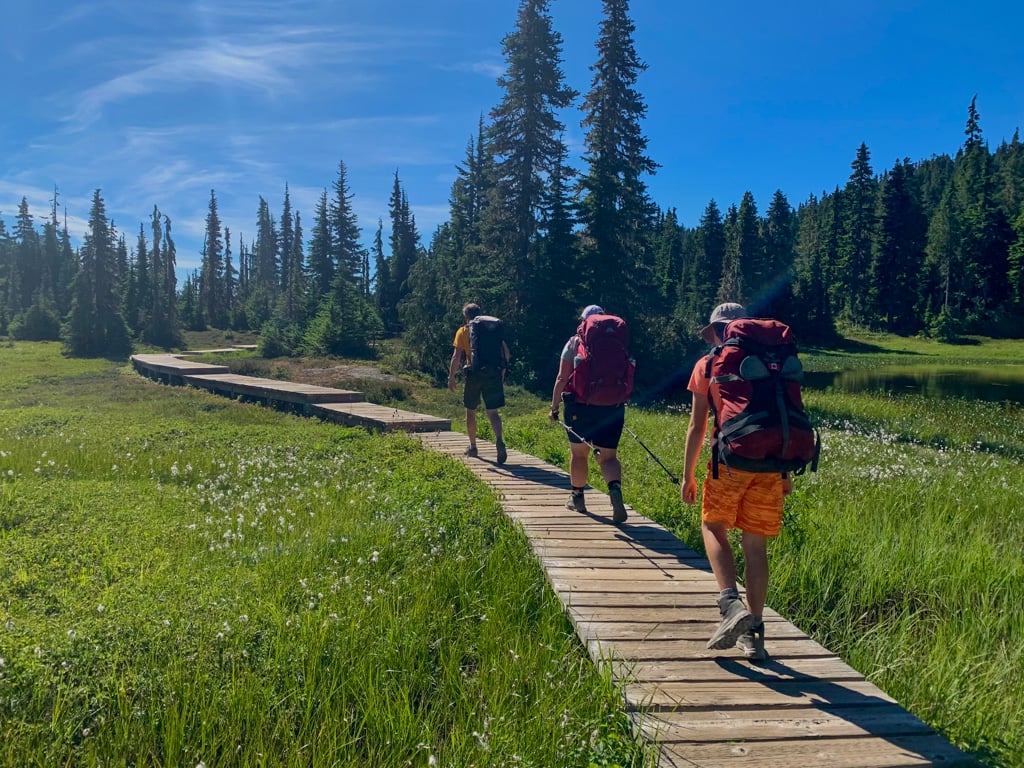
Forbidden Plateau Loop

Duration: 2 to 3 days
Difficulty: Easy
Distance: 8.3 to 15. 4 km loop
Elevation Gain: 190 m
Best Months: July to September
Fees and Reservations: Camping fees charged. All campsites are first-come, first-served.
Trail Info: The easy trails starting at Paradise Meadows in Strathcona Provincial Park are a great option for a laidback backpacking trip. With two campgrounds (Lake Helen Mackenzie and Kwai Lake) you can choose to make a shorter or longer loop. There are also several great day hikes from the campgrounds.
I’ve hiked here four times since it’s so nice and it’s on my list of the best backpacking trips in BC and best easy backpacking trips in BC.
Getting There Without a Car: From Nanaimo, take the Island Link bus to Courtenay/Comox. From there, take an Ambassador Transportation shuttle to the trailhead at the top of Mount Washington.
More Info: Find details on this hike in my book, Backpacking on Vancouver Island.
Circlet Lake and Mount Albert Edward

Duration: 2 to 3 days
Difficulty: Challenging
Distance: 31 km round trip
Elevation Gain: 980 m
Best Months: July to September
Fees and Reservations: Camping fees charged. All campsites are first-come, first-served.
Trail Info: Mount Albert Edward is one of the highest mountains on Vancouver Island and one of the few you can summit without mountaineering gear. The trip up the mountain begins with a hike through the Paradise Meadows area of Strathcona Provincial Park. Stay overnight at tiny Circlet Lake and day hike to the peak from there.
I’ve hiked here twice – it’s on my list of the best backpacking trips in BC.
Getting There Without a Car: From Nanaimo, take the Island Link bus to Courtenay/Comox. From there, take an Ambassador Transportation shuttle to the trailhead at the top of Mount Washington.
More Info: Find details on this hike in my book, Backpacking on Vancouver Island.
Join the Backpacking in BC Facebook Group
North Coast Trail
Duration: 5 to 6 days
Difficulty: Very challenging
Distance: 43 km one-way
Elevation Gain: 245 m
Best Months: mid-April to October
Fees and Reservations: Camping fees charged between May and September. (Otherwise, it is free.) All campsites are first-come, first-served.
Trail Info: I’ve hiked a lot of coastal trails and I think the North Coast Trail is the toughest. The trail is muddy, rooty, and sometimes near vertical as it ascends coastal cliffs. But the beaches and old-growth forests are spectacular.
I’ve hiked this trail twice – it’s on my lists of the best backpacking trips in BC, and best spring backpacking trips in BC.
Getting There Without a Car: From Nanaimo, take the Island Link Bus to Port Hardy. From there you can take Cape Scott Water Taxi to the eastern trailhead. To get back from the trail, take the North Coast Trail Shuttle bus (operated by Cape Scott Water Taxi) from the Cape Scott trailhead to Port Hardy.
More Info: Get details on this hike in my North Coast Trail guide and my book, Backpacking on Vancouver Island. Join the Cape Scott Park Facebook group for the latest trail conditions.
READ NEXT: North Coast Trail: Backpacking on Vancouver Island
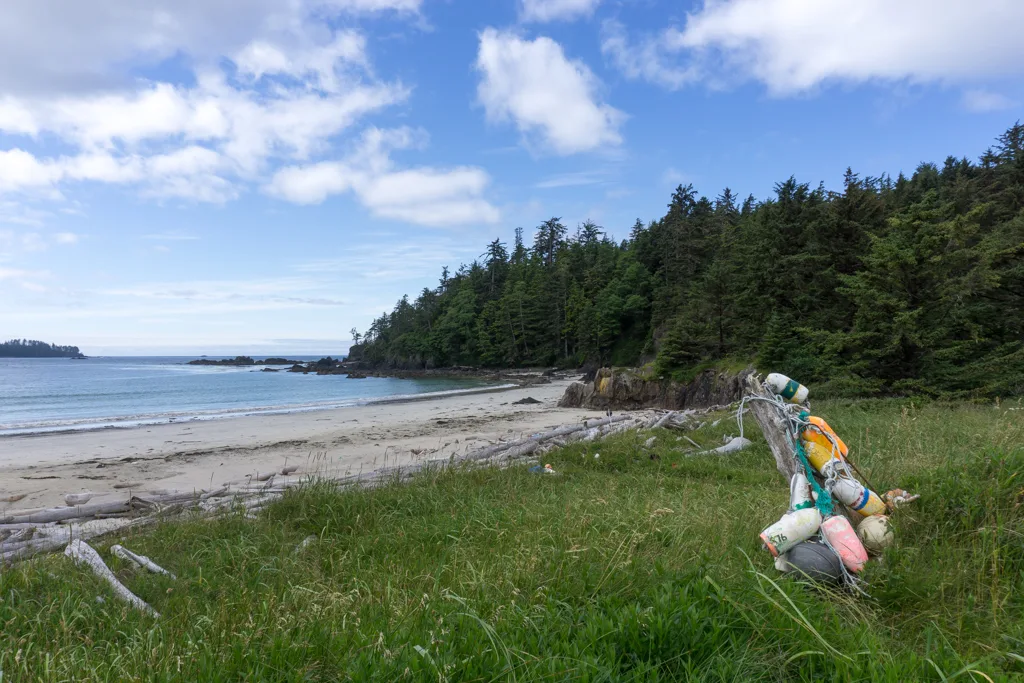
Cape Scott
Duration: 2 to 3 days
Difficulty: Moderate
Distance: 41.5 km round trip
Elevation Gain: 100 m
Best Months: Year-round
Fees and Reservations: Camping fees charged between May and September. (Otherwise, it is free.) All campsites are first-come, first-served.
Trail Info: I love the hike to Cape Scott – I’ve done it 4 times. The trail heads through the wet and muddy rainforest before emerging on the coast. You can camp at several different sandy beaches. The highlight is the day hike to the lighthouse at Cape Scott, the northernmost point on Vancouver Island.
This is my favourite hike on Vancouver Island – it’s on my lists of the best backpacking trips in BC, and best spring backpacking trips in BC.
Getting There Without a Car: From Nanaimo, take the Island Link bus to Port Hardy. From there you can take the North Coast Trail Shuttle bus (operated by Cape Scott Water Taxi) to the trailhead.
More Info: Get details on this hike in my Cape Scott Trail guide and my book, Backpacking on Vancouver Island. Join the Cape Scott Park Facebook group the latest trail conditions. For camping fees, see Cape Scott Provincial Park.
READ NEXT: Cape Scott Trail Guide: Hiking and Camping on Northern Vancouver Island
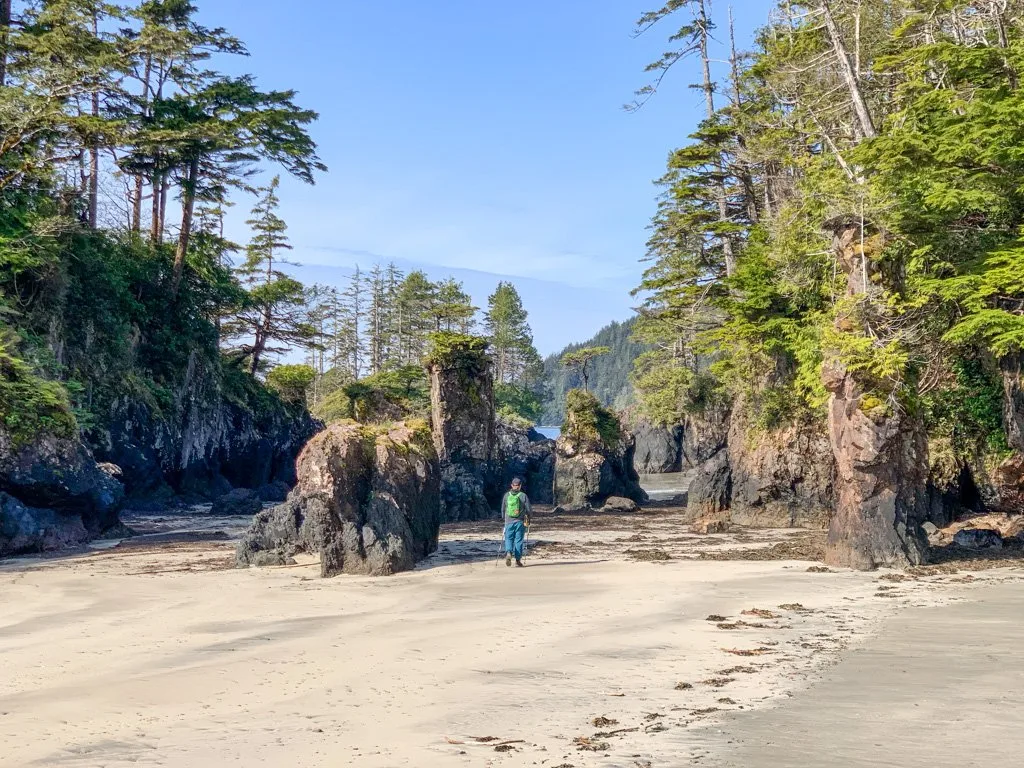
San Josef Bay

Duration: 2 days
Difficulty: Easy
Distance: 5 km return
Elevation Gain: 45 m
Best Months: Year-round
Fees and Reservations: Camping fees charged between May and September. (Otherwise, it is free.) All campsites are first-come, first-served.
Trail Info: The flat trail to San Josef is so easy that you can pull a wagon on it – and many people do. The beautiful sandy beach is a great place to camp. Be sure to allow extra time to explore the sea stacks at low tide. It takes a long time to get here, but this is a great beginner backpacking trip in BC without a car.
I’ve hiked to this beautiful beach twice – it’s on my lists of the best spring backpacking trips in BC and best easy backpacking trips in BC.
Getting There Without a Car: From Nanaimo, take the Island Link bus to Port Hardy. From there you can take the North Coast Trail Shuttle bus (operated by Cape Scott Water Taxi) to the trailhead.
More Info: Get details on this hike in my Cape Scott Trail guide and my book, Backpacking on Vancouver Island. Join the Cape Scott Park Facebook group the latest trail conditions. For camping fees, see Cape Scott Provincial Park.
Get My Book…
Backpacking on Vancouver Island
Discover Vancouver Island’s best day hikes and overnight trips
- 25 backpacking trips and 10 day hikes throughout Vancouver Island
- Info about permits, reservations and campground facilities
- Detailed maps and photos
- Advice for extending your trip
- Points of cultural and natural history
Backpacking Trips in Eastern BC and the Rocky Mountains Without a Car
Heads up: Some of the trips in this section are technically in Alberta, but they are so close to the BC border that it seemed silly not to include them.
Okanagan High Rim Trail
Duration: 3 to 4 days
Difficulty: Moderate
Distance: 59 km one-way
Elevation Gain: 800 m
Best Months: May to October
Fees and Reservations: None. Camping is free and all campsites are first-come, first-served.
Trail Info: This trail makes a traverse through the mountains above the Okanagan Valley between Vernon and Kelowna. It’s a newer route that is gaining in popularity thanks to the many little lakes and great views. Easy access makes it one of the best backpacking trips in BC without a car.
This trip made it onto my lists of the best backpacking trips in BC, and best spring backpacking trips in BC.
Getting There Without a Car: Take Ebus to Vernon from Kelowna or Vancouver. From there, you can take a taxi for 15 minutes to the northern trailhead. You can also take BC Transit bus 1 to the stop on Kalamalka Road at Bonavista Drive, then walk 2.8 to the trailhead. To finish the trail, take a taxi for 30 minutes back to Kelowna from Highway 33 at Philpott Road.
More Info: Get the details from the Okanagan High Rim Trail Association.
Okanagan Mountain Park
Duration: 2 to 3 days
Difficulty: Moderate/Challenging
Distance: 22 to 40 km
Elevation Gain: 200 to 1100 m
Best Months: Mid-March to October
Fees and Reservations: None. Camping is free and all campsites are first-come, first-served.
Trail Info: There are tons of trail options in this huge park south of Kelowna. There are backcountry campgrounds near the peak of Okanagan Mountain at Divide Lake and Baker Lake. Or you can choose from several campgrounds on the shores of Okanagan Lake, accessed via the Wild Horse Canyon Trail. It’s also possible to combine the two to make a big loop.
This trip is also on my list of the best spring backpacking trips in BC.
Getting There Without a Car: Take Ebus to Kelowna from Vancouver or Calgary or points along the way. From Kelowna, take a taxi for 25 minutes to the trailhead on Lakeshore Road.
More Info: See Okanagan Mountain Provincial Park.
Skoki Loop

Duration: 3 days
Difficulty: Moderate
Distance: 33.5 km round trip
Elevation Gain: 1,295 m
Best Months: July to September
Fees and Reservations: Reservations, camping fees, and National Park admission required. (See my guide to making backcountry camping reservations in BC for more info.)
Trail Info: This lollipop-shaped loop trip heads into the mountains east of Lake Louise in Banff National Park. The route weaves between tall peaks and picturesque alpine lakes.
Getting There Without a Car: Take the Rider Express bus to Lake Louise from Calgary, Kamloops, or Vancouver, then walk 3.5 km to the trailhead.
More Info: See my Skoki Loop trail guide.
Psst! This trail is on my list of the best backpacking trips in the Canadian Rockies.
Egypt Lake

Duration: 2 to 4 days
Difficulty: Moderate
Distance: 24.6 km round trip
Elevation Gain: 1,135 m
Best Months: July to September
Fees and Reservations: Reservations, camping fees, and National Park admission required. (See my guide to making backcountry camping reservations in BC for more info.)
Trail Info: This trail climbs up through Healy Pass to Egypt Lake in Banff National Park. From there you can day hike to several stunning lakes. You can make your trip into a loop by taking the Sunshine Village gondola back to the trailhead.
Getting There Without a Car: Take the Rider Express bus to Banff from Calgary or Vancouver. From there take the Sunshine Village Shuttle to the trailhead at the base of the gondola.
More Info: See my Egypt Lake backpacking guide.
READ NEXT: Egypt Lake in Banff Hiking and Backpacking Guide
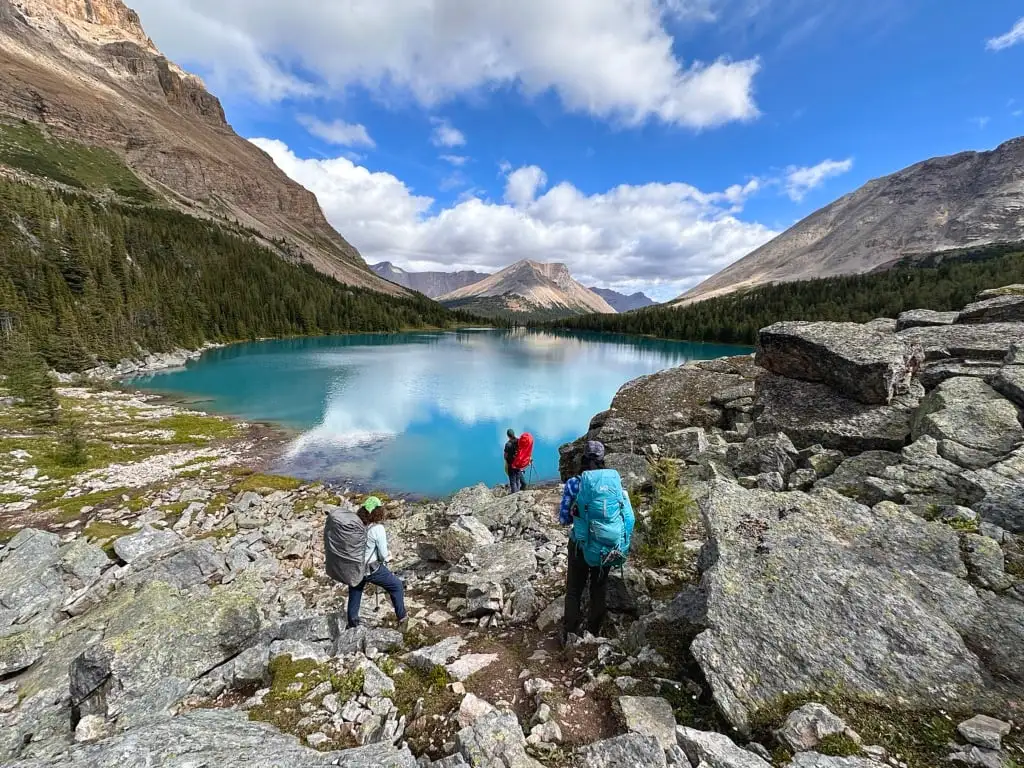
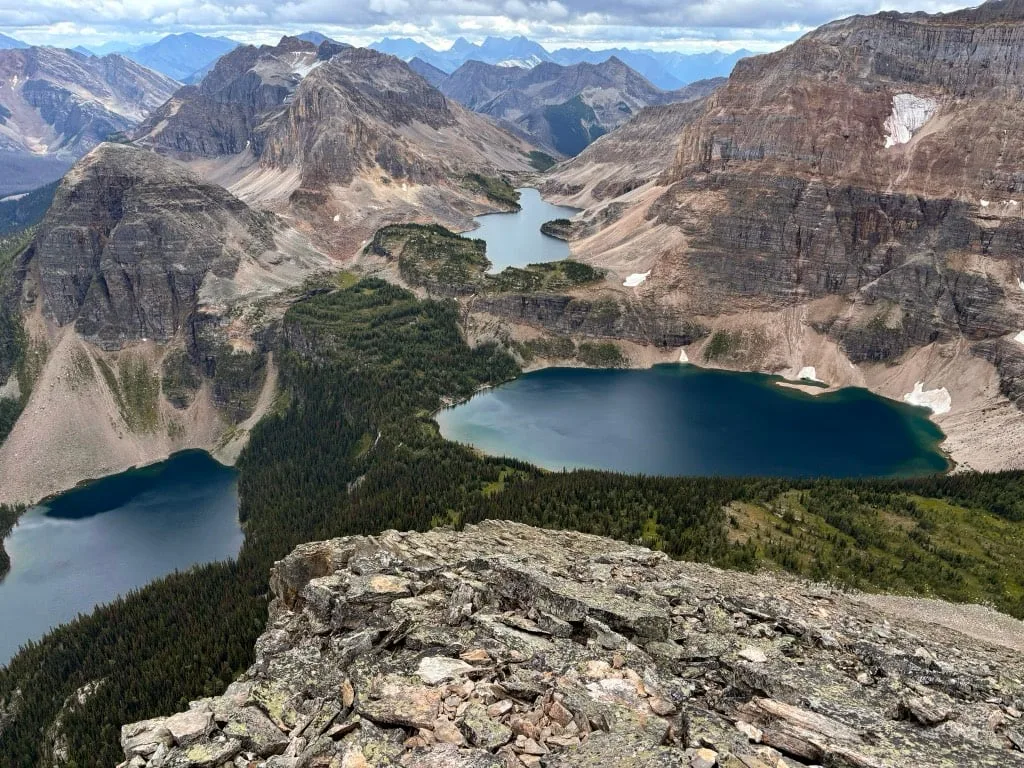
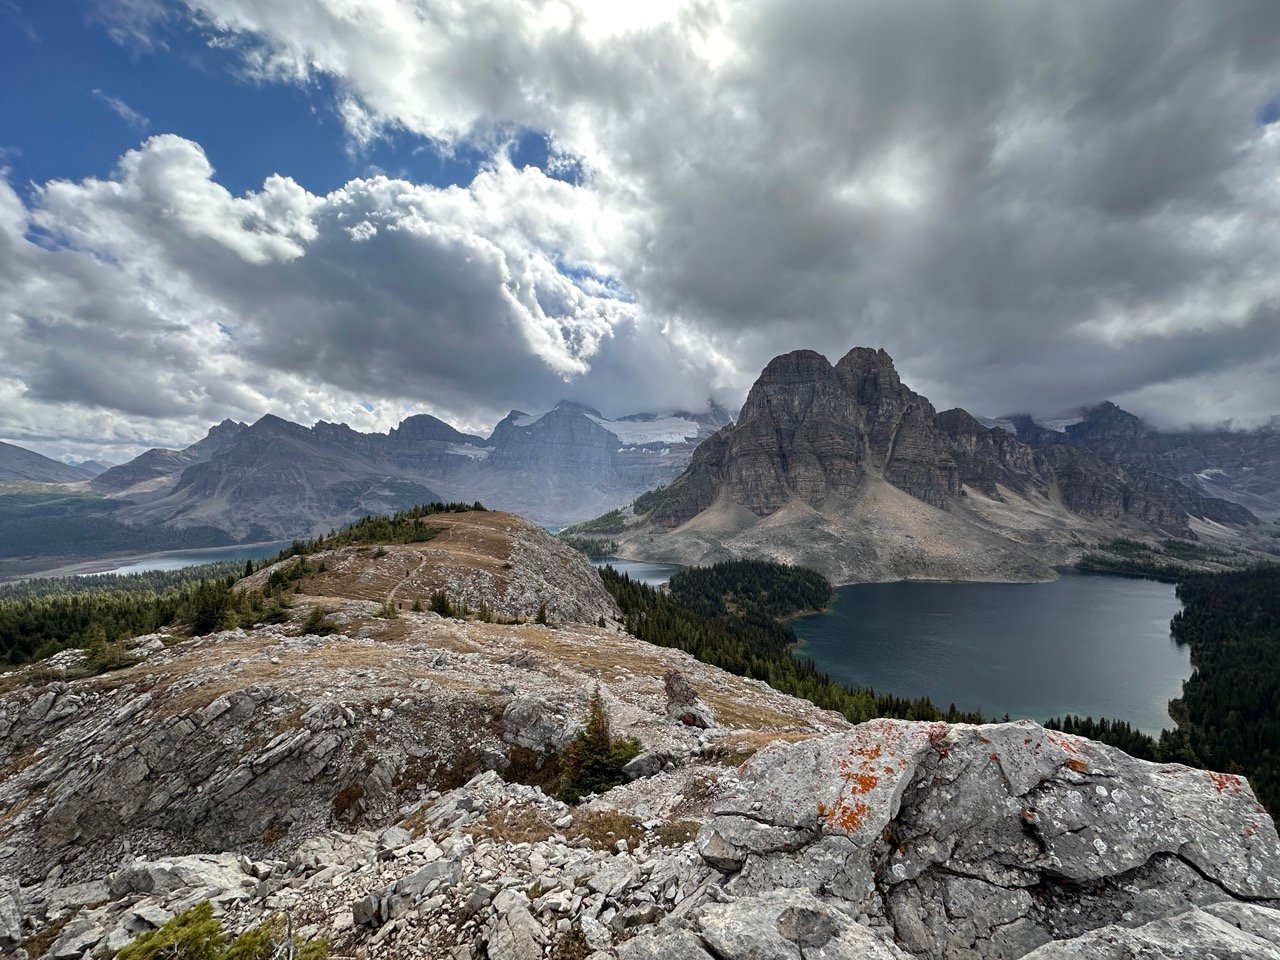
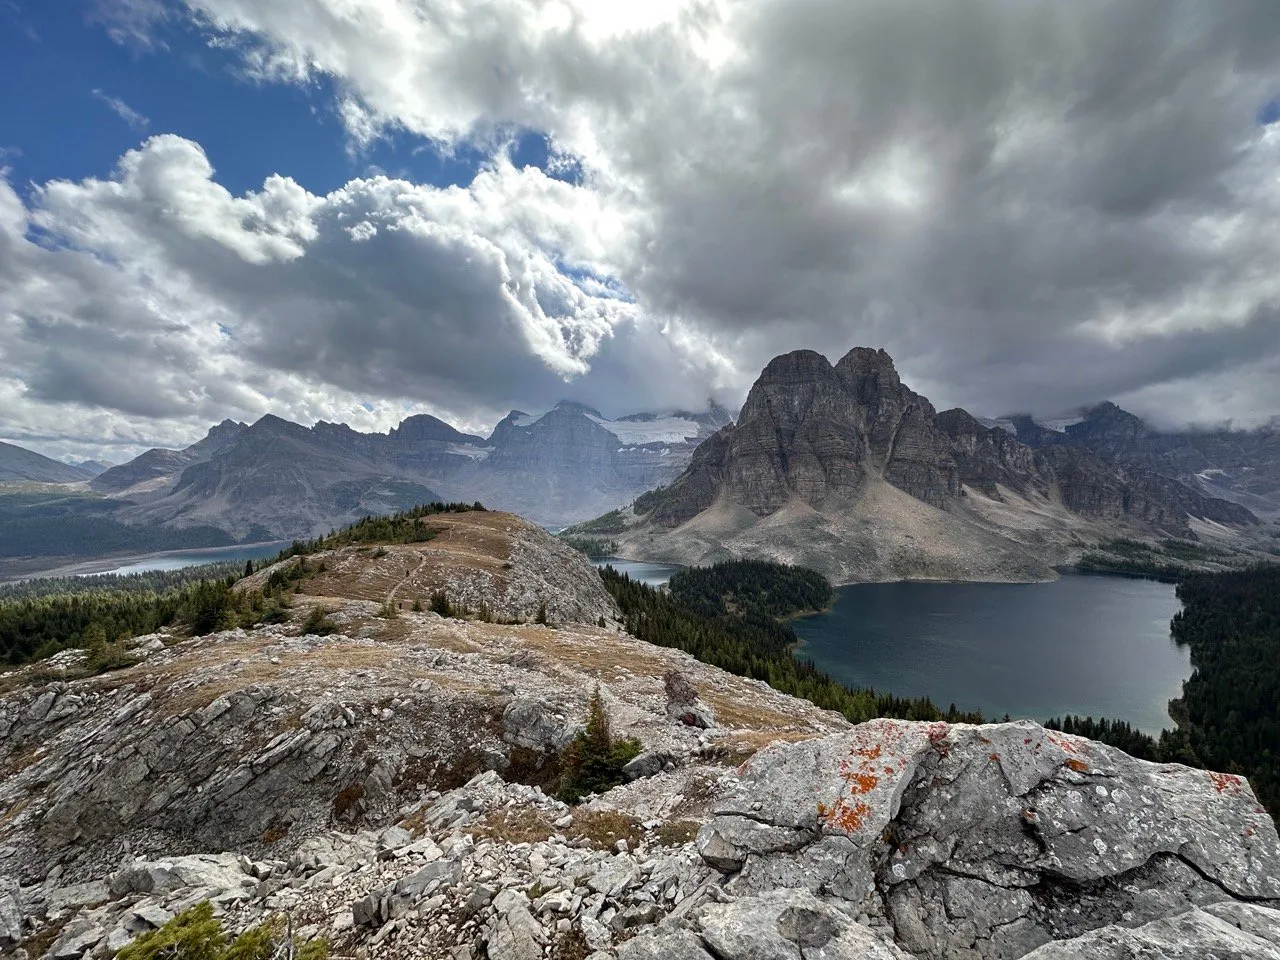
Mount Assiniboine
Duration: 4 to 6 days
Difficulty: Moderate
Distance: 55 km round trip
Elevation Gain: 480 m
Best Months: Mid-July to September
Fees and Reservations: Reservations and fees are required to camp in the park through BC Parks and to camp on the access trails through Banff National Park. (See my guide to making backcountry camping reservations in BC for more info.)
Trail Info: The whole Mount Assiniboine area is stunning. There are several day hikes from the base camp at Lake Magog which lead to incredible viewpoints. There are two ways to hike to the core area – via Mount Shark trailhead in Kananaskis or via Sunshine Village near Banff. Only the Sunshine Village option is possible to backpacking without a car.
This trip is one of my favourites – it’s on my list of the best backpacking trips in BC. It’s also on my list of the best backpacking trips in the Canadian Rockies.
Getting There Without a Car: Take the Rider Express to Banff from Vancouver or Calgary. From there take the Sunshine Village Shuttle to the trailhead at the base of the gondola. Ride the gondola up to the top to the trailhead.
More Info: See my huge Mount Assiniboine hiking guide for more info. Make reservations on the Mount Assiniboine Provincial Park. Join the Mount Assiniboine Facebook group. See Banff National Park for reservations for camping on the approach trails.
READ NEXT: Mount Assiniboine Hiking Guide
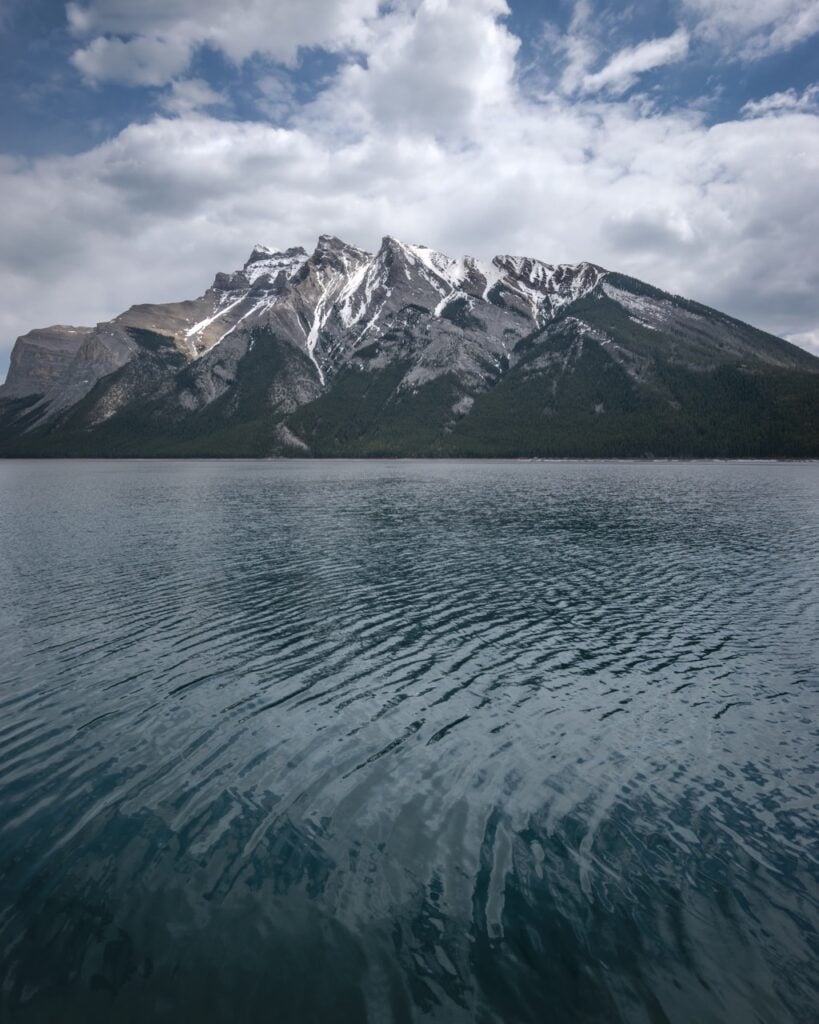
Lake Minnewanka Shoreline Trail

Duration: 2 to 4 days
Difficulty: Easy
Distance: 15.6 to 57.8 km round trip
Elevation Gain: 300 m
Best Months: May to October
Fees and Reservations: Reservations, camping fees, and National Park admission required. (See my guide to making backcountry camping reservations in BC for more info.)
Trail Info: The easy trail along the shore of Lake Minnewanka in Banff National Park is a great option for spring or fall since it is in the valley bottom. There are six backcountry campgrounds along the route. Don’t miss the day hike to Alymer Pass, which has a spectacular view.
Getting There Without a Car: Take the Rider Express to Banff from Calgary or Vancouver. From there take Roam Transit bus 6 to Lake Minnewanka.
More Info: See Banff National Park.
Join the Backpacking in BC Facebook Group
Saturday Night Lake Loop
Duration: 2 to 3 days
Difficulty: Easy
Distance: 24.6 km
Elevation Gain: 480 m
Best Months: May to October
Fees and Reservations: Reservations, camping fees, and National Park admission required. (See my guide to making backcountry camping reservations in BC for more info.)
Trail Info: This easy trail starts right in the town of Jasper. The loop heads steadily but never steeply uphill, passing several lakes. There are two campgrounds along the trail both near picturesque lakes.
Getting There Without a Car: Take Sundog Tours bus from Edmonton. From there, walk 1.6 km to the trailhead.
More Info: See Jasper National Park.
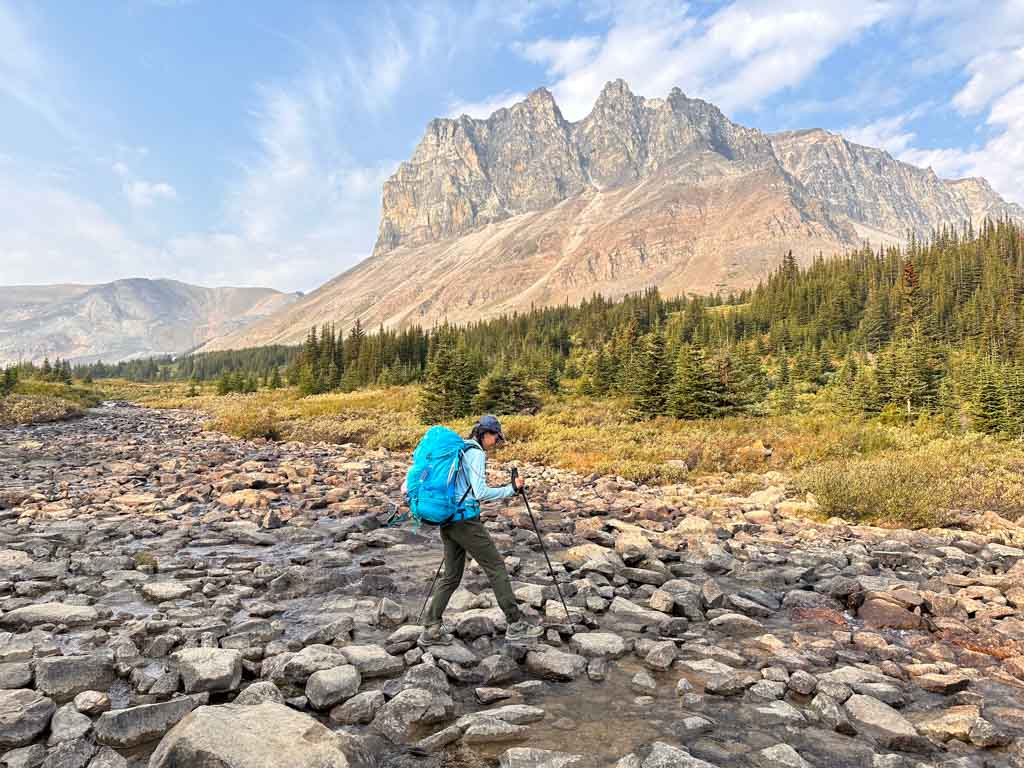
Skyline Trail (Jasper National Park)
Duration: 2 to 4 days
Difficulty: Moderate
Distance: 44.1 km one-way
Elevation Gain: 1330 m
Best Months: Mid-July to mid-September
Fees and Reservations: Reservations, camping fees, and National Park admission required. (See my guide to making backcountry camping reservations in BC for more info.)
Trail Info: The Skyline Trail is one of the most popular backpacking trips in Jasper National Park. The trail is mostly above the treeline, so it has incredible views as it goes over mountain passes. Most people choose to hike from south to north since it has less elevation gain.
Getting There Without a Car: Take Sundog Tours bus from Edmonton. Then take the Maligne Valley Hiker’s shuttle to the trailhead.
More Info: See my Skyline Trail hiking guide.
READ NEXT: Hike the Skyline Trail in Jasper National Park
Get My Books
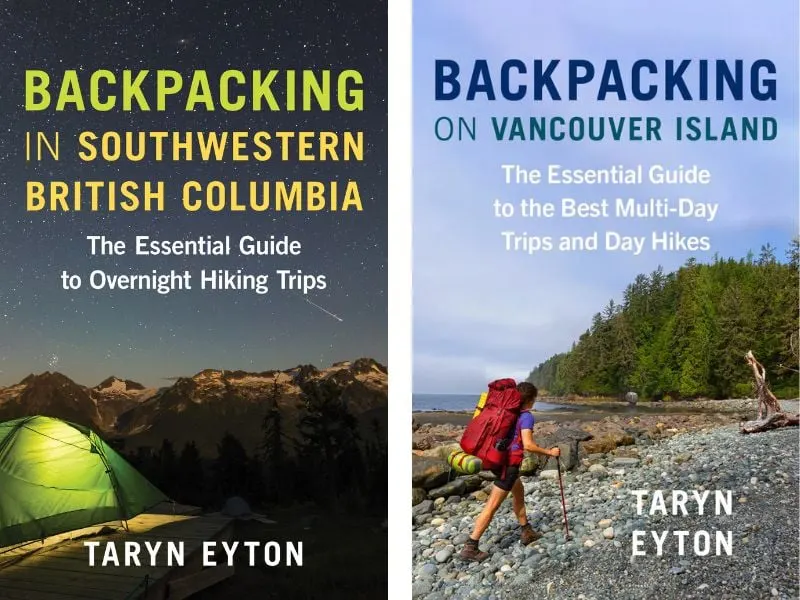
Backpacking in Southwestern British Columbia and Backpacking on Vancouver Island
Discover BC’s best backpacking trips
- 40 backpacking trips within a few hours of Vancouver
- 35 backpacking trips and day hikes on Vancouver Island
- Info about permits, reservations, and campground facilities
- Detailed maps and photos
Final Thoughts
With over 35 car-free backpacking trips in BC on this list, I’m sure you’ll find one that works for you. Do you have other suggestions for places to go backpacking in BC without a car? Leave them in the comments.
MORE BC BACKPACKING TRIP LISTS:
- 31 Best Backpacking Trips in BC
- 11 Best Backpacking Trips in the Canadian Rockies
- 24 Easy Backpacking Trips In BC For Beginners
- 25 Spring Backpacking Trips in British Columbia
BC BACKPACKING RESOURCES:
- How to Make Backcountry Camping Reservations in BC
- 2023 BC Backpacking Reservation Dates You Need to Know
- How to Go Backpacking in BC Without Reservations
- Backcountry Huts in British Columbia and the Canadian Rockies


- Best Sun Hoodies for Hiking - June 3, 2026
- Lower Stein Valley Trail Hiking and Backpacking Guide - May 27, 2026
- The Best Things to Do in Vernon, BC - May 21, 2026
Amy
Wednesday 1st of April 2026
Hi Taryn- unfortunately, Ebus not longer has a route that goes to Mount Robson PP. This would be really helpful for GDT hikers (and others)!
Taryn Eyton
Wednesday 1st of April 2026
Oh I hadn't realized they had changed their service. That sucks. I'll update the post.