
Note: The devastating 2024 fires in Jasper National Park burned a small section of the northern portion of the Skyline Trail. However, the trail has fully re-opened and is safe to hike.
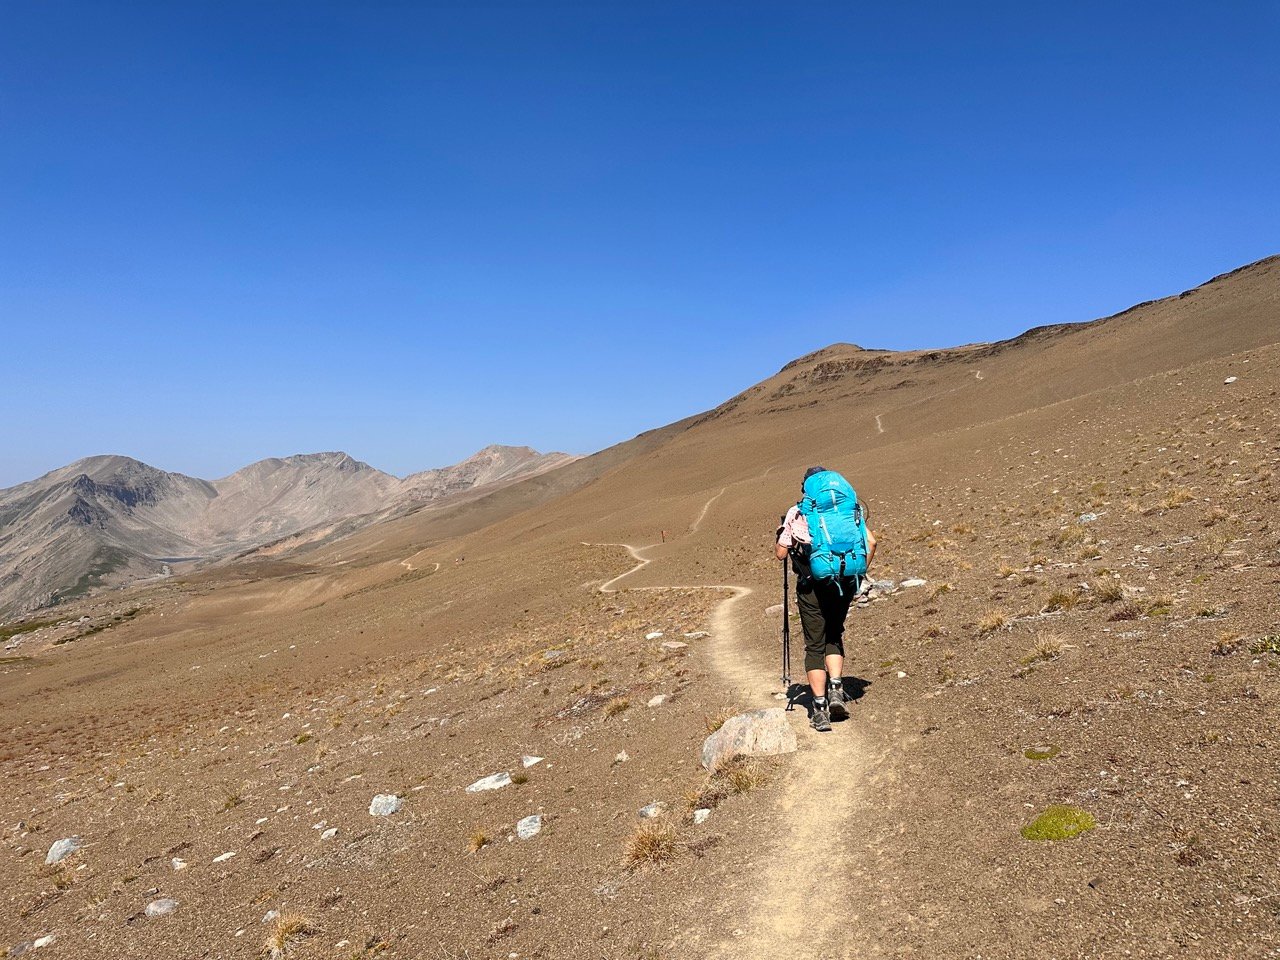
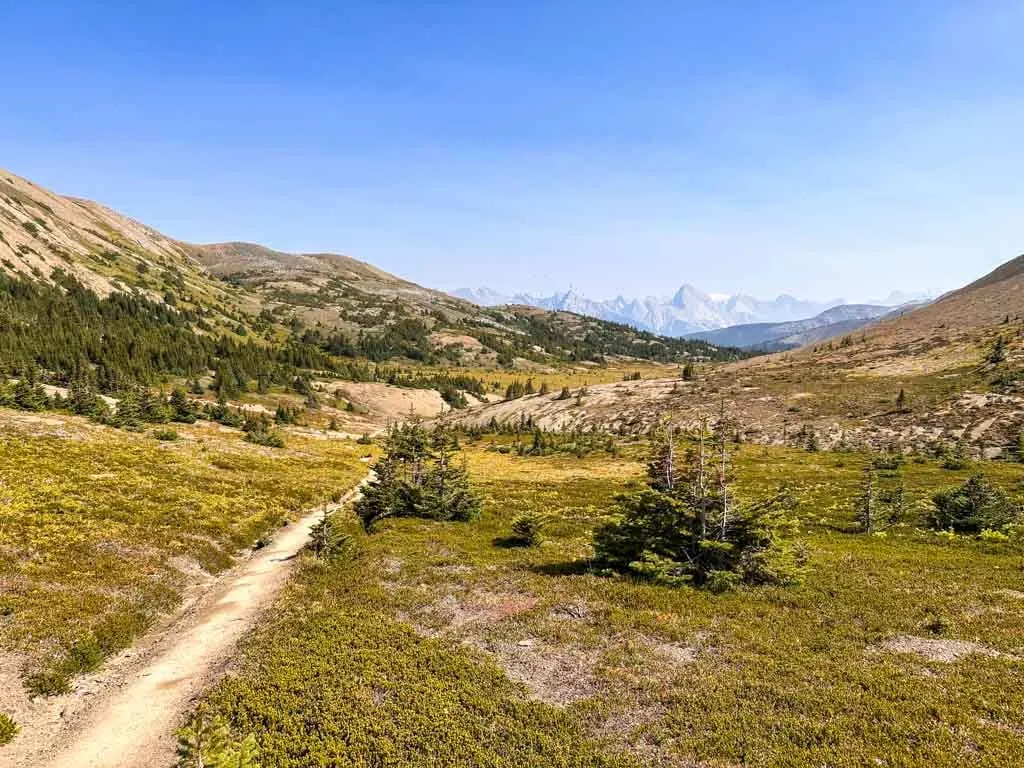
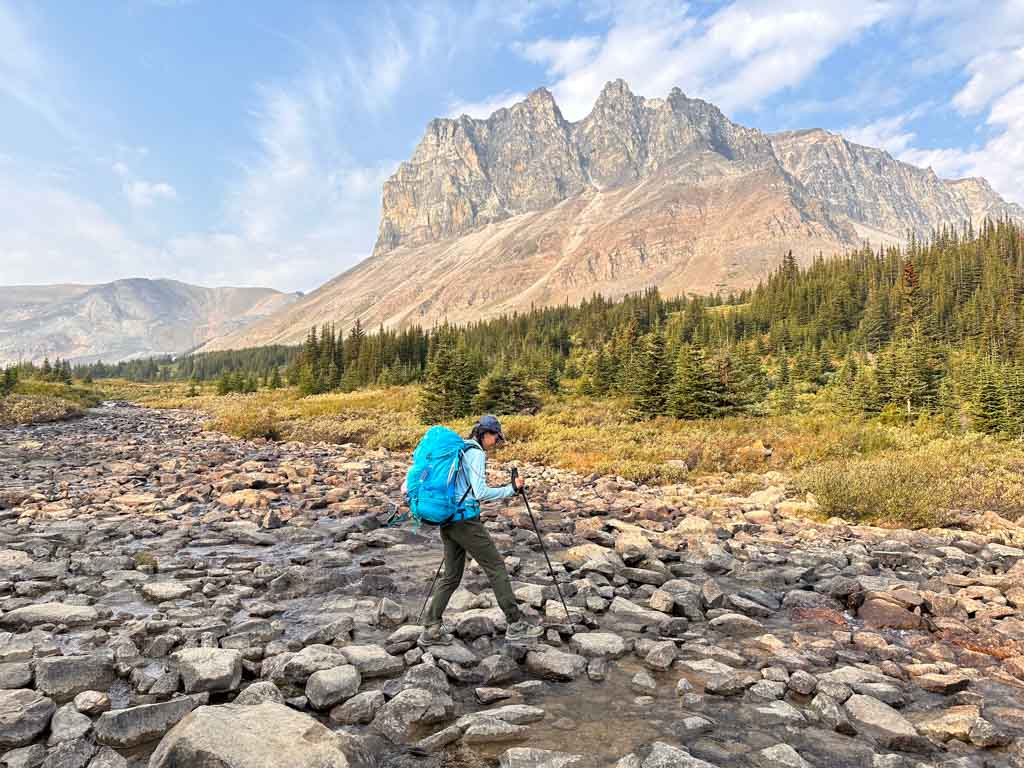
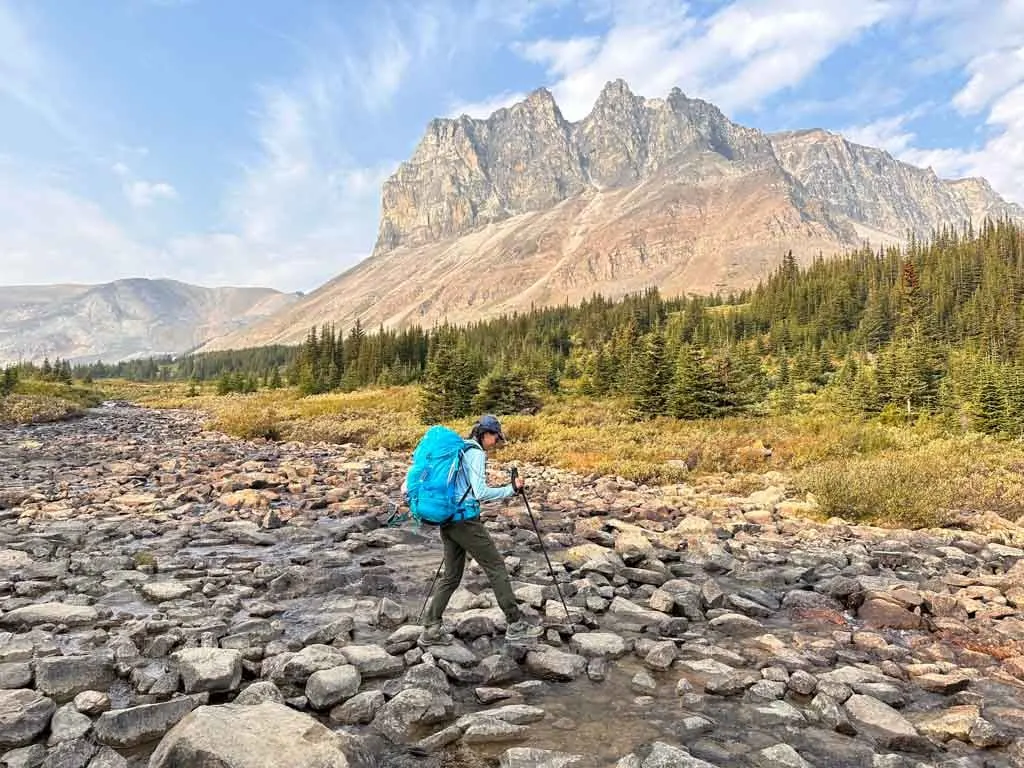
The Skyline Trail is one of the most popular backpacking trips in Jasper National Park. And it’s easy to see why – it’s 44 km of spectacular mountain scenery including 25 km above the treeline. I hiked the trail over 3 days in late August and was amazed by its beauty.
I’m a hiking guidebook author and have backpacked all over BC and the Canadian Rockies. So far the Skyline Trail is tied with the Rockwall Trail as one the most spectacular multi-day mountain backpacking trip I’ve done.
My guide to the Skyline Trail in Jasper National Park includes:
- Quick facts about the Skyline Trail including distance, location, how long it takes, and more
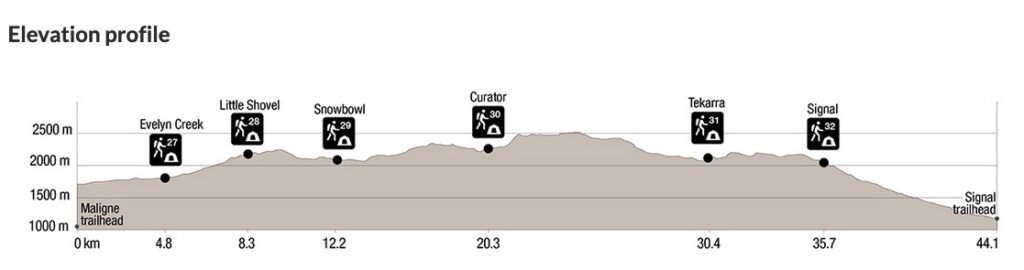
- Skyline Trail map and elevation profile with all the key locations marked
- How to get to the Skyline Trail including info about parking and shuttles
- Skyline Trail reservations: key dates plus booking tips
- How much does it cost to hike the Skyline Trail? My detailed budget breakdown
- Detailed trail description, broken down into sections including details for each campground
- Skyline Trail itinerary options from 2-4 days
- Skyline Trail hiking tips: advice for bears, toilets, weather, and more
This is a sensitive wilderness area. Learn how to Leave No Trace to keep the wilderness wild. Make sure you are prepared by bringing the 10 Essentials. Get ready for adventure with this checklist of things to do before every hike.
Hey there: Some of the links in this post are affiliate links, which means I earn a small commission at no cost to you. Thanks for your support. -Taryn
Skyline Trail Quick Facts
Description: The Skyline Trail is a spectacular hike through the mountains in Jasper National Park. Most of the hike is above the treeline and you cross three mountain passes. There are six backcountry campgrounds and one backcountry lodge along the route.
Location: The Skyline Trail is located in the Rocky Mountains in Canada’s Jasper National Park. The trail runs thought the mountains from Maligne Lake to Signal Mountain Trailhead on Maligne Lake Road near Maligne Canyon.
Distance: 44 km one-way
Elevation Gain: 800-1330m depending on which direction you hike
Difficulty: Moderate. There is one steep and challenging section but the rest of the trail is quite mellow.
How long does it take to hike the Skyline Trail? 2-4 days. Most people will take 3 days. See the itinerary section for more info.
Best time to hike the Skyline Trail: Mid-July to mid-September. The trail is too snowy the rest of the time.
Skyline Trail Weather: The Skyline Trail is the highest trail in Jasper National Park. Most of the trail is above 2000m. In July and August, the average high temperature is 22°C and the average low is 7°C. Thunderstorms in the afternoon are common. Use my picks for the Best Weather Apps for Hiking to see the forecast for your trip.
Skyline Trail Reservations and Costs: You must make reservations to hike the Skyline. It costs about $127.50 per person to hike the trail (including National Park entry fees, backcountry camping fees, a reservation fee, and a shuttle fee). But you can save money by going in a group, hiking faster, or driving yourself. More details are in the reservations and costs sections below.
What to Bring on the Skyline Trail: This is a remote hiking trip, so you will need to bring typical backpacking gear. Use my backpacking checklist to make sure you have everything you need.
Wildlife on the Skyline Trail: The trail is in bear country (both black bears and grizzly bears). Carry bear spray, hike in a group, and make noise, especially in brushy areas. Use campground cooking areas and store all your food in toiletries in bear lockers. Read my bear safety tips for backpackers for more info.
Skyline Trail Rules: Dogs, fires, drones and hammocks are not allowed.
Indigenous Context: The Skyline Trail is in the traditional territory of the Anishinabe, Aseniwuche Winewak, Dene-zaa, Nêhiyawak, Secwépemc, Stoney Nakoda, Mountain Métis and Métis. The government forced Indigenous people to leave when Jasper National Park was created in 1907 and prohibited from accessing their traditional territory to hunt, fish, gather, and conduct cultural practices.

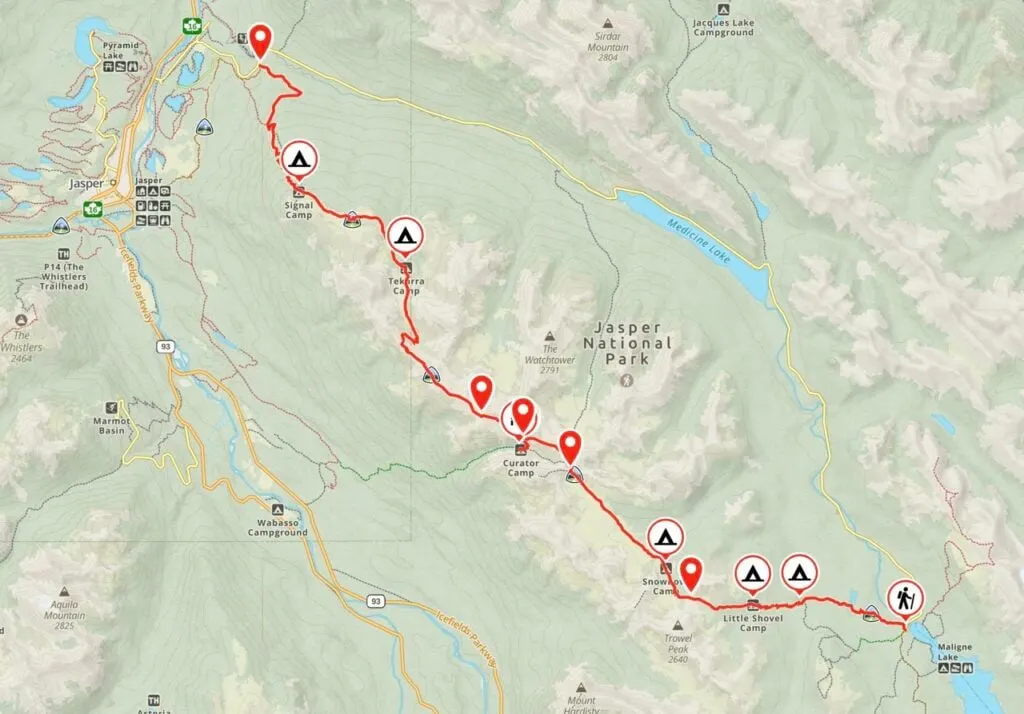
Skyline Trail Map and Elevation Profile
The Skyline Trail is well-marked and easy to navigate with signs at all junctions. If you want a paper map, the Jasper and Maligne Lake Map from Gem Trek is the best one.
I used the Gaia GPS app on my hike. It was helpful to know where I was on the trail to figure out how much higher I had to climb and where the next campsite or landmark was. All Trails+ is also great.
I also made you a trail map using Gaia GPS. Click through to zoom in and explore. You can also save it to your routes in Gaia GPS or export the gpx file.


How to Get to the Skyline Trail in Jasper National Park
The Skyline Trail is located in Jasper National Park near Maligne Lake and the town of Jasper. You can drive yourself to the trailheads or take a shuttle bus. Since it is a one-way hike, you will need to have two cars or arrange to take the shuttle between trailheads. There are two trailheads, both on Maligne Lake Road east of the town of Jasper.
Skyline Trail Driving Directions
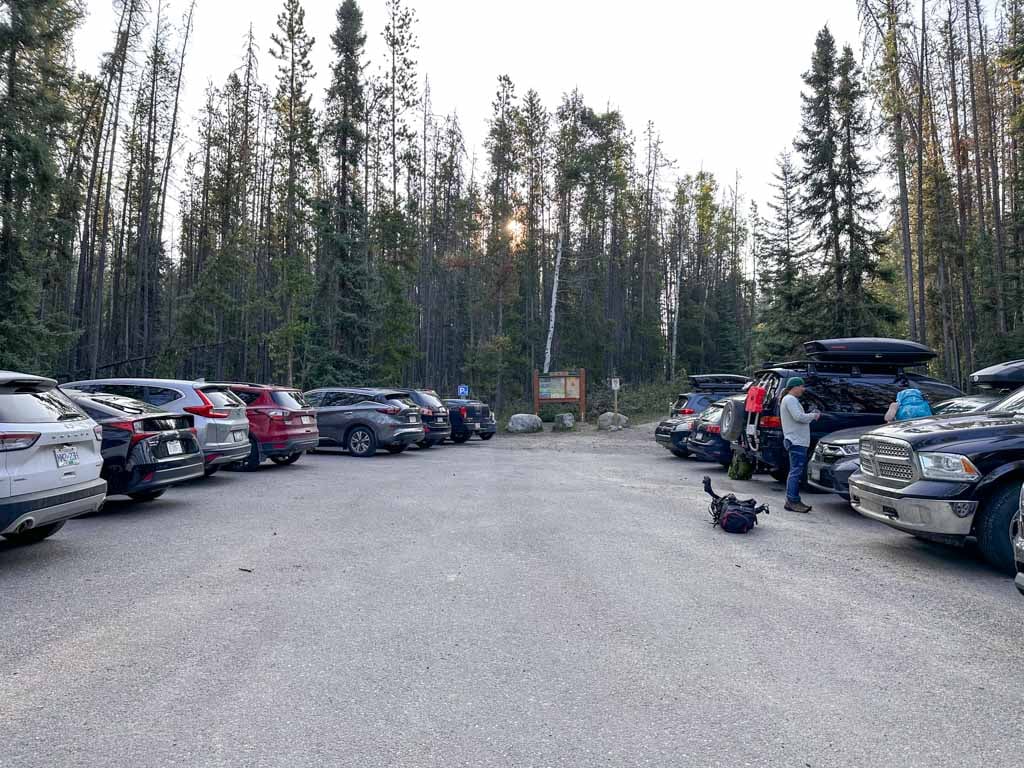
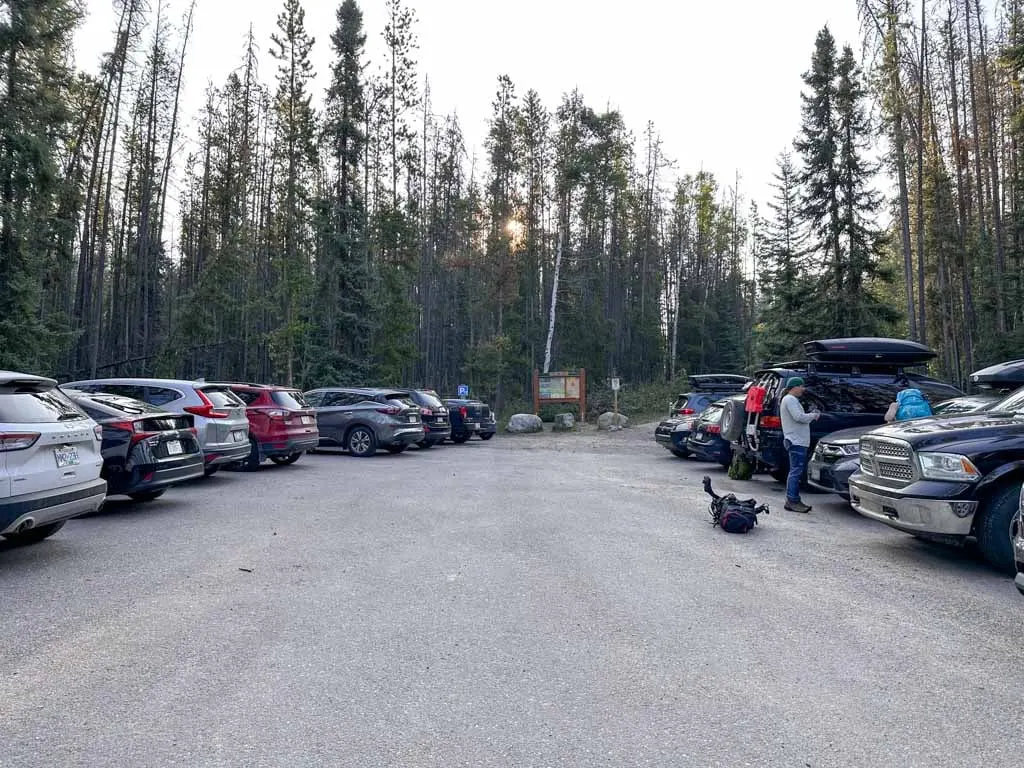
Signal Mountain Trailhead (North Trailhead): From Jasper, take Highway 16 east for a few minutes, then turn right onto Maligne Lake Road. About 5.5 km later, turn right into the Signal Mountain Trailhead parking lot. It is marked with a small brown and yellow sign with an icon of a hiker. The drive from Jasper takes about 15 minutes. Click here for Google Maps driving directions to the Signal Mountain Trailhead.
The parking lot is small – it has room for about 20 cars. If it is full, you can try finding parking on the shoulder, but be careful to get well off the road. Otherwise, there is more parking 500 m down the road at Maligne Lookout (marked with a viewpoint sign).
Maligne Lake Trailhead (South Trailhead): To get to the Maligne Lake Trailhead, continue on Maligne Lake Road for another 38 km past the Signal Mountain Trailhead. Continue to the end of the road and turn left into the last parking lot. It is big but does fill up by midday. The trailhead is near the end of the road on the uphill side. The drive from Jasper takes about an hour. Click here for Google Maps driving directions to the Maligne Lake Trailhead.
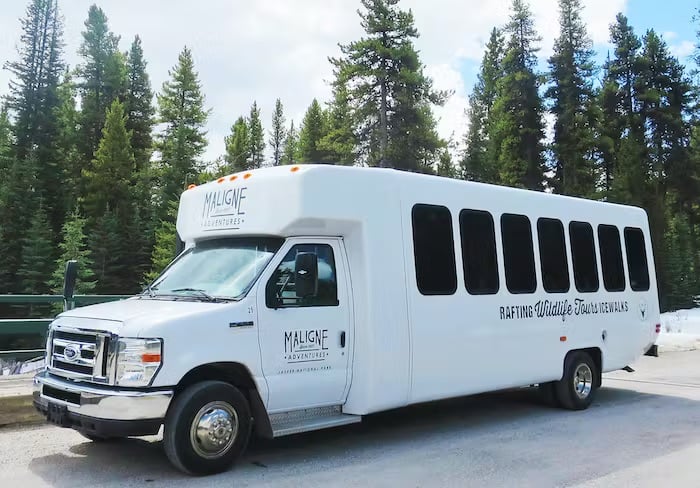
Skyline Trail Shuttle Bus
Maligne Adventures, a local tour company, offers a hiker shuttle service for the Skyline Trail. They stop at trailheads along the Maligne Lake road, including the Signal Mountain and Maligne Lake Trailheads. You can leave your car in Jasper and take the shuttle. Or you can drive to one trailhead and catch the shuttle to the other trailhead, which takes about 45 minutes.
You must make reservations for the shuttle. It runs every morning between late June and late September. As of 2026, Fares are $49/person for adults and $39 for kids under 16.
Hitchhiking
Although I haven’t tried it, I have heard that some people hitchhike between the two trailheads or to/from Jasper. It’s about 45 minutes between trailheads so you may want to offer your driver some gas money.
Where to Stay Near the Skyline Trail
It is easiest to stay overnight in Jasper the night before hiking the Skyline Trail so that you can get an early start. This is especially important if you want to catch the shuttle.
There are lots of drive-in campgrounds in Jasper National Park. Whistlers Campground is the largest and the closest to both the town of Jasper and the Skyline trailheads. Parks Canada renovated it recently and it has beautiful new wash buildings with hot showers. I camped at Whistlers before my hike.
Hotels in Jasper are expensive and get booked up fast. If you’re on a budget, the Marmot Lodge at the edge of town isn’t too pricey. Or if you really want to save, the HI Maligne Canyon Hostel is just one kilometre from the Signal Mountain Trailhead. It’s a wilderness-style hostel with dorm beds and no flush toilets.

Skyline Trail Reservations
The Skyline Trail is popular so advance reservations are required.
Reservations for the entire summer season open in January or February each year. In 2026, reservations open on January 28, 2026, at 8 a.m. Mountain Time. You must book on the Parks Canada Reservations website.
See my tips for booking backcountry camping for pointers on how to navigate the site. Be ready to book as soon as reservations open as popular dates will sell out in minutes.
You need to book each campsite when you make your reservation. Prepare a couple different itinerary options and dates. (Use my suggested itineraries.)
Your booking can include up to 10 people and up to 3 tent pads on the same reservation. Keep in mind that you are only allowed to have one tent per tent pad.
Have the following info ready to go when you make your Skyline Trail reservation:
- preferred itinerary with campgrounds and dates as well as backups
- number of tent pads and people you are booking for
- credit card
If you didn’t get a reservation, keep checking back as people cancel and spots open up. A more efficient way is to sign up for a camping cancellation notification app like Campnab or Schnerp. Read my guide to camping cancellation apps to find out how they work and which one I recommend.

Skyline Trail Fees and Costs
You must pay a few different fees to hike the Skyline Trail. The cost breakdown for the Skyline Trail is as follows:
- Reservation fee: $11.50 per booking (for up to 10 people and up to 3 tent pads)
- Backcountry camping fee: $15/person/night
- Jasper National Park entry fee: $12.25/person/day (or $24.50 per car with up to 7 people)
- Maligne Lake Road Shuttle: $49/person.
Most people hike the Skyline Trail in three days/2 nights and use the shuttle. In that case, a solo hiker would pay $127.25. Per-person costs decrease if you hike in a group since you can share the expense of reservation and national park entry fees. If you have two cars and don’t take the shuttle, you can lower your costs even more.

Skyline Trail Description
The most common way to hike the Skyline Trail is from south to north since it involves less overall elevation gain, especially on the first day. So my Trail Description below is laid out from south (Maligne Lake Trailhead) to north (Signal Mountain Trailhead). More info about which direction to hike the Skyline Trail is in the itinerary section below.
Key Distances on the Skyline Trail
| Location | Distance | Elevation |
|---|---|---|
| Maligne Lake Trailhead | 0 km | 1695 m |
| Evelyn Creek Camp | 4.8 km | 1825 m |
| Little Shovel Camp | 8.3 km | 2075 m |
| Little Shovel Pass | 10.1 km | 2240 m |
| Snowbowl Camp | 12.2 km | 2094 m |
| Big Shovel Pass | 17.3 km | 2310 m |
| Watchtower Junction | 18 km | 2310 m |
| Curator Junction | 20.3 km | 2205 m |
| The Notch | 22.3 km | 2510 m |
| Tekarra Camp | 30.4 km | 2062 m |
| Signal Camp | 35.7 km | 2014 m |
| Signal Mountain Trailhead | 44.1 km | 1165 m |
Maligne Lake Trailhead to Evelyn Creek Camp
Distance: 4.8 km
Time: 1.25-1.75 hours
Elevation Gain: 130 m
Elevation Loss: 0 m
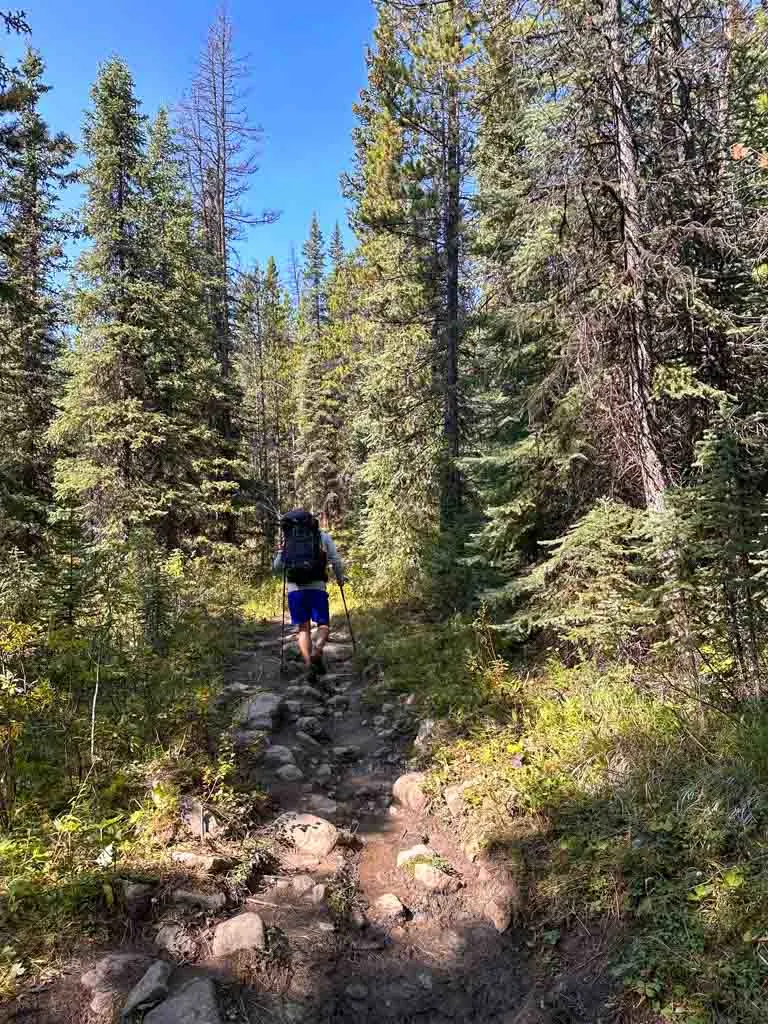
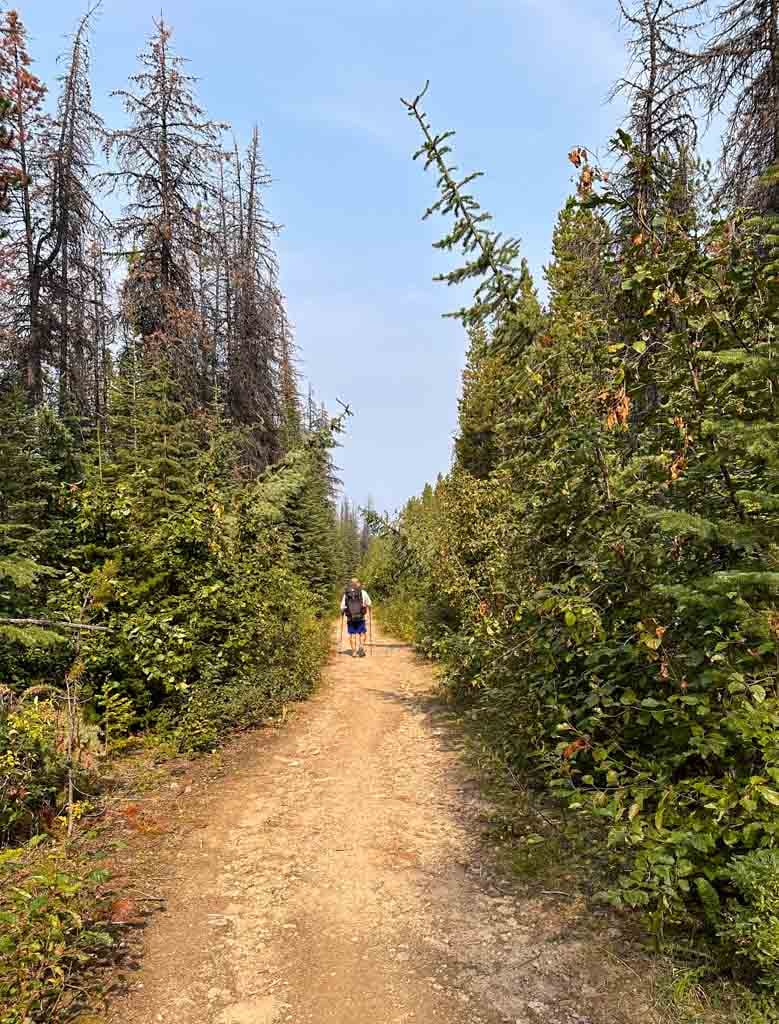
The Skyline Trail starts at a trailhead near the end of Maligne Lake Road. It is uphill from the parking lot and marked with a large info sign and map. The trail climbs very gradually through the forest and crosses a stream about 1.5 km from the start.
At the 2.1 km mark, a short side trail leads left to Lorraine Lake. The trail is 150 m long and passes a small pond. The shallow lake has a marshy shoreline.
Back on the trail, another side trail branches right at the 2.4 km mark to Mona Lake. This trail is 170 m long and descends slightly to the lakeshore. Mona Lake is bigger and deeper. Since the valley opens up here, it also has a bit of a view to the north down the Maligne Valley.
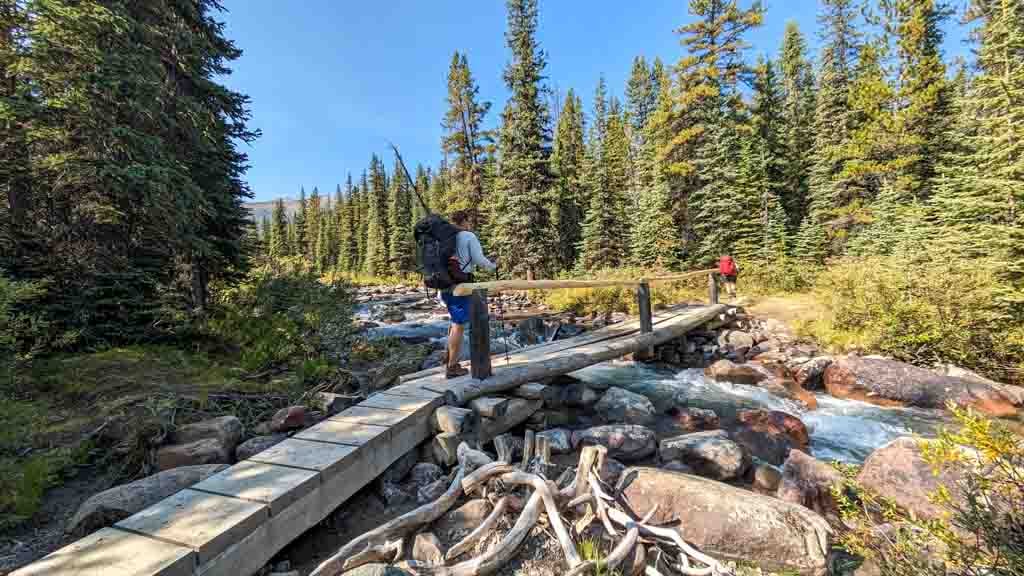
Past the Mona Lake turn-off, the trail is nearly flat for over 2 km as it winds through the forest. Pass a trail branching right to connect with the Bald Hills Trail and reach the bridge over Evelyn Creek almost immediately. The Evelyn Creek campground is located on the other side of the bridge.

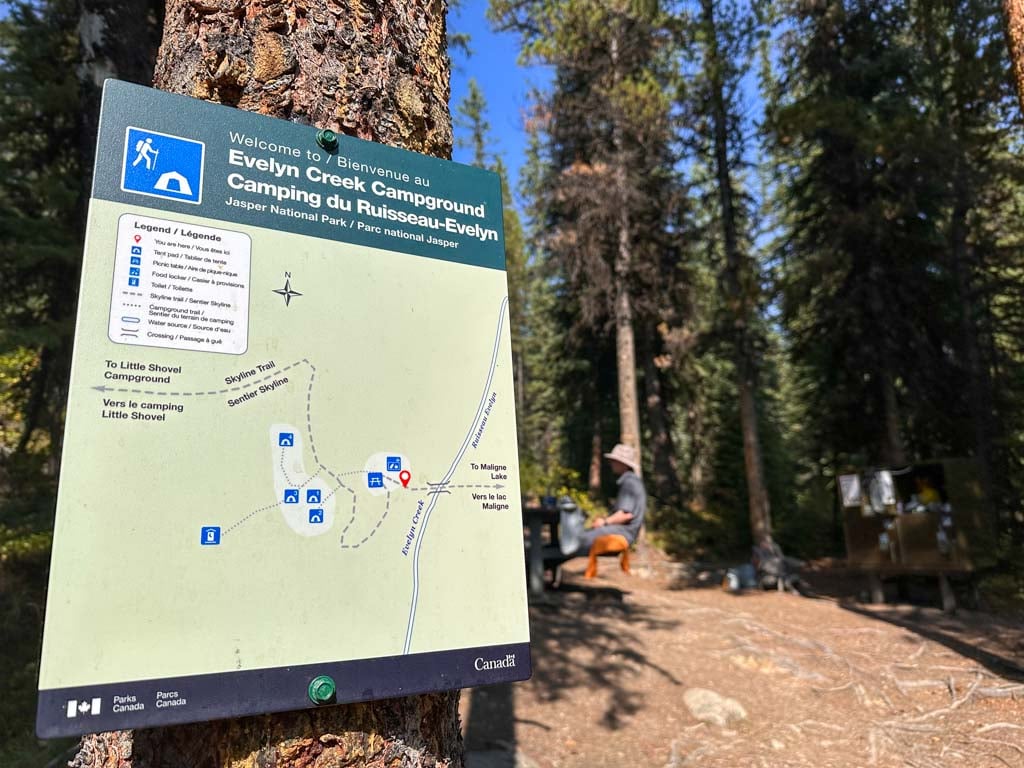
Evelyn Creek Camp
Number of Sites: 4 dirt tent pads on the left side of the trail at the top of a small hill.
Toilet: Green plastic throne at the back of the tenting area.
Food storage: Food lockers near the picnic table at the entrance to the campground
Water: Collect from Evelyn Creek near the bridge
This small campground is located on the west side of Evelyn Creek. All of the sites are in tight forest. Since it is a little over an hour from the trailhead, staying here doesn’t make sense on most itineraries.

Evelyn Creek Camp to Little Shovel Camp
Distance: 3.5 km
Time: 1-1.75 hours
Elevation Gain: 250 m
Elevation Loss: 0 m
The next section of the Skyline is a switchbacking climb that stays in the trees. Towards the top, there are some peekaboo views to the south of the Evelyn Creek valley, the Bald Hills, and the surrounding peaks.
Although you might be sweating under a heavy pack, it’s a fairly easy ascent to Little Shovel Camp since the climb is steady but never steep.

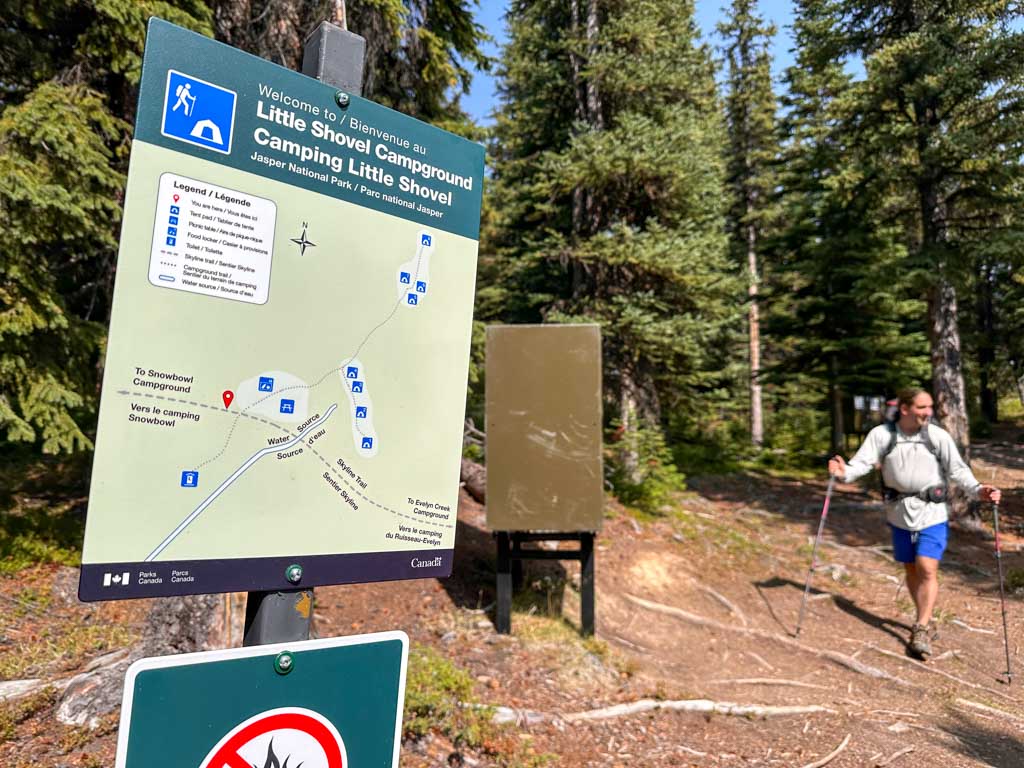
Little Shovel Camp
Number of Sites: 8 dirt tent pads on a branching spur trail uphill from the cooking area.
Toilet: Three-seater barrel-style toilet on a marked spur trail downhill from camp.
Food storage: Food lockers next to the picnic tables at the entrance to the campground.
Water: Collect from a spring near the main trail and the cooking area.
This campground is set into the forest on the side of a hill. Staying at Little Shovel is a good option if you want a shorter first day, you can’t get a site at Snowbowl, or you are on a four-day itinerary.

Little Shovel Camp to Snowbowl Camp
Distance: 3.9 km
Time: 1.25-1.75 hours
Elevation Gain: 165 m
Elevation Loss: 146 m
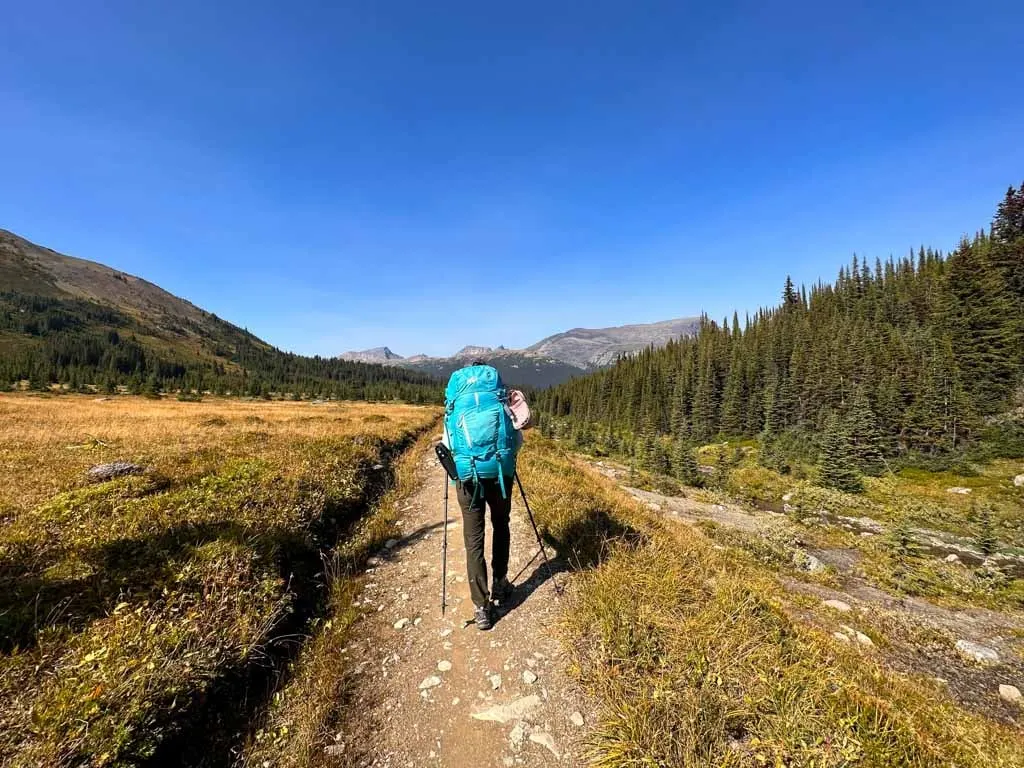
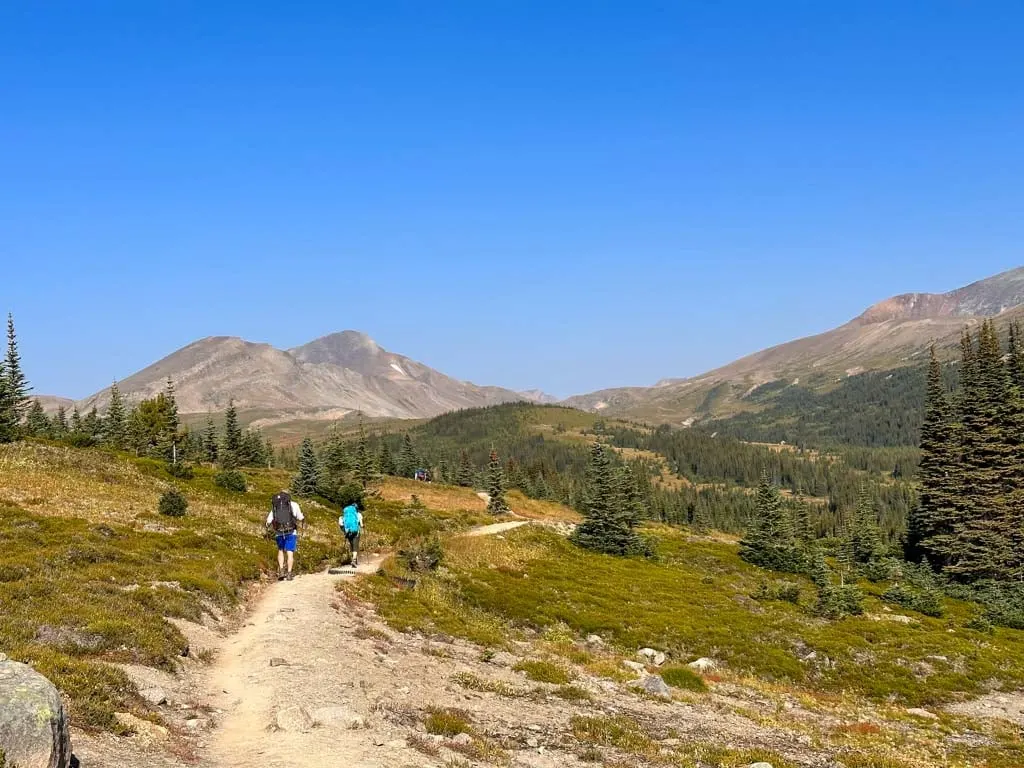
Leaving Little Shovel Camp, the trail feels nearly flat, but you are actually gaining elevation gradually. The trail is cut into the side of a hill. Initially, it is in the forest, but as you hike, the trees start to thin out and you emerge above the treeline.

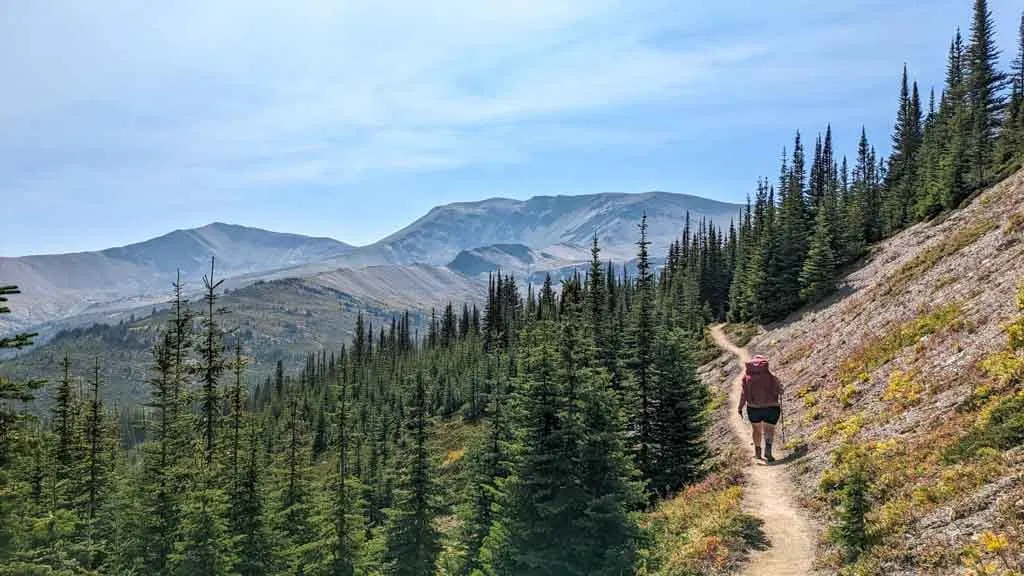
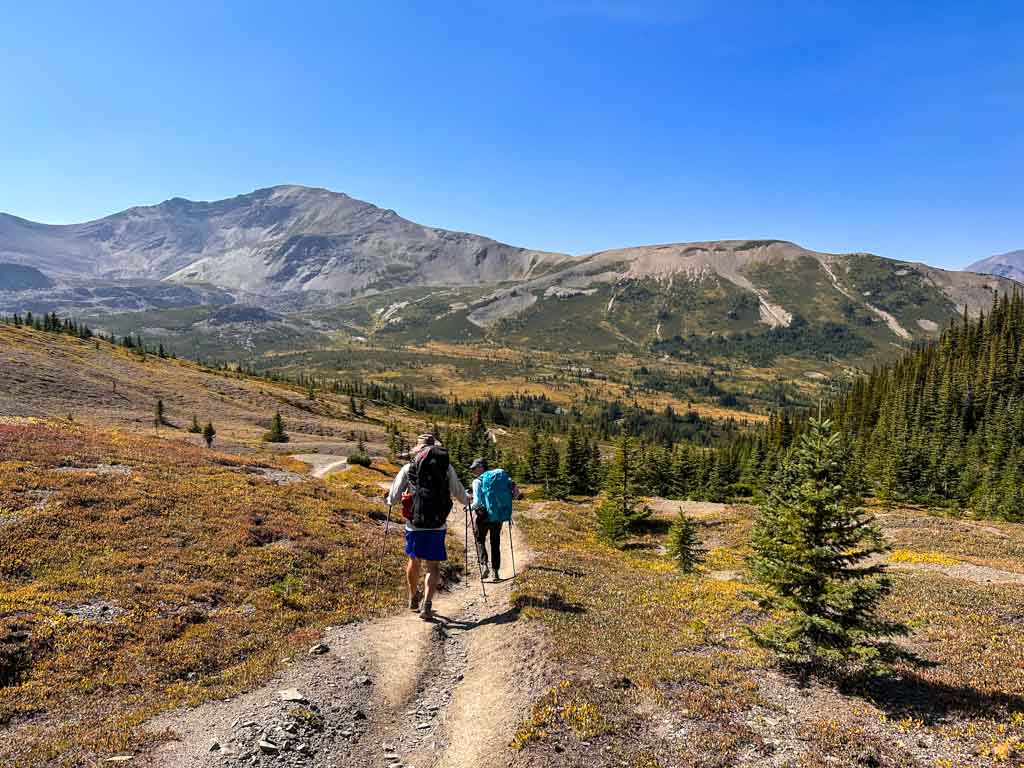
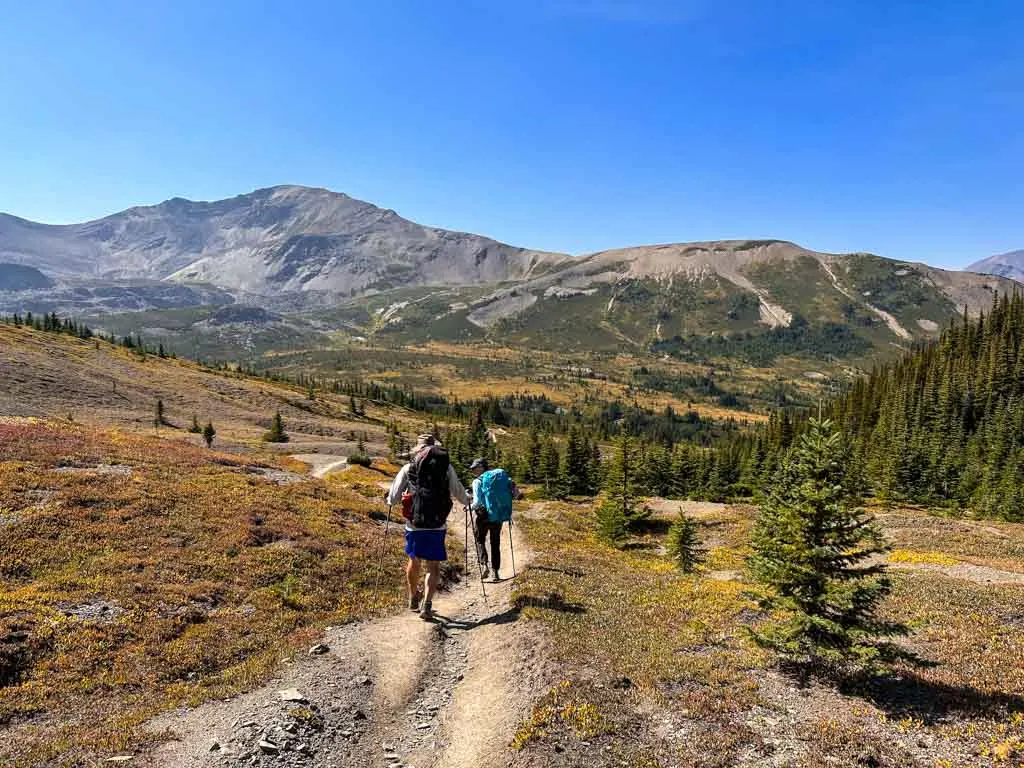
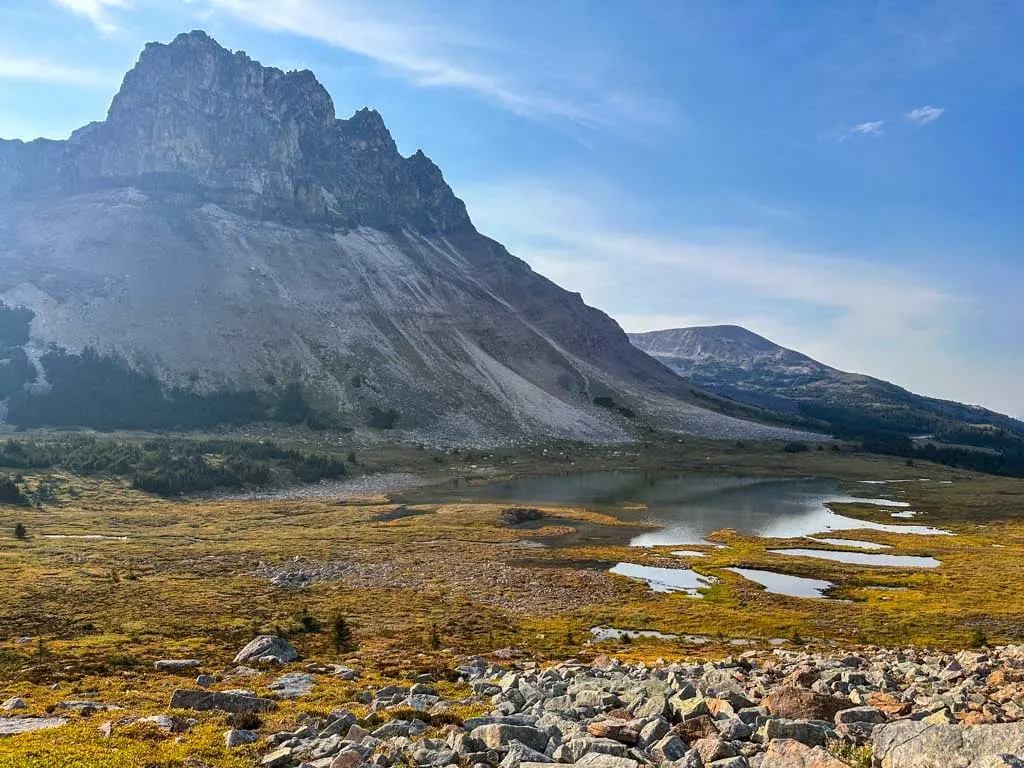
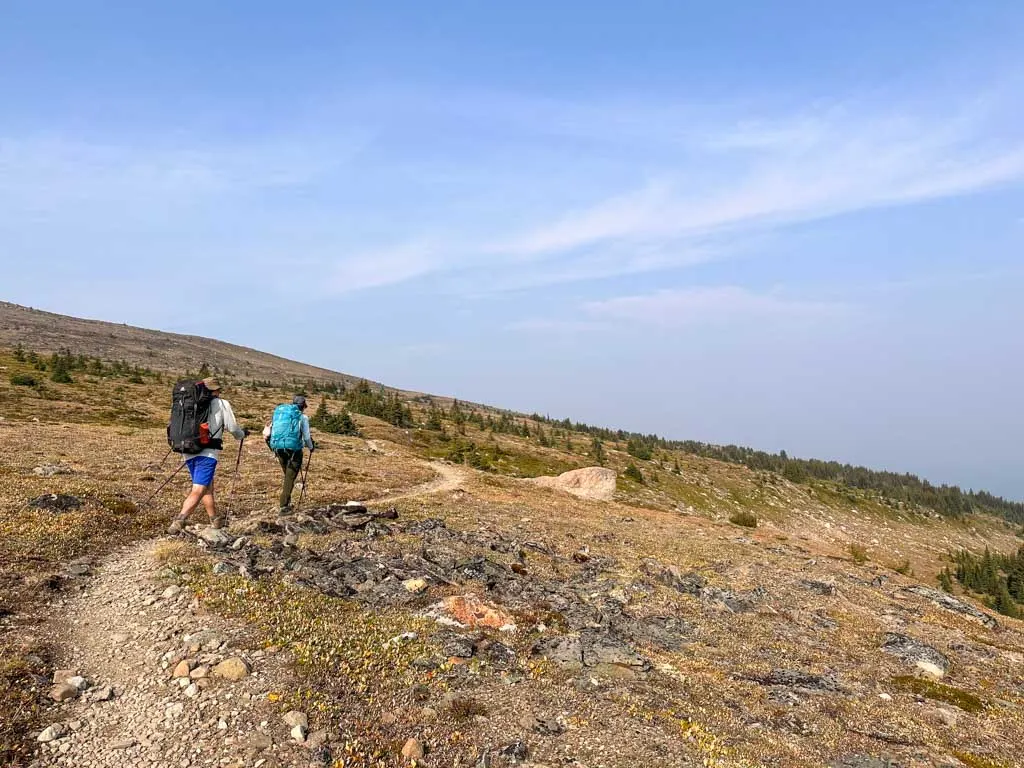
You will spend the next 25 km (all the way to Signal Camp) mostly above treeline! As you leave the forest behind, you will see the Little Shovel Pass ahead of you between Sunset Peak and Trowel Peak. It’s a short climb up to the pass, first across a meadow and then over gravel and dirt.

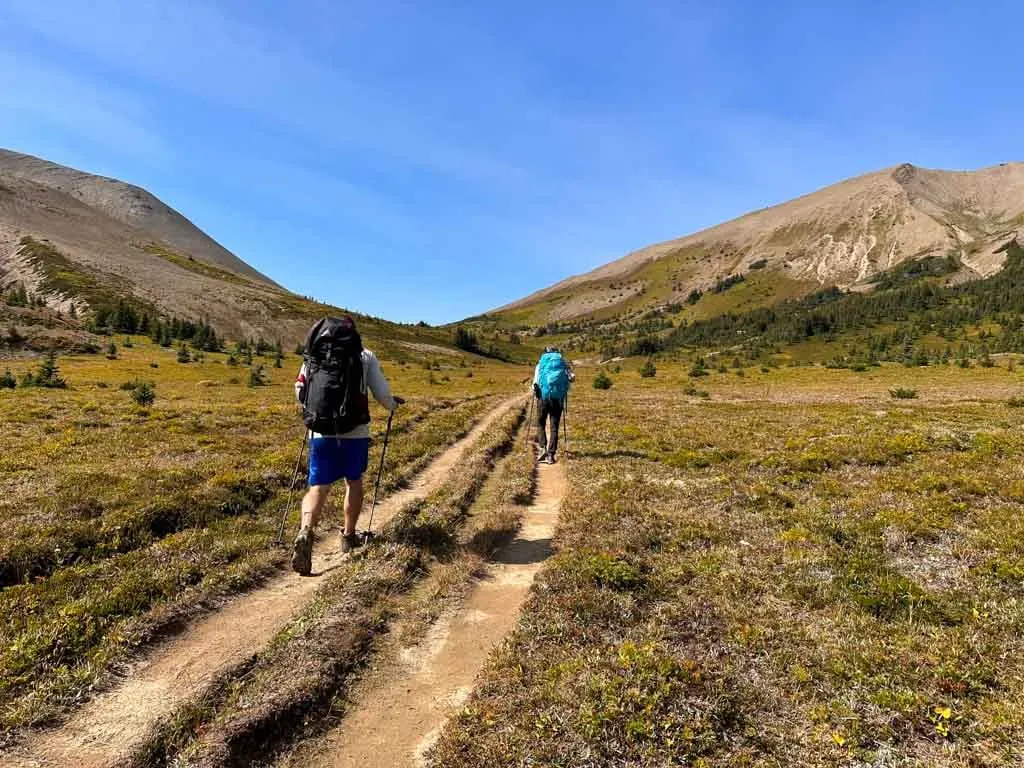
If you look behind you to the east you can see Leah Peak and the mountains on the far side of Maligne Lake. And ahead of you, you can Mount Aberhart.

Follow the trail downhill from the pass through more meadows. The trail curls around to the north and the trees become more numerous as you descend. Drop steeply into a canyon and follow it for a few minutes, then cross a few branches of the same creek.
After the final crossing, the path heads back into the meadows with a few smaller creek crossings. Watch to see if any of these streams are running as you may need to hike back here from camp to get water. As the trees get thicker, arrive at Snowbowl Camp on the right side of the trail.

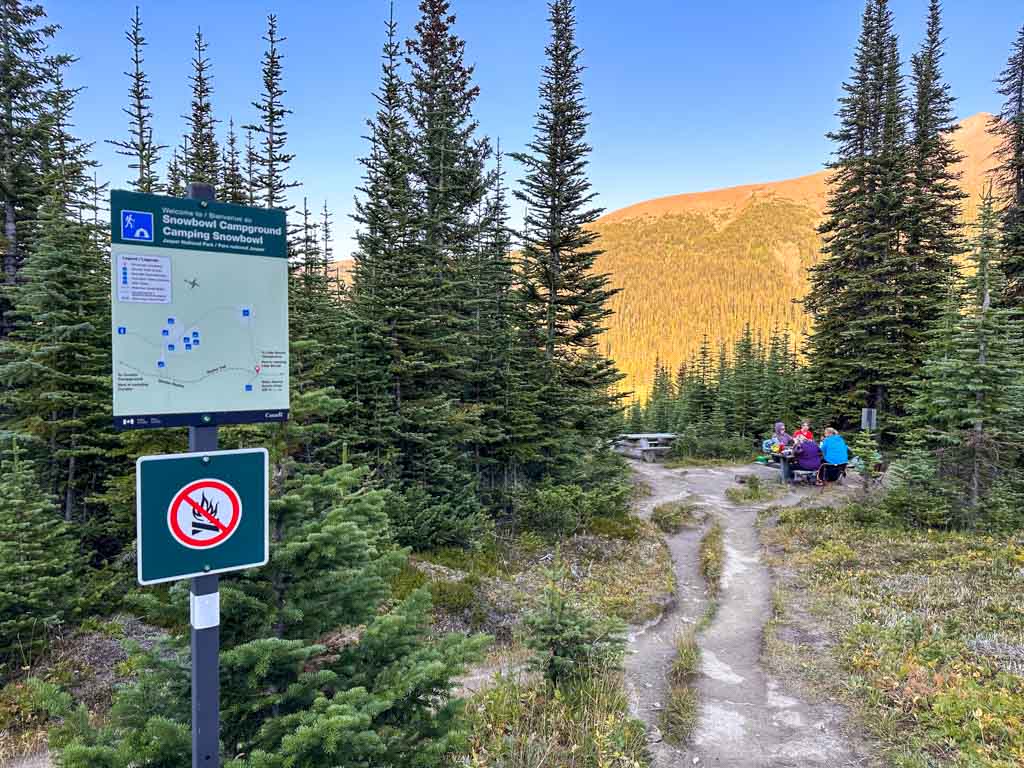
Snowbowl Camp
Number of Sites: 8 sites. Most are wooden platforms but the two sites at the northeast end of the campground are dirt pads.
Toilet: Three-seated barrel-style toilet on a spur trail at the north end of the campground.
Food storage: In food lockers uphill from the cooking area on the other side of the main trail.
Water: Collect from one of the streams south of the campground (up to 500 m away). However, there may be a trickle of a stream on the trail to the northern campsites and the outhouse. I hiked the trail in late August a few days after a big rainstorm and the campground creek was running.
Snowbowl is set down the hill in the forest, but it does have a slightly obscured view of Sunset Peak (which is gorgeous as the sun goes down). The trails through the campground are badly eroded and muddy after rains. This is the best campsite to book if you are on a three-day hike of the Skyline Trail.

Snowbowl Camp to Curator Junction
Distance: 8.1 km
Time: 2.5-3.5 hours
Elevation Gain: 216 m
Elevation Loss: 240 m
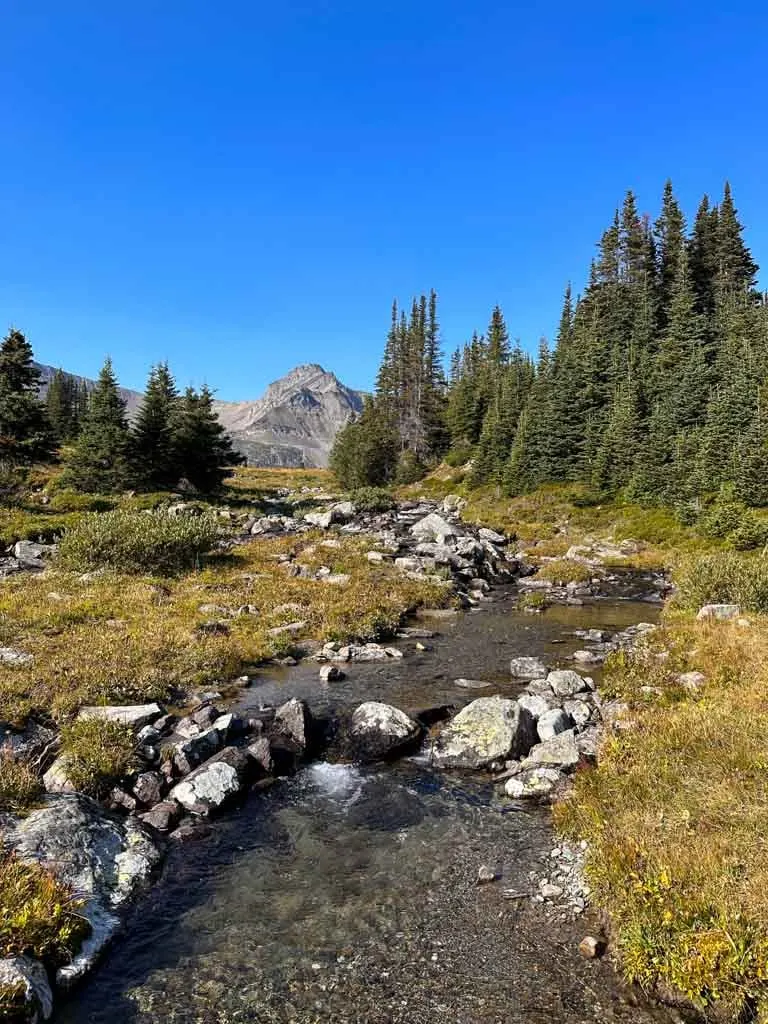
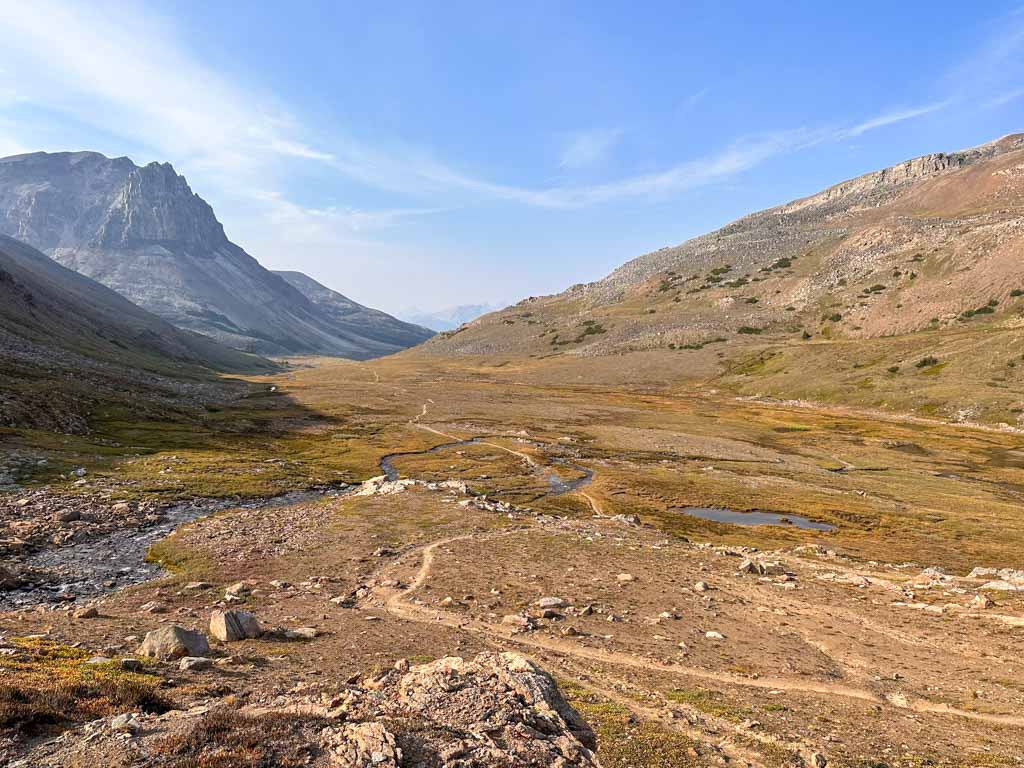
Leaving Snowbowl Camp, the trail meanders through the meadows for about 2 km before starting to climb towards Big Shovel Pass. The climb is never steep, but it is long. And since there are no trees, you can see the pass and the trail leading to the pass for a long time as you hike uphill!

The scenery through here is spectacular with views of Antler Mountain and Curator Mountain to the west. Don’t forget to look back the way you came as the views are great that way too. There are three stream crossings between Snowbowl Camp and Big Shovel Pass if you need water.
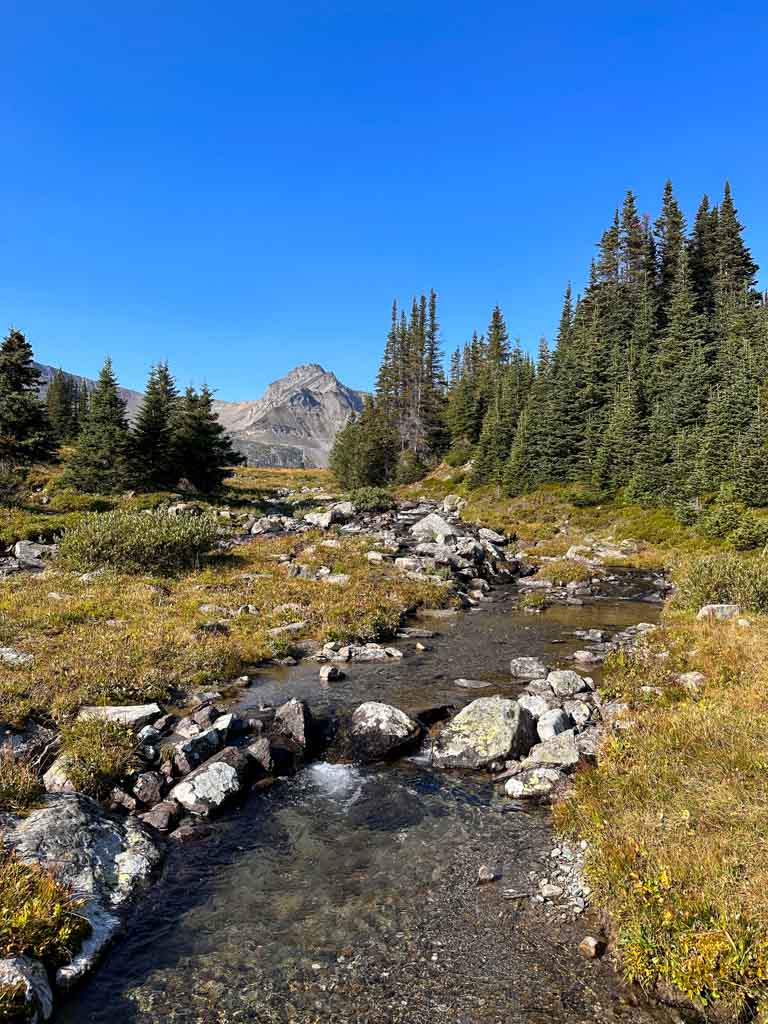
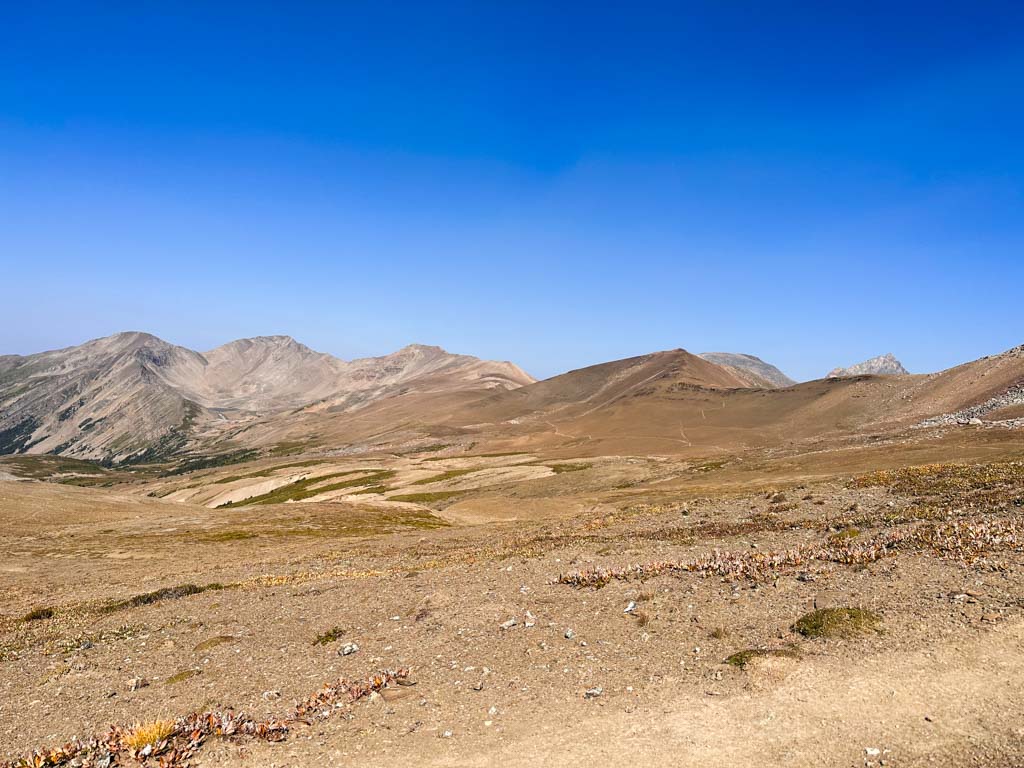
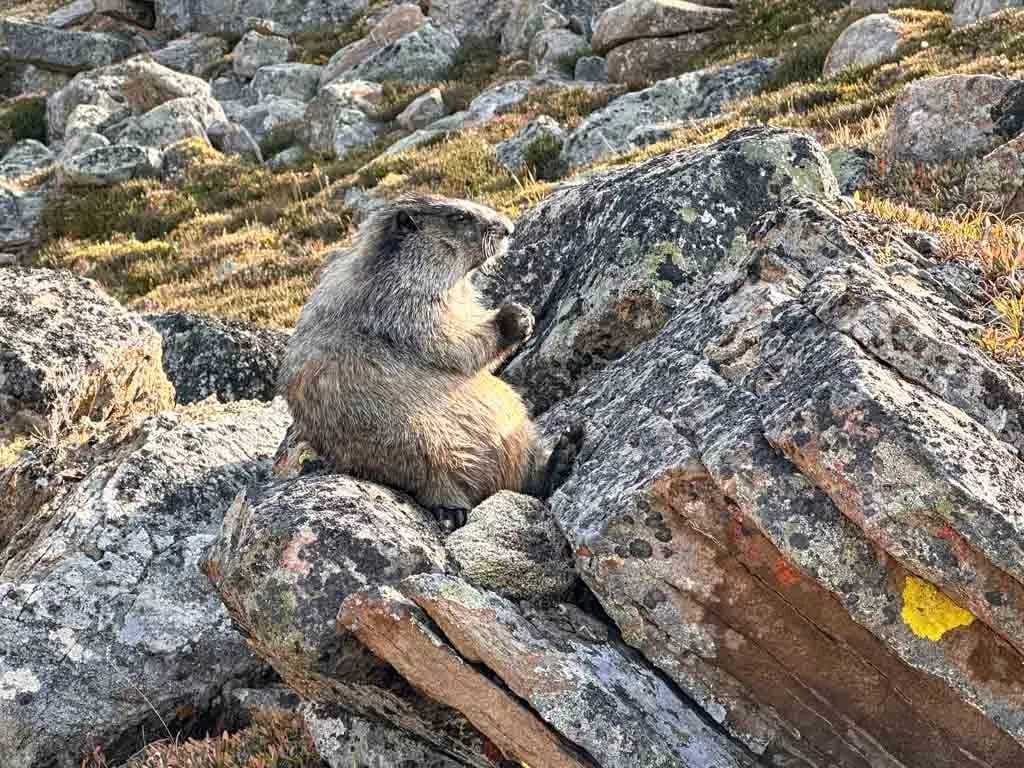
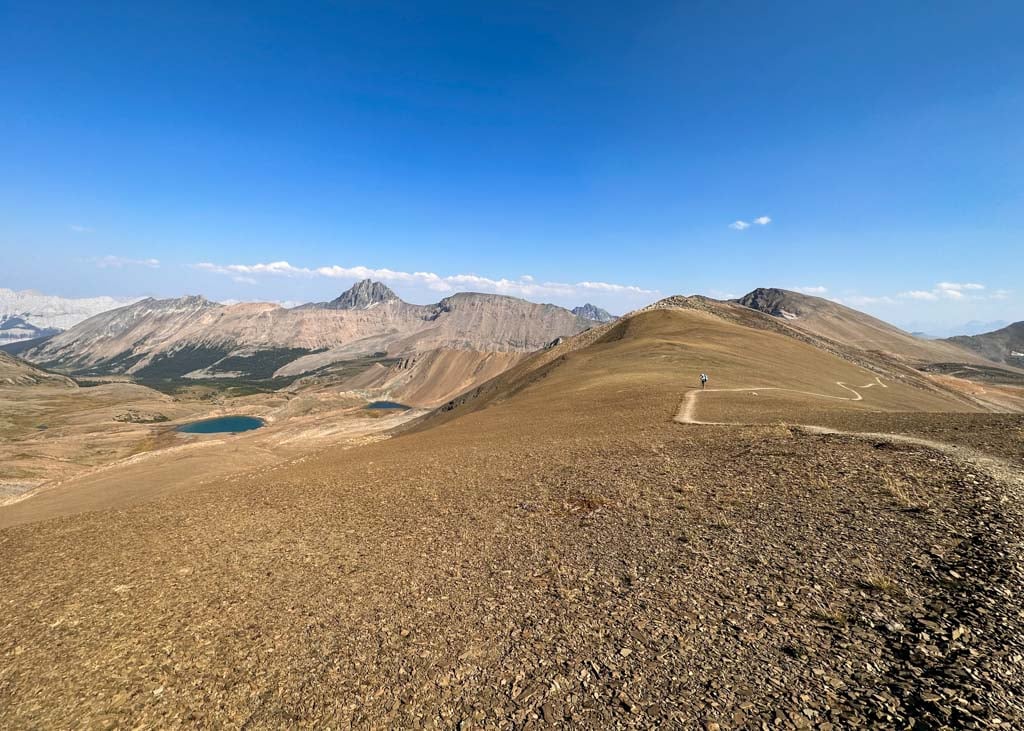
Reach the top of Big Shovel Pass 5.3 km from Snowbowl Camp. While the trail behind you was green with wildflower meadows, the terrain ahead of you is alpine barrens. The rock and sand have little patches of grass clinging on. Watch for marmots in this section chomping on whatever vegetation they can find.
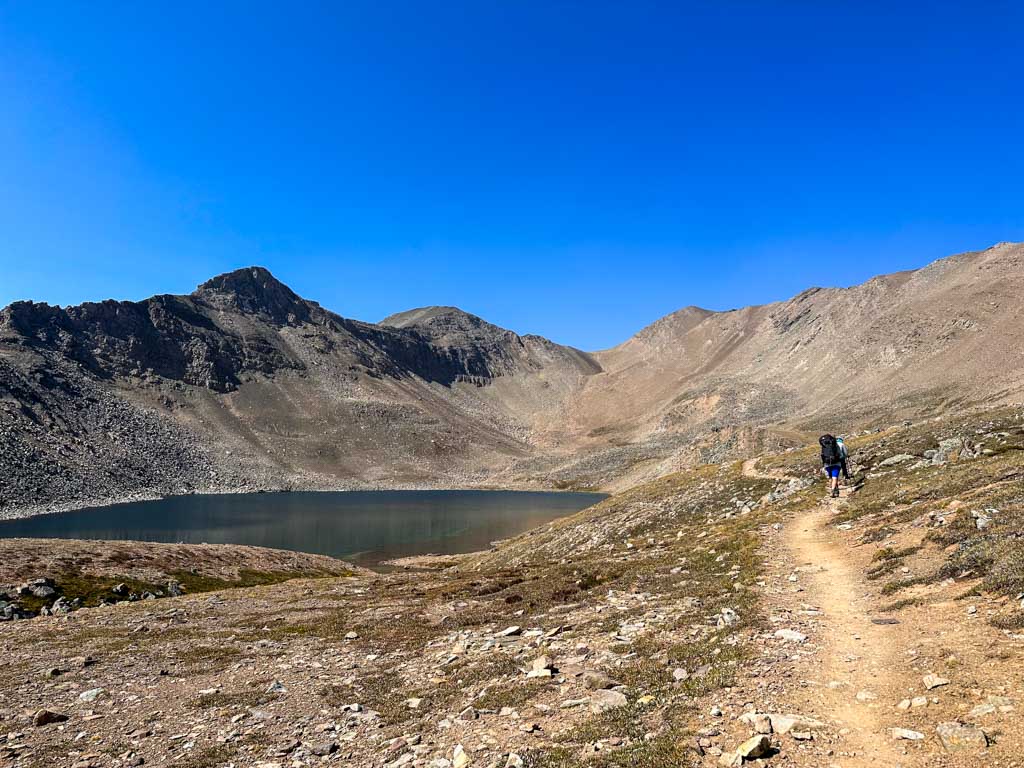
You can see Curator Lake in front of you and The Notch Beyond that. You can also see the Wabasso Valley dropping down to the left. Curator Camp and Shovel Pass Lodge are at the head of the valley just below the trail. After the pass, the Skyline Trail curls around to the right. At first, it drops elevation very gradually.

About 700 m after Big Shovel Pass, the Watchtower Trail zigzags up the hill to the right over a pass. If you want a quick view, drop your pack at the junction and hike up to the col.


From the col, this trail leads to Maligne Lake Road 13 km away. However, there is no bridge over the Maligne River just before the trailhead and the river is impassable at high water and the trail is seldom maintained. That makes the Watchtower Trail unpopular. However, Watchtower Camp, 3.4 km along the trail, is a good alternative camp for parties on the Skyline Trail. (More in the Watchtower Camp section below.)
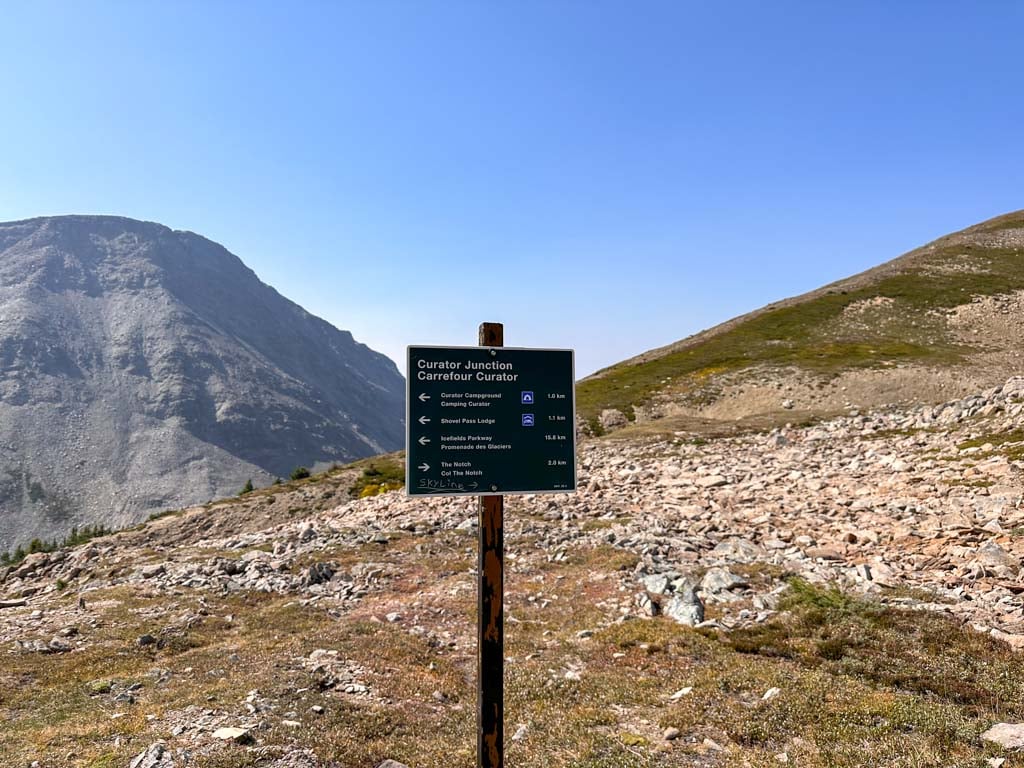
From the Watchtower Junction, the Skyline trail starts to descend gently. The last few minutes before Curator Junction are a bit steeper.
From Curator Junction, the Skyline Trail continues north past Curator Lake to The Notch. But you can also turn left and descend to Curator Camp (1 km away) and Shovel Pass Lodge (1.1 km away). Details on both are below.

Watchtower Camp
Number of Sites: 4 dirt tent pads
Toilet: Barrel-style toilet
Food storage: Hanging cable.
Water: Collect from the creek next to camp
Watchtower Camp is located 3.4 km from the Skyline Trail. To get there, you will need to ascend 50 m to Watchtower Pass, then lose 350 m on the descent to the campground. This is not a popular campground so it is much easier to book.
I didn’t hike to Watchtower Camp on my trip, but I’ve heard that the trail can be a bit hard to follow since it isn’t maintained. As well, the route can be muddy and involves some creek crossings.
Curator Camp
Note: As of December, 2024 this campground is still closed due to the 2024 Jasper fires. It is unclear if it will re-open in time for the 2025 summer season.
Number of Sites: 8 dirt tent pads.
Toilet: Barrel-style toilet
Food storage: Food lockers near the cooking area.
Water: Collect from the creek near camp
Curator Camp is located off the Skyline Trail on the Curator Trail. The Curator Trail leads to Wabasso Lake on the Icefields Parkway 15 km away (and 1100 m lower), but to reach Curator Camp, you only have to hike 1 km and descend 135 m.
This is the most popular place to stay on a 2-day Skyline Trail itinerary. I didn’t hike to Curator Camp on my trip, but I’ve heard that despite being in a clump of trees, it does have some mountain views. You can also pay to get dinner or breakfast at Shovel Pass Lodge if you reserve in advance.

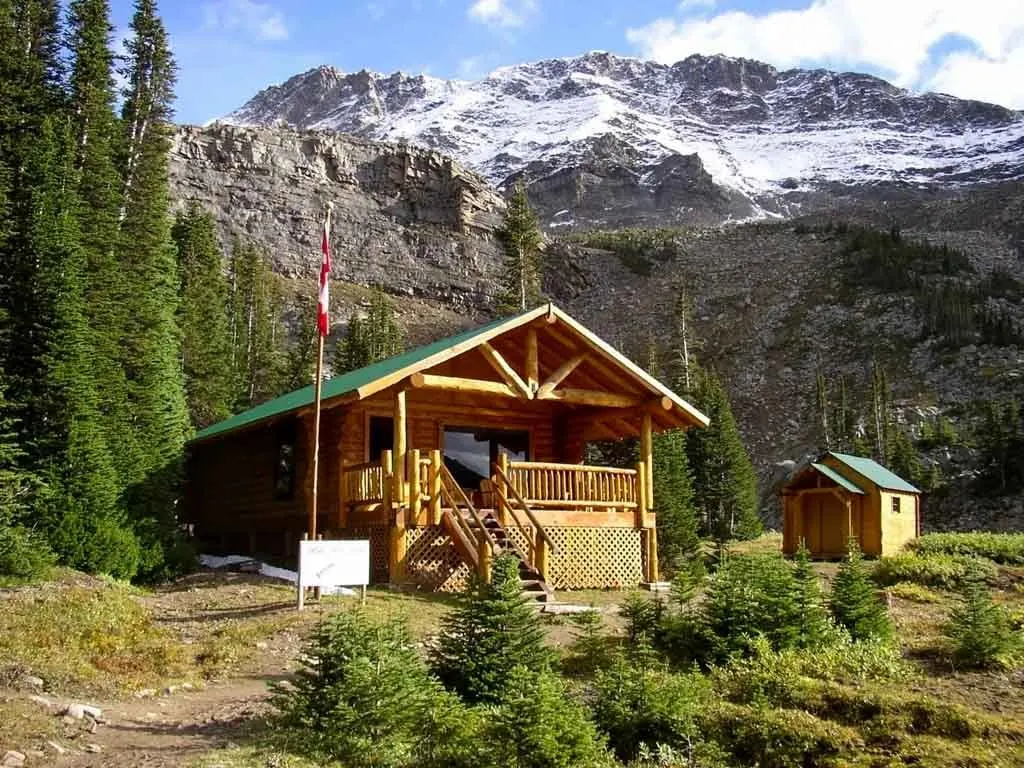
Shovel Pass Lodge
Shovel Pass Lodge is located just past Curator Camp. If you want to go light on the Skyline Trail, you can tackle the trail in two days with an overnight at the lodge. That way you can skip bringing a tent, sleeping bag, sleeping mat and stove!
The lodge has seven cabins that each sleep two or three people. Dinner and breakfast are included. They will also pack you a bagged lunch. As of 2024, a stay at the lodge costs $349/person/night.

Curator Junction to Tekarra Camp
Distance: 10.1 km
Time: 3.5-4.5 hours
Elevation Gain: 305 m
Elevation Loss: 448 m
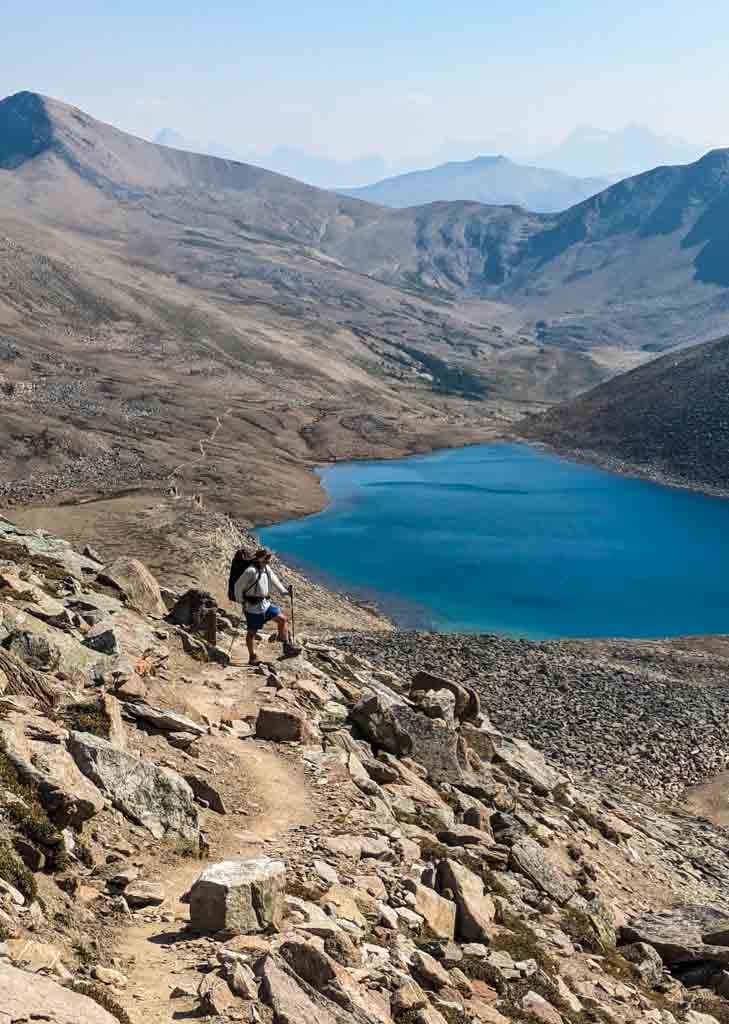
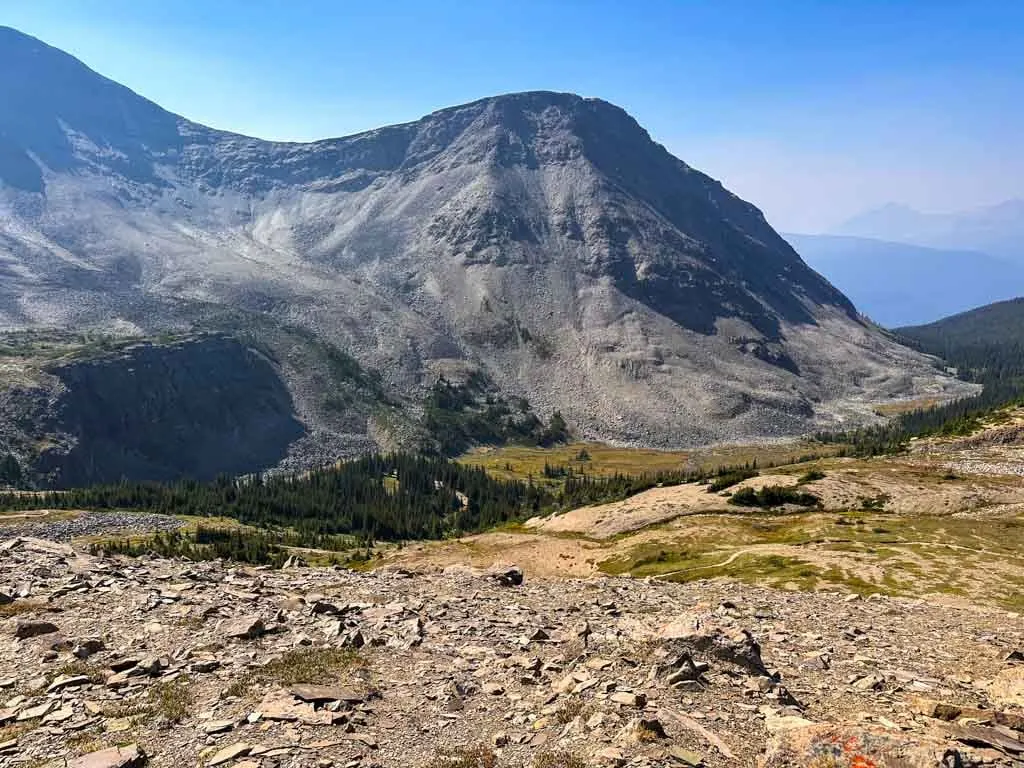
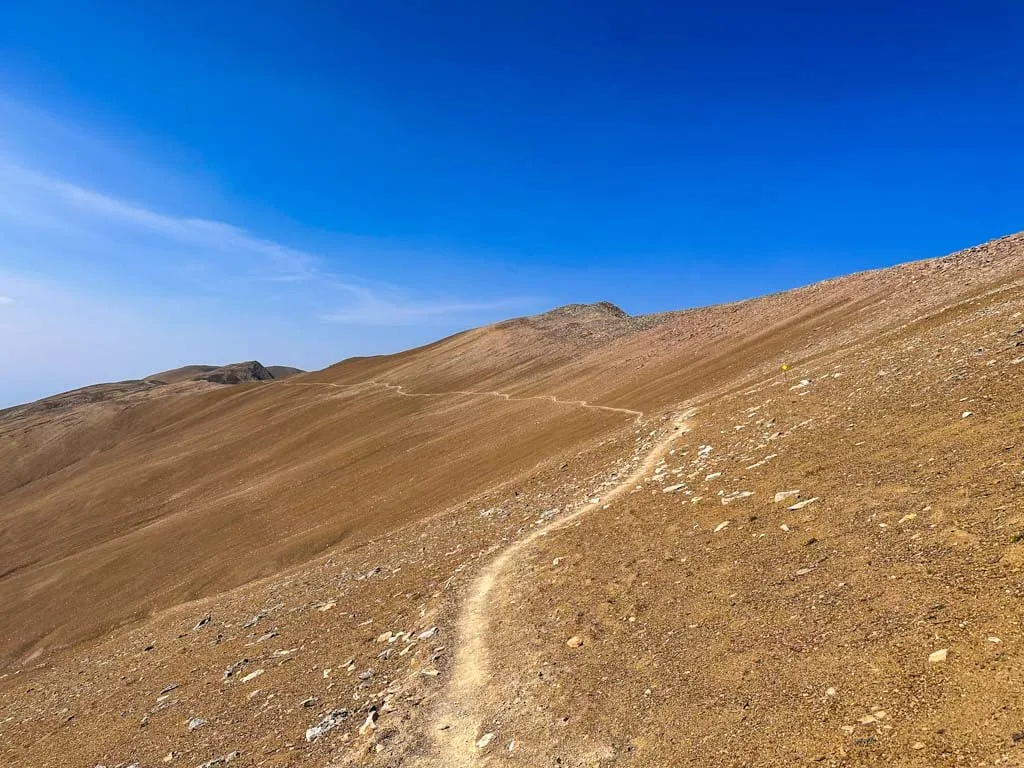
Leaving Curator Junction the trail makes a short but stiff climb up to Curator Lake. The trail doesn’t actually reach the lake, but several informal trails lead down the shoreline. It’s a good spot to grab water or take a break. The lake is an incredible blue colour and is set in a deep rocky bowl beneath Notch Peak.

After Curator Lake the toughest climb of the whole Skyline Trail begins. The trail zigzags upward through rocks and gravel. At times the slope drops steeply away from you. This area holds snow late in the season – often until mid-July. When this section is snow-covered, a slip could be fatal, so it is best to leave this trail for later in the summer.

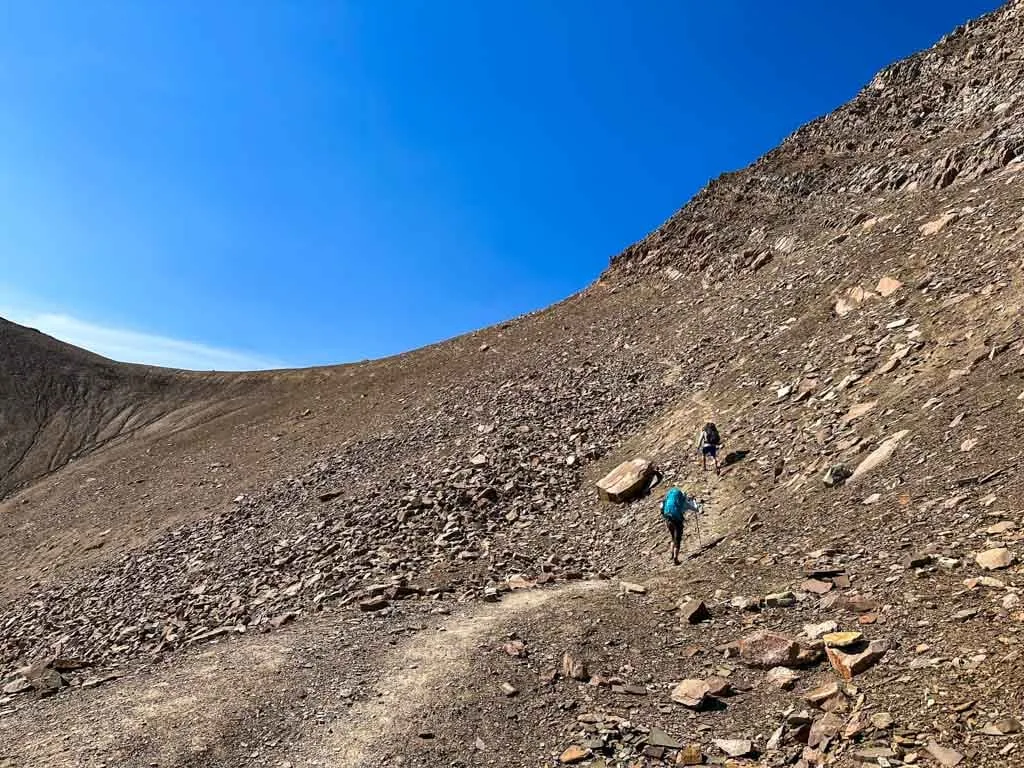
When there is still snow on the trail, you may be able to follow a boot-beaten path across the slope. Be sure to use trekking poles for balance and kick-steps into the snow. When in doubt, stay right for the safest route. If you get to this area and it looks unsafe, you may have to backtrack to Maligne Lake or take the Curator Trail past Curator Camp to Wabasso Lake on the Icefields Parkway.
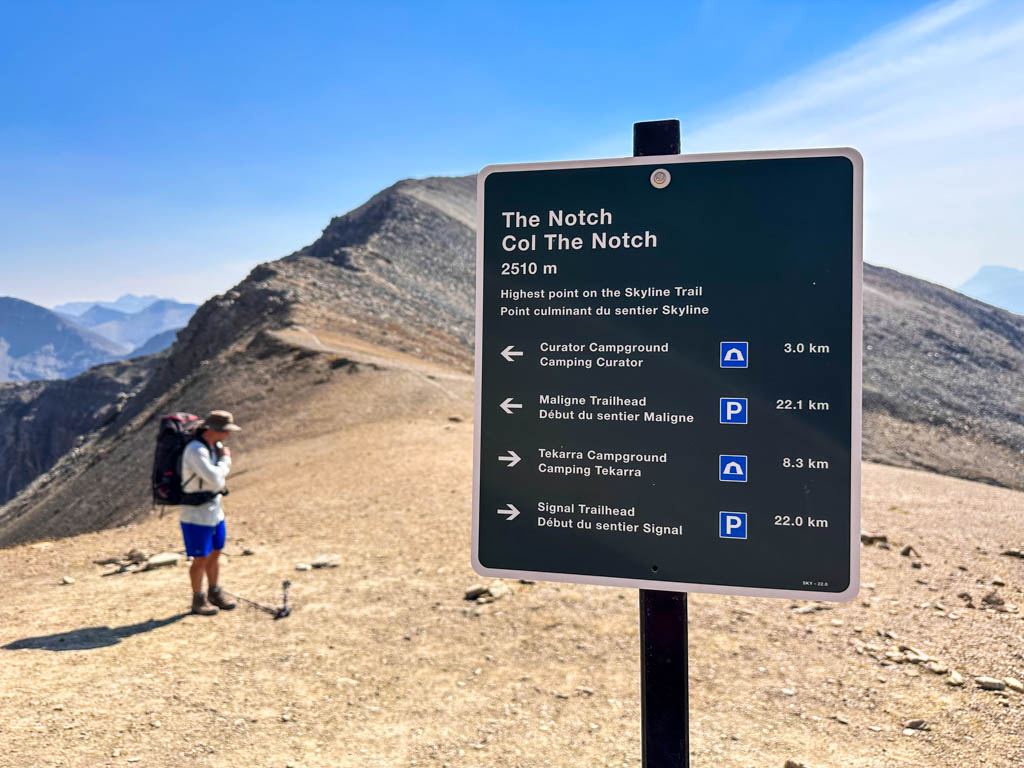
Once you reach the top of the climb you will be at The Notch. A sign at the top announces that it is the highest point on the Skyline Trail. For the most part, it’s all downhill from here to the trailhead!

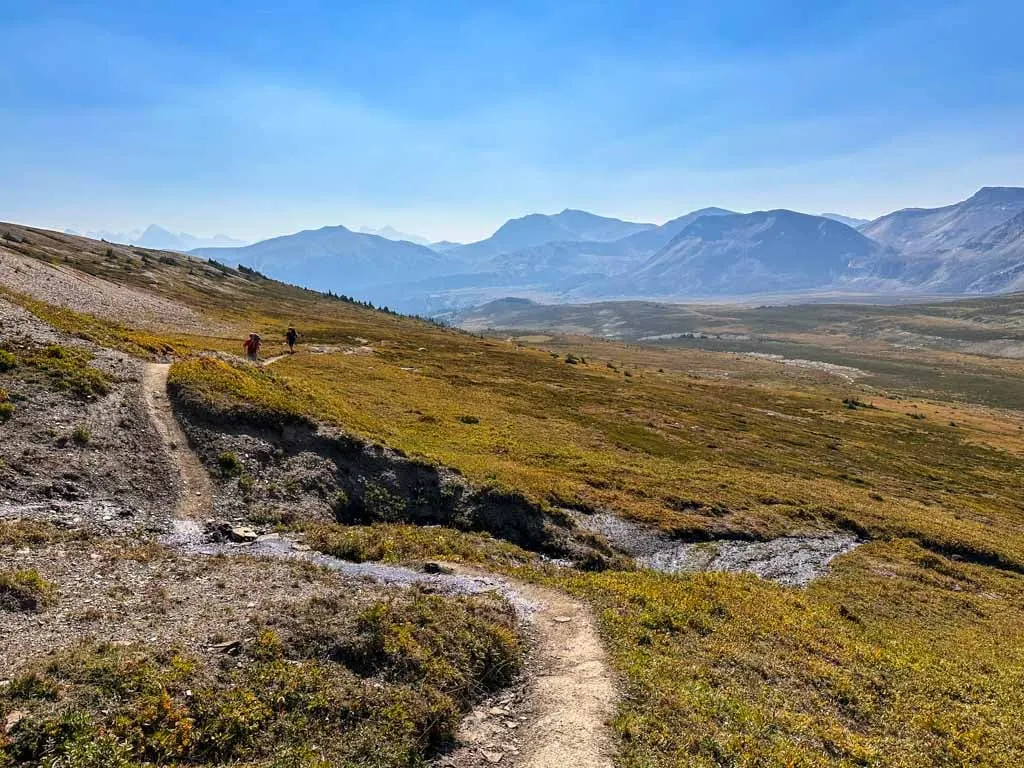
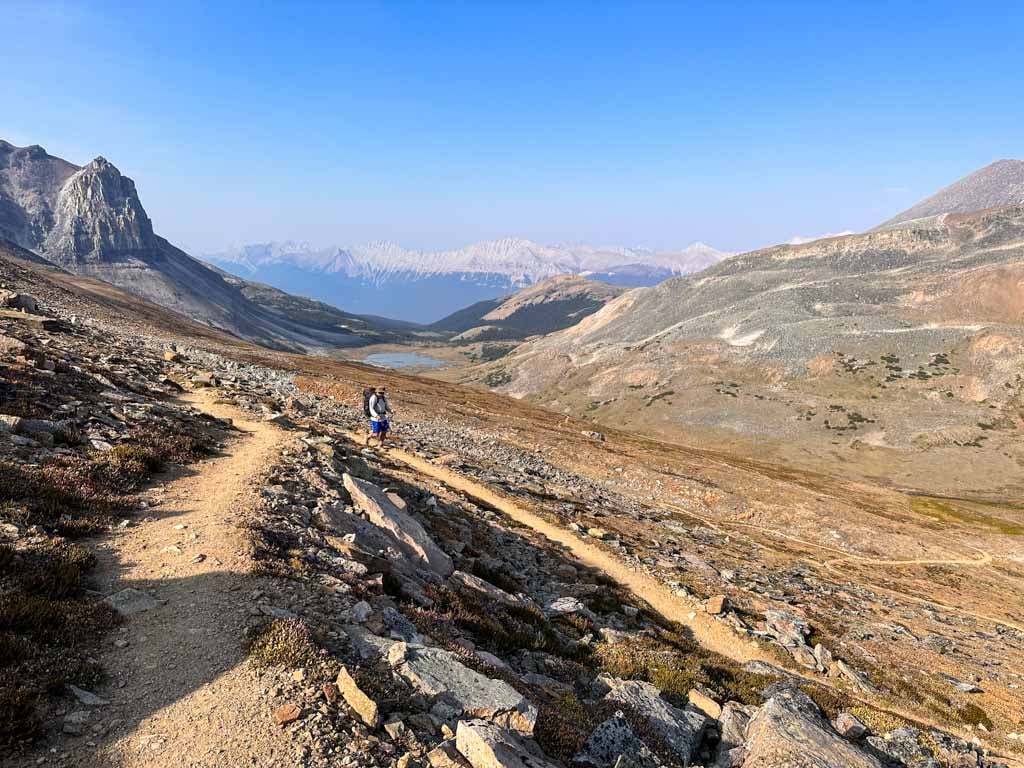
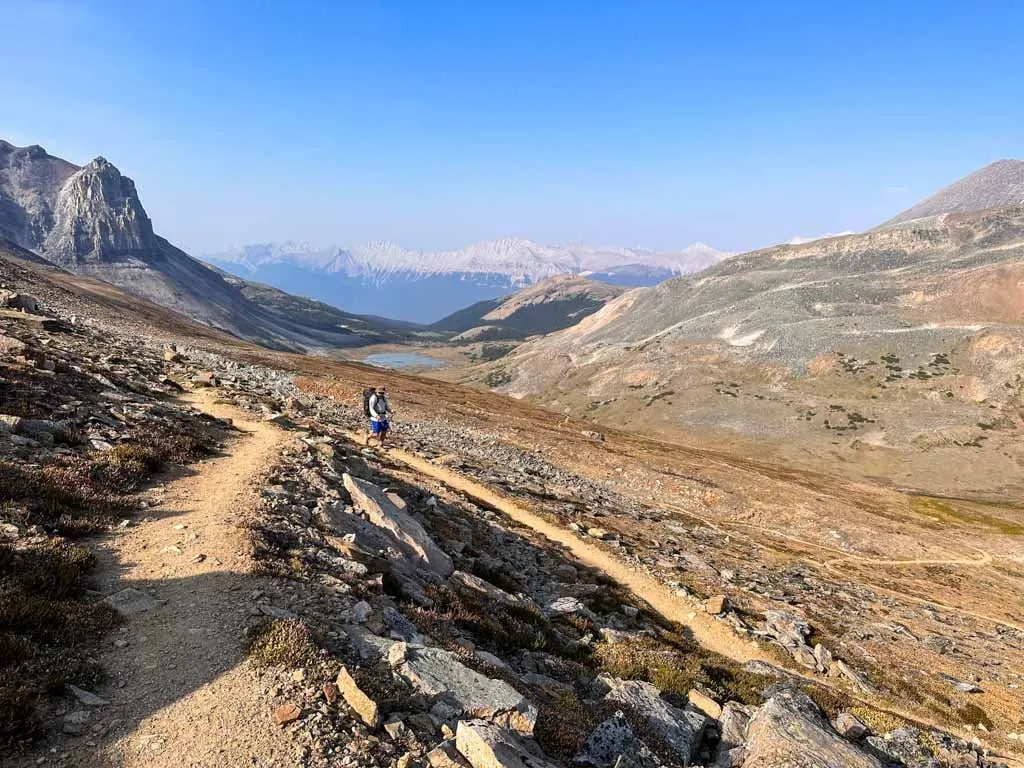
After The Notch, the trail follows the ridgeline and for the first time, you will get views to the west. You can see the Athabasca River Valley (with the Icefields Parkway running through it) and the mountains on the other side including Mount Edith Cavell. Unfortunately, there was a bit of wildfire smoke on my trip, so we couldn’t see too much in that direction.
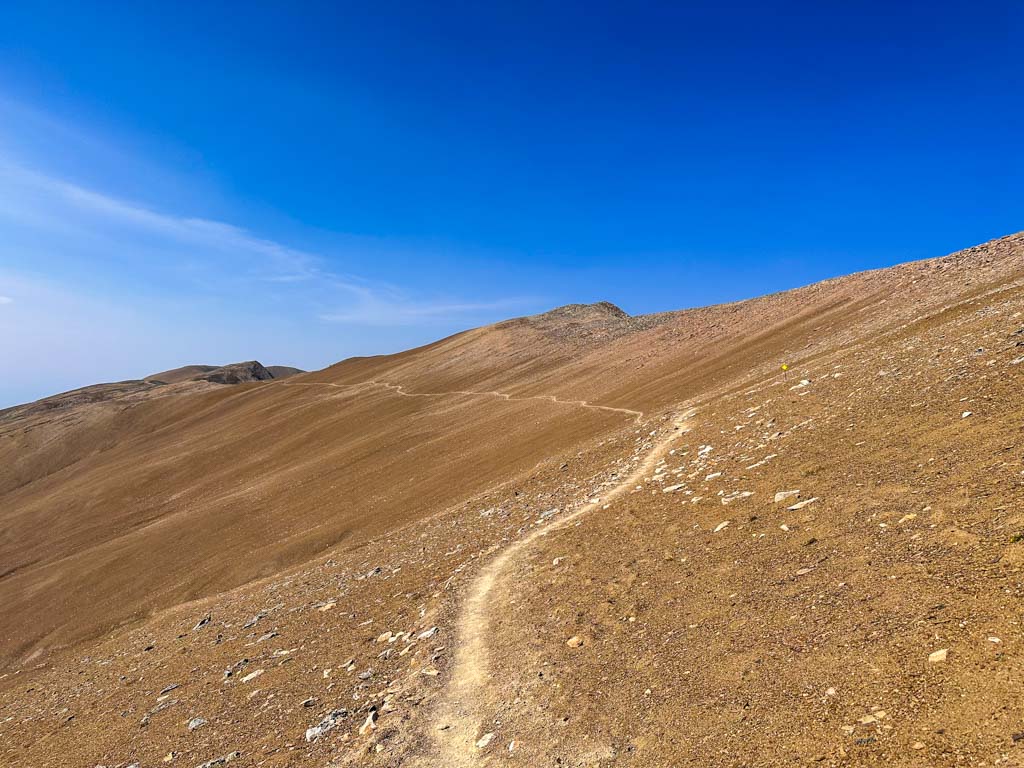
The trail contours just below the ridgecrest for 2.5 km with incredible views the whole time. Sometimes you can also look east to the headwaters of Excelsior Creek and The Watchtower.
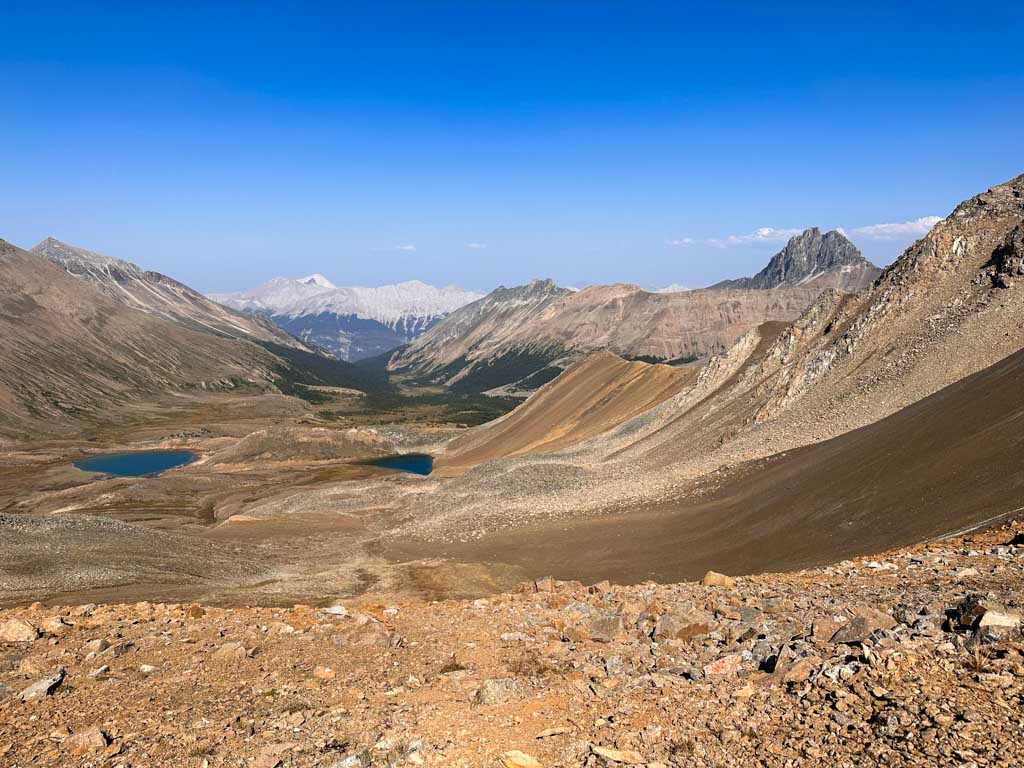

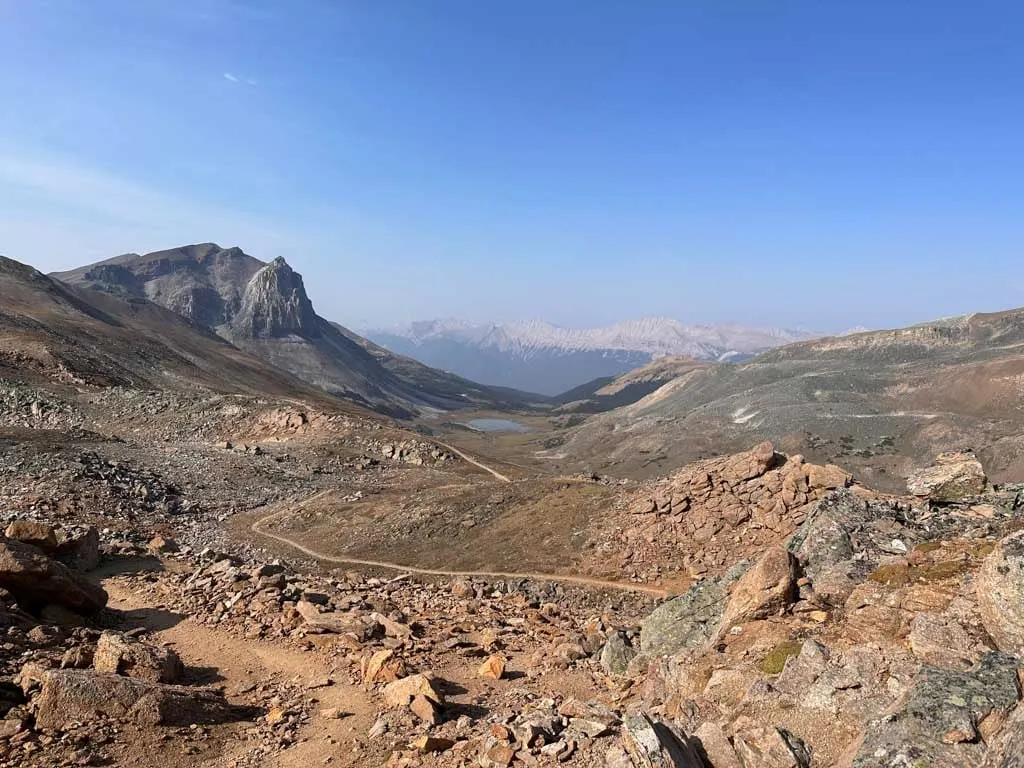
The trail passes almost right over the peak of Amber Mountain (which is pretty much the same height as The Notch) before starting to lose elevation. The remainder of your route for the day stretches out in front of you. You can trace your route along the ridge, then down past the lakes in the valley below.


Follow the trail down the ridge to a saddle. From here the path starts to switchback downhill through gravel and rocks and then through meadows.
The path makes an annoyingly long dogleg of almost a kilometre to the north before swinging back south again. Unfortunately, the circuitous route is necessary to avoid a scree slope.
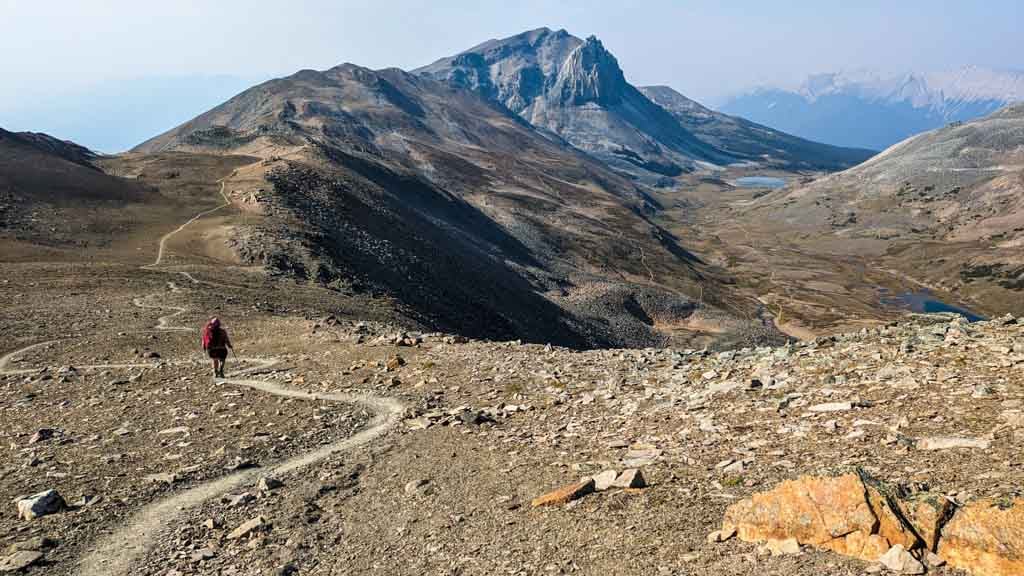
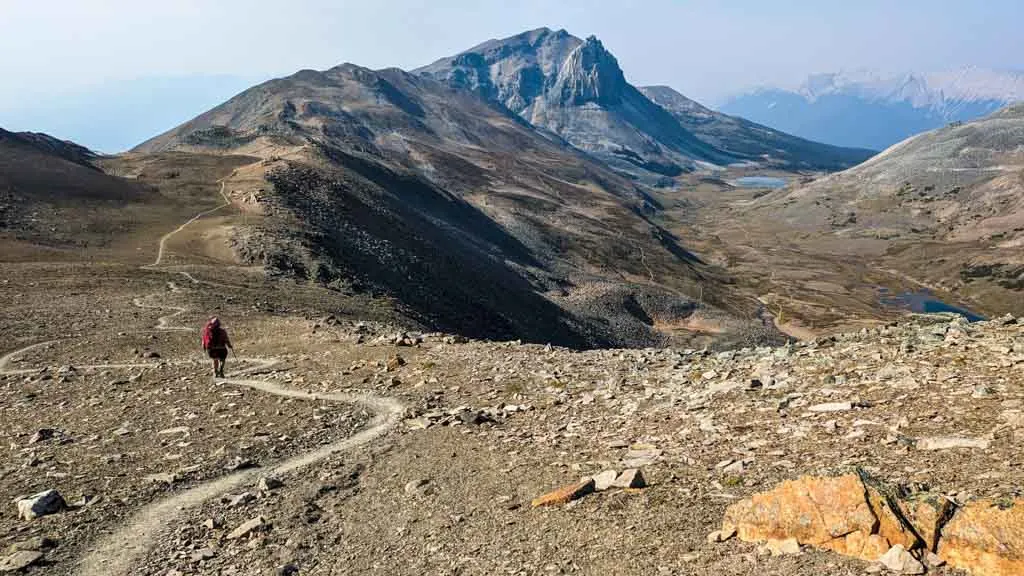
In the lower stretches of descent, there are lots of busy marmots to watch as they scamper through the meadows.

The steep slope levels out at a stream crossing with several branches. This is the first place to fill up with water since Curator Lake. It’s still another 3 km to Tekarra Camp, so you may want to fill up here.

The remaining distance to camp is nearly flat as you amble along the valley bottom. We were lucky enough to spot a group of big horn sheep in this section. From up on the ridge you could see three small lakes but the trail never gets very close to any of them.

As you work your way down the valley it’s mostly easy hiking. However, there are a few rocky sections that will slow you down as well as a few stream crossings and wet areas.
You will know you are getting close to Tekarra Camp when the patches of forest get thicker and closer together. The trail runs through the campsite to Tekarra Creek.
Tekarra Camp
Number of Sites: 8 sites on a short loop trail – half are wooden platforms and half are dirt tent pads
Toilet: Three-seater barrel-style toilet uphill from the back of the tenting area
Food storage: Food lockers at the cooking area near the creek
Water: Collect from the Tekarra Creek on the main trail
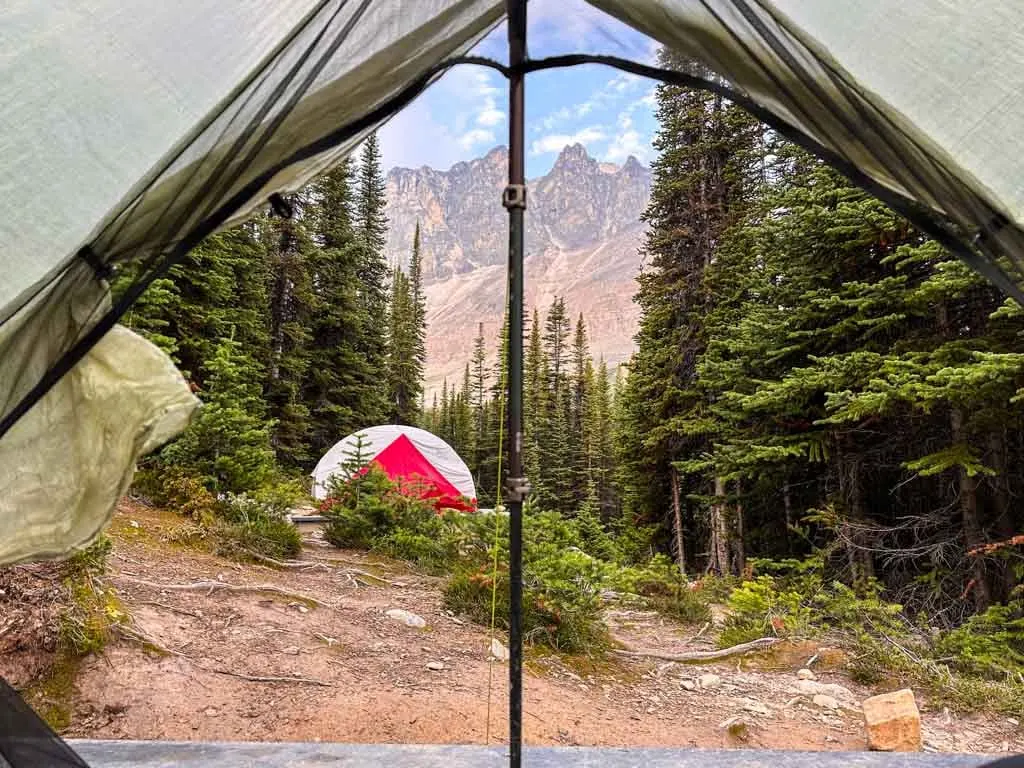
Tekarra Camp was my favourite campsite. The cooking area has a great view of the imposing east side of Mount Tekarra. The nearby creek made it easy to collect water and soak tired feet. This camp is the best option for people on a three-day/two-night Skyline Trail itinerary.

Tekarra Camp to Signal Camp
Distance: 5.3 km
Time: 1.25-2 hours
Elevation Gain: 110 m
Elevation Loss: 150 m
Leaving Tekarra Camp you will need to ford Tekarra Creek. Later in the year and at times of low water this is easy as you can rock hop across. But at other times you may need to take your boots off and wade. The creek is wide so it is never too deep.
On the other side, the trail climbs gradually through meadows and pockets of forest as it curls around the northeast side of Mount Tekarra. The terrain gets a bit more open as you progress and you can look across the Maligne Valley to the peaks on the other side including Grisette Mountain and Mount Dromore. I had a lot of wildfire smoke on my trip so we couldn’t see much.
After reaching a barely perceptible highpoint, the trail continues rambling through the meadows as it heads northeast and starts to descend.

Before long, you will pop out onto an old gravel road. The route to the Signal Mountain Lookout heads uphill to your left. Your route down to the mountain is straight ahead. There is a bike rack here since bikes are allowed up to this point.


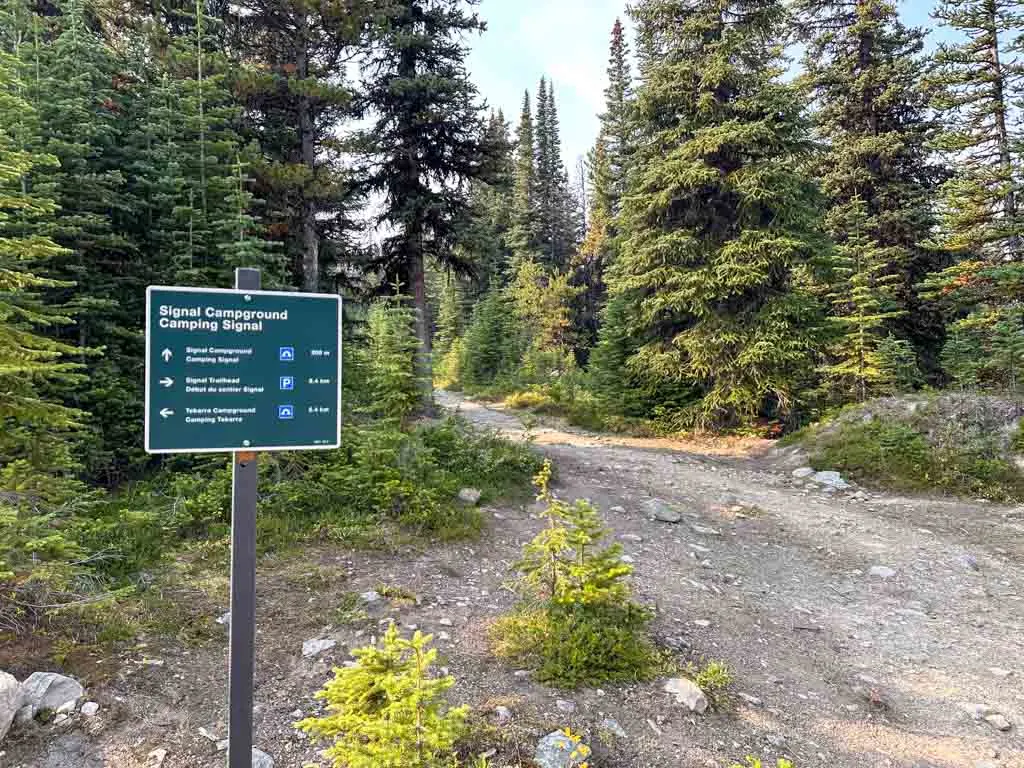
Continue down the road for another minute. The 200-metre-long side trail to Signal Camp is on your left.
Signal Camp
Number of Sites: 8 dirt tent pads
Toilet: Barrel-style outhouse on a spur trail near the entrance to camp
Food storage: Food lockers near the picnic tables at the entrance to camp
Water: Collect from a stream behind the camp.
This campground is set in thick forest. It’s a good first or last night’s camp if you are on a longer hike (3 or 4 days). It would also be a good place to base yourself if you want to visit Signal Mountain Lookout or explore off-trail towards the peak of Signal Mountain.

Signal Camp to Signal Mountain Trailhead
Distance: 8.4 km
Time: 1.75-2.5 hours
Elevation Gain: 0 m
Elevation Loss: 849 m
The entire route down to Signal Mountain trailhead is on an old fire road. The road is open to bikes, and I spent the entire time wishing someone had left a bike at the top for me so I could just coast down!
This part of the trail was burned in the 2024 Jasper wildfires. I haven’t hiked this section since the fires. However, Parks Canada officially re-opened this part of the trail on December 19, 2024 and it is safe to hike.
The road is steep in a few places, but most of the time, it is fairly gradual. It also has a few switchbacks to make the grade easier. The entire trail is in the forest, so there is not much to see and there are no good break spots – we just plunked down on the side of the road.

Gaia GPS, AllTrails and other gps maps show a trail paralleling the road in the upper section, but from what I could tell, it doesn’t really exist. About halfway down a trail called Loni’s or Trail 7 leaves from the left side of the road. This is a black diamond mountain bike trail that isn’t ridden very often. It leads down to Trail 7 and the Maligne Lake Road. But it is steeper than the fire road and provides a less direct route to the trailhead, so it’s not worth taking.
The last section of the fire road is not quite as steep as you finally make your way to the Signal Mountain Trailhead and your waiting car or shuttle bus.
Skyline Trail Itineraries
Which direction to hike the Skyline Trail in Jasper?
The majority of hikers tackle the Skyline Trail from south to north (Maligne Lake to Signal Mountain).
Staring in the south gives you a much shorter and easier climb up above the treeline. If you start from the north you have an extra 530 m of elevation overall. And you start with an 850 m climb up a depressing fire road. As well, it is much easier to hike up The Notch than to hike down it.
The shuttle schedule is a bit better for south to north hikers. And if you finish at Signal Mountain you are just a few minutes from the town of Jasper so you can hurry to get a burger or a shower. (I was in desperate need of both on my trip!)
We met only a few groups going north to south – almost all hikers seemed to be going south to north.
Fast 2-Day Skyline Trail Itinerary
If you are fit and don’t have a lot of time, this quick 2-day Skyline Trail itinerary will work for you. It does involve some long days on the trail though. You can make it easier by staying at Shovel Pass Lodge so you can have a light pack. This itinerary also lets you tackle the tough climb up to The Notch first thing in the morning when you aren’t as tired.
Note: This itinerary is 2 km and 30 minutes longer than the standard length since it includes the out-and-back hike to Curator Camp/Shovel Pass Lodge.
Day 1 – Maligne Lake Trailhead to Curator Camp/Shovel Pass Lodge – Distance: 21.3 km, Elevation Gain: 761 m, Elevation Loss: 521 m, Time: 5-9 hours
Day 2 – Curator Camp/Shovel Pass Lodge to Signal Mountain Trailhead – Distance: 24.8 km, Elevation Gain: 550 m, Elevation Loss: 1447 m, Time: 6.5-9 hours

Standard 3-Day Skyline Trail Itinerary
This is the standard Skyline Trail itinerary and the plan I recommend for most hikers. The middle day is definitely the most challenging (and it includes The Notch), but it is doable.
Day 1 – Maligne Lake Trailhead to Snowbowl Camp – Distance: 12.2 km, Elevation Gain: 545 m, Elevation Loss: 146 m, Time: 3.5-5.25 hours
Day 2 – Snowbowl Camp to Tekarra Camp – Distance: 18.2 km, Elevation Gain: 521 m, Elevation Loss: 688m, Time: 6-8 hours
Day 3 – Tekarra Camp to Signal Mountain Trailhead – Distance: 13.7 km, Elevation Gain: 110 m, Elevation Loss: 999 m, Time: 3.25-4.5 hours
Relaxed 4-Day Skyline Trail Itinerary
This 4-day Skyline Trail itinerary is great for those who want to take their time, groups with kids, or people who want to explore off-trail and maybe summit some peaks. This itinerary also gives you two full days above the treeline.
Note: This itinerary is 2 km and 30 minutes longer than the standard length since it includes the out-and-back hike to Curator Camp/Shovel Pass Lodge.
Day 1 – Maligne Lake Trailhead to Little Shovel Camp – Distance: 8.3 km, Elevation Gain: 380 m, Elevation Loss: 0 m, Time: 2.25-3.5 hours
Day 2: Little Shovel Camp to Curator Camp/Shovel Pass Lodge – Distance: 13 km, Elevation Gain: 521 m, Elevation Loss: 386 m, Time: 4-5.5 hours
Day 3: Curator Camp/Shovel Pass Lodge to Tekarra Camp – Distance: 11.1 km, Elevation Gain: 440 m, Elevation Loss: 305 m, Time: 3.5-4.5 hours
Day 4: Tekarra Camp to Signal Mountain Trailhead – Distance: 13.7 km, Elevation Gain: 110 m, Elevation Loss: 999 m, Time: 3.25-4.5 hours
Alternative Skyline Trail Itineraries
If you can’t get the campsites you want, consider the following options:
- Try booking your itinerary from north to south instead
- Book Watchtower Camp instead of Curator Camp
- Book Signal Camp instead of Tekarra Camp
- Book Little Shovel Camp instead of Snowbowl Camp
- Consider doing just part of the Skyline Trail and hiking or or out via the Curator Trail to Wabasso Lake.
- Keep checking back for cancellations or use a cancellation app like like Campnab or Schnerp to notify you when something becomes available to book. Lots of people change their plans and getting a cancellation is definitely possible. My review of Campnab vs Schnerp has more details.
Skyline Trail Hiking Tips
Toilets: Most of the toilets along the Skyline Trail are three-seater barrel-style, which can be intimidating at first. But don’t worry – only one person uses them at once! There three seats because there are three waste barrels to fill. It is common practice to leave a trekking pole or branch or other obvious item across the trail to show others that the toilet is occupied so you don’t surprise each other.


Cooking Areas: Each campground has a communal cooking area with a few picnic tables. It was nice to have a place to sit down each evening! But don’t hog the tables – they are for everyone to share.
Mosquitos: Bugs can be bad on the trail in July and early August. Bring bug spray and a head net.
Bears: This is black and grizzly bear country. Encounters are more likely below treeline and in the meadows (although I did see an old bear scat high on Amber Mountain!). Bring bear spray and store your food securely. See my bear safety tips for more info.
Changeable weather: The high mountains are notorious for fickle weather. Rainstorms can blow in at any time. Thunderstorms can be dangerous – you do not want to be in the high alpine when they hit. Be especially cautious between The Notch and Amber Mountain.
Mud and Snow: Since it is the highest trail in Jasper National Park, it holds snow late into the year. It can also be muddy in sections due to the melting snow and frequent rainstorms. Waterproof boots are essential, especially while the snow is still melting.
Escape routes: If the weather is terrible or the terrain is unsafe, you can leave the Skyline Trail via the Curator Trail to Wabasso Lake on the Icefields Parkway. There is cell service at the parkway so you can call a taxi to take you to Jasper or to your car. You can also escape via the Watchtower Trail to Maligne Lake Road but it is less maintained and involves a river crossing.
Peak bagging: Fit hikers who have more time and are skilled in off-trail navigation may be interested in summitting some of the peaks along the trail. Non-technical peaks along the Skyline Trail include Sunset Peak, Mount Aberhart, Trowel Peak, Curator Mountain, Amber Mountain, and Signal Mountain.
That’s everything you need to know to hike the Skyline Trail in Jasper National Park. If you have questions about the hike, ask them in the comments – I’m always happy to help.
READ NEXT:
- 11 Best Backpacking Trips in the Canadian Rockies
- 31 Best Backpacking Trips in BC
- Rockwall Trail Guide: Everything You Need to Know
- Backpacking Checklist: Gear You Need To Go Backpacking
- Bear Safety for Hikers, Campers and Backpackers


- Things to Do on Newfoundland’s Great Northern Peninsula - July 29, 2026
- Best Sun Hoodies for Hiking - June 3, 2026
- Lower Stein Valley Trail Hiking and Backpacking Guide - May 27, 2026
Lauren
Monday 6th of July 2026
Thank you so much for sharing your Gaia trail map!
Rebecca
Sunday 22nd of February 2026
Hi Taryn! FyI the web page for the Maligne Shuttle has changed, as well as shuttle prices: https://maligneadventures.com/shuttles/
Taryn Eyton
Monday 23rd of February 2026
Thanks for the update Rebecca. It looks like they changed their URL slightly - it used to end in "shuttle" and now it ends in "shuttles"! I've fixed the link and updated the shuttle prices in the post along with the overall cost estimate for the trail.