

These days, Elfin Lakes in Garibaldi Provincial Park is the closest backcountry camping to my house in Squamish – it’s literally just up the street. But I’ve been going to Elfin Lakes for two decades – it was my first winter backpacking trip back in 2003!
I’ve hiked the Elfin Lakes Trail more times than I count, in every season, in boots, in spikes, and in snowshoes. I’ve spent lots of nights in the campground and the shelter and really explored the area. Elfin Lakes is one of the best hikes in Squamish and it is featured in my hiking guidebook, Backpacking in Southwestern British Columbia.
In this post, I’ve got everything you need to know to do the Elfin Lakes hike in Squamish. This guide includes:
- Trail stats including how long it takes, difficulty, best time to go, and more
- Tips for hiking to Elfin Lakes including what to pack and how to prep
- Day Passes – what you need to know to get a pass
- Camping reservations – how to reserve and when to book
- Trail map that shows all the key locations I mention in this post
- How to get to the Elfin Lakes trail – driving directions plus tips for going without a car
- Step-by-step hiking directions so you know what to expect
- Extending your trip – my picks for hikes you can do from Elfin Lakes
- Backcountry camping and the hut – info on where to camp and what to expect at each campground
- Snowshoeing and skiing – info on trekking to Elfin Lakes in winter
- Biking to Elfin Lakes – tips for going by bike instead of hiking
This is a sensitive wilderness area. Learn how to Leave No Trace to keep the wilderness wild. Make sure you are prepared by bringing the 10 Essentials. Get ready for adventure with this checklist of things to do before every hike.
Hey there: Some of the links in this post are affiliate links, which means I earn a small commission at no cost to you. Thanks for your support. -Taryn

Elfin Lakes Trail Stats
Here are the basic stats that you need to know about hiking the Elfin Lakes Trail in Squamish:
Location: The trail is located in the southern part of Garibaldi Provincial Park near Squamish, BC.
Duration: 6-7 hours
Distance: 22 km
Difficulty: Moderate/Challenging
Elevation Change: 900 m of elevation gain
Day Passes: Required between June and October. (See the Day passes section below for more info.)
Camping and the Hut: Reservations are required for camping and staying at the Elfin Lakes Hut. (See the Camping and Hut section below for more info.)
Best Time to Go: July to early October when the trail is snow-free. I also recommend picking a clear day so you can enjoy the views.
Toilets: There are toilets at the trailhead, Red Heather day-use shelter, Elfin Lakes campground, Elfin Lakes Hut, and Rampart Ponds campground.
Drinking Water: You can fill your water bottles at Brandvold Falls (2.5 km from the trailhead) and at the north Elfin Lake (11 km from the trailhead). Pack plenty of drinking water. Since you don’t know if humans or animals have pooped or died upstream, you need to filter or treat all water before you drink it. (I use a Katadyn BeFree.)
Dogs: Not allowed in Garibaldi Provincial Park to protect wildlife and the fragile ecosystem.
Bikes: Bikes are allowed on the trail as far as the Elfin Lakes shelter. (See the biking section below for more info.)
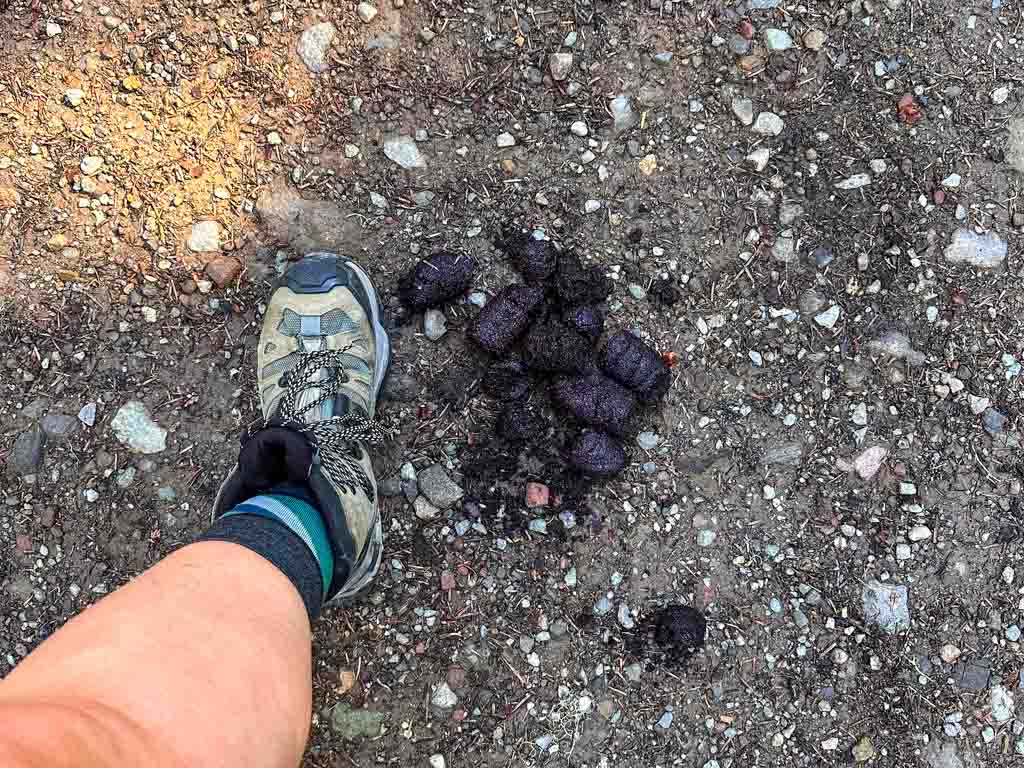
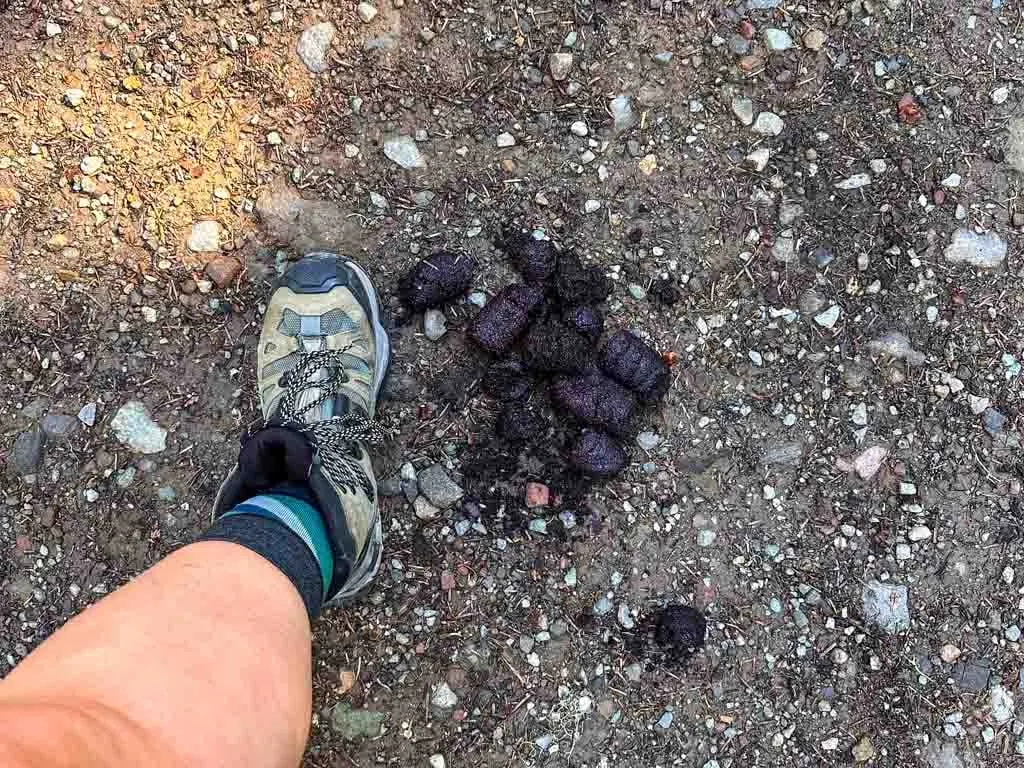
Bears: This area has a high black bear population. Hike in a group and carry bear spray.
Indigenous Context: The Elfin Lakes Trail is in the traditional territory of the Skwxwu7mesh (Squamish) Nation. Historically, the area was an important place to pick berries and harvest mountain goats. To learn more, see the info sign in the Elfin Lakes campground or visit the Squamish Lil’wat Cultural Centre.
Tips for Hiking Elfin Lakes
- Check the weather before you go. City weather forecasts are useless in the mountains. Use an algorithmic spot forecast for Elfin Lakes like Spotwx. (Read my guide to weather apps for hikers for more tips.)
- Check trail conditions online using AllTrails or Instagram. This is especially important in the spring or fall when the trail can be icy or snowy.
- Bring a rain jacket and warm clothing just in case. It can be much colder and rainier in the mountains than in the city.
- Wear trail running shoes or hiking boots. The trail is rocky and loose in places. Regular running shoes don’t have enough grip or ankle support.
- Bring water and snacks. It is not safe to drink the water from the lakes without boiling, filtering, or treating it as you never know if people or animals have pooped or died upstream. Gross! (I use a Katadyn BeFree.)
- Bring the 10 Essentials. These are key safety items you should have on every hike.
- Bring a camera – it’s gorgeous and you will want tons of pics! But leave the drone at home. Drones aren’t allowed in BC Parks without a commercial filming permit.
- Pack out all your garbage. There are no garbage cans here so you must take your garbage home with you. Leaving it in the park attracts animals.
- Be Bear aware: There are lots of black bears on this trail, especially in late summer and fall. Hike in a group, make noise, and carry bear spray. Read my bear safety tips for more info.
Elfin Lakes Day Passes
Since this is such a popular area, you need to get a free day pass to visit between June and October. Your pass covers everyone in your vehicle. Passes are available on the BC parks website starting at 7 AM two days before your trip. Act fast: passes run out fast on summer weekends.
Tip: Select the Diamond Head trailhead in Garibaldi Provincial Park to reserve a day pass to hike to Elfin Lakes.
Print out your day pass or save it as a screenshot on your phone. Cell service at the trailhead is really spotty, so you might not be able to pull it up from your email. Parks staff will check for passes on the road just before the trailhead. If you don’t have a pass, you won’t be allowed to hike.
Read my guide to BC Parks day passes for more info including tips for getting a pass.
Elfin Lakes Camping Reservations
The backcountry campgrounds and hut at Elfin Lakes are popular destinations so they all require reservations. You can book online up to 4 months before your trip. See my guide to making backcountry reservations in BC for tips on getting a spot.
Camping costs $10 per person per night plus a $6 reservation fee for each tent. Bunks in the hut cost $15 per person per night plus a $6 reservation fee per group. Note: You don’t need a day pass if you have a backcountry camping reservation.
I’ve got lots of details on what to expect at the Elfin Lakes Campground, Elfin Lakes Shelter, and other nearby campgrounds further down in this post.
Read my guide to making backcountry camping reservations in BC for tips on getting a camping reservation.
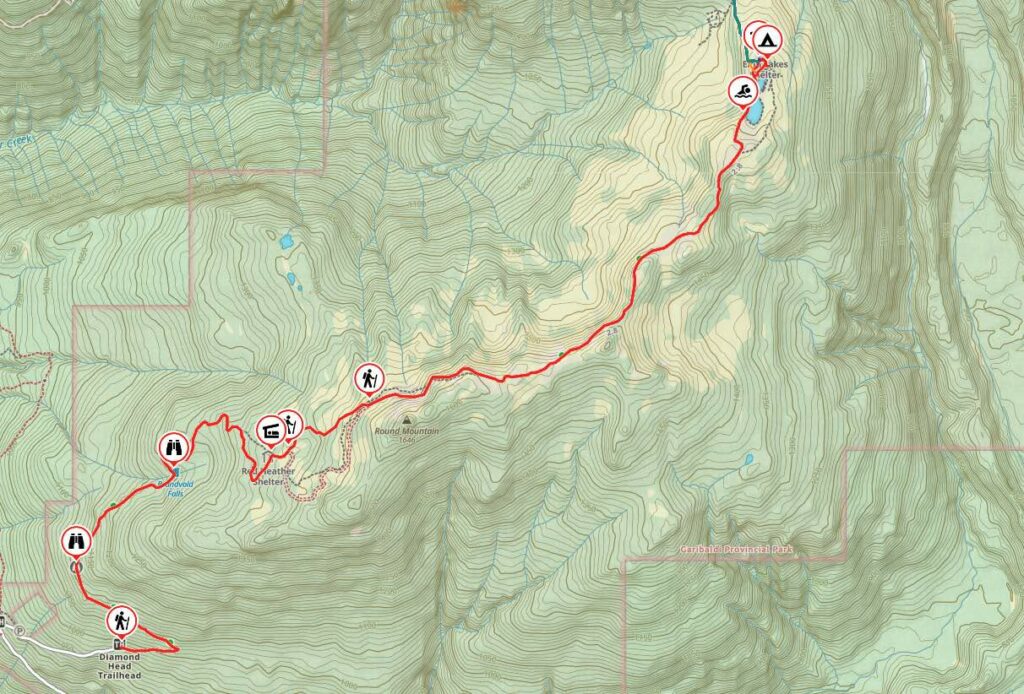
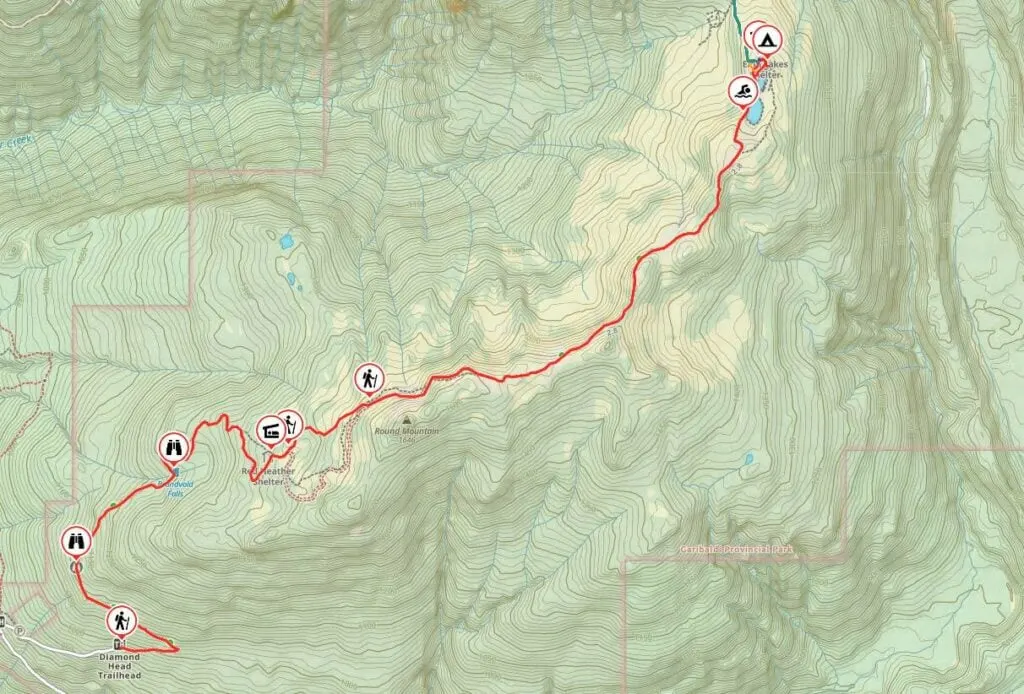
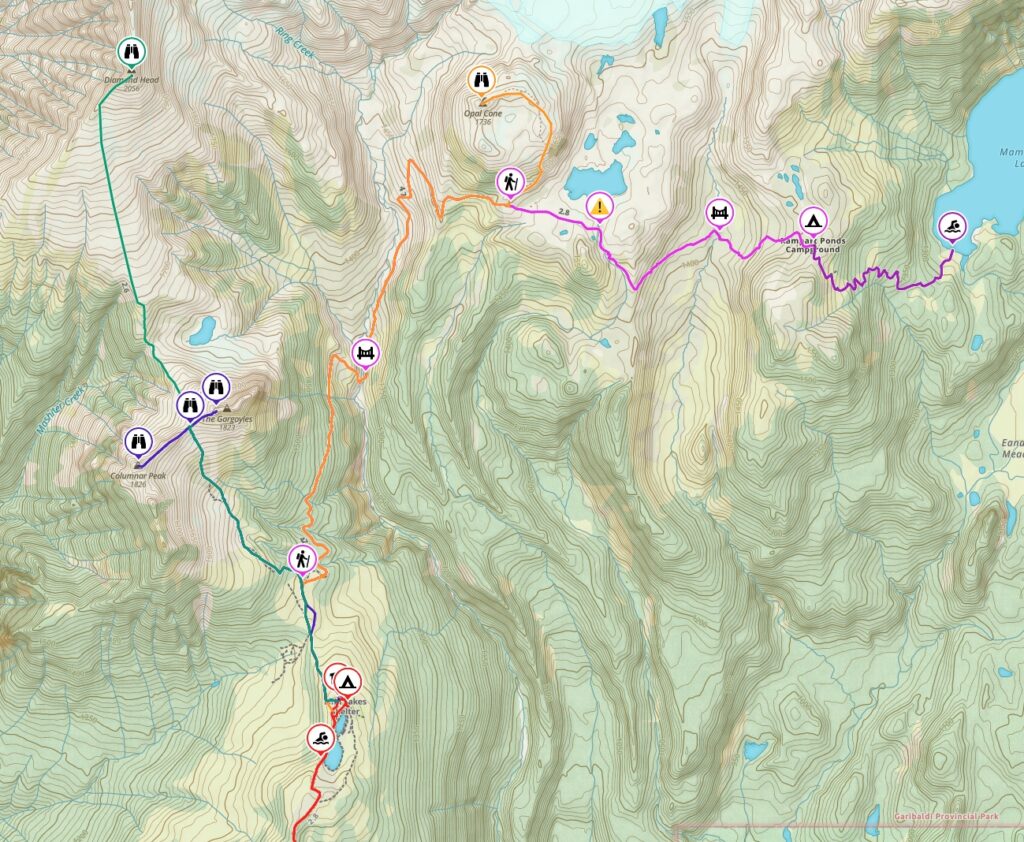
Elfin Lakes Trail Map
I made a map of the Elfin Lakes Trail for you using Gaia GPS, my favourite GPS and mapping app. It also includes an elevation profile. Click through to zoom in and download the GPX track.
Psst! Want to save 20% off a premium Gaia GPS annual membership, which includes the maps I use on my trips? Use this link.
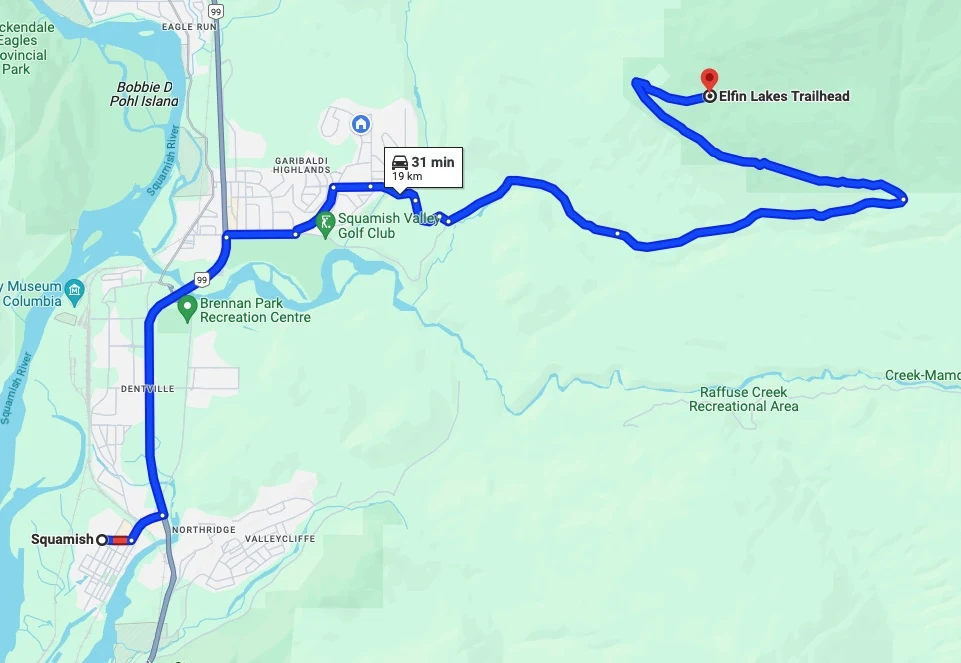
How to Get to Elfin Lakes
The trailhead is about 1.5 hours from Vancouver and about 30 minutes from Squamish. You can get there by car or a bus/taxi combo. In this section, I’ve got everything you need to know for driving, parking, and taking the bus and a taxi to Elfin Lakes.
Driving Directions
From Vancouver, head over the Lions Gate Bridge, then go west on Highway 1. Follow the signs to switch to Highway 99 North just before Horseshoe Bay. Stay on Highway 99 North and drive past downtown Squamish.
Turn right onto Mamquam Road just after crossing the bridge over the Mamquam River. A few blocks later turn left onto Highlands Way. At the roundabout, go right onto the Boulevard. Go straight through the next roundabout and follow the Boulevard up the hill and across a bridge where it becomes University Boulevard.
Turn right at the roundabout onto Village Drive. Then turn left onto Mamquam Road. A few blocks later Mamquam Road turns to gravel and becomes Garibaldi Park Road. The road has bumpy and loose sections, but is fine for all vehicles – just go slow.
Stay on this road, ignoring side roads. Watch for mountain bikers. Go left to stay on Garibaldi Park Road amongst a group of houses. Follow the road for another 5 km to the trailhead and the large gravel parking area. Here are Google Maps driving directions.

Parking Passes
Just before you reach the parking lot, you may encounter a park facility operator checking parking passes and camping reservations.
If you visit between June and October, you must have a day pass for your car (also called a parking pass). See the day pass section above for more info.
If you are camping, you don’t need a parking pass, but you do need a camping reservation for each member of your group. See the camping section above for more info.
Getting to Elfin Lakes Without a Car
You can get to Elfin Lakes without a car, but it isn’t easy. From Vancouver, take the YVR Skylynx or Squamish Connector buses to downtown Squamish or the Squamish Adventure Centre. From there, Howe Sound Taxi can take you 30 minutes to the trailhead. (Call ahead to confirm that they will go up the gravel road to the trailhead – some dispatchers get confused as to where this is.)
Elfin Lakes Hiking Directions
Here are my step-by-step directions for hiking to Elfin Lakes.
Trailhead to Red Heather Day-Use Hut
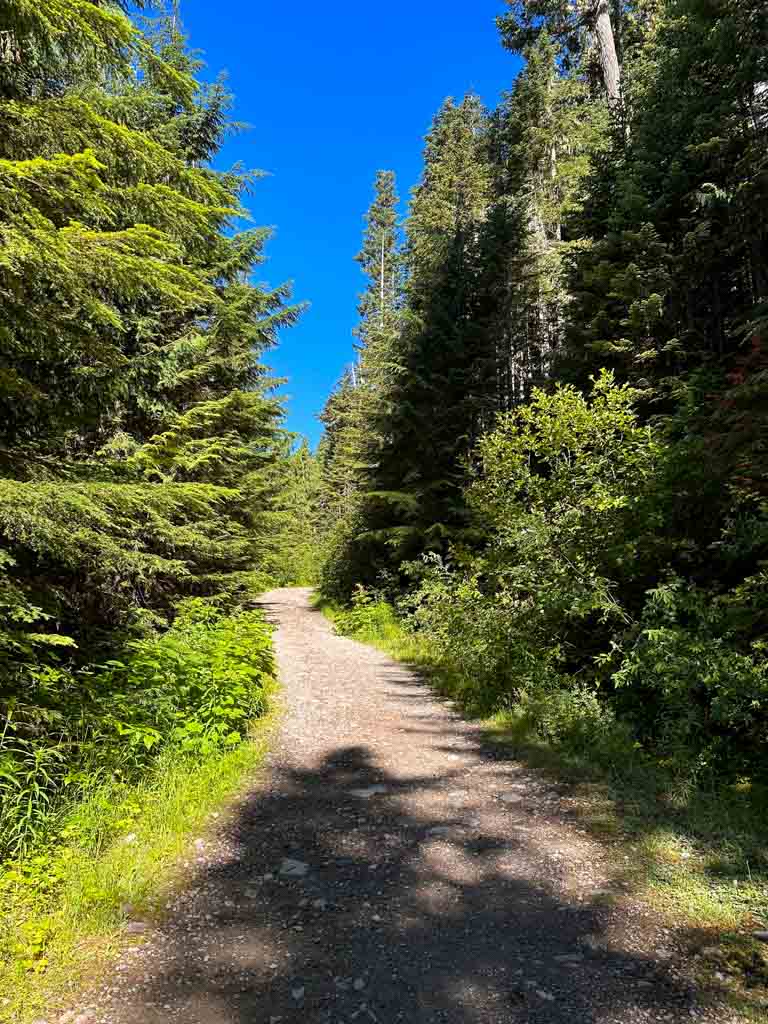
The trailhead is at the east end of the parking lot next to a large info sign. Walk around the yellow gate and past the outhouse to start your hike up the old road.
The Brandvold family built this road to access their backcountry lodge at Elfin Lakes in the 1940s. The lodge closed in 1972 and these days the only cars allowed on the road are BC Parks maintenance vehicles. The road is steep and rocky, so it doesn’t make for the most pleasant hiking experience.

Follow the old road up and around a switchback. About 1.5 km from the trailhead, look for a small opening in the trees to your left. There is a bit of a view down to the Squamish harbour, but it is getting overgrown.


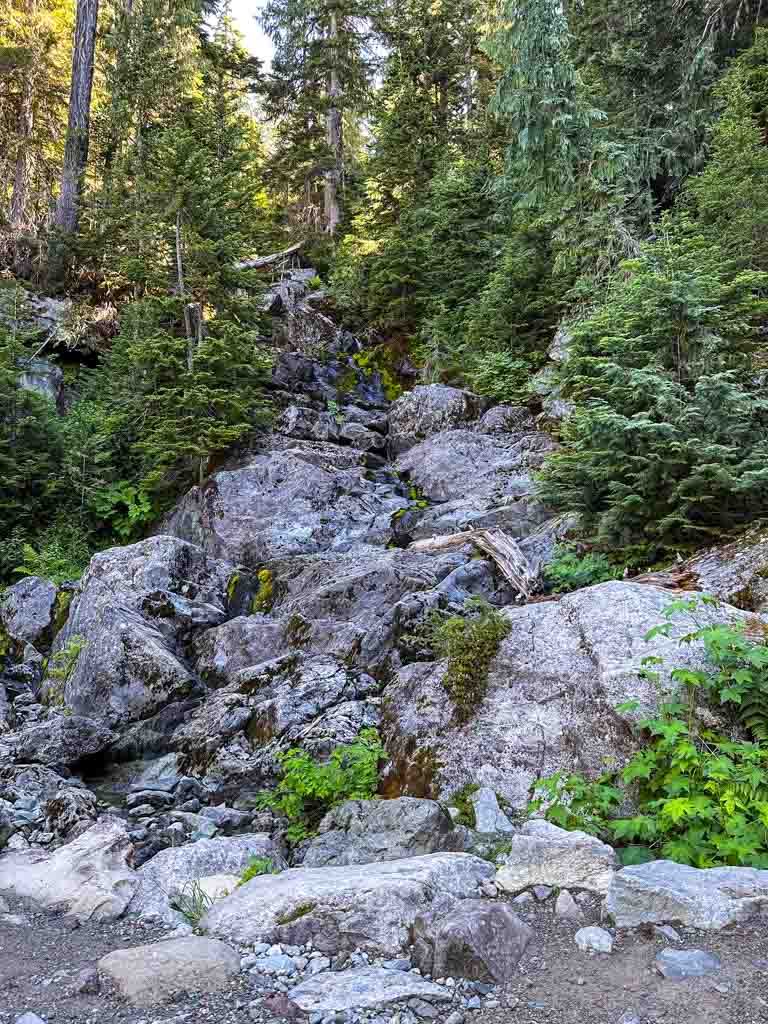
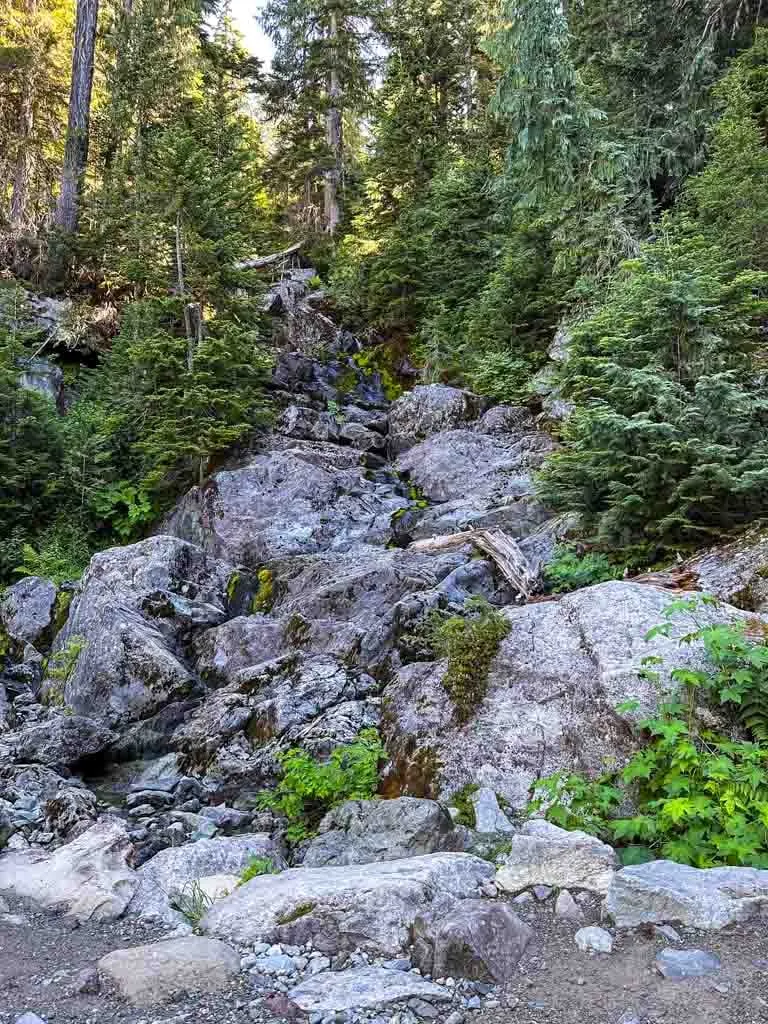
Reach Brandvold Falls about 2.5 km from the trailhead. This is the only place to get water on the hike – but be sure to treat or filter your water. The falls are quite dry late in the summer, but there is usually at least a trickle.
Past the falls the trail starts to zigzag. In the next few kilometres, the forest opens up a bit as it starts to transition to alpine vegetation.
About 5 km from the start, reach the Red Heather day-use shelter tucked away on your left. This is a good place to take a break. There are tables and benches inside. There is also a wood stove, but it is only unlocked and available for use in the winter.

You’ll find an outhouse a few metres down the trail from Red Heather day-use shelter. It has tall stairs to keep it out of the deep snow that falls here each year.
Red Heather Day-Use Shelter to Elfin Lakes
So far the trail has been entirely uphill. (You have gained about 400 m of elevation up to this point.) But past here, the trail gets a little flatter and the views start.
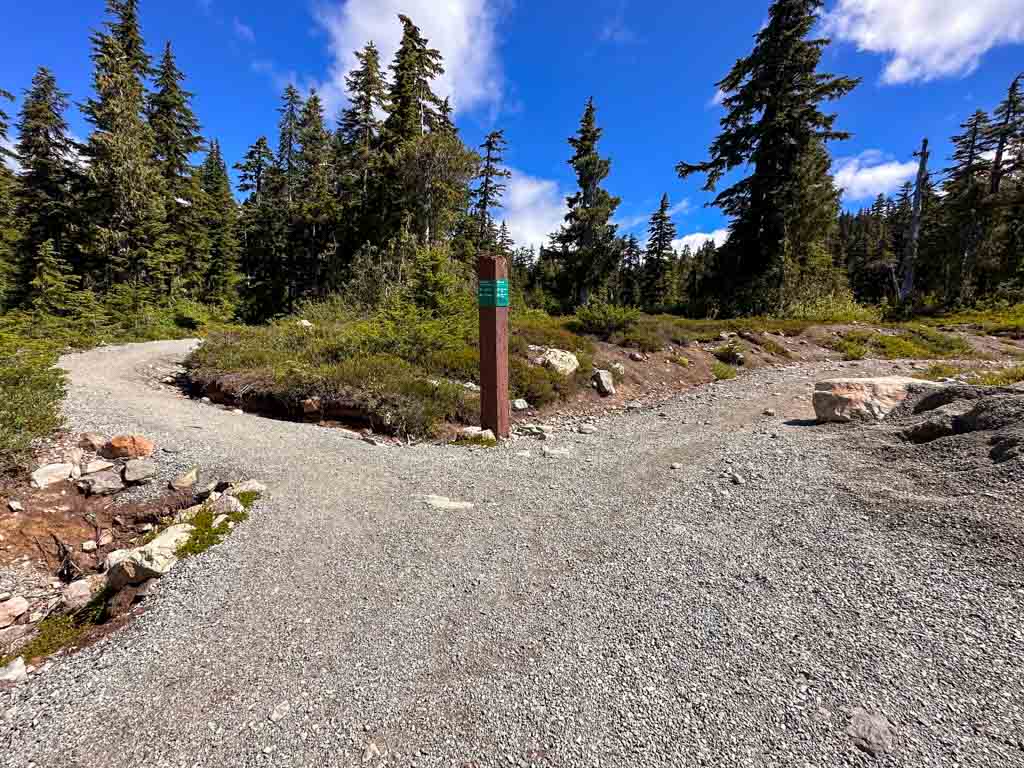
From Red Heather Shelter, follow the trail past the outhouse to a junction. Go left onto the hiker’s trail and follow it steeply uphill through patches of trees and meadow. (The cyclists’ route stays on the road to the right.)
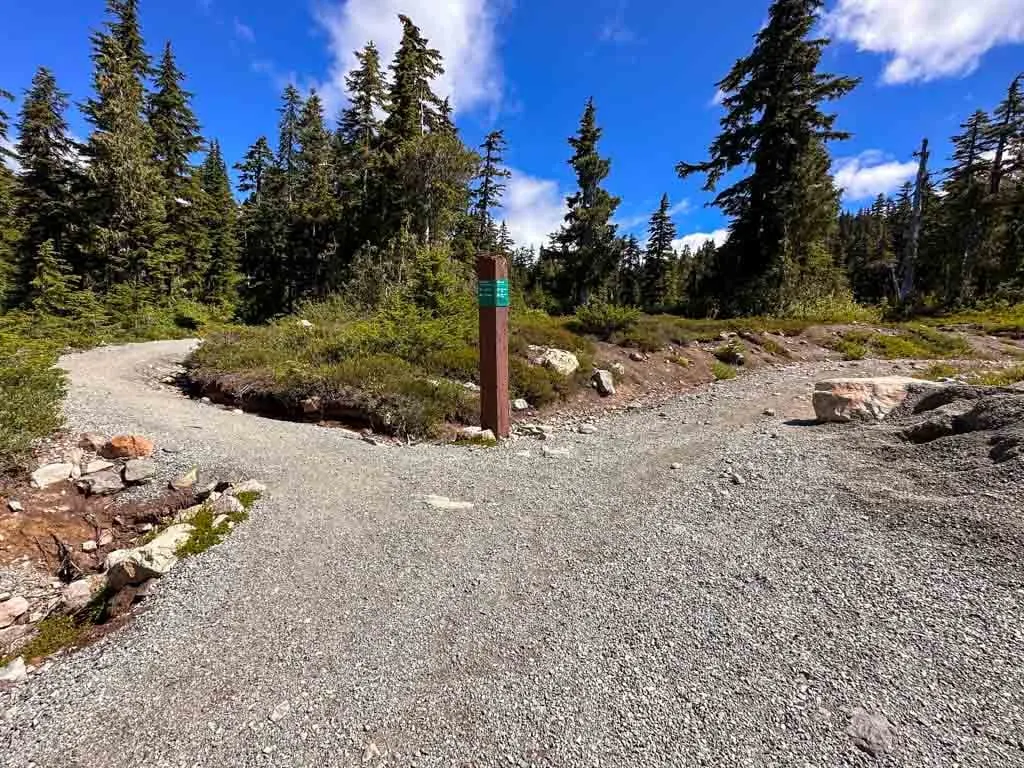

About 1 km after Red Heather Shelter, the hikers’ trail meets back up with the old road. Turn left and hike along the road.

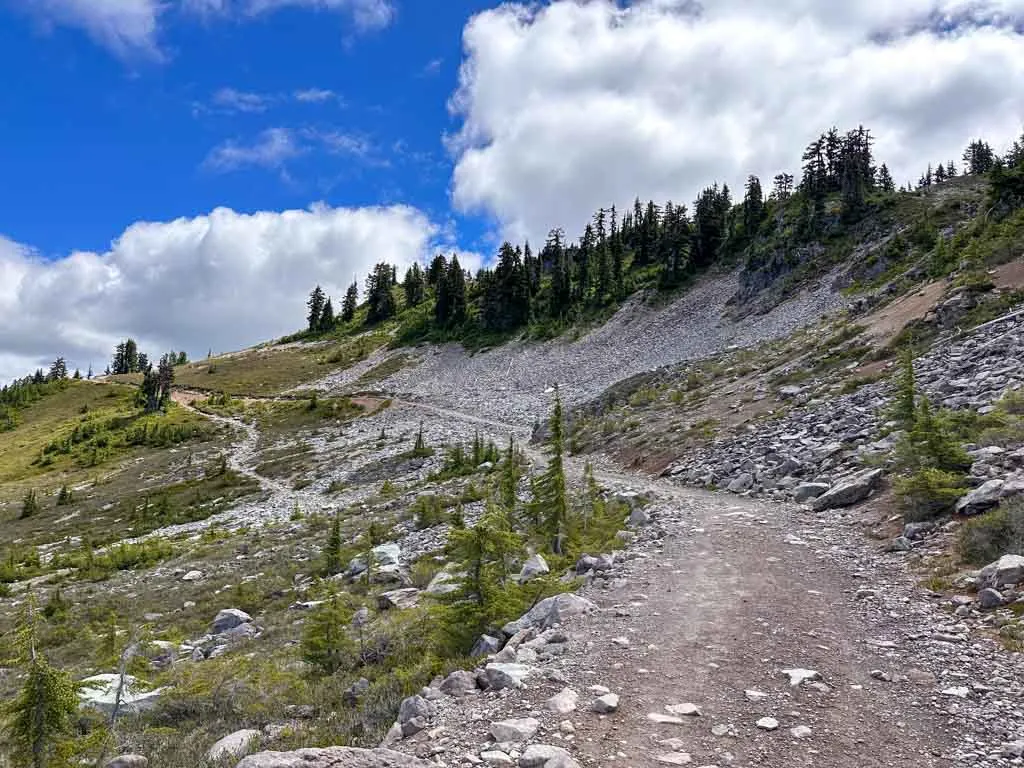
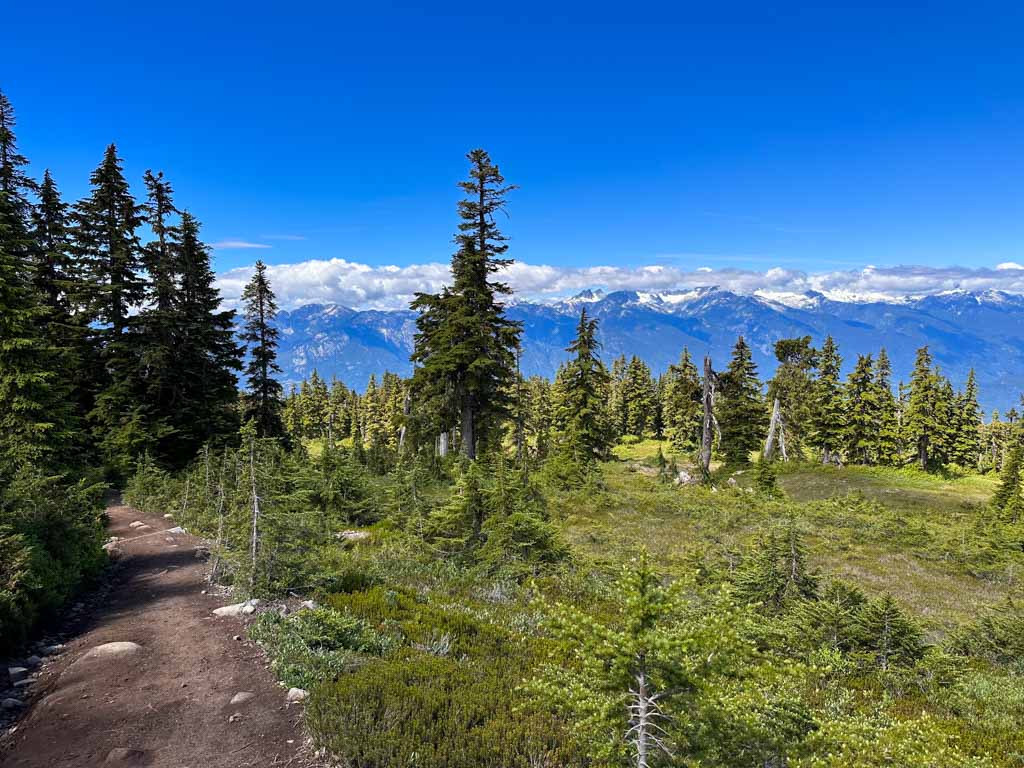
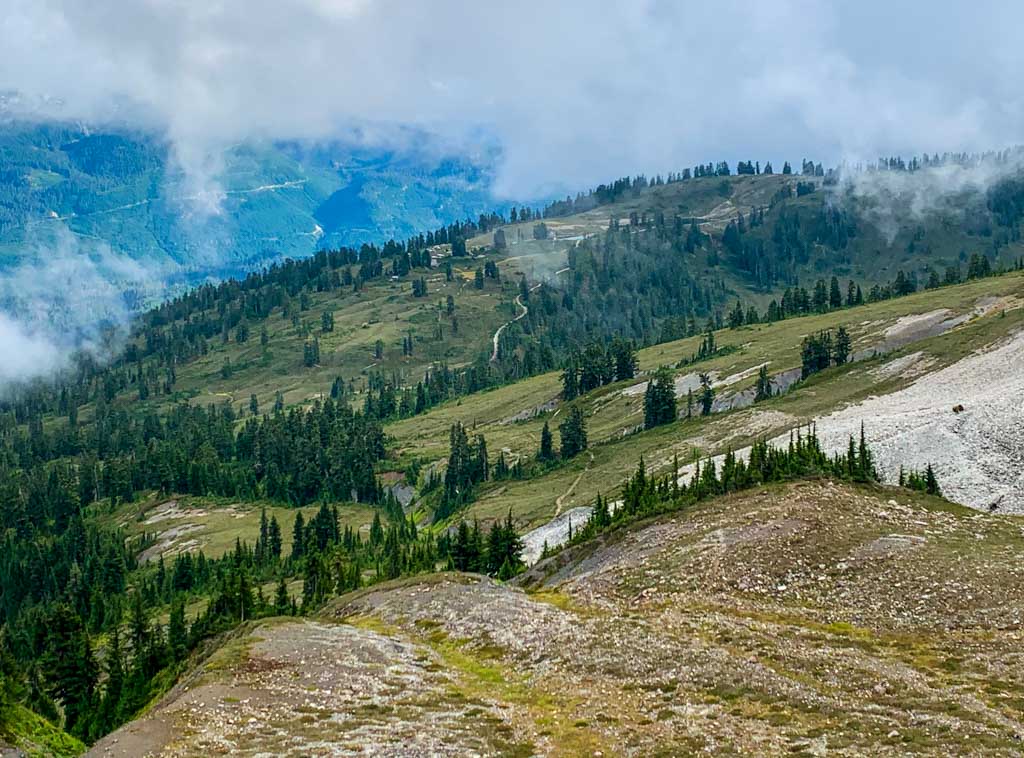
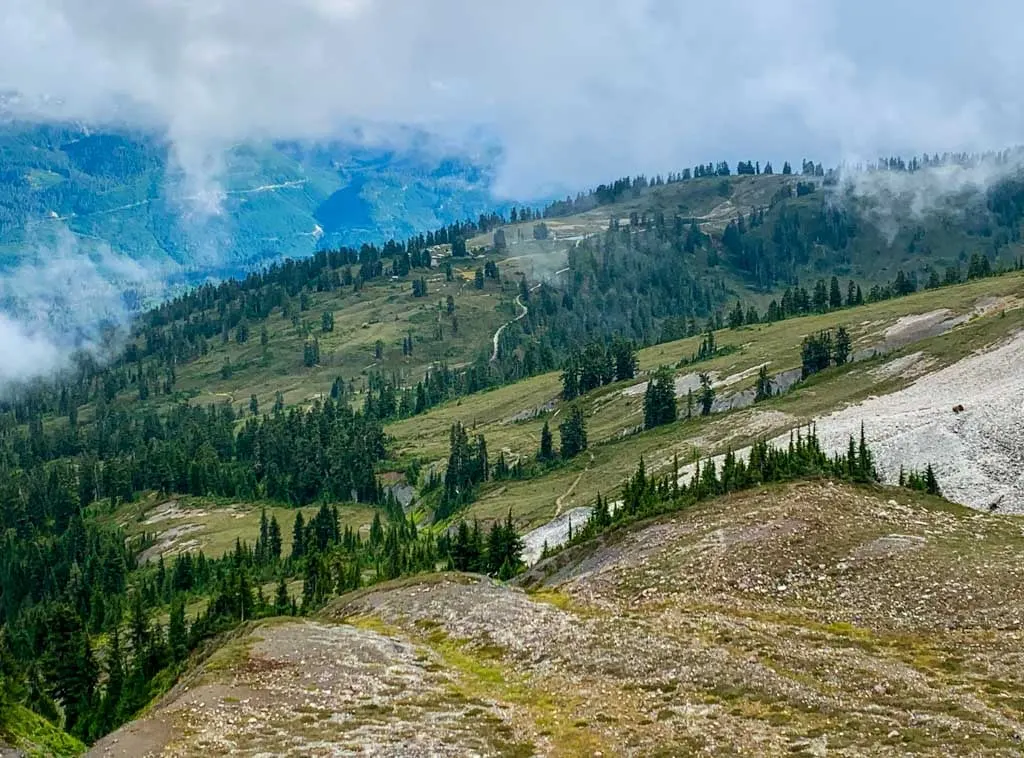
Follow the trail as it works its way along the crest of Paul Ridge through rolling terrain. In places, the terrain is rocky and barren and in others, there are beautiful meadows. There are great views of Mount Garibaldi (Nch’kay in the Squamish language) to the north.

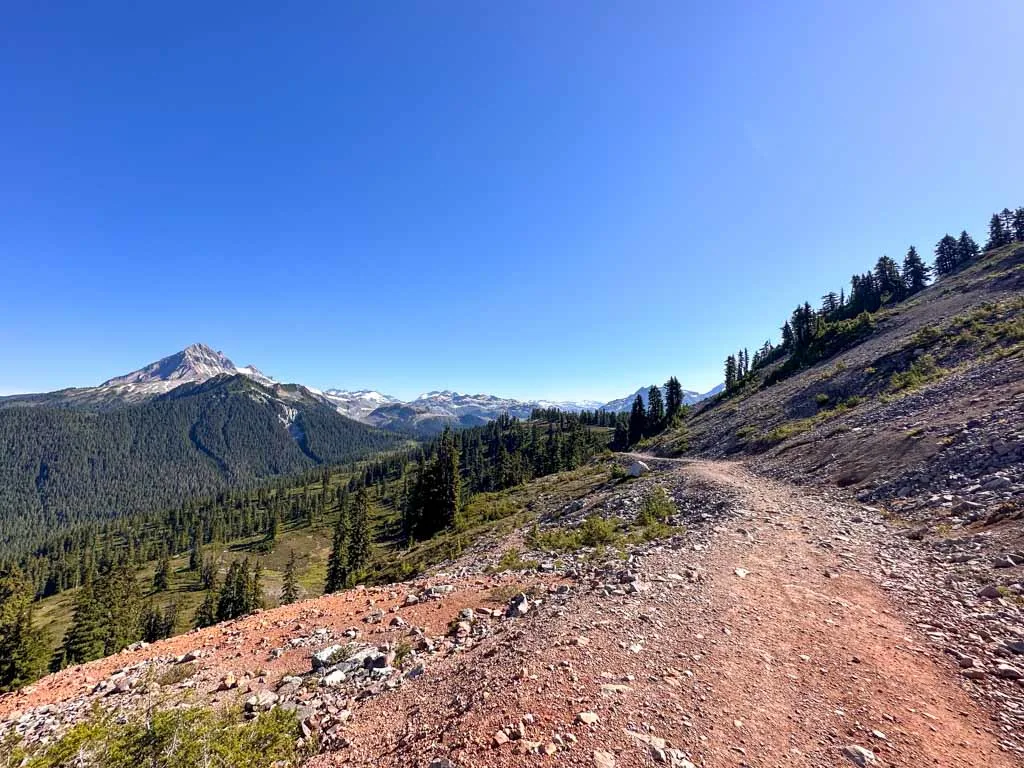
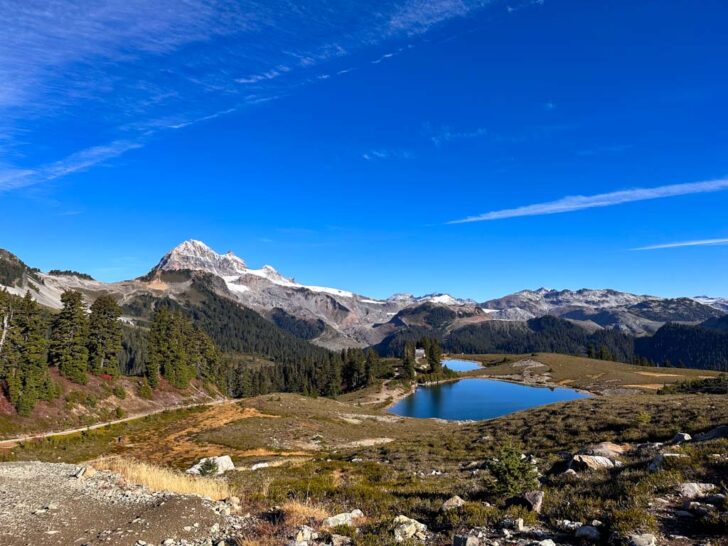
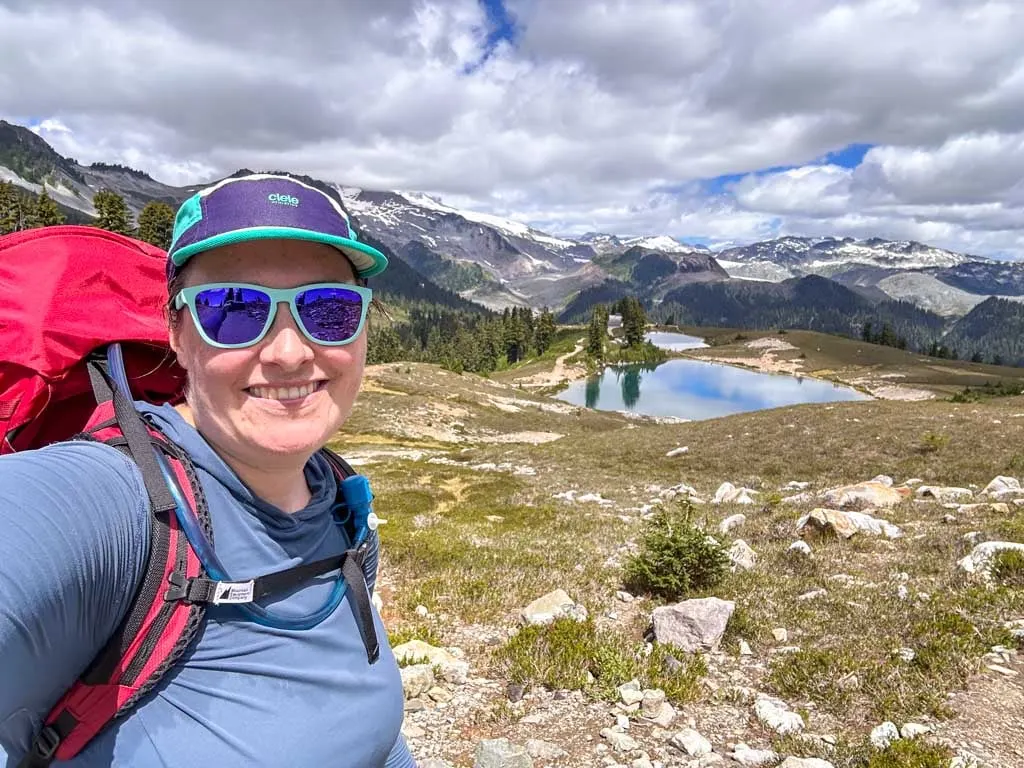
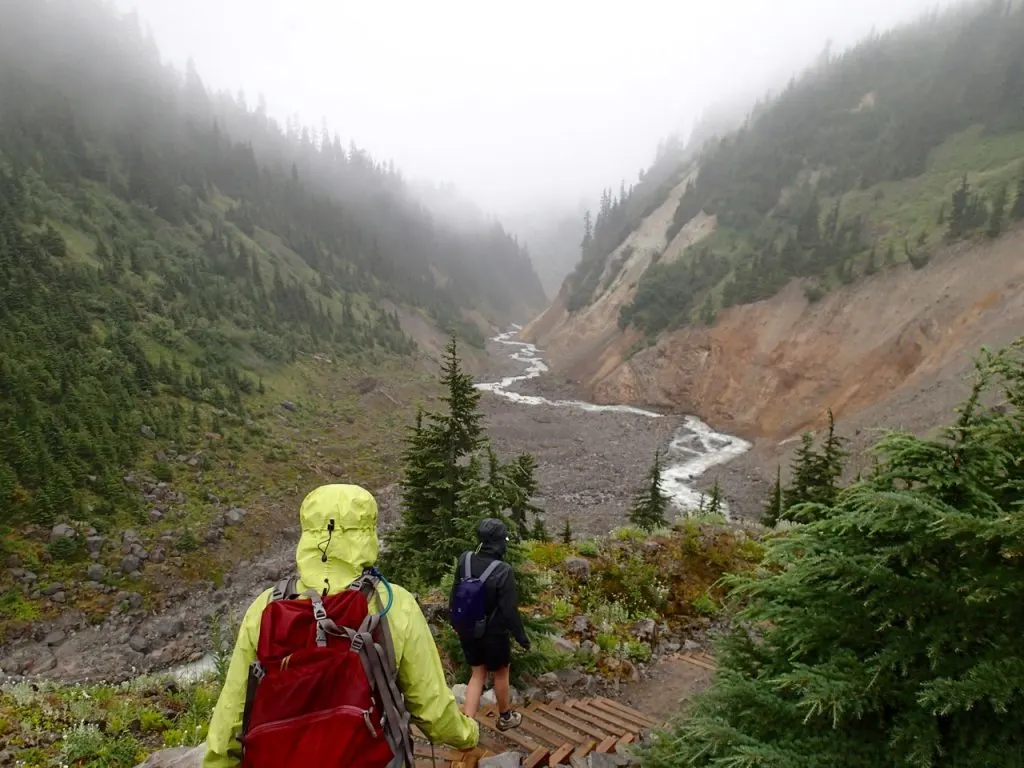
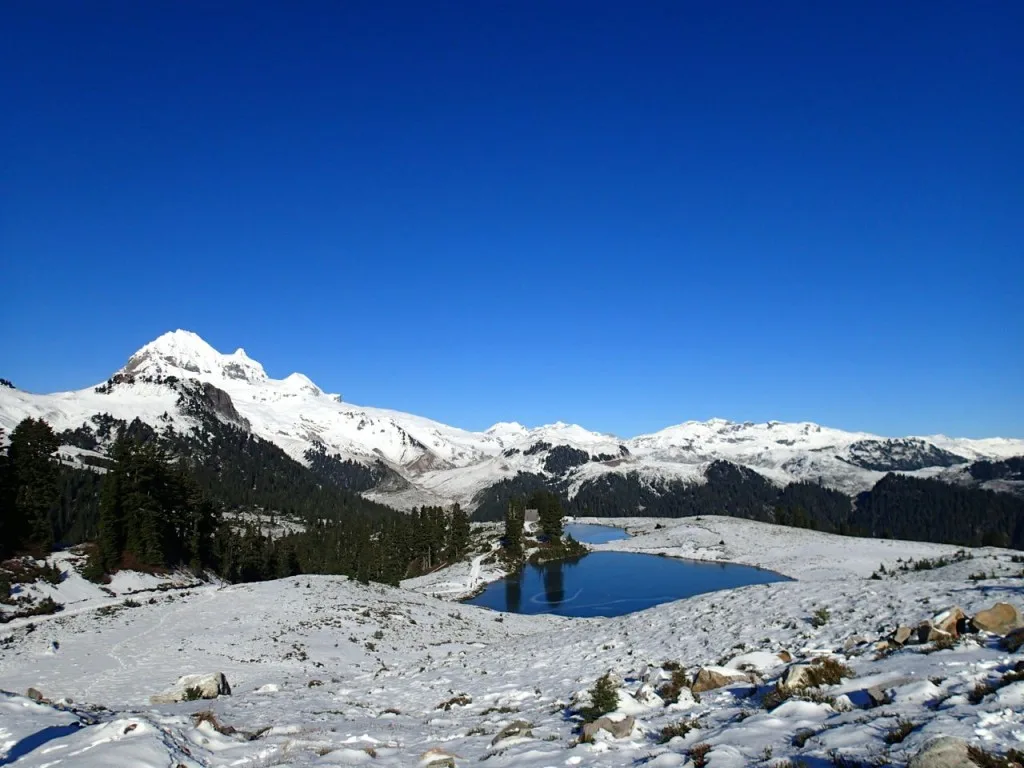
Occasionally, there are patches of trees, but the entire route is quite exposed to the sun, so wear a hat and sunscreen. About 10 km from the trailhead the path heads downhill and you get your first good view of Elfin Lakes.

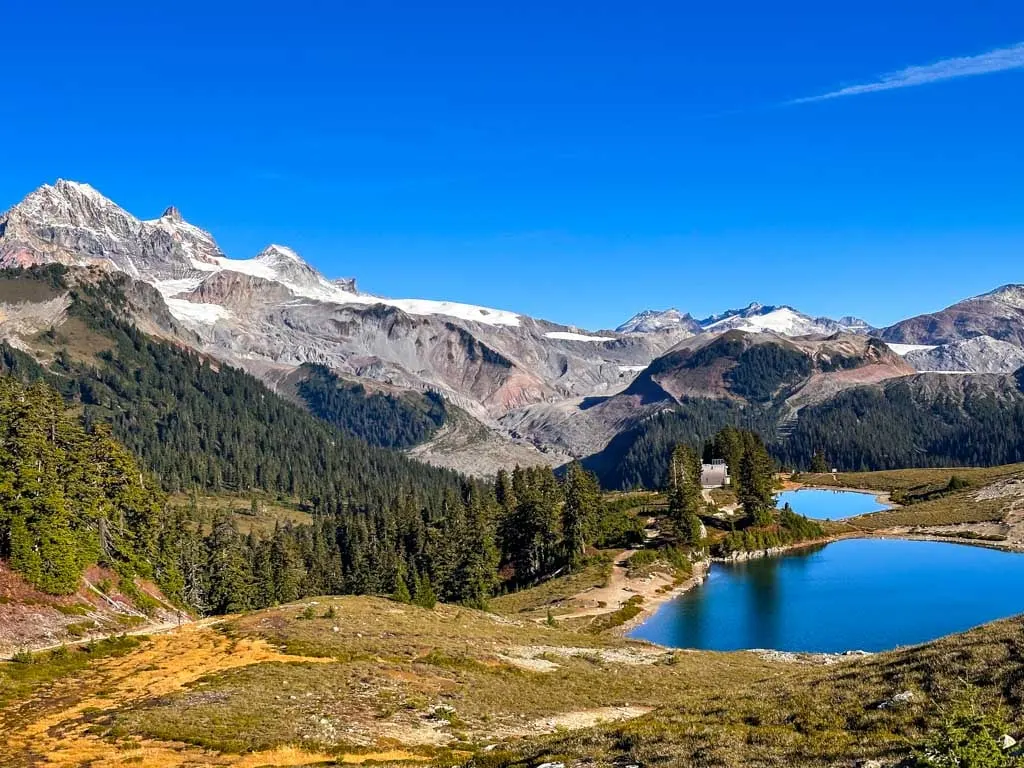
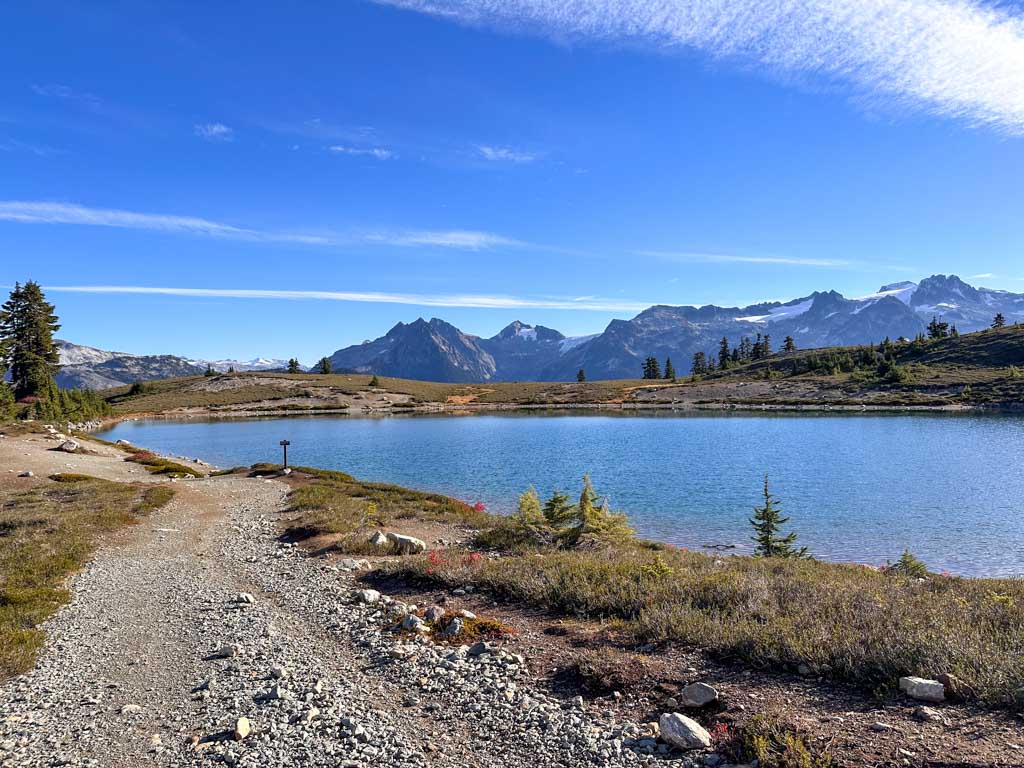
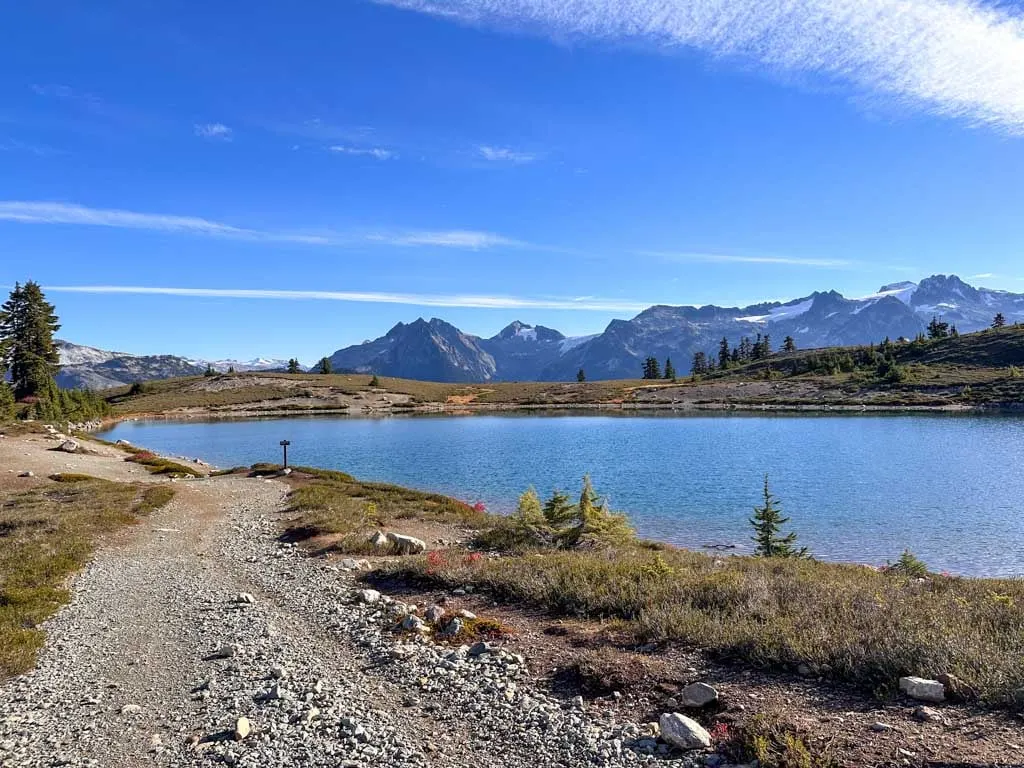
Follow the trail to the left of the lakes. Reach the lakeshore about halfway along the southern lake. This is a good place to go swimming on a hot day.
Ignore the spur trail to the ranger station and continue on the main trail as it trends left. Arrive at a junction near the Elfin Lakes Shelter and go right and up a small hill to reach the Elfin Lakes campground.
There are great views of Nch’kay from here as well as of the Garibaldi Neve glaciers. Take a break at the picnic tables in the campground or head down to the shore of the north lake to fill up on water. (Don’t swim in the north lake as this is the drinking water source.)

When you are ready, retrace your steps back to the trailhead. If you want to explore further, I’ve got some options for extending your trip below.
Extending Your Trip
At 22 km round-trip, this hike is fairly long. But if you have lots of time and energy, it’s possible to extend your trip a bit. As well, the Elfin Lakes campground is a great place to base yourself for some day hikes. Here are my picks for the best hikes that leave from the Elfin Lakes campground/Elfin Lakes Shelter area.

Columnar Peak and the Gargoyles
The short (but steep) hike to Columnar Peak and the Gargoyles is doable for hikers tackling the Elfin Lakes hike in a day. It’s also a great hike from the campground. It has incredible views of the campground, Mamquam Mountain, and Nch’Kay.
Here are the key stats for the hike to Columnar Peak and the Gargoyles from Elfin Lakes campground:
- Duration: 2-3 hours
- Distance: Up to 6 km round-trip
- Difficulty: Challenging
- Elevation Change: 500 m elevation gain
- Map: Use my Gaia GPS map of the Columnar Peak and Gargoyles trail
From the junction outside the Elfin Lakes Shelter, go west on the trail towards Opal Cone and Rampart Ponds. The trail heads downhill into a meadow.
About 1 km from the shelter, go left at a junction towards Columnar Peak and the Gargoyles. The trail immediately becomes much rougher and eroded. Try to stay on the trail as much as you can to keep the erosion concentrated, rather than spreading it out.
Follow the trail uphill through clumps of trees and then across the bottom of a scree slope and across a creek. The trail braids in a few places – you should stick to the most well-trodden path. Keep following the trail steeply uphill through rocks and meadows to a saddle.
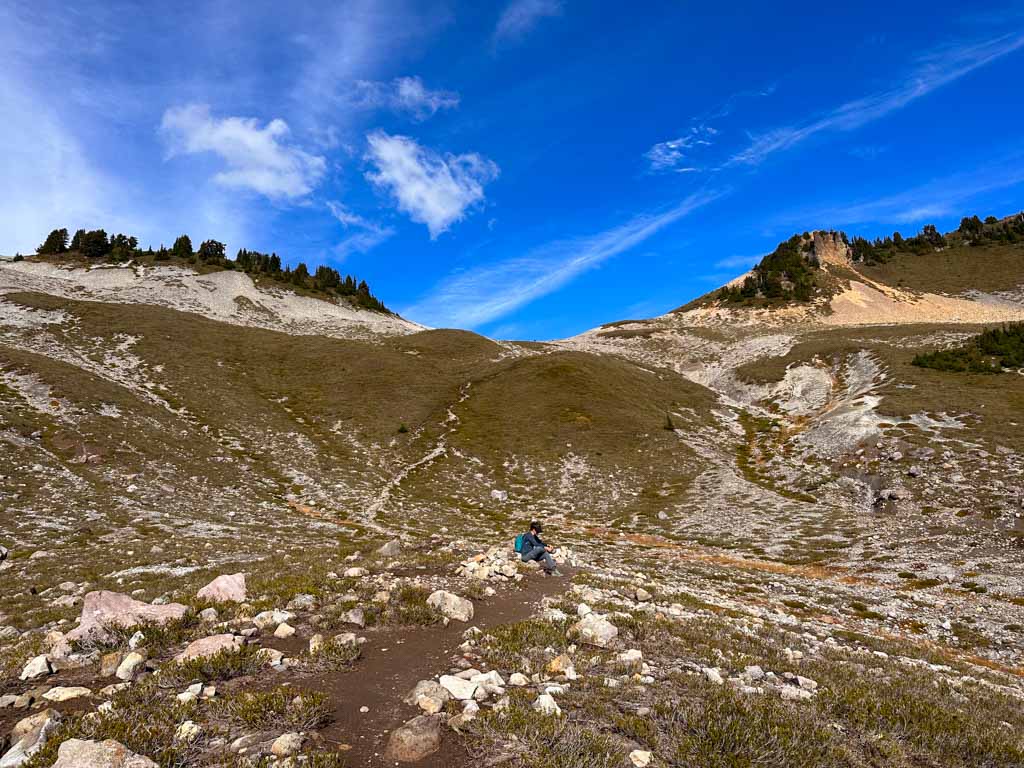
There are incredible views from here and you may be content to make this your turnaround point. If you want to reach a summit, you can scramble uphill to the Gargoyles (to your right) and Columnar Peak (to your left). Both involve a bit of route finding and some steep slopes, so step carefully and take your time. The Gargoyles is a bit shorter and easier.
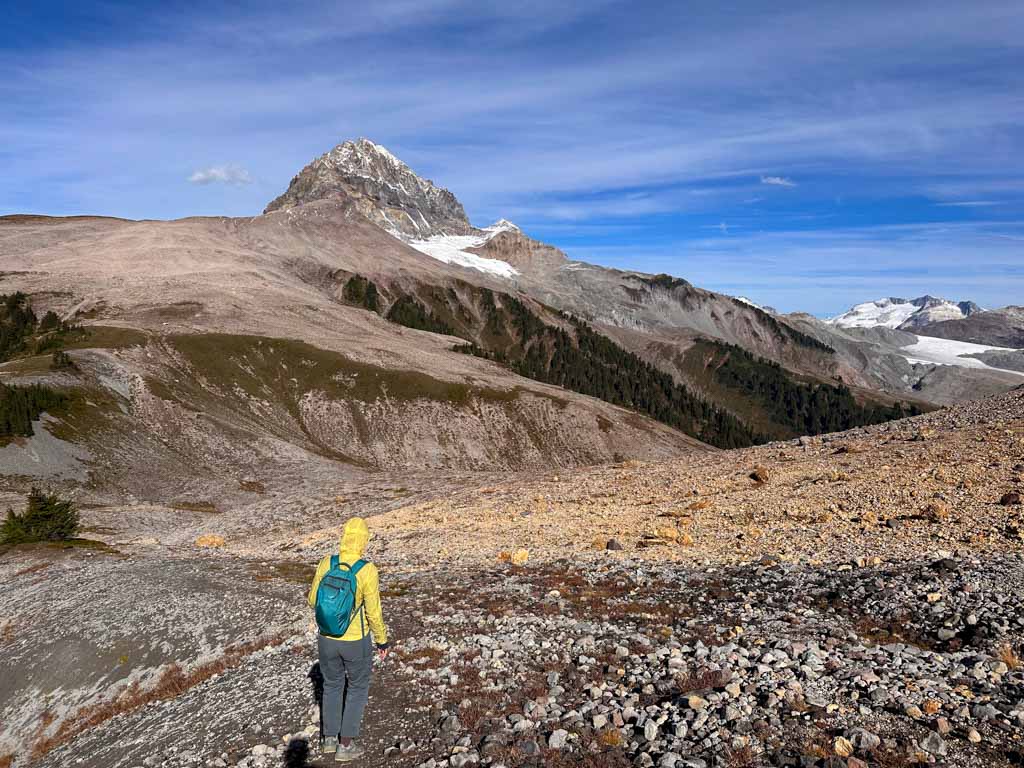
Diamond Head Peak
Diamond Head Peak is a triangular subsummit of Mount Garibaldi (Nch’kay). This peak is also called Little Diamond Head and is named after Diamond Head Peak in Hawaii.
This is the only peak on Nch’Kay that you can reach just by hiking. It’s a long trip that involves some route finding, but it is fairly straightforward. It’s best as a day trip from the Elfin Lakes campground, but strong hikers can tackle it from the trailhead in one long day. When I did it, we took about 11 hours car-to-car.
Here are the key stats for the hike to Diamond Head Peak from Elfin Lakes campground:
- Duration: 3.5-5 hours
- Distance: 10 km round-trip
- Difficulty: Very Challenging
- Elevation Change: 730 m elevation gain
- Map: Use my Gaia GPS map of the Diamond Head trail
Follow the directions above to the saddle between the Gargoyles and Columnar Peak. From there, follow a faint trail downhill through the scree to a low point with a great view of the Squamish Valley to the southwest and a small lake to the northeast.
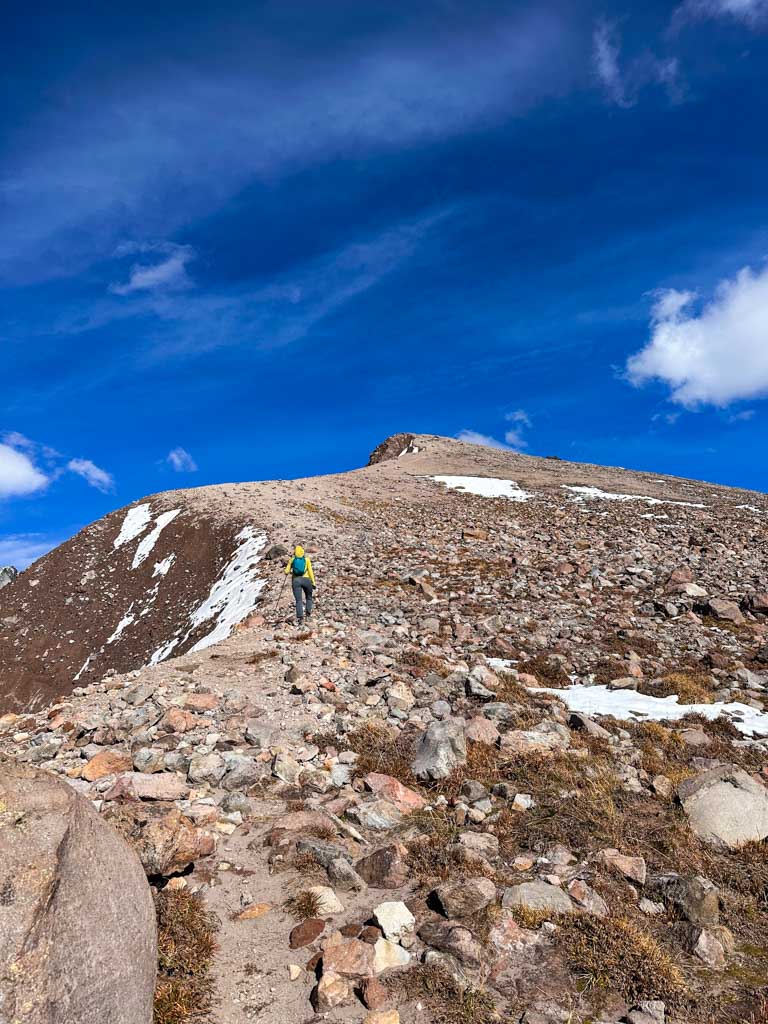
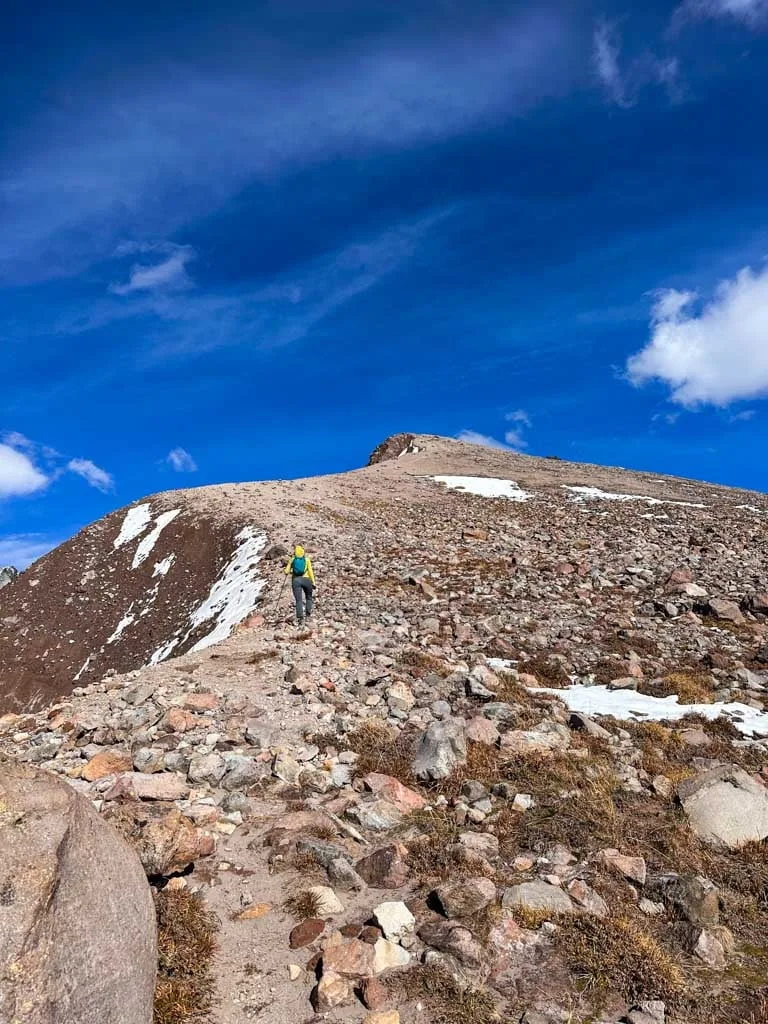
Follow a faint trail uphill through meadows and trees to the base of a huge gravel slope. The trail disappears here and you will need to find your own route. There are a few cairns that show the way, but they peter out eventually. Just keep working your way uphill towards Diamond Head, which you can always see above you.

About half a kilometre before the summit, reach the edge of a ridge that drops away steeply to the west. I was lucky enough to see mountain goats here! Stay back from the edge and follow the ridge uphill to the north. A very steep boot-beaten path through the gravel takes you to the summit of Diamond Head. It’s steep with big drop-offs so be careful.
Opal Cone
Opal Cone is an extinct volcanic cinder cone. It has great views of the glaciers to the north as well as Mamquam Mountain to the east. It’s a great day hike from the Elfin Lakes campground or a detour on the way to Rampart Ponds.
Here are the key stats for the hike to Opal Cone from Elfin Lakes campground:
- Duration: 3.5-5 hours
- Distance: 14 km round-trip
- Difficulty: Challenging
- Elevation Change: 540 m elevation gain
- Map: Use my Gaia GPS map of the Opal Cone trail
From the junction in front of the shelter, follow the trail north through the meadows. After the turn-off for the Gargoyles, it heads into the trees crosses lots of deep gullies as it trends downhill. Reach your low point 3 km from Elfin Lakes and 200 m lower as you cross Ring Creek on a bridge.

On the other side, the trail heads uphill beside the creek through bare gravel that transitions to meadows. The route makes a few switchbacks before heading into a short stretch of trees. Reach a junction and head left to make your ascent of Opal Cone. (The route to the right continues to Rampart Ponds.)
After the junction, the route is very steep and loose. Follow the cairns to stay on track to the summit 1.25 km from the junction. You can retrace your steps, or walk all the way around the rim of the crater.
Rampart Ponds
If you want to explore further into the park, make the trek out of the backcountry campground at Rampart Ponds. It’s a good spot to base yourself for the hike to Mamquam Lake.
Here are the key stats for the hike to Rampart Ponds from Elfin Lakes campground:
- Duration: 5.5-7.5 hours
- Distance: 17.1 km round-trip
- Difficulty: Challenging
- Elevation Change: 950 m elevation gain
- Map: Use my Gaia GPS map of the Rampart Ponds trail
The route to Rampart Ponds involves lots of elevation gain and loss as well as a mandatory ford through a flooded section. To begin, follow the directions to the Opal Cone junction above.
From Opal Cone, the trail descends down to a huge volcanic gravel plain that looks like a moonscape. About 1 km after the Opal Cone junction, reach the flooded section. Each year the melting glaciers change this area, expanding the meltwater ponds. Carefully wade across the flooded area – it may be up to your waist.
On the other side, follow the trail as it heads downhill to cross Zigzag Creek on a small bridge. If the bridge is missing, this creek can be too dangerous to cross. Climb up the hill from the creek. The turn-off to the Rampart Ponds campground is 1 km past the creek. The glacier views through here are amazing.
Mamquam Lake
Mamquam Lake makes a good day hike from the Rampart Ponds campground. It’s also a very tough day hike from Elfin Lakes campground. Note: There used to be a campground at Mamquam Lake, but BC Parks closed it due to archeological concerns and built the Rampart Ponds campground instead.
Here are the key stats for the hike to Mamquam Lake from Rampart Ponds campground and from Elfin Lakes campground:
- Duration: 1-1.5 hours from Rampart Ponds/6.5-9 hours from Elfin Lakes
- Distance: 3.7 km round-trip from Rampart Ponds/20.8 km round-trip from Elfin Lakes
- Difficulty: Easy from Rampart Ponds/Very Challenging from Elfin Lakes
- Elevation Change: 250 m elevation gain from Rampart Ponds/1200 m elevation gain from Elfin Lakes
- Map: Use my Gaia GPS map of the Mamquam Lake trail
Follow the directions above to Rampart Ponds. From there, follow the trail as it switchbacks downhill. The route starts in the gravel glacial plain, then transitions to meadow and then forest. The trail ends at the lakeshore, which is great for swimming.
Backcountry Camping and the Hut at Elfin Lakes
Most people choose to camp at Elfin Lakes campground or stay in the Elfin Lakes Shelter (also called the Elfin Lakes Hut). But there are also a couple other camping options nearby. I have details on all of them below.
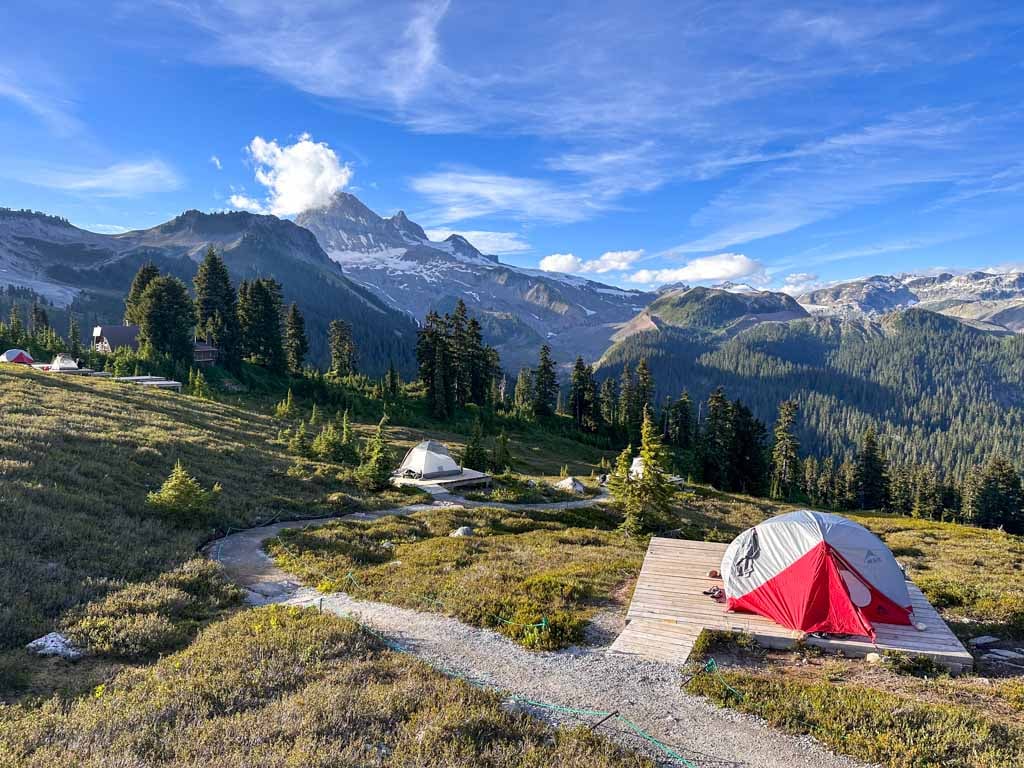
Elfin Lakes Campground
Elfin Lakes Campground is spread out at the north end of North Elfin Lake. The campground has 35 wooden tent platforms that can hold up to a 4-person tent. You can also squeeze two 2-person tents on the platforms, but you probably won’t be able to get your rain flies staked out all the way.
All campsites are first-come, first-served for campers with reservations. Just choose a site once you arrive.

There are metal hanging poles with pulleys to store your food. Bring a waterproof bag (I recommend a lightweight dry bag) to protect your food from rain and birds.
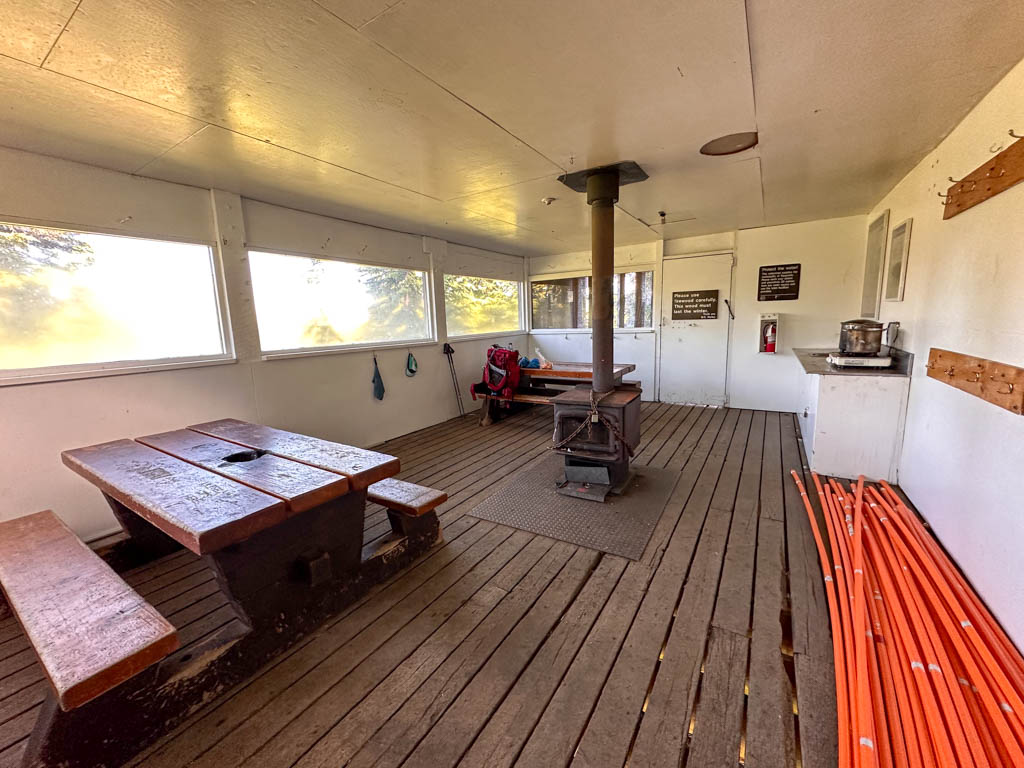
The cooking shelter has a metal counter for cooking, picnic tables, and a wash sink with grey water disposal. There are also outdoor picnic tables. Plan to cook and eat in the cooking area to minimize food smells and waste around the tent pads.

There are outhouses at each end of the campground. The outhouse building for the Elfin Lakes Shelter are also very close by.
Collect water from the north Elfin Lake. This is the designated drinking water lake so keep it clean! You must filter or treat all drinking water as you don’t know if people or animals have contaminated it with poop or other pathogens. (I use a Katadyn BeFree.)
Campfires are never allowed in Garibaldi Provincial Park to protect the fragile alpine vegetation. As well, be sure to stay on the paths through the campground. Over the years, campers’ feet have eroded a lot of the beautiful heather meadows.
You can find more info about backpacking to Elfin Lakes in my book, Backpacking in Southwestern British Columbia.
Get My Book…
Backpacking in Southwestern British Columbia
A one-stop resource for backpackers in beautiful British Columbia.
- 40 backpacking trips within a few hours of Vancouver
- Info about permits, reservations, and campground facilities
- Detailed maps and photos
- Advice for extending your trip
- Points of cultural and natural history

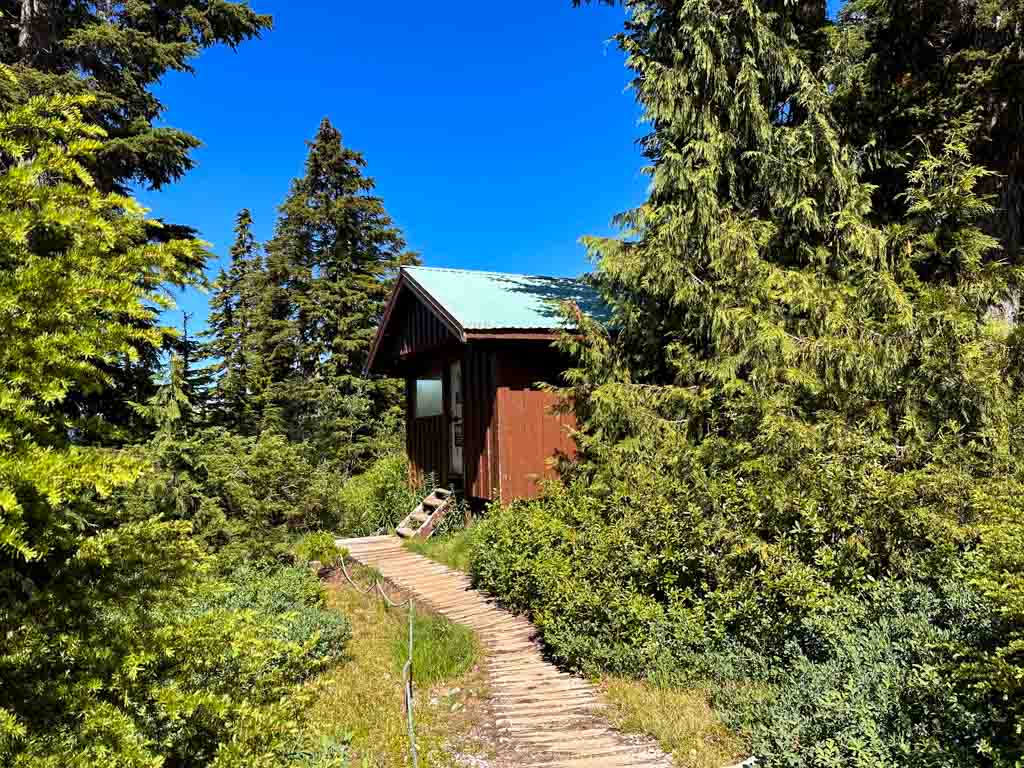
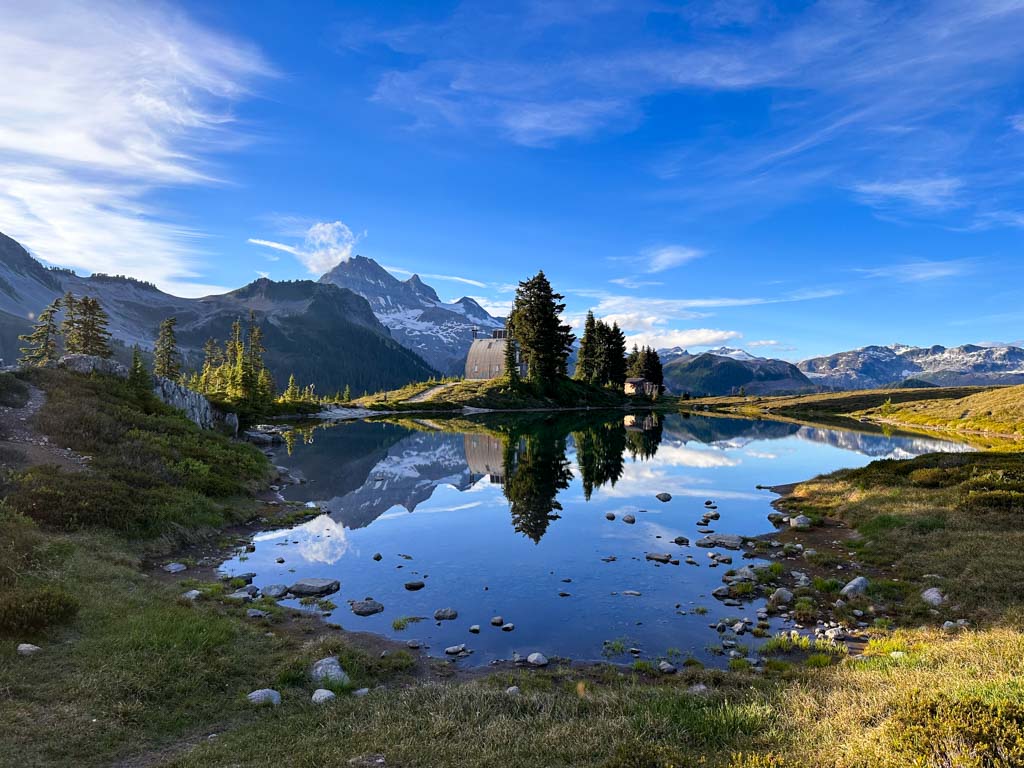
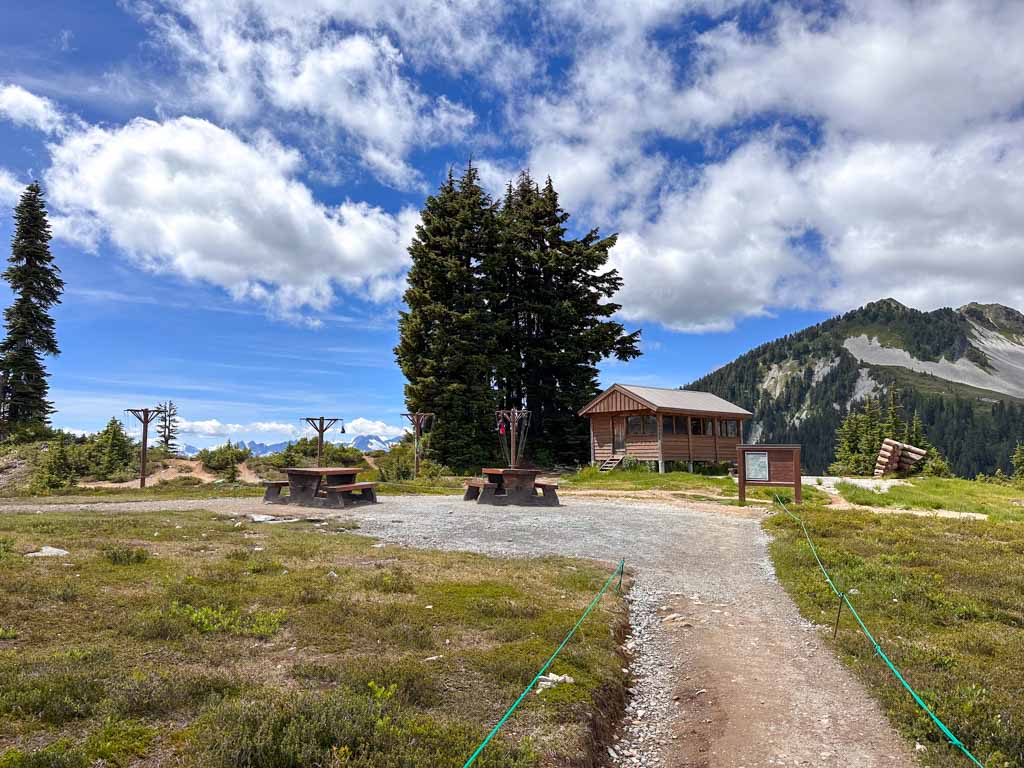
Elfin Lakes Shelter
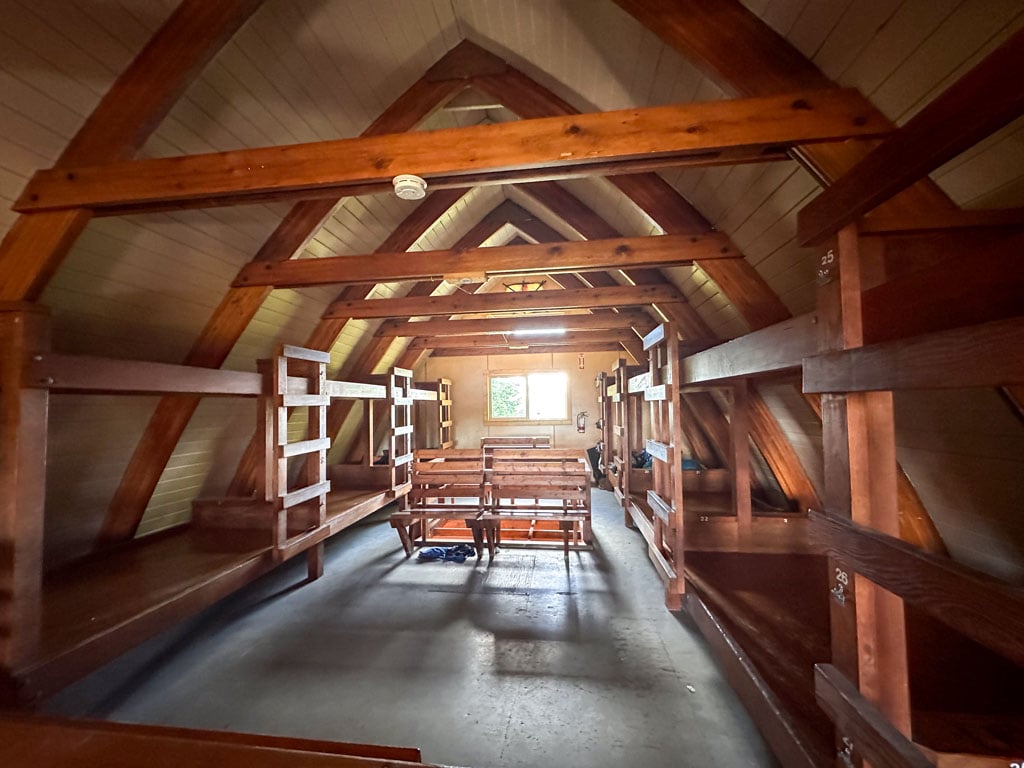
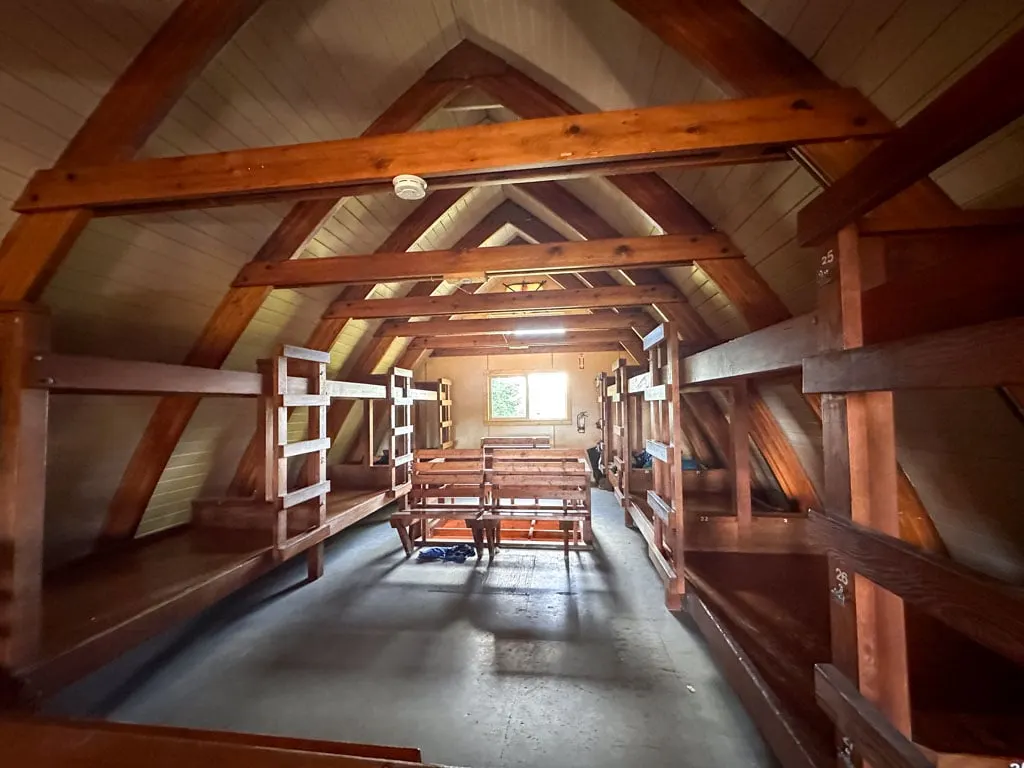
The Elfin Lakes Shelter is also known as the Elfin Lakes Hut or the Elfin Lakes Cabin. It is located just past the north end of the two lakes. This large A-Frame hut has a kitchen and eating area downstairs and bunkbeds upstairs.
There are 33 double bunks (bottom bunks) and 11 single bunks (top bunks) and all bunks are first-come, first-served amongst people with reservations – choose an available bunk when you arrive.
The kitchen area downstairs has a propane stove that is free to use but you will need to bring your own pots. There are also metal counters for cooking and picnic tables for eating. You can wash dishes in the sink – it also has a grey water disposal drain. Hang your food on hooks on the wall and ceiling to protect it from mice.

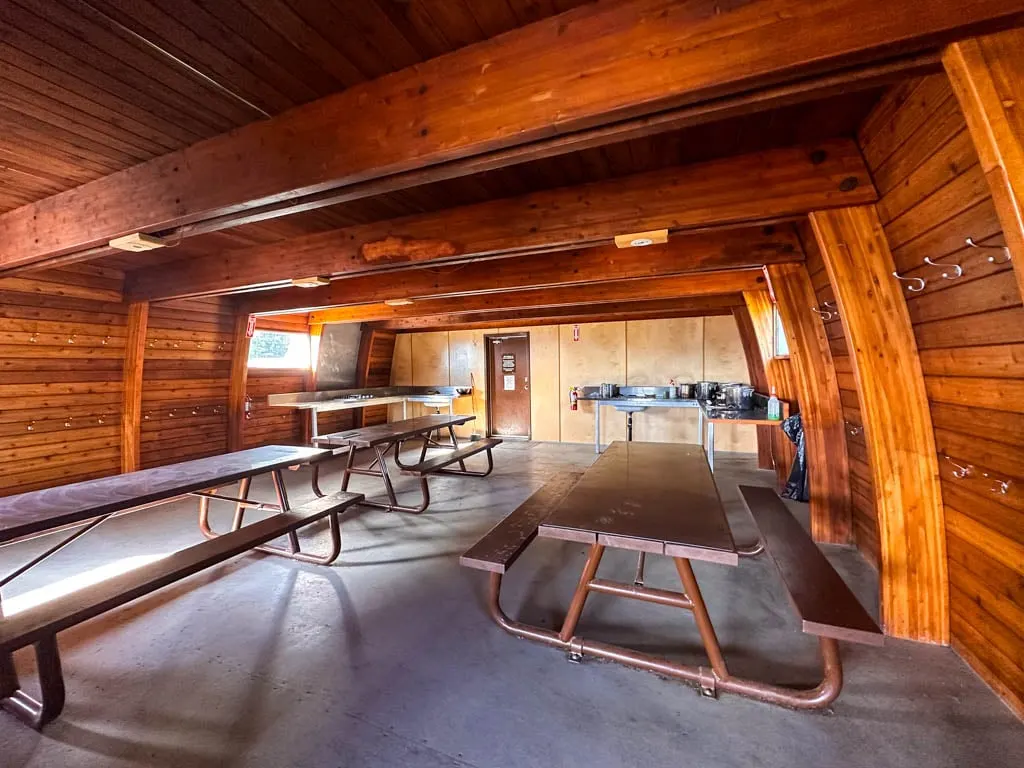
The propane heater in the centre of the hut is only turned on in winter. The hut also has solar lighting, but it doesn’t always work. There is an outhouse building to the east of the hut with four separate stalls.
Collect water from the north Elfin Lake by walking past the cooking area for the campground. This is the designated drinking water lake so keep it clean. You must filter or treat all drinking water.
Join the Backpacking in BC Facebook Group
Rampart Ponds Campground
The Rampart Ponds Campground is located 8.5 kilometres from Elfin Lakes and 19.5 kilometres from the trailhead. Keep in mind that it will take about 7-8 hours to hike there from the trailhead.
The Rampart Ponds are shallow glacial ponds in the middle of a rocky glacial plain. There are no trees for shelter so it can be a miserable place to camp in bad weather… but it also has gorgeous glacier views in good weather.
The campground has 12 gravel campsites, an outhouse, and food lockers. Collect water from Rampart Ponds.
Red Heather Campground
The Red Heather Campground is open during the winter months only. (It is prime bear habitat the rest of the year so camping is only allowed in the winter.) There are no tent pads or designated tenting area – just pitch your tent on the snow. You can use the Red Heather hut for cooking, eating, and storing your food. There is an outhouse nearby.


Snowshoeing and Skiing at Elfin Lakes in Winter
The Garibaldi Park Road is plowed in winter, making Elfin Lakes a very popular winter hiking, snowshoeing and backcountry skiing destination. I’ve got more details in my guide to snowshoeing in Squamish.
However, it is a much more challenging and potentially dangerous trip in winter. The trail is marked in winter with reflective wands, but when the fog rolls it can be difficult to see them. You will need to be comfortable with navigation. I use the Gaia GPS app.
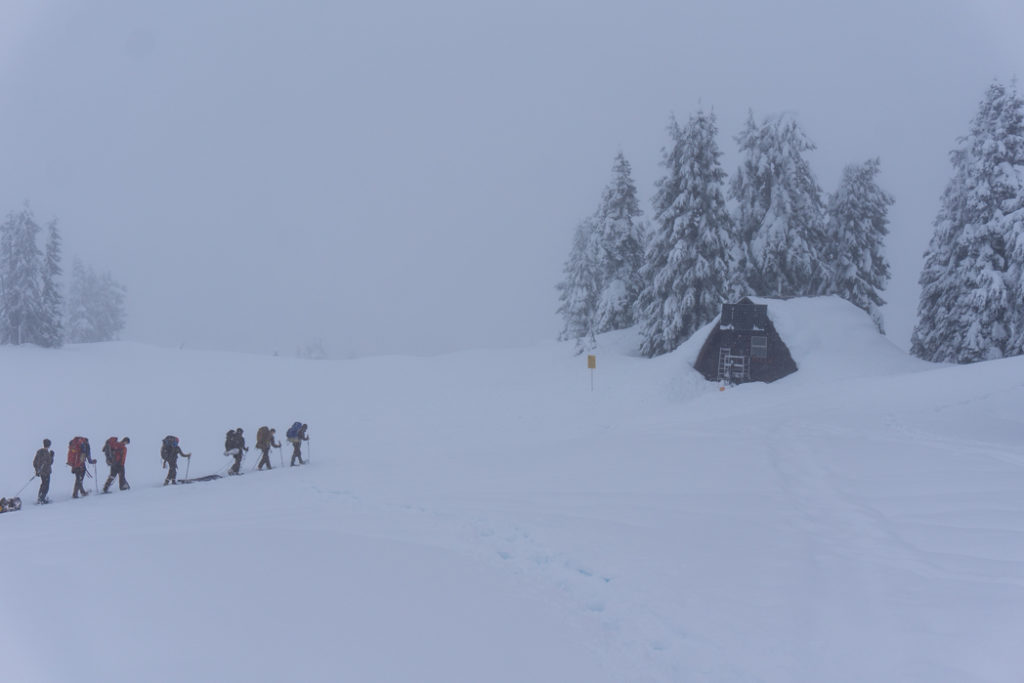

The trail will also be very snowy and icy. Depending on trail conditions, you will need snowshoes or microspikes. I recommend microspikes in May and November and snowshoes between December and April. (Read my guide for tips on how to choose snowshoes and my guide to the differences between snowshoes and microspikes).

The winter route (marked by wands) deviates from the summer route in a few places (most notably around the east side of Round Mountain.) Thanks to this, it stays out of most of the serious avalanche terrain. However, the backcountry ski runs below the trail are in avalanche terrain. In any case, you should still have avalanche training and rescue gear. Check the avalanche forecast before your trip.
While the road is plowed in winter, it is still usually snow and ice-covered. You must have tire chains to drive this road. BC Parks has a checkpoint partway up the road in winter. If you don’t have chains, they won’t let you continue. Even if the road doesn’t seem that slippery, the final switchback before the parking area can be very icy – lots of cars have slipped off the road here and required a tow truck to get them out. Just put your chains on!
Biking to Elfin Lakes
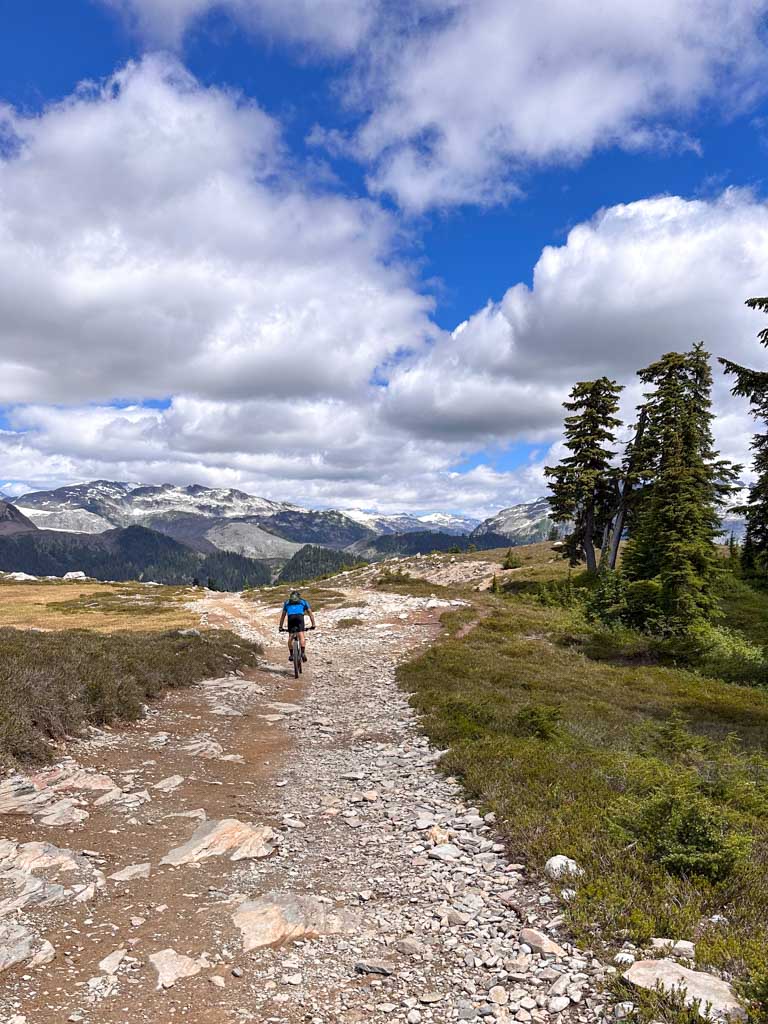
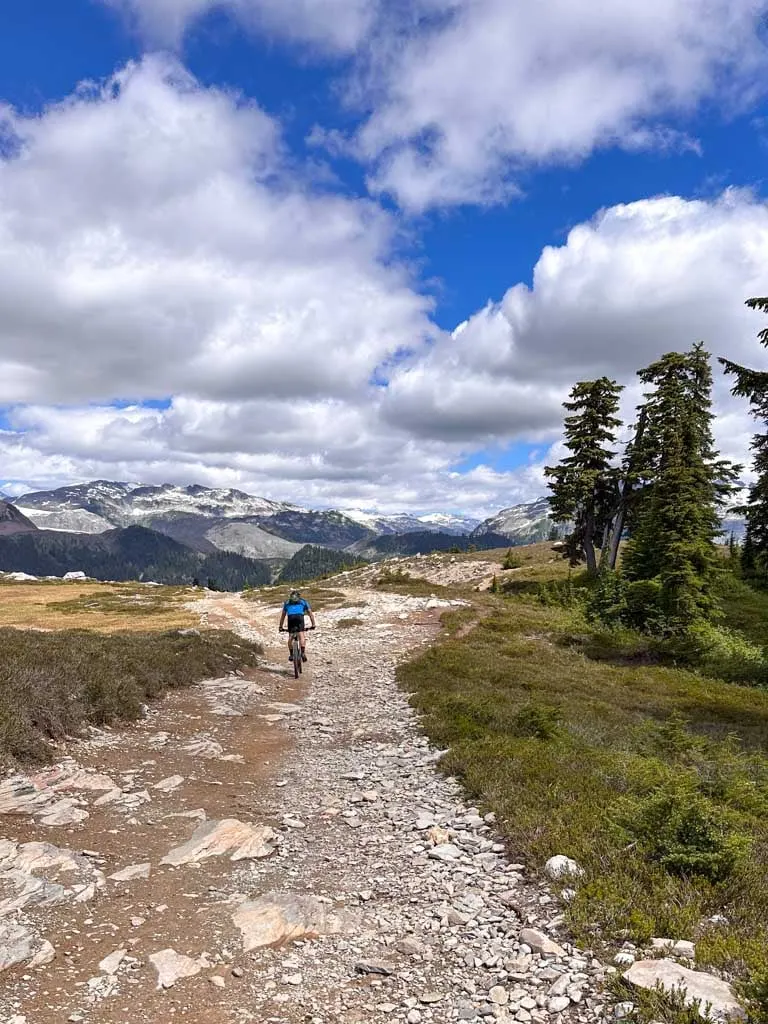
Bikes are allowed on the trail as the Elfin Lakes Shelter. Since the entire route is on an old road, biking makes the trip to Elfin Lakes much faster.
The biking directions are the same as the hiking directions above, with one key exception. Just after Red Heather day-use shelter, the hikers’ route leaves the road and heads directly uphill. If you are on a bike you must stay on the old road as it makes a long switchback before meeting back up with the hikers route about 1 km later.
The trail is steep in a few places and is often very rocky. You will need a mountain bike with suspension or at least a gravel bike. Class 1 e-bikes (pedal assist only) are allowed. You will also need a bit of stamina for the first six kilometres since they are entirely uphill.
That’s everything you need to know to plan a trip to Elfin Lakes. I recommend going in clear weather to really enjoy the views. Do you have questions about the trail? Ask them in the comments – I’m happy to help.
READ NEXT:
- The Best Hikes in Squamish, BC (From a Local)
- Where to Go Snowshoeing in Squamish
- 70+ Things to do in Squamish (By a Local)
- Camping in Squamish, BC: 22 Places to Camp Near Squamish
- 31 Best Backpacking Trips in BC


- 25+ Women’s Adventure Books That Will Inspire You - April 2, 2024
- Dehydrated Mushroom Risotto For Backpacking - March 31, 2024
- Dehydrating Food For Backpacking: A Beginner’s Guide - March 15, 2024