
I go backpacking a lot (I’ve actually written two backpacking guidebooks), so that means I eat a lot of backpacking food. Over the years I’ve tried lots of meals, but one that I keep returning to is my recipe for dehydrated mushroom risotto.
It’s a pretty simple recipe, but it’s got tons of flavour thanks to the mushrooms. I also like to add chicken for protein. And of course, I sprinkle Parmesan cheese on top!
This dehydrated mushroom risotto recipe dispatches most of the cooking at home so you don’t have to fuss at the campsite. And it makes four servings so you can prep multiple backcountry dinners at once. Or do what I do: eat one of the servings right away. You can make tonight’s dinner and a backpacking meal at the same time!
In this post, I’ve got everything you need to know to make dehydrated mushroom risotto. It includes:
- How to adapt risotto for backpacking
- Equipment needed
- Ingredients
- Cooking instructions
- Dehydrating and packing instructions
- Rehydrating instructions
Hey there: Some of the links in this post are affiliate links, which means I earn a small commission at no cost to you. Thanks for your support. -Taryn
How to Adapt Risotto for Backpacking
At first glance, this might look like a pretty standard risotto recipe. But I’ve made a few changes to make this recipe work for backpacking.
It’s dehydrated. Risotto has a fairly long cooking time (up to about 40 minutes), involving lots of stirring and simmering. That uses lots of fuel! So this recipe does all that cooking at home. Then the risotto goes into the dehydrator. At camp, you can just add water and simmer for a few minutes and it’s ready. (Psst: If you’re new to dehydrating, check out my beginners guide to dehydrating backpacking food.)
It’s low-fat. Risotto is usually creamy with lots of butter, cheese, and rich broth. You can’t dehydrate fats and they go rancid, so backpacking meals have to be low-fat. My recipe uses just one tablespoon of oil and a fat-free veggie broth.
But it still has cheese! Traditional risotto has the cheese mixed right in. But that won’t dehydrate well. Instead, I recommend packaging Parmesan cheese separately and stirring it in just before eating. Parmesan travels quite well, especially if it is vacuum-sealed. But if you’re out for a long time or in hot weather, you can also use shelf-stable Parmesan (e.g. Kraft Parmesan).
It uses canned chicken. The chicken is optional, so you can leave it out if you’re a vegetarian (or sub in some pine nuts). But I love it for added protein. The reason I used canned chicken is that it dehydrates really well. If you’ve read my guide to dehydrating backpacking food, you’ll know that canned chicken is pressure-cooked and very low fat – perfect for dehydrating.
It uses dried mushrooms. It might seem weird to buy dried mushrooms, rehydrate them, put them into the risotto, and dehydrate them again. But what you are really getting from that process is delicious mushroom liquid. When you add this liquid to the risotto, it soaks into the rice and chicken, giving the whole dish a wonderful umami flavour.
You can use any dried mushrooms you like. I used a mix of local wild mushrooms I found at my grocery store. But dried porcini mushrooms are the most traditional. If your mushrooms don’t come sliced (for example, many Asian mushrooms are dried whole), slice them thinly after you rehydrate them in hot water. They will dehydrate much better that way.
Equipment
- Deep skillet (a Dutch oven or high-sided pot will also work)
- Dehydrator – I use the Nesco Snackmaster. (Or read my tips for dehydrating in your oven.)
- Dehydrator tray liners or parchment paper.
- Backpacking stove that simmers
- Backpacking pot that holds at least 0.75 L (for one portion)
- Ziploc freezer bags, canning jars or a vacuum sealer (I use this simple Nesco one)
Ingredients

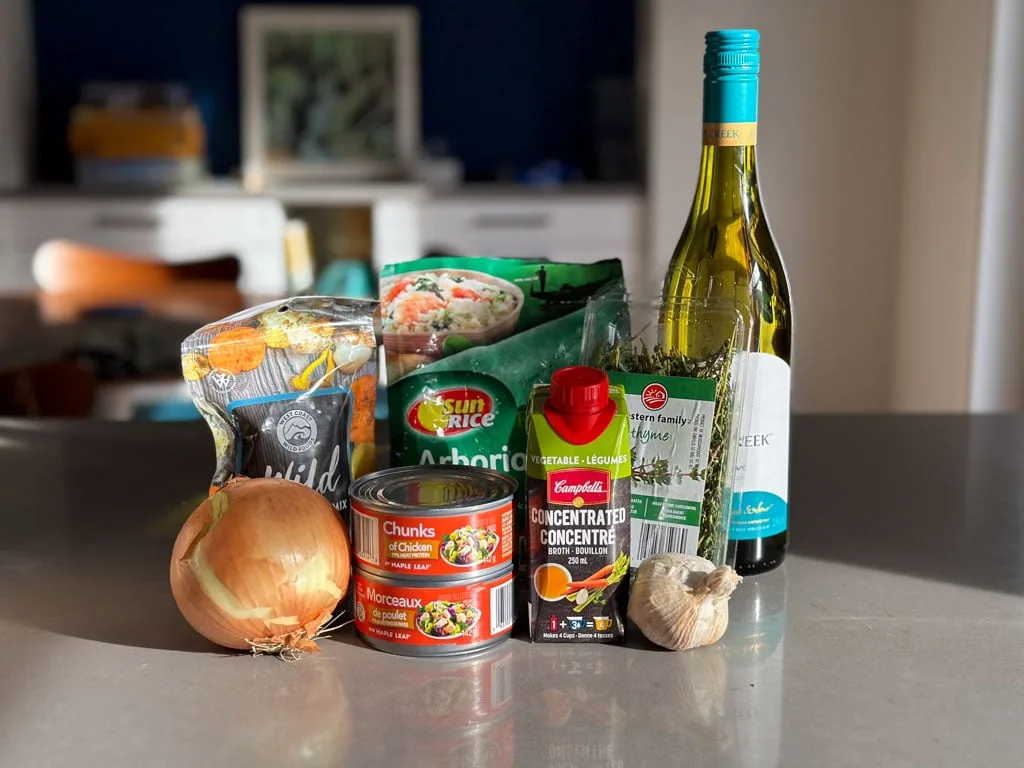
Makes four servings. Approx. 600 calories per serving.
- 1 1/2 cups of hot water
- 1 ounce/28g dried sliced mushrooms (porcini or any other variety)
- 1 tablespoon olive oil
- 1 medium yellow onion, finely diced
- 2 to 4 cloves of garlic, minced (depending on how much you like garlic)
- 1 tablespoon fresh thyme leaves
- 1 1/2 cups Arborio rice, rinsed
- 2/3 cup dry white wine
- 4 cups vegetable broth
- freshly ground black pepper to taste
- salt to taste
- 2 5 oz/142g cans of chicken, drained (optional)
- 1/4 cup grated Parmesan cheese
Cooking Instructions
- Add the mushrooms to a heat-proof bowl along with 1 1/2 cups of hot water. Soak until softened, about 30 minutes. Drain the mushrooms in a sieve, but save that tasty mushroom liquid – you’ll use it later in the recipe.
- Combine the mushroom liquid and vegetable broth in a pot. Warm it up on low heat.
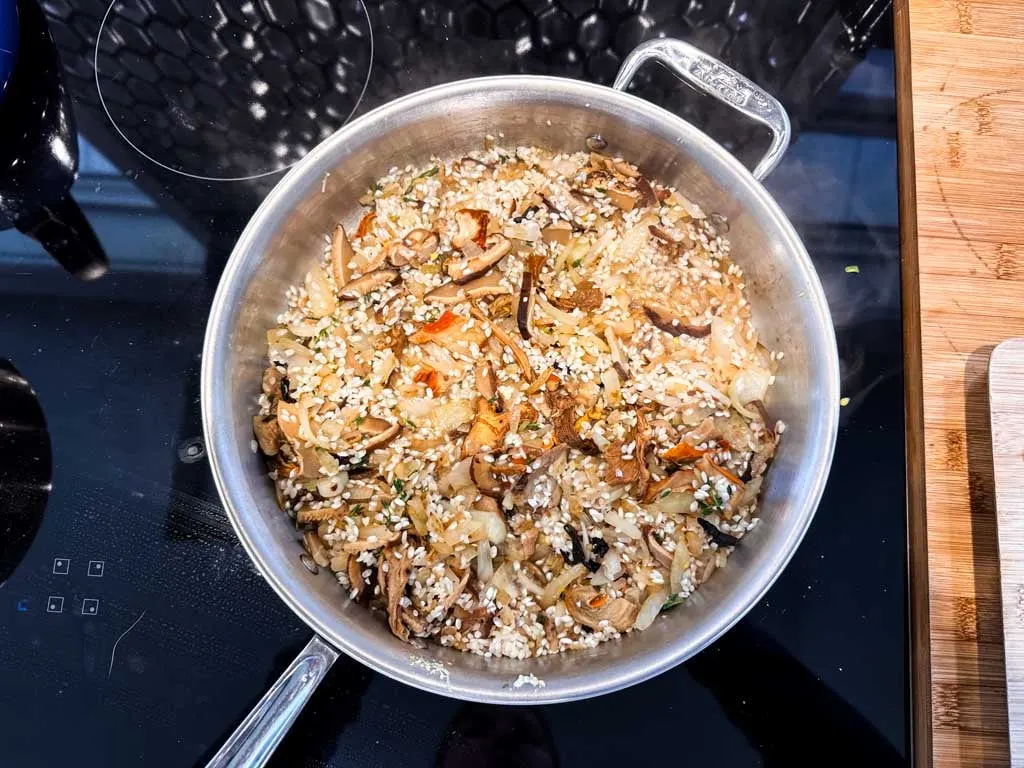
- In a deep skillet, saute the onion over medium heat with the oil until it browns and softens (about 6 or 7 minutes).
- Stir in the garlic, thyme, mushrooms, chicken (if using), and rice. Cook for 1 minute.
- Add the wine and stir until the wine cooks down (about 1 to 3 minutes).
- Add 3/4 cup of the broth/mushroom liquid mixture and stir until all liquid is absorbed. Repeat with the remaining broth/mushroom liquid mixture, adding 3/4 cup at a time and stirring until you’ve used it all.
- Season with salt and pepper to taste. I recommend going heavy on the seasoning because the dehydrating process can mellow out the flavours.

Dehydrating and Packing Instructions
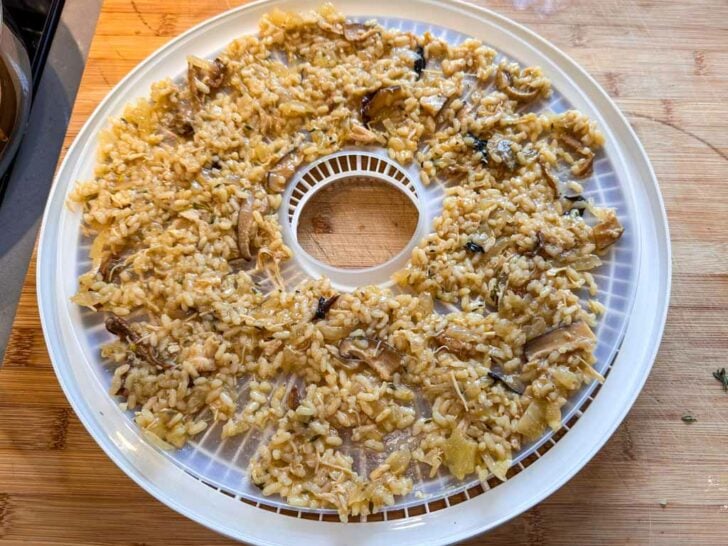
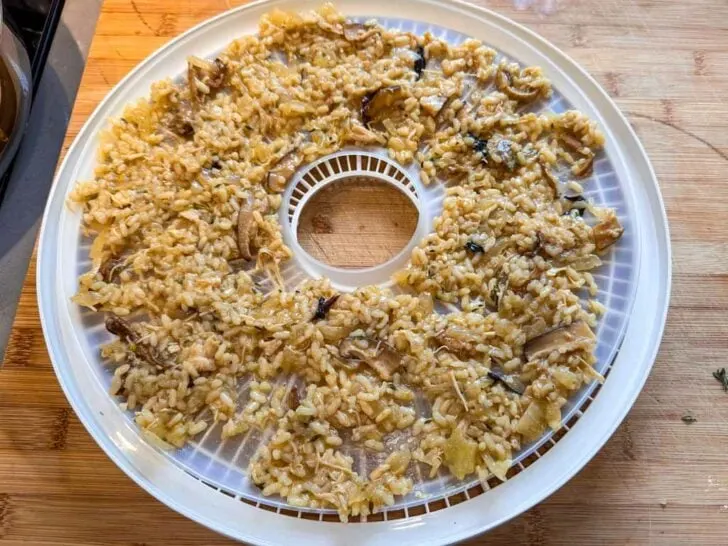
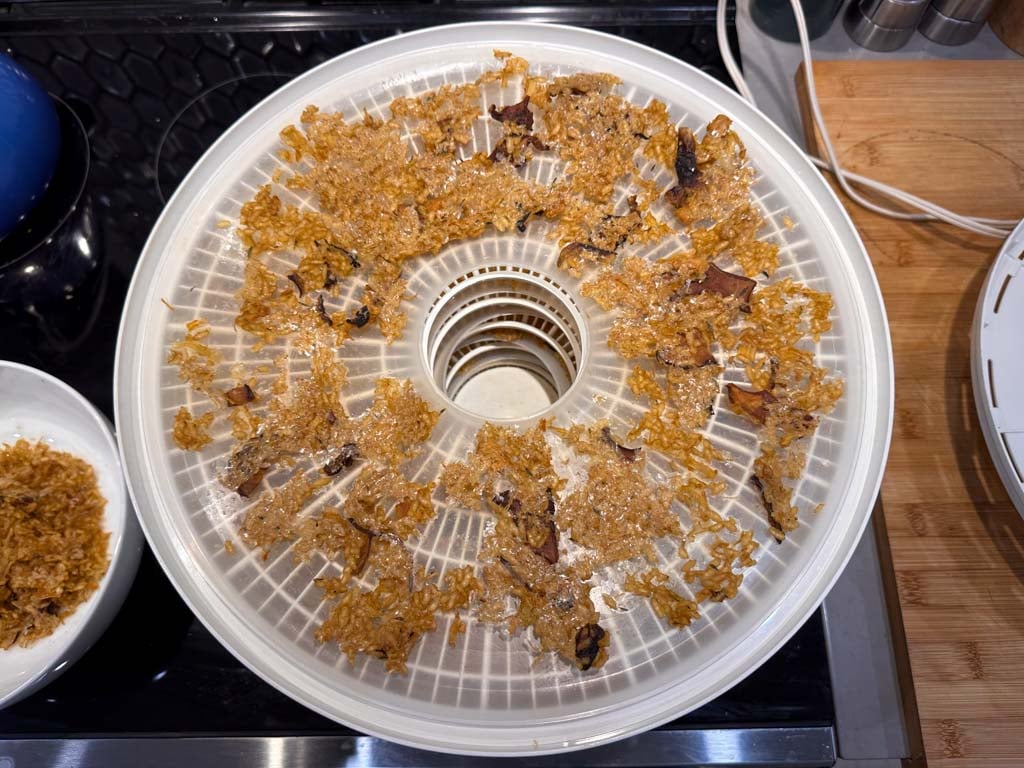
- Line dehydrator trays with parchment or use dehydrator tray inserts for liquids. (You can skip this step if you have fine mesh trays.) Spread risotto on dehydrator trays in an even layer.
- Dehydrate at 145F for 5 to 9 hours. Check the risotto periodically to break up any clumps. Flip it over about halfway through to speed up drying. When it is done it should be crispy and brittle with no soft spots.
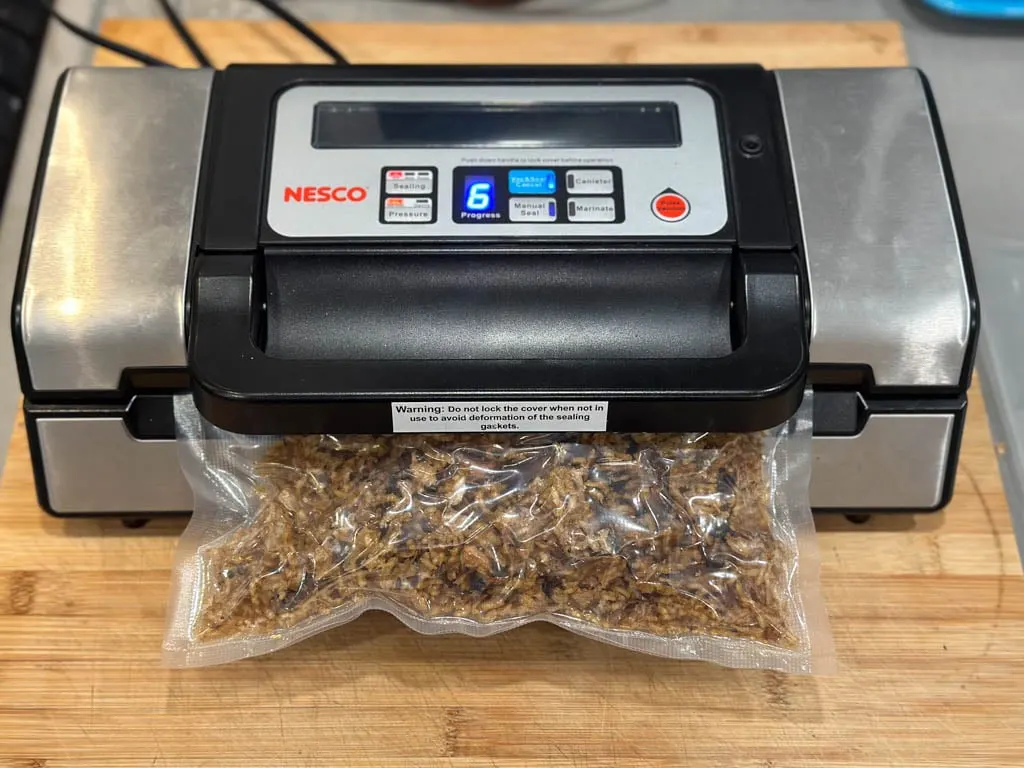
- Allow to cool, then store in a sealed, airtight container until ready to use. (I recommend vacuum sealing or using a canning jar. You can also store it in a Ziploc bag in your freezer.)
- Pack the risotto for the trail in a Ziploc freezer bag or a vacuum-sealed bag. This recipe makes 4 portions, so divide the dehydrated risotto into portions before you pack it. Pack the Parmesan cheese in its own bag. (Use 1 tablespoon of Parmesan for each portion.)


Rehydrating Instructions
- At camp, put the risotto in a cooking pot with enough water to cover – about 1 cup per serving.
- Let the risotto soak as long as you can – ideally at least 30 minutes. (Soaking is optional, but the longer you soak, the less fuel you will use and the faster it will cook.)
- Bring to a boil, then simmer and stir until the risotto is rehydrated. If it seems too dry, add water a splash at a time.
- Stir in Parmesan cheese and eat!
This is one of my favourite homemade backpacking meals and I hope it becomes one of your faves too. If you make it, tell me about it in the comments.
READ NEXT:
- Dehydrating Food For Backpacking: A Beginner’s Guide
- The Best (and Worst) Backpacking Meals Reviewed
- Grocery Store Backpacking Meals for Cheap
- How to Choose the Best Backpacking Meals
- Backcountry Chocolate Fondue Recipe


- Things to Do on Newfoundland’s Great Northern Peninsula - July 29, 2026
- Best Sun Hoodies for Hiking - June 3, 2026
- Lower Stein Valley Trail Hiking and Backpacking Guide - May 27, 2026
Rick Giles
Wednesday 12th of March 2025
Hi Taryn,
Great recipe!! Here's a great tip for rehydrating dehydrated foods on a hike (just maybe not risotto...). We double bag each meal in ziploc freezer bags. Each morning, we pull out that evening's meal and add a cup (or two) of water to it and mix it up well. At lunch, we check it, and if required, add more water. By the time we get to our camping site and get everything set up, the meal is usually fully rehydrated and can literally just be warmed up. It saves a lot of fuel.
Rick
Helen
Wednesday 28th of August 2024
The risotto was tasty, but it turned into mush when I left it to rehydrate for an hour as recommended. Almost all the water was absorbed. I had to add a little water in order to heat it up, but our stove does not permit simmering, so I had to stir a lot in order to prevent it sticking - and then it became a sticky mess. Any suggestions if I re-make it? Thanks, Helen
Taryn Eyton
Thursday 29th of August 2024
Hi Helen. You can try reducing the rehydrating time. But rehydrating backpacking food is tricky business - it's hard to strike a balance between too mushy and too chewy. As I said in the recipe, you will need to simmer the risotto at the end. If it is sticking, it's likely the heat is up too high. If you don't have a stove that simmers, hold the pot higher above the flame to try to reduce the temperature.