
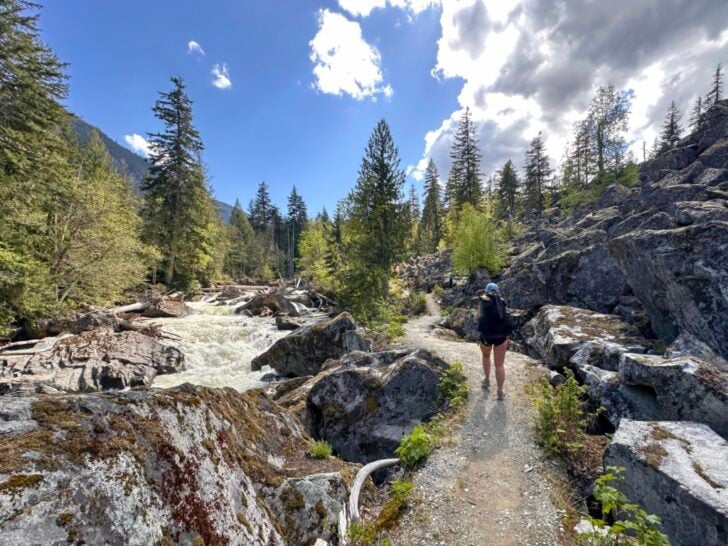

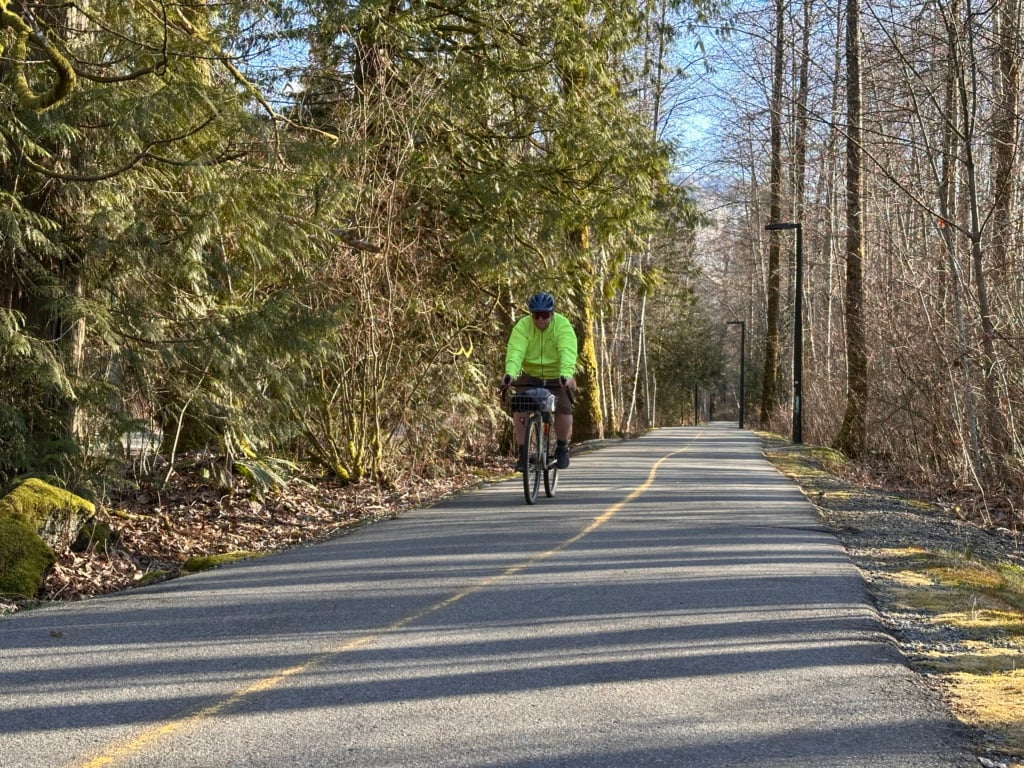
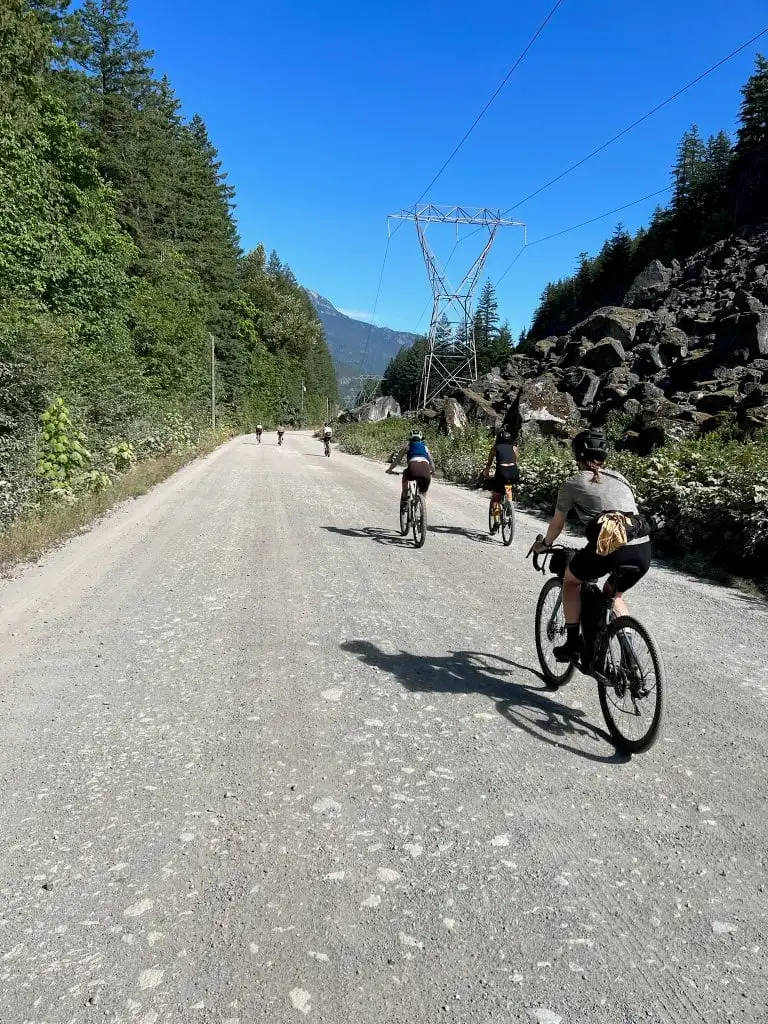
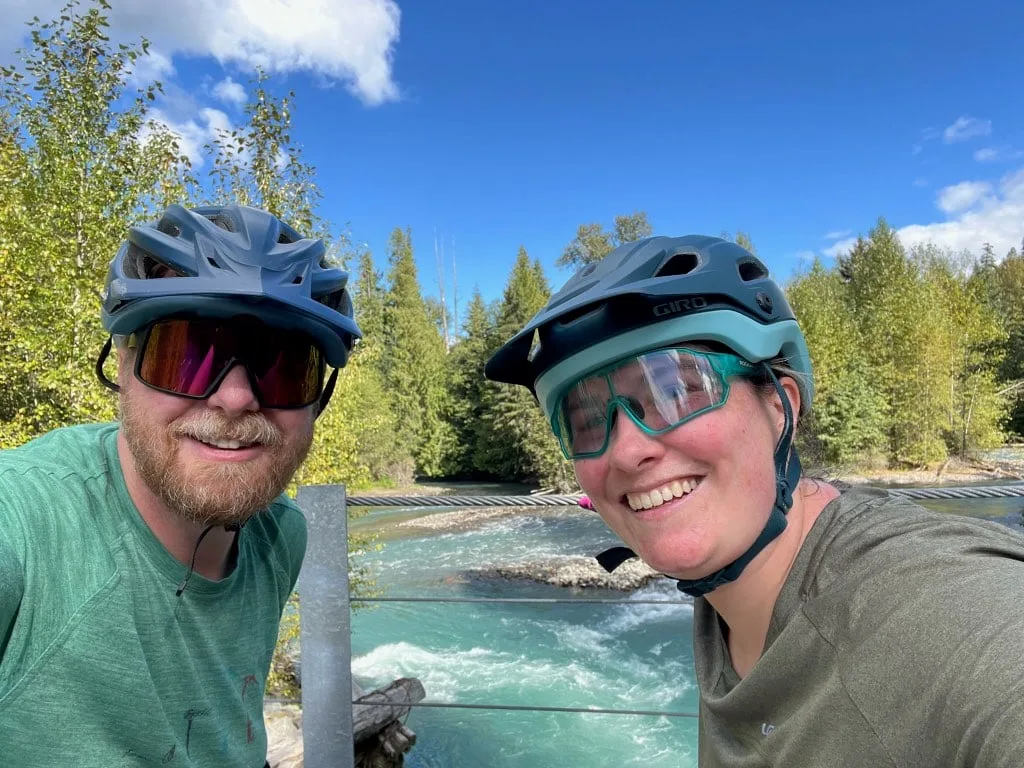
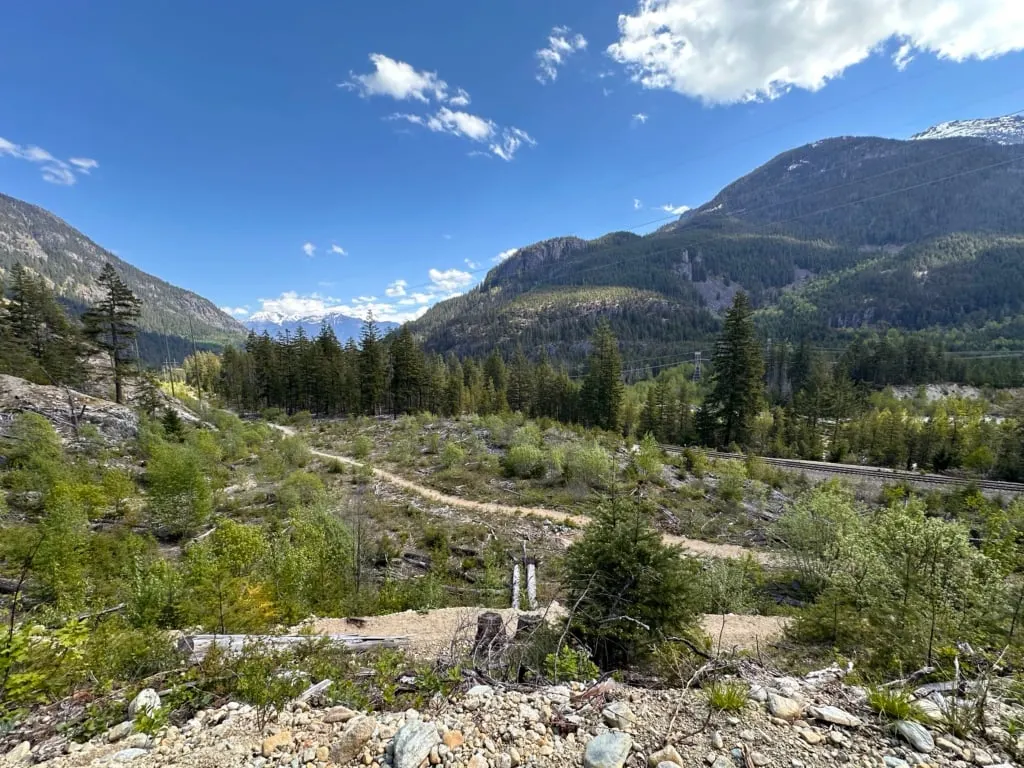
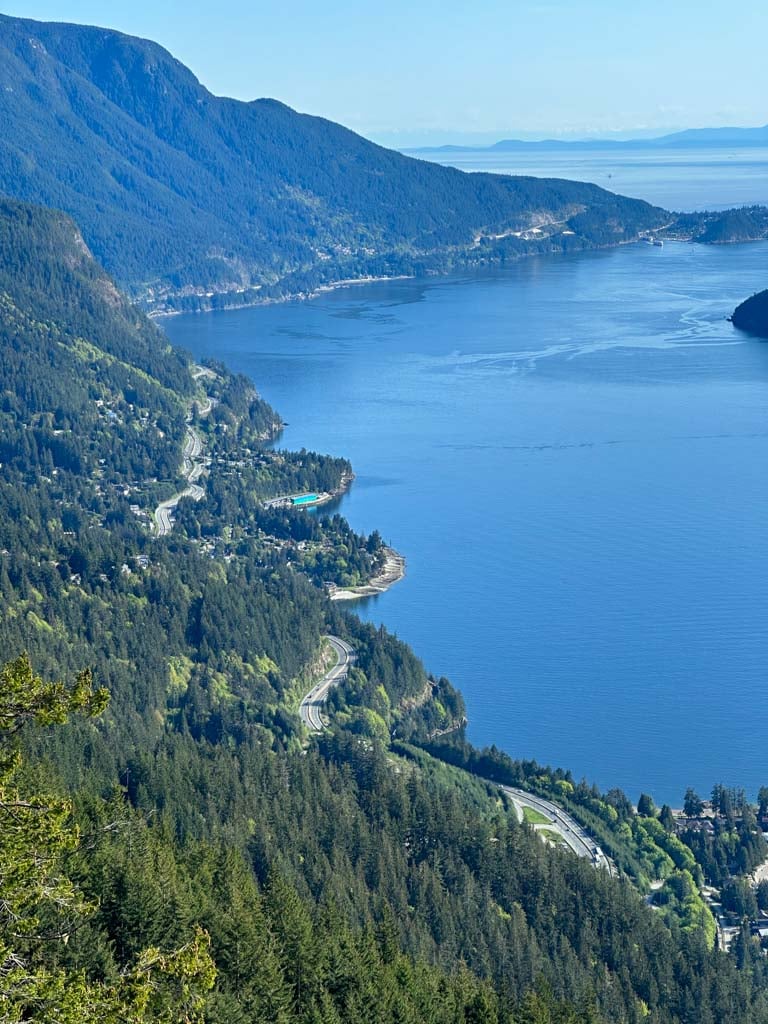
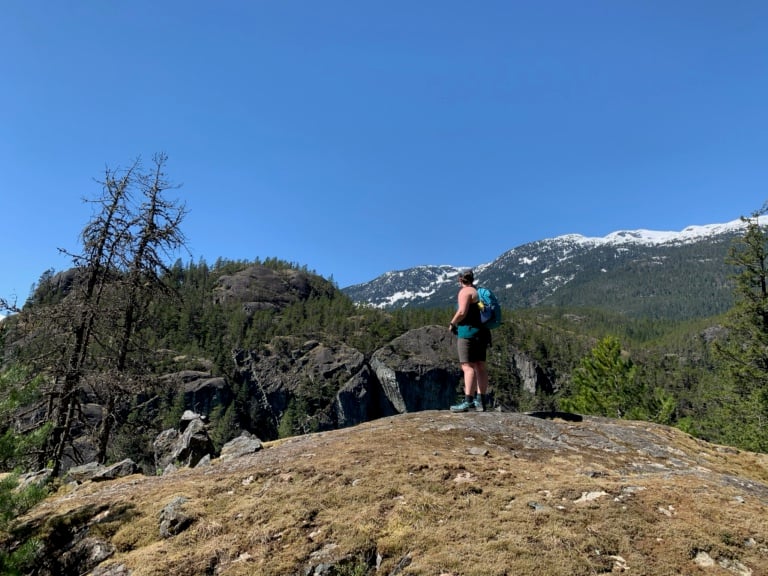
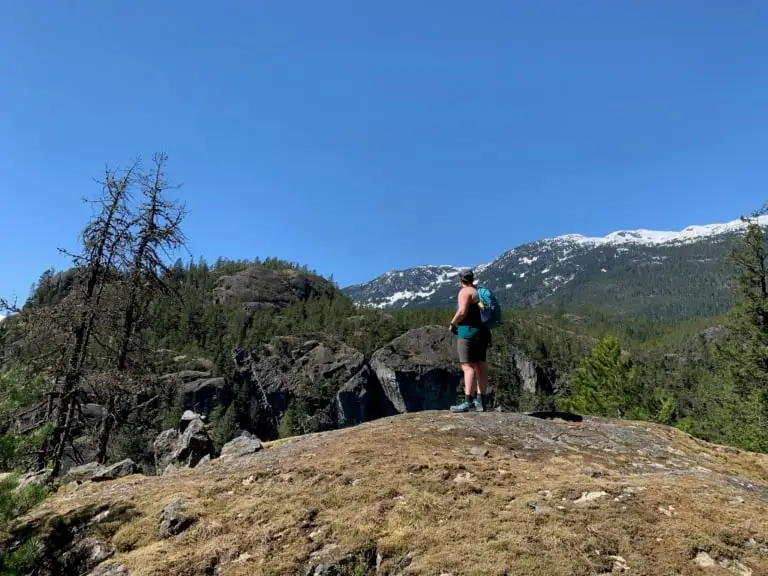
I’ve been driving the Sea to Sky Highway for decades, but it wasn’t until I moved to Squamish that I could also hike or bike through this region instead of driving it. The Sea to Sky Trail stretches for 107 kilometres between Squamish and Pemberton.
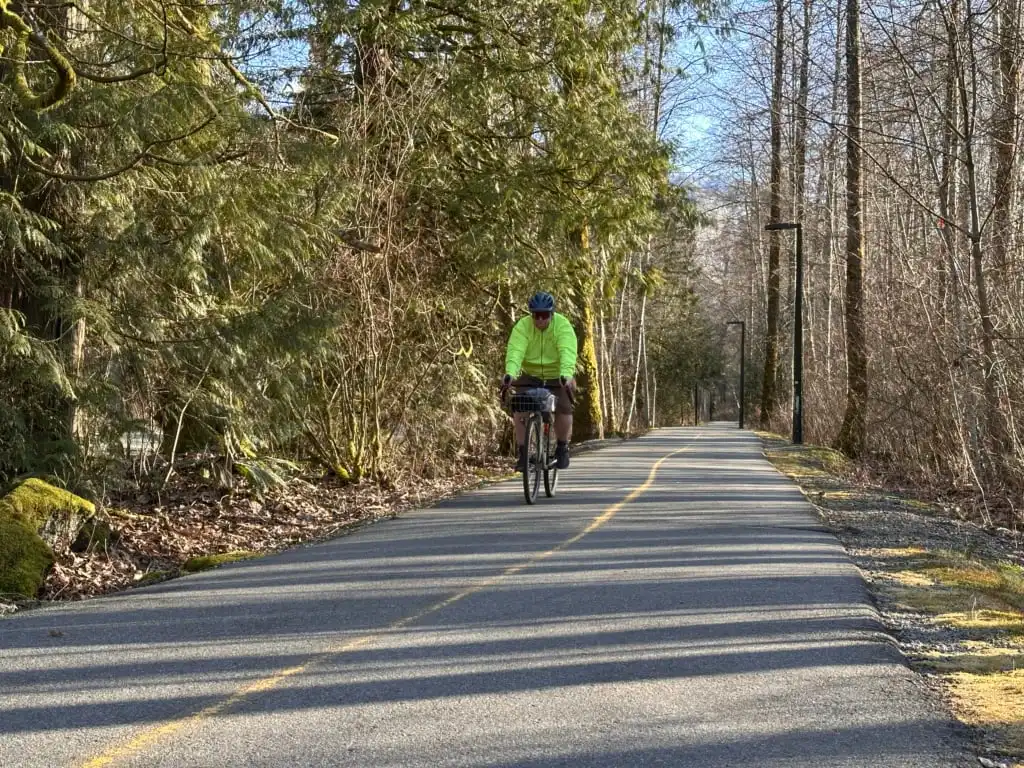
The route leads you through lush coastal rainforest, past rushing rivers, and beside swimmable lakes. It also passes right through downtown Squamish and Whistler Village, so that you can stop for a civilized coffee break. However, there are a few short stretches where the trail is not complete, so you’ll have to walk on roads or Highway 99.
The trail is multi-use, open to both hikers and cyclists. I’ve done both, covering the trail’s entire length on a series of hikes and bike rides over the years. My husband, an avid bikepacker, also helped with this post.
There isn’t much info on the Sea to Sky Trail online (and what is online is a bit dated since several new trail sections have been built in the last few years). In this guide, I’ve got everything you need to know about the Sea to Sky Trail, including:
- Quick facts about the Sea to Sky Trail: distance, best time to go, how long it takes, and more
- An up-to-date map and elevation profile, plus a downloadable GPX file
- Detailed trail description, broken down into sections with distances and elevation change
- My recommended itineraries for hiking and biking
- Camping and where to stay along the trail
- Sea to Sky Trail tips, including water access and specific tips for hikers and bikers
- How to get to the Sea to Sky Trail and between trailheads
- My honest opinion of the trail and whether I recommend it
This is a sensitive wilderness area. Learn how to Leave No Trace to keep the wilderness wild. Make sure you are prepared by bringing the 10 Essentials. Get ready for adventure with this checklist of things to do before every hike.
Hey there: Some of the links in this post are affiliate links, which means I earn a small commission at no cost to you. Thanks for your support. -Taryn
Sea to Sky Trail Quick Facts
Route Overview: The Sea to Sky Trail runs from Squamish to Whistler in a route that parallels the Sea to Sky Highway (Highway 99). It is a multi-use trail that is open to hikers and bikers and strings together sections of trail and road to create the Sea to Sky Trail.
Not the Sea to Sky Gondola: Lots of people get this trail confused with the trail that goes from the base of the Sea to Sky Gondola to the top. That one is called the Sea to Summit Trail – the Sea to Sky Trail is a different trail!
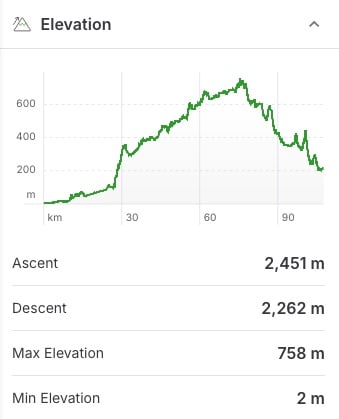
Distance: 107.4 km
Elevation Gain: 2,435 m
Surface Breakdown: Single-track trail: 52.8 km; Paved multi-use trail: 20.1 km; Gravel road: 19.4 km; Paved road: 11.5 km; Paved Highway: 10 km
How Long to Spend: Cyclists should plan on 2 to 3 days. Hikers can complete the trail in 4 days.
Best Time to Go: May to October for the best weather and no snow.
Indigenous Context: The Sea to Sky Trail is on the traditional territory of the Squamish and Lil’wat Nations. Be respectful in this special place.

Sea to Sky Trail Maps and Elevation Profile
When I was researching my trips, I had trouble finding good info about the routing of the Sea to Sky Trail. Some sections are really straightforward, but others are not. This is because the trail has been rerouted in a few places to avoid roads or to take paths that are bikeable versus just hikable.
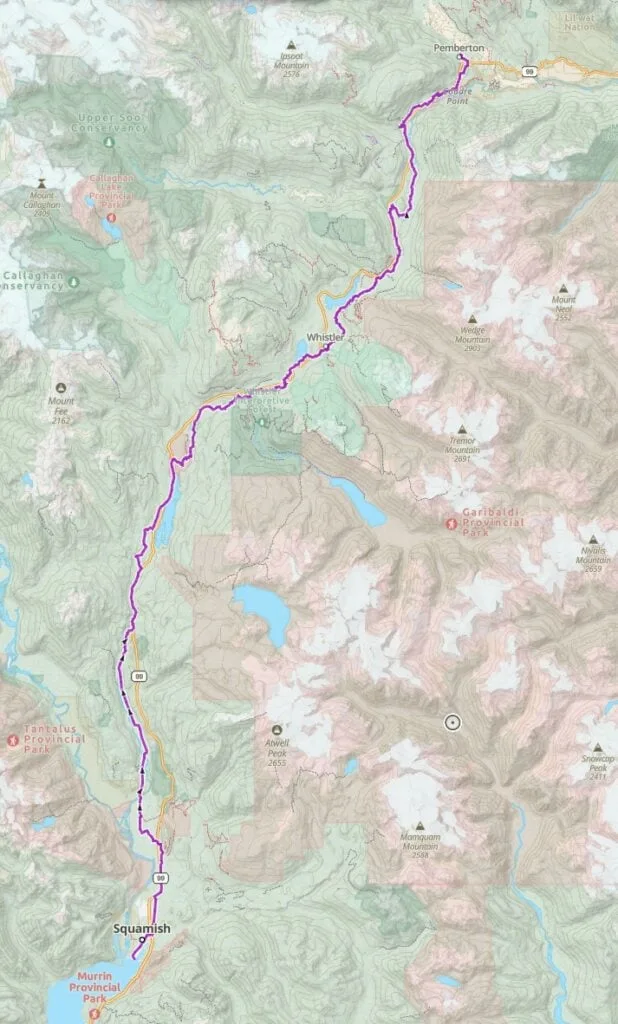
After digging through the Sea to Sky Trail section of the Squamish-Lilooet Regional District website, the Trans Canada Trail interactive map, Trailforks, and Gaia, I’ve put together what I think is the most complete and accurate (for now) map of the Sea to Sky Trail.
Here is my custom Sea to Sky Trail map, made using Gaia GPS, my fave mapping app. Click through to zoom in and explore (and to download the GPX file).


PS: Want to save 10% on a premium subscription to Gaia GPS (the app I use for all my hikes)? Use my link – the discount appears in cart.
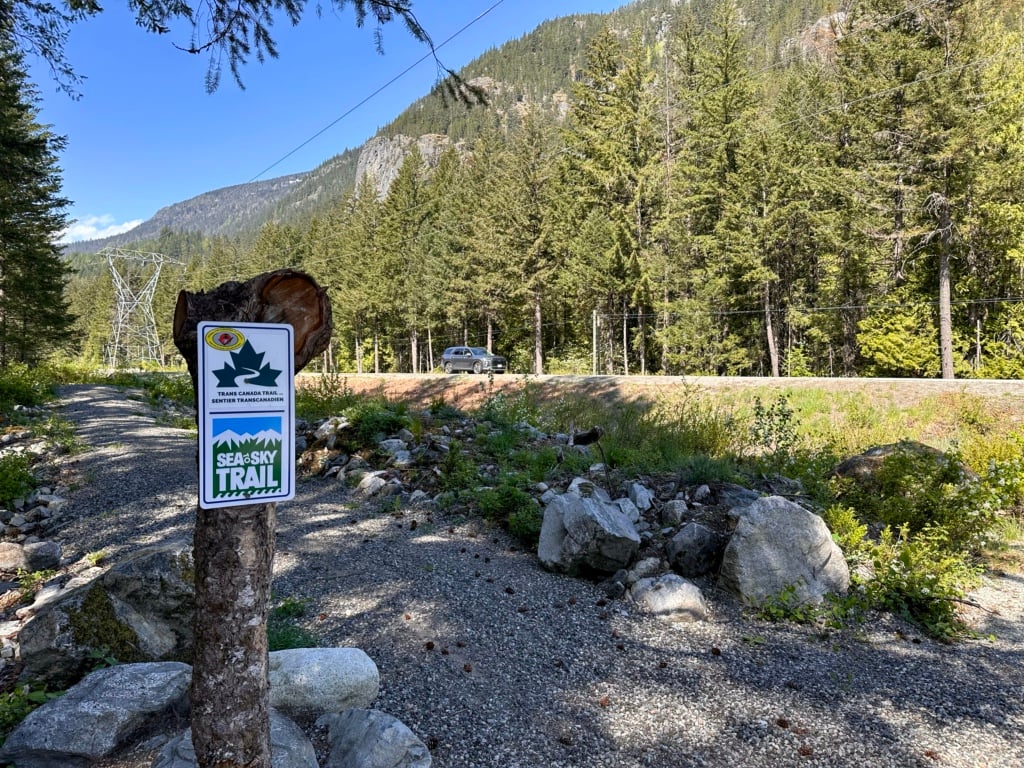
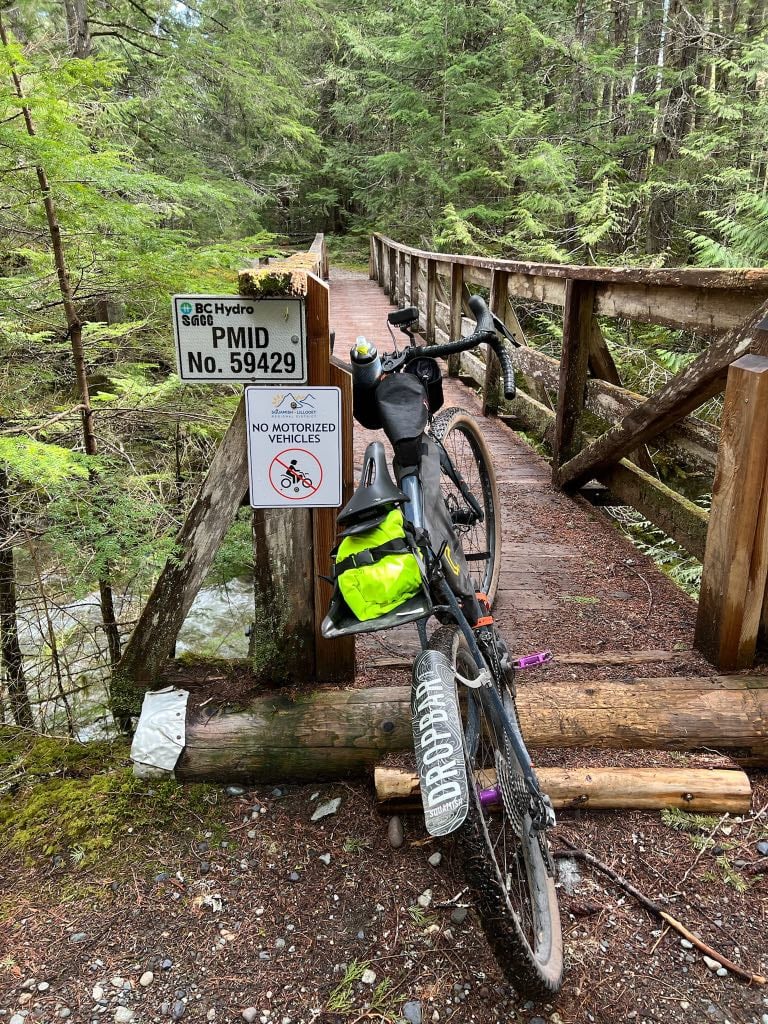
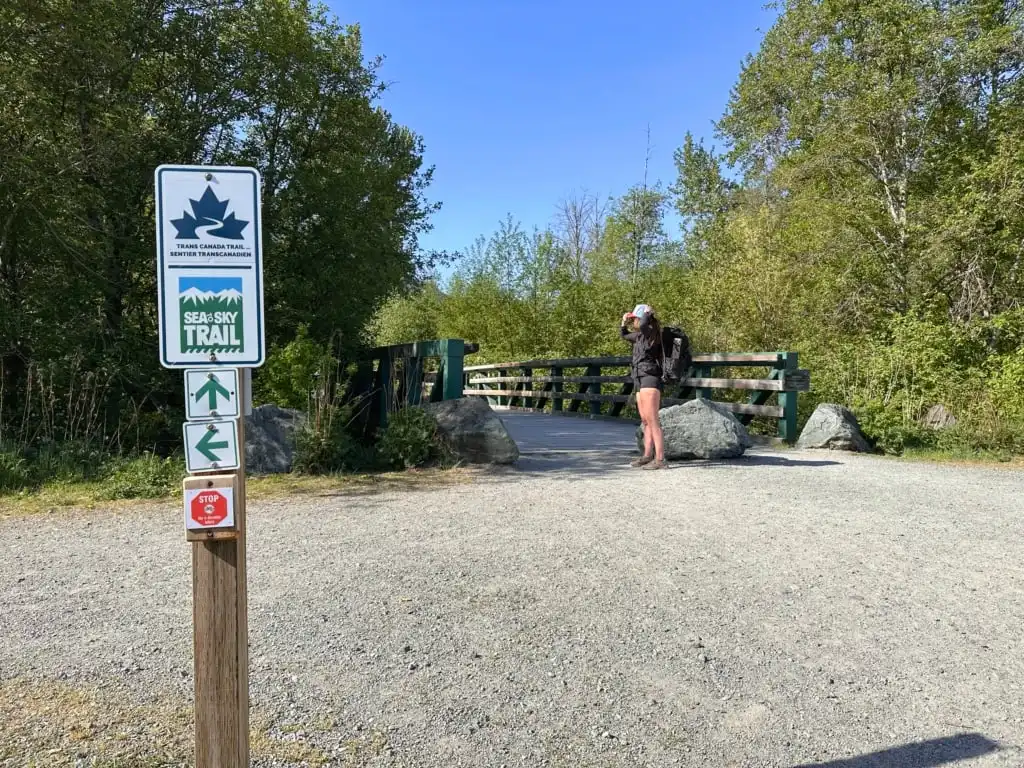
When you’re hiking or biking the trail, you will usually come across Sea to Sky Trail markers at important junctions. The markers aren’t huge, but they are there if you look for them. However, keep in mind that sometimes the markers will take you on older versions of the trail so use the markers along with my map to stay on track.

Sea to Sky Trail Description
Which Direction to Go?
When I was researching this trip, it seemed like most people (both hikers and cyclists) chose to start in Squamish and go north to Pemberton. But then I looked at the elevation profile and realized that if I started in Pemberton and went south, the first 30 km would be uphill, but then the rest would be downhill. So I started in Pemberton.
However, I don’t know that I would necessarily recommend that strategy. The 30 km from Pemberton to the high point above Green Lake involves lots of climbs, some of which are steep. Starting in the north means you have your hardest day first. If you start in Squamish, yes, you’ll be going uphill, but it’s much more gradual.
So, in summary, I don’t recommend one direction over the other.
Join the Backpacking in BC Facebook Group
Key Locations
| KM | Elevation | Landmark |
|---|---|---|
| 0 km | 0 m | Sp’akw’us Feather Park |
| 11 km | 35 m | MTN Fun Basecamp Campground |
| 16.1 km | 50 m | Start of Paradise Valley Road |
| 19.7 km | 50 m | Paradise Valley Campground |
| 26.5 km | 105 m | End of Paradise Valley Road |
| 28.6 km | 225 m | Starvation Lake |
| 32 km | 320 m | Highway 99 at Cheakamus Canyon Trail |
| 36.1 km | 335 m | Chance Creek FSR |
| 39 km | 385 m | Shadow Lake |
| 43 km | 385 m | Highway 99 at Retta Lake Road |
| 46.9 km | 475 m | Brandywine Falls |
| 52.2 km | 500 m | Cal-Cheak Campground |
| 60 km | 600 m | Function Junction |
| 69.2 km | 670 m | Whistler Village |
| 80.4 km | 600 m | Riverside Dispersed Camping |
| 86.2 km | 510 m | Start of Gord’s Garden |
| 94.7 km | 350 m | Highway 99 |
| 96.6 km | 370 m | Rutherford Creek FSR |
| 103.1 km | 250 m | Nairn Falls Provincial Park |
| 107.4 km | 205 m | Welcome to Pemberton Sign |
Squamish Waterfront to MTN Fun Basecamp
Distance: 10.9 km
Elevation Gain: 100 m
Elevation Loss: 70 m
The trail starts at Sp’akw’us Feather Park near downtown Squamish. It’s a new beachfront park accessed via Loggers Lane. It has washrooms, a water bottle refill station, and incredible views of the Stawamus Chief. You’ll find a small “Sea to Sky Trail” sign on the road near the parking area, but otherwise, there is no other info about the trail.


From the beach, head west along the paved path through the park. Exit the park at the northwest corner, following a gravel trail along a narrow inlet littered with remains of Squamish’s industrial past.
About 1.5 km from the start, emerge onto the pavement in downtown Squamish. Use Logger’s Lane or Cleveland Avenue to head north to Pemberton Avenue, then turn right. Take the path under the bridge. On the other side, stay on the paved Corridor Trail beside the Mamquam Blind Channel.
Follow the Corridor Trail as it parallels Loggers Lane, then crosses the Mamquam River beside Highway 99. About 7 km from the start, the Corridor Trail passes in front of Garibaldi Village shopping centre. This is a good place to get a snack or go to the bathroom at one of the quick-service restaurants. The Purebread cafe here is a great place for a treat.
The Corridor Trail ends at the 9.9km mark. From here, follow signs for the Through the Looking Glass Trail through the woods. Those on bikes should be prepared for a steep first few minutes and some tight switchbacks at the end.
At the 11 km mark, exit the trail onto Depot Road. MTN Fun Basecamp Campground is located here.
MTN Fun Basecamp to End of Paradise Valley Road
Distance: 15.4 km
Elevation Gain: 155 m
Elevation Loss: 90 m
Cross Highway 99 at the traffic light, then turn right onto the Ray Peters Trail. A minute later, go left to take the left branch of the Ray Peters Trail (right continues beside the highway). You’ll follow this packed gravel and dirt path through the forest as it parallels Ross Road and Government Road.


Exit the Ray Peters Trail at the intersection of Government Road and Squamish Valley Road at the 14.5 km mark. From here, you have a long road section, first paved, then gravel. Thankfully, traffic is light.
Head west on Squamish Valley Road to the bridge over the Cheakamus River. Fergie’s Cafe is on your right – it’s a great brunch or lunch spot if you have time. Sunwolf Riverside Cabins are also on the same property.
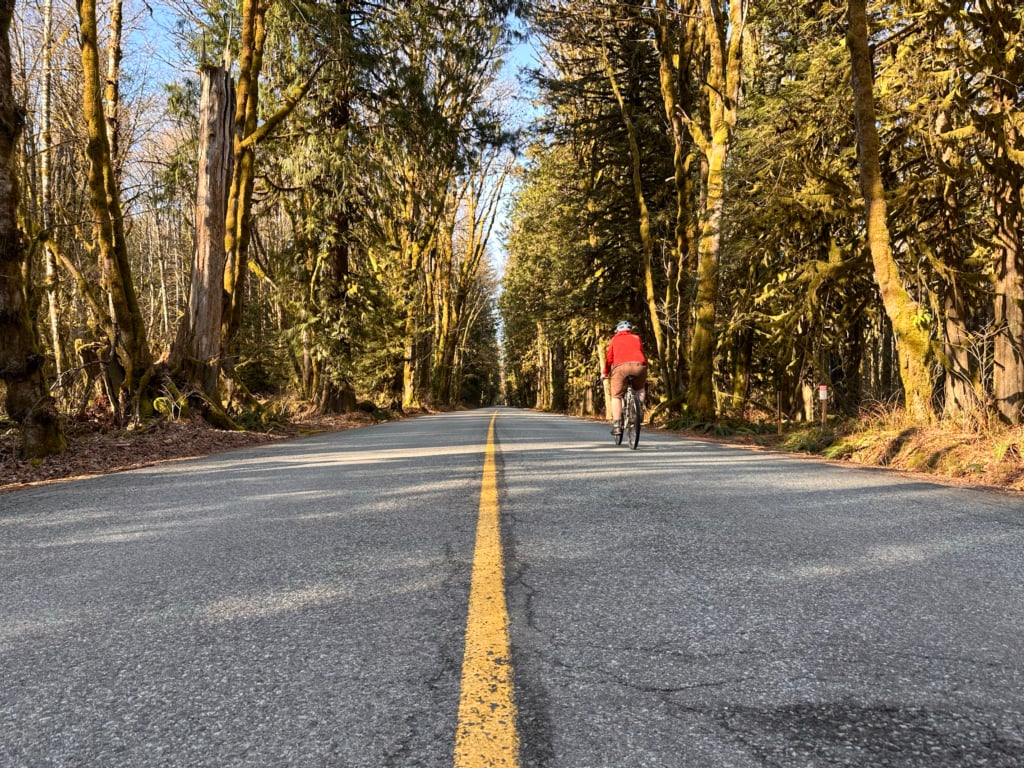
On the other side of the bridge, at the 16.1 km mark, turn right onto Paradise Valley Road. The first section of this road is gorgeous with lots of big leaf maple trees overhead. Pass the Paradise Valley Campground at 19.7 km just after crossing a bridge over the Cheakamus River.

The road turns to gravel at 21.5 km. Unfortunately, this section isn’t very scenic, and it can be dusty. The road gets rougher as it reaches its end at 26.5 km. There is an informal drive-in camping area at the end of the road that is popular on weekends. However, it has no toilets, food storage, or other facilities.
End of Paradise Valley to Chance Creek FSR
Distance: 9.9 km
Elevation Gain: 455 m
Elevation Loss: 235 m
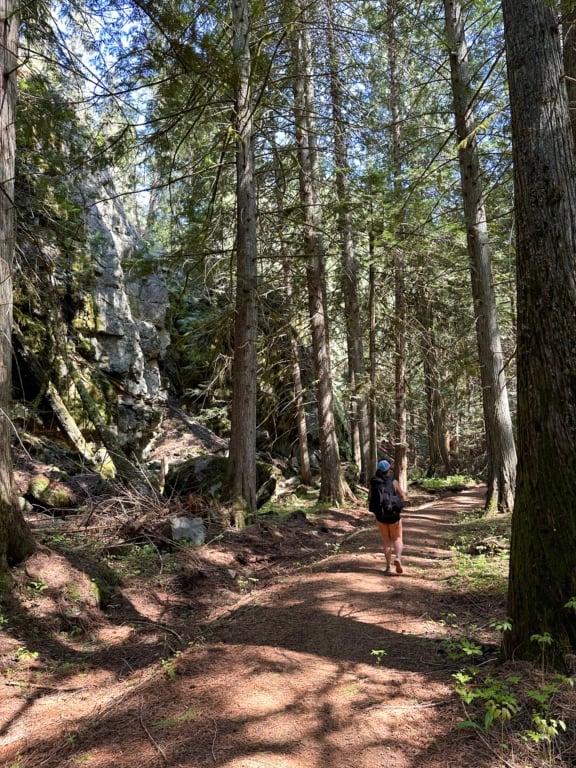
From the end of the road, follow the Cheakamus Canyon Trail uphill into the forest – it’s one of my favourite hikes in Squamish. This is one of the biggest climbs on the trail. The trail is steep and loose in places. Cyclists will have to hike-a-bike through here. There is a large barrier at a railway crossing that bikes will need to be lifted over.
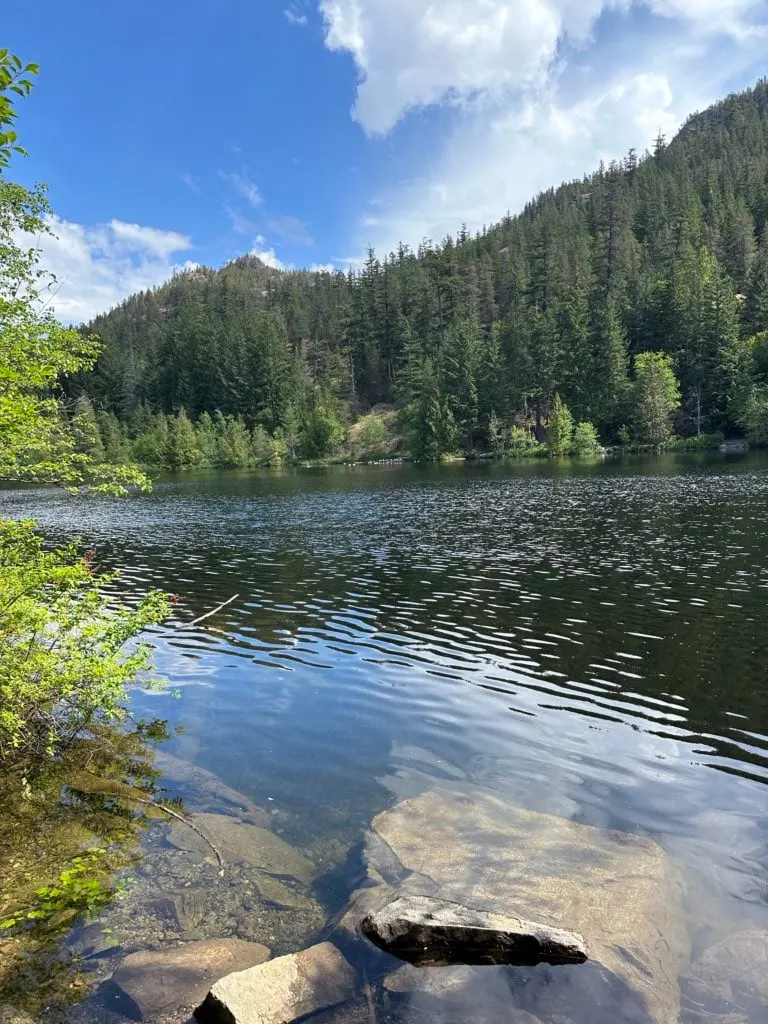
Reach Starvation Lake at 28.6 km, having gained about 115 m since leaving the road. I love swimming here. There is a clearing in the trees on a spur trail on the north side of the lake that makes a good informal campsite. It has no toilet, food storage, or other facilities.

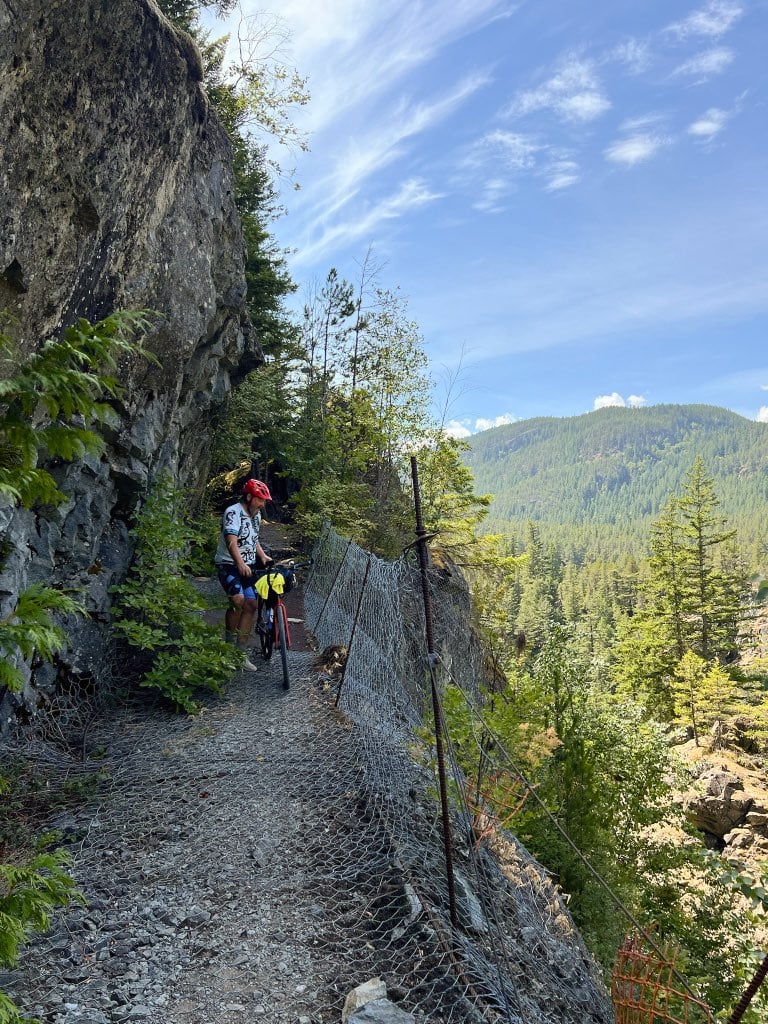
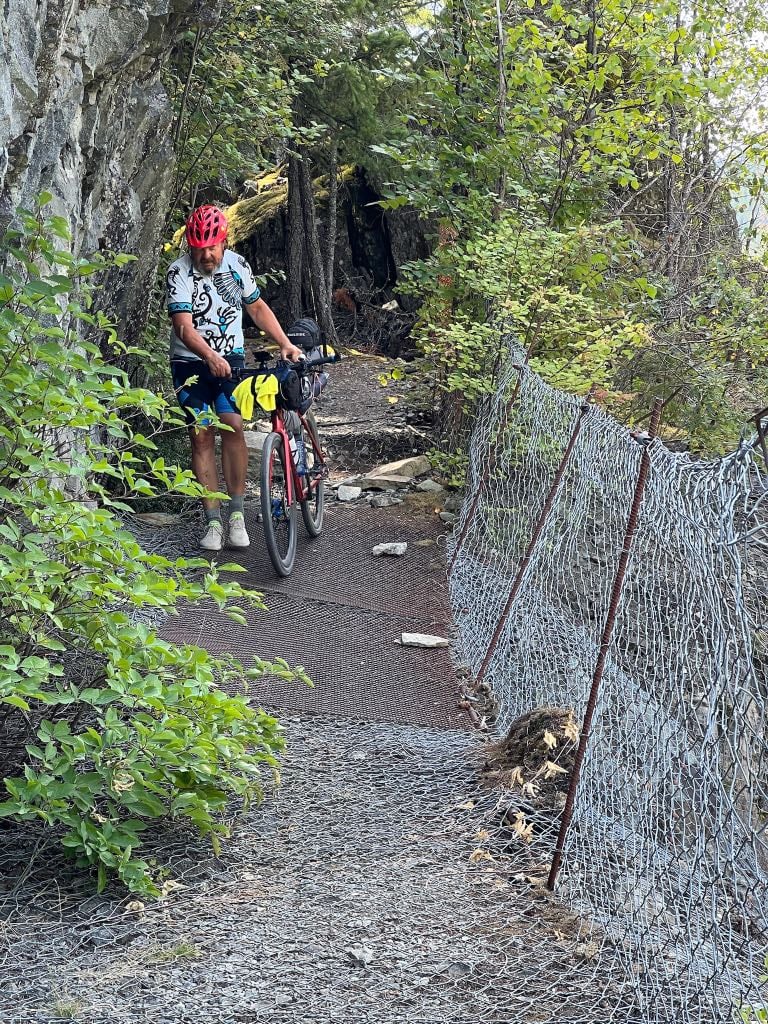
Continue uphill past the lake. In places, you can see the railway line and Cheakamus River in the canyon below you. In one short section, traverse a wire mesh catwalk suspended on the side of a cliff. The trail has steep drop-offs in places, but it is wide, so you can always stay far back from the edge. Some short, steep hills with loose gravel may require pushing your bike.


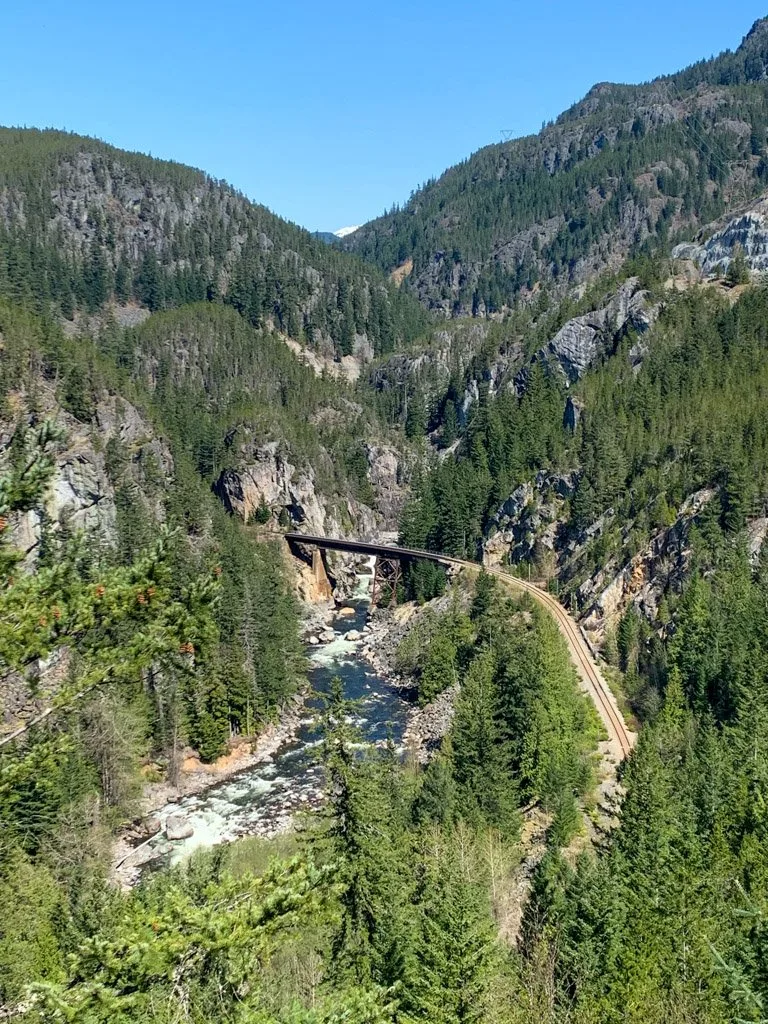
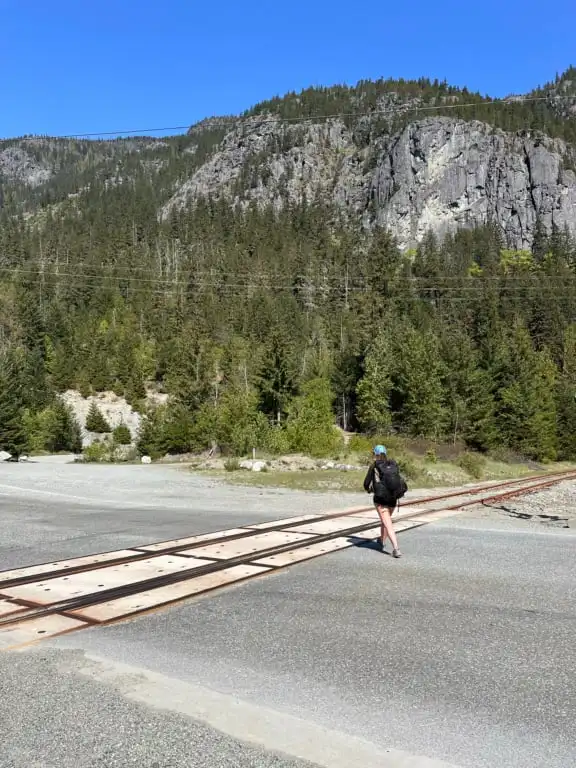
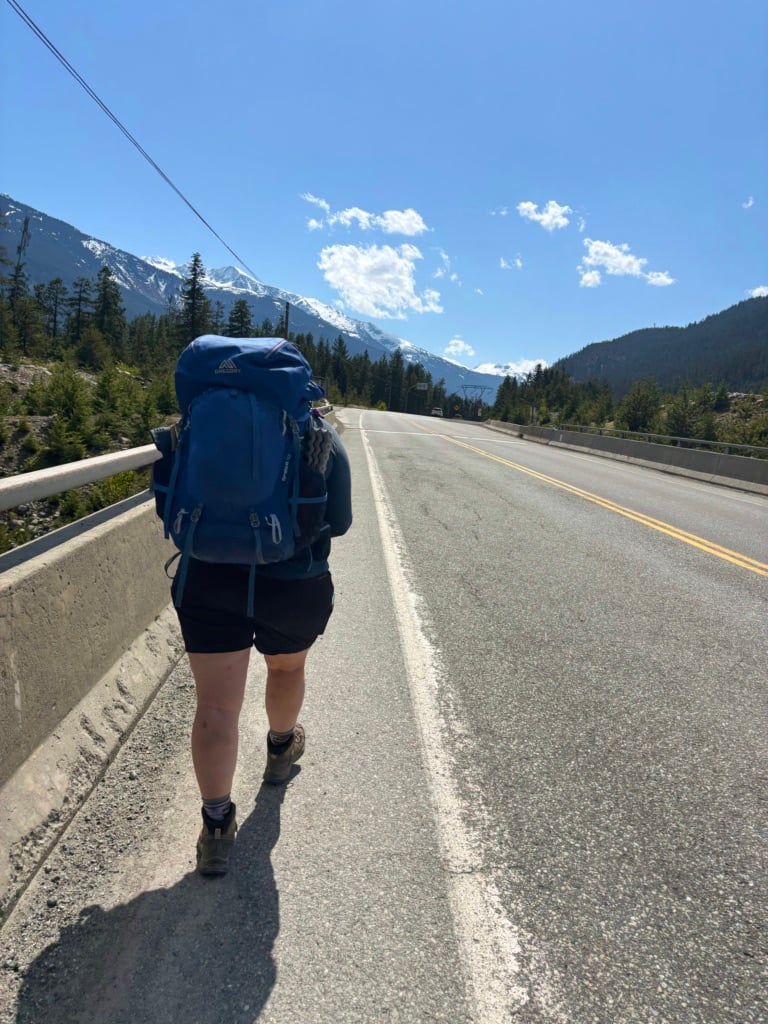
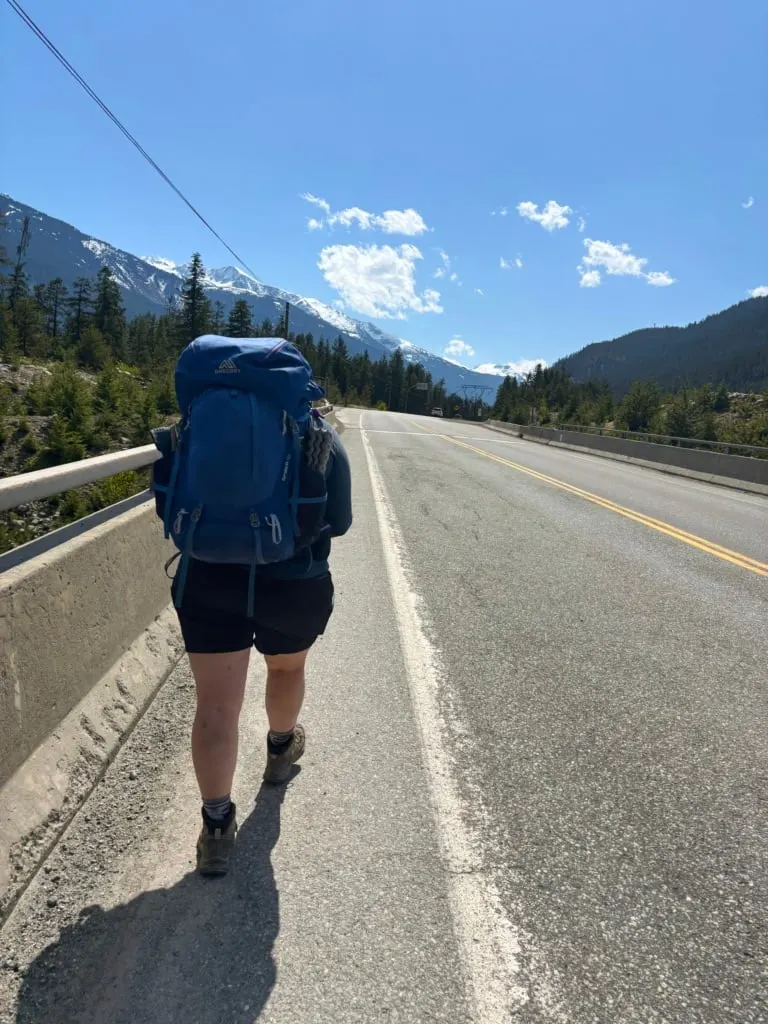
The trail ends at Highway 99 at the 32 km mark, having climbed another 100 m up from the lake. From here, you have a 3.9 km segment of Highway 99 to deal with. Hikers can stay on the west shoulder, in some places on the other side of the concrete barrier. Bikers will need to cross the highway carefully, then bike on the shoulder, which is reasonably wide.
Turn left onto Chance Creek FSR at the 36.1 km mark.
Chance Creek FSR to Brandywine Falls
Distance: 10.5 km
Elevation Gain: 260 m
Elevation Loss: 125 m
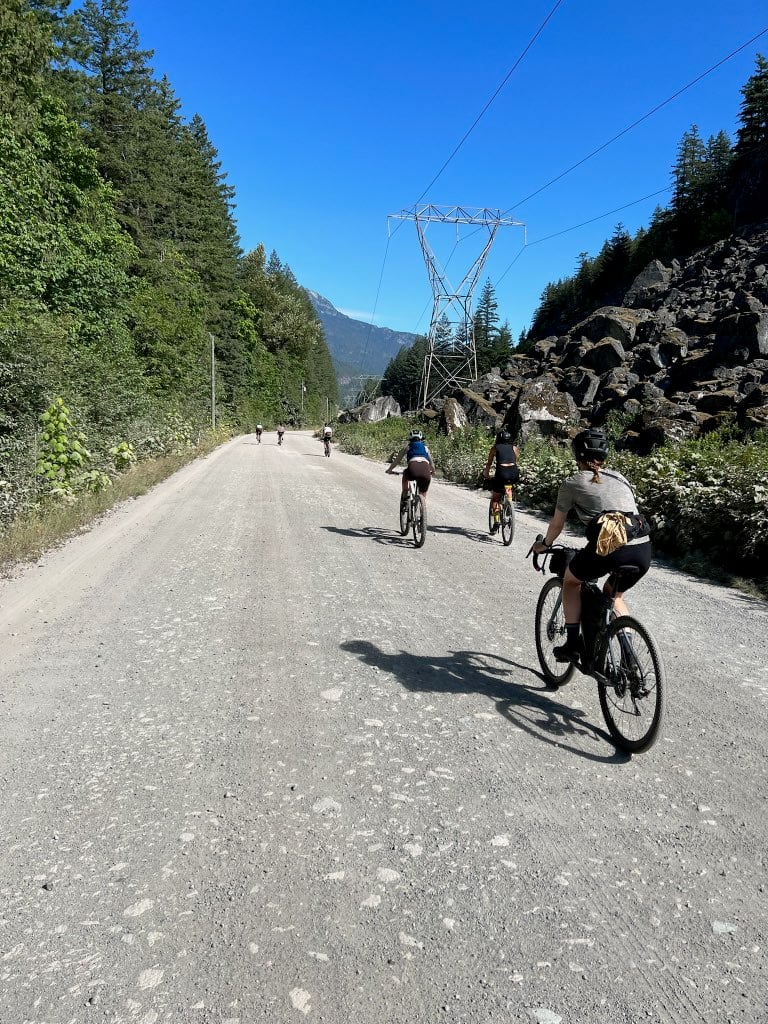
Follow this gravel road for 0.2 km, then turn right back onto the Sea to Sky Trail. The trail climbs up under a power line and passes near Lucille Lake. (Take a trail branching left to visit the lake, which has good swimming.) It then heads back under the same powerline and follows old double-track roads to Shadow Lake.
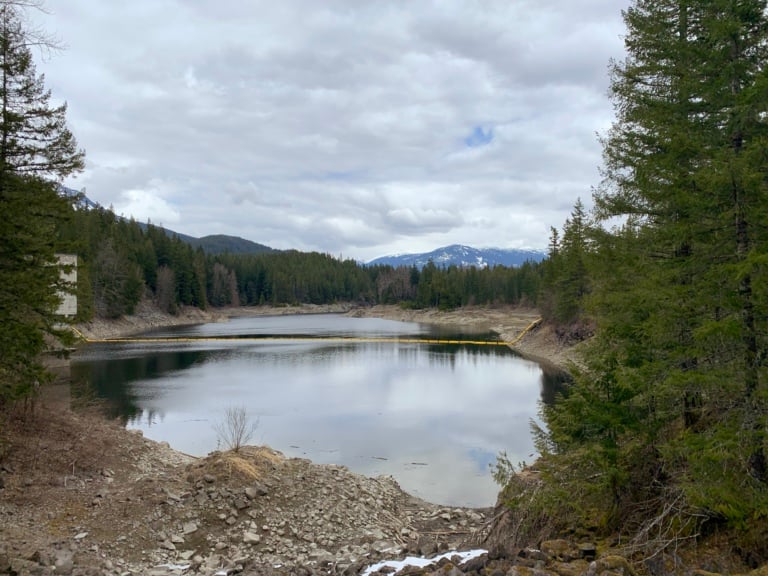

Shadow Lake is part of the larger Daisy Lake Dam complex, so there are pumphouses and other infrastructure in this section. Stay on the old double track on the west side of the lake, then follow the road as it becomes a trail and heads into the forest. Some trailside clearings near a bridge over Roe Creek could work as informal campsites. There are no toilets, food storage, or other facilities.

The trail becomes old double track again as it crosses the railway tracks and swings north to follow the powerlines. Reach paved Retta Lake Road at the 41.5 km mark. This road accesses two gated communities of private homes.
Go north on Retta Lake Road until you reach Highway 99 at the 43 km mark. Next up is the longest Highway section. You’ll be on the road for 4.1 km. Cyclists have a left turn lane to cross the highway, but the shoulder in this section is quite narrow. As well, it’s uphill – you’ll gain almost 100 m. Hikers can stay on the west shoulder, facing traffic, which is a bit wider.
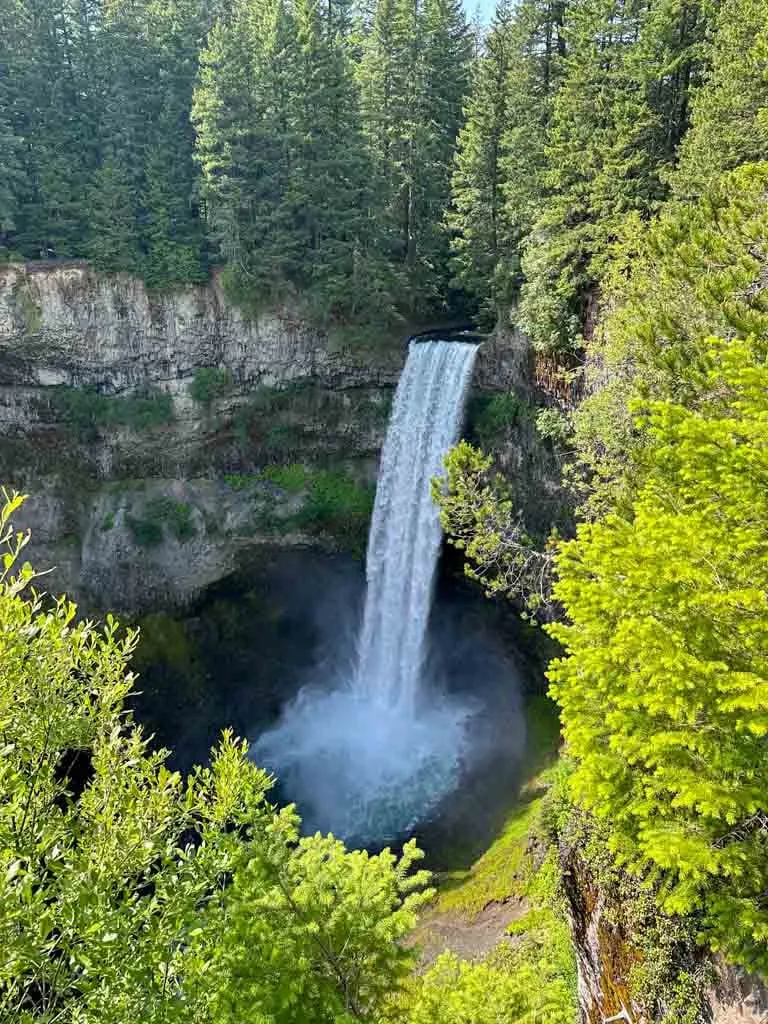
Turn right into Brandywine Provincial Park at 46.9 km.
Brandywine Falls to Cal-Cheak Campground
Distance: 5.2 km
Elevation Gain: 155 m
Elevation Loss: 135 m
Brandywine Falls Provincial Park has lots of trails, but you’ll use just a few of them. Head through the parking lot, past the outhouses, and over the bridge across Brandywine Creek. Follow the wide main trail southeast and across the railway tracks. On the other side, detour for a few hundred metres to visit the Brandywine Falls viewpoints.

The Sea to Sky Trail continues east just south of the railway tracks. The wide gravel trail heads through the forest and down a small hill before climbing back up into more open terrain as you pass under powerlines and past old lava flows pockmarked with little lakes.
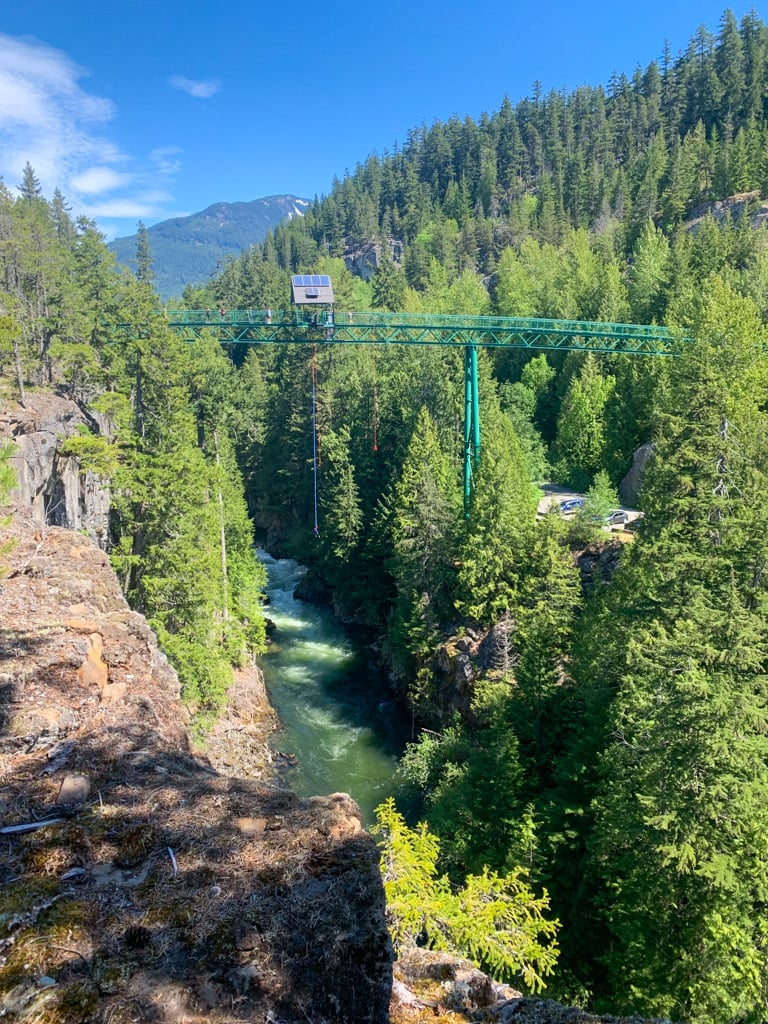
Arrive at the Bungee Bridge at 46.9 km. It’s worth waiting at the viewpoint to watch someone jump. Cross the bridge when the bungee staff tell you it’s safe to do so. Cyclists will have to carry their bikes up a short flight of stairs.

On the other side, follow the trail down to the Daisy Lake/Cal-Cheak FSR and head north on the wide gravel road.
Reach the southern entrance to Cal-Cheak Campground at 52.2 km at the intersection of the Cheakamus River and Callaghan Creek. This large campground has three main areas, each with tent sites and outhouses.
Cal-Cheak Campground to Function Junction
Distance: 8 km
Elevation Gain: 250 m
Elevation Loss: 150 m
Continue along the gravel road, watching for the Sea to Sky Trail to branch off to the right at 52.6 km, just past the spur road to the north campground.
The next section of trail travels through beautiful shady woods and past several rockslides, a relic of the area’s volcanic history. There are some short, sharp climbs with tight switchbacks that require careful bike handling. A long, straight section follows a former logging railway. Cross the Cheakamus River on a suspension bridge at the 55 km mark.

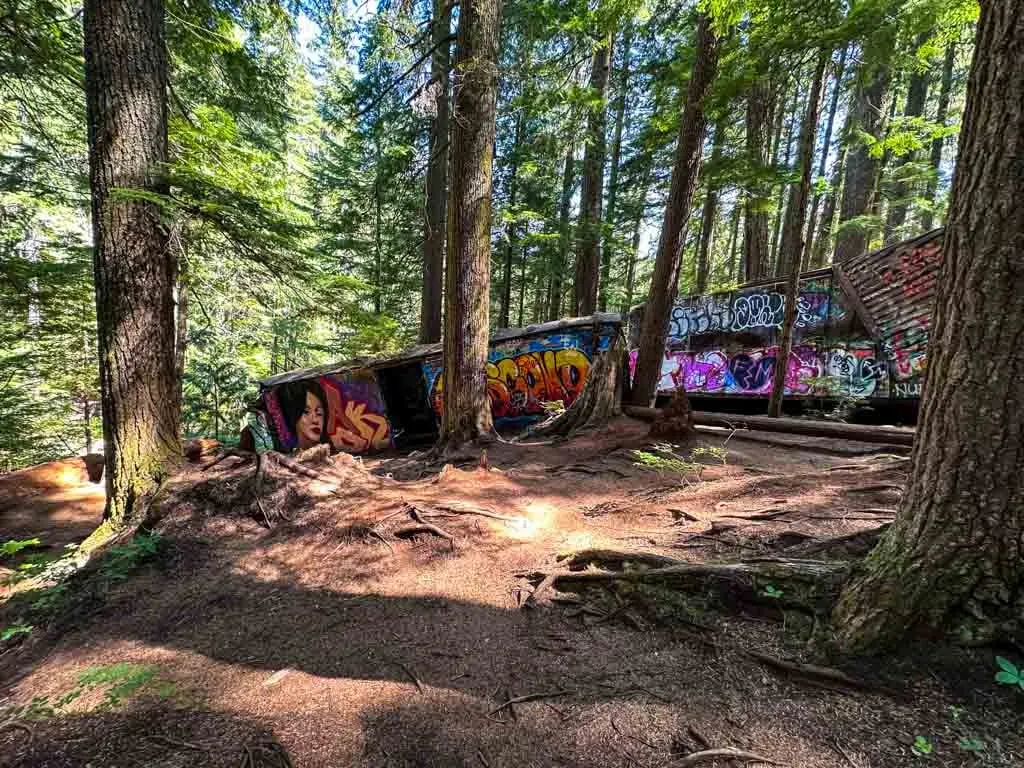
On the other side, the trail starts with a climb and then winds across a series of rolling hills. Expect to see lots of hikers as you approach Trainwreck junction at 58.3 km.
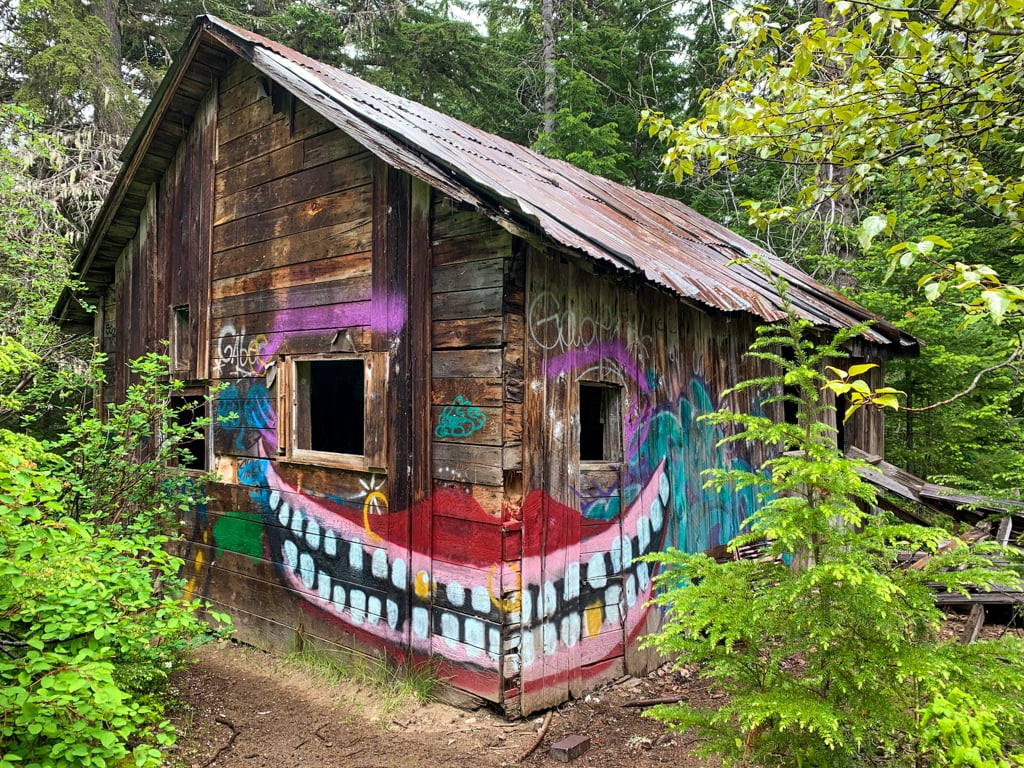
You can take a short detour down the hill to the Whistler Trainwreck, a set of abandoned train cars suspended over the side of the Cheakamus River Canyon. From the junction, follow the busy trail east to Jane Lakes Road at 58.8 km.

Go northeast on Jane Lakes Road, then take the Valley Trail across the Cheakamus River near the intersection with Legacy Way. At 60 km, stay on the Valley Trail as it heads northeast on the east side of Highway 99. If you need a break, detour across the Highway into Function Junction to grab a treat from Purebread or beer and pizza from Whistler Brewing.
Function Junction to Lost Lake
Distance: 11.6 km
Elevation Gain: 270 m
Elevation Loss: 175 m
You’ll be on the Valley Trail all the way through Whistler. It is a paved multi-use trail, so expect to share it with other cyclists, joggers, and walkers. Even though it crosses many streets and Highway 99, the trail is fairly easy to follow with signs at every junction – just follow the arrows to Whistler Village.
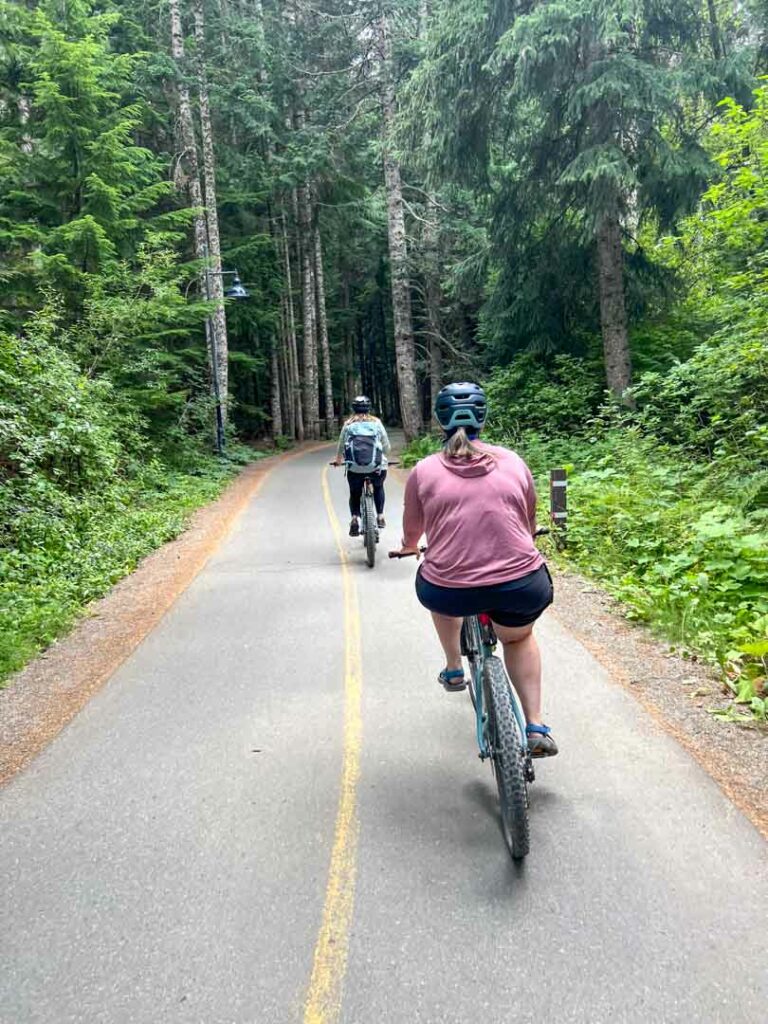
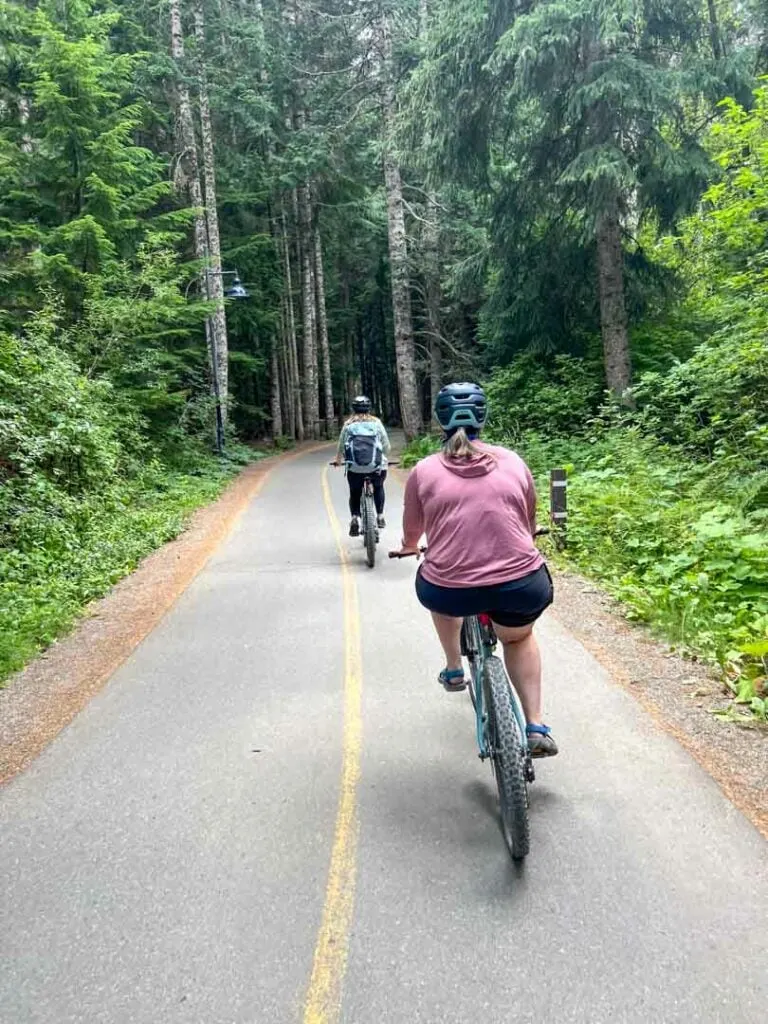
At 64.5 km ride through Alpha Lake Park. Pass through Wayside Park at 66.2 km and Lakeside Park at 66.7 km. All three parks have bathrooms and swimming areas. Wayside Park and Lakeside Park are also launch points for paddling the River of Golden Dreams.
Use the underpass to cross Highway 99 at 69.2 km to enter Whistler Village. You must walk your bike through the village. This is a great place to stop for something to eat – there are seemingly endless cafes and restaurants. It’s a bit fancy, but I love the sandwiches at Provisions on Village Stroll.
Make your way through the village, aiming for the Valley Trail between parking lots #1 and #2. After crossing the parking lots, take the Valley Trail north towards Lost Lake – ignore the branch that crosses Fitzsimmons Creek on the covered bridge.
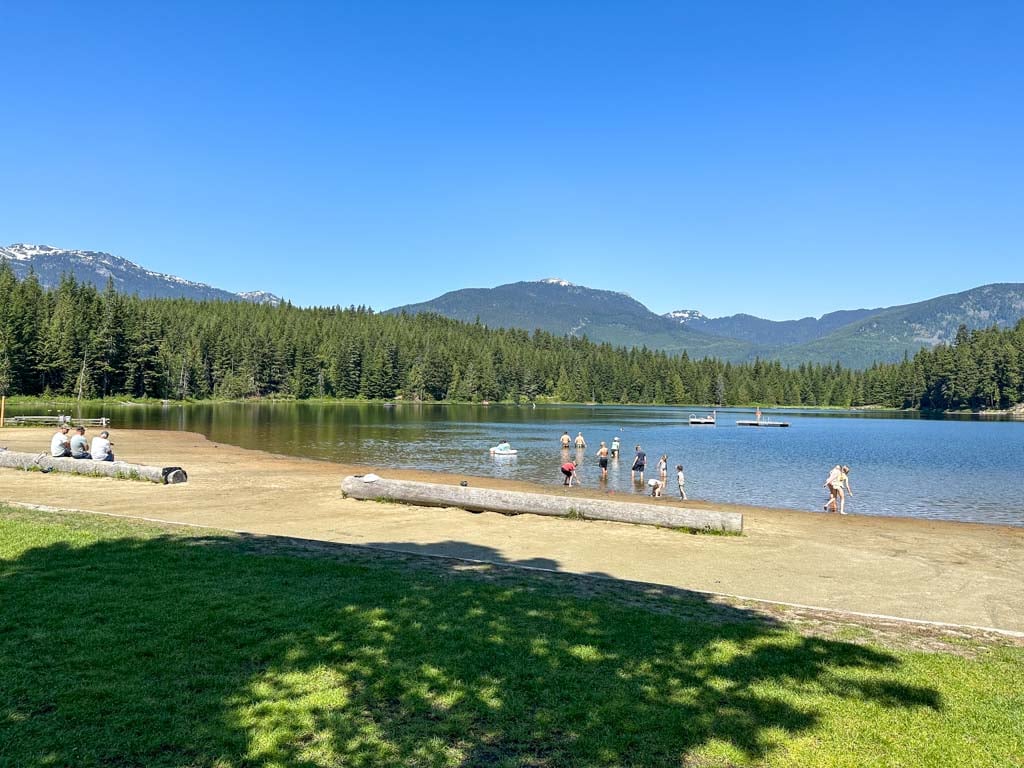
Stay on the Valley Trail as it parallels the parking lots and passes underneath Lorimer Road. Cross Fitzsimmons Creek on a wide bridge, and arrive at the entrance to Lost Lake Park and the Lost Lake Passivhaus at 70.7 km.
Follow the wide gravel trail into the park, then go right to stay on it towards Lost Lake Beach. There are more bathrooms and another swimming area here.

Lost Lake to Wedgewoods
Distance: 8.4 km
Elevation Gain: 245 m
Elevation Loss: 335 m
Stay on the wide gravel trail as it heads up the lake’s east side.
From here, you’ll be on a series of mountain bike trails that traverse the slopes high above Green Lake. If you follow the signage correctly, you’ll stay on easy green-rated trails or old logging roads. But if you get lost, you could end up on a challenging black diamond-rated trail. Pay attention!
At the end of the Lost Lake Trail, take Gandy Dancer for 400 m to Siwash Trail for 200 m to the Green Lake Loop. Stay on the Green Lake Loop as you reach the Sea to Sky Trail’s high point at 758 m.
As you get towards the north end of Green Lake, the trail network can be confusing. Look for signs that say Sea to Sky Trail or Green Lake Loop. When in doubt, the wide gravel road will also take you where you want to go. If you want an interesting detour, you can head northwest on the Parkhurst Trail to explore the abandoned ghost town of Parkhurst.

Eventually, you’ll descend to the Green River Road, also called Riverside Drive. Turn right and follow this road as it parallels the railway tracks and the Green River.
At 80.4 km, reach the Riverside Dispersed Camping Area near the railway tracks and Highway 99. This informal drive-in camping area has an outhouse but no food storage or other facilities.
Follow the gravel road northeast from the junction. In a few minutes, ignore the uphill branch that goes to the Wedgemount Lake Trailhead. Instead, stay left and follow the road into the Wedgewoods neighbourhood.
Wedgewoods to Gord’s Garden
Distance: 5.8 km
Elevation Gain: 90 m
Elevation Loss: 185 m
A wide paved path runs beside Riverside Road through this high-end subdivision. Follow it across a bridge over the Green River. Just before the road curves left to meet up with Highway 99, turn left on Skier’s Rest Lane. Turn left again into an unmarked driveway for the complex’s trash storage building, and find the Sea to Sky Trailhead at 82.7 km.
The next section of trail sticks close enough to Highway 99 that you can often hear it or see it. The path heads through tight second-growth forest and rambles underneath the powerlines.


Emerge on Highway 99 at 86.1 km and turn right to cross the railway tracks, then turn right onto Soo Valley Road. You’ll be on the Highway for less than 100 m.
Gord’s Garden to Green River Motocross
Distance: 8.4 km
Elevation Gain: 150 m
Elevation Loss: 295 m
Find the Gord’s Garden Trailhead on your left almost immediately after leaving the highway. This section is named for Gordon McKeever, one of the early champions of the Sea to Sky Trail. Follow the trail steeply up the hill and under the power lines. There are tons of dirt bike trails in this area – follow the Sea to Sky Trail signs to stay on track.
After reaching a high point under the power lines, the trail descends gradually. Watch for a left turn into the forest. The trail continues to descend until it reaches the banks of the Green River.
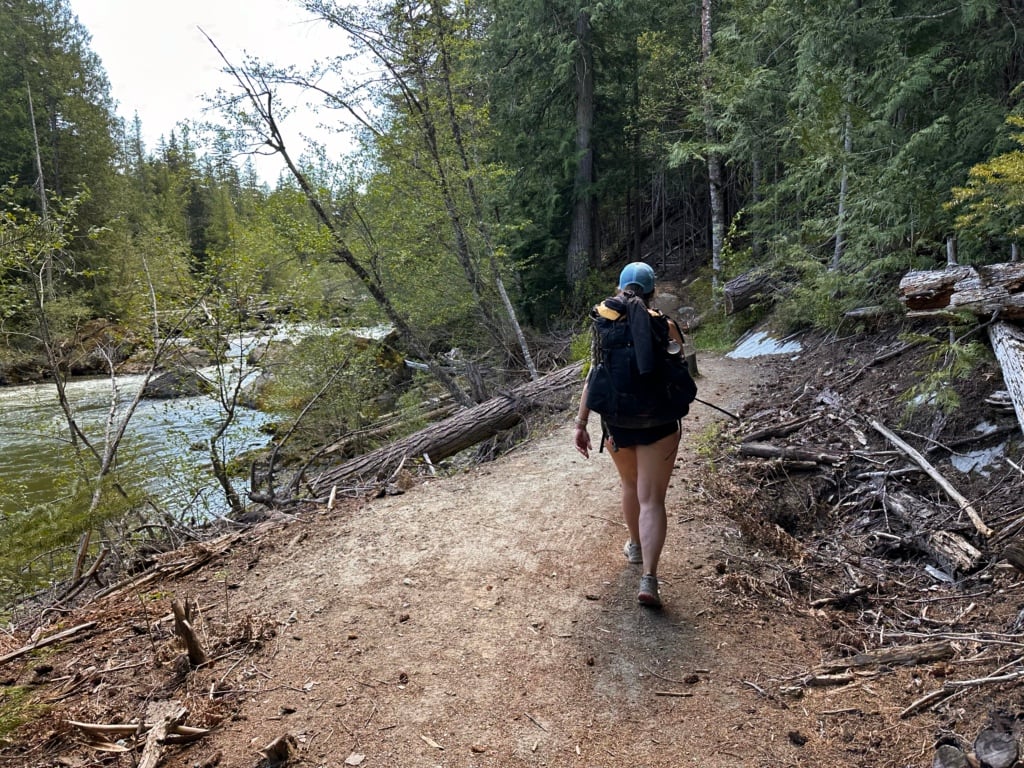

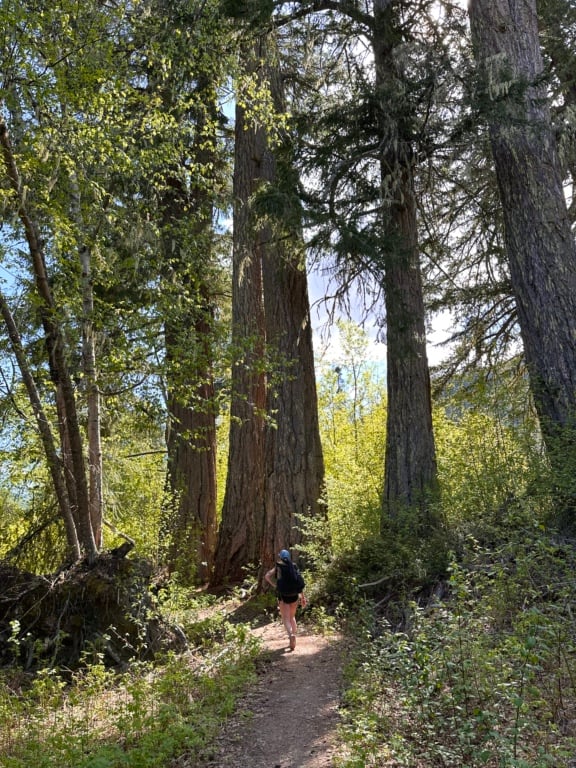
The next few kilometres are my favourite part of the Sea to Sky Trail. The path follows the Green River with lots of spots to stop for a break or stick your toes in the water. There are also some lovely groves of giant trees.
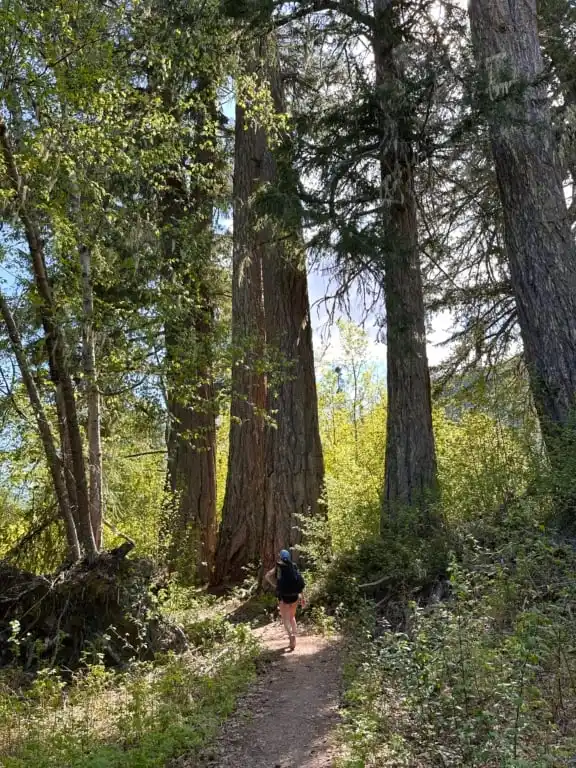
There are even a few clearings big enough to work as informal campsites. The best one near the 90 km mark has a picnic table, but there are no toilets, food storage, or other facilities.
Starting near the 90.5 km mark, the trail passes through an ancient rockslide. A spur trail leads to a viewing platform. In places, the trail builders have shored up the trail to create a smooth pass across large boulders. It’s a spectacular sight.


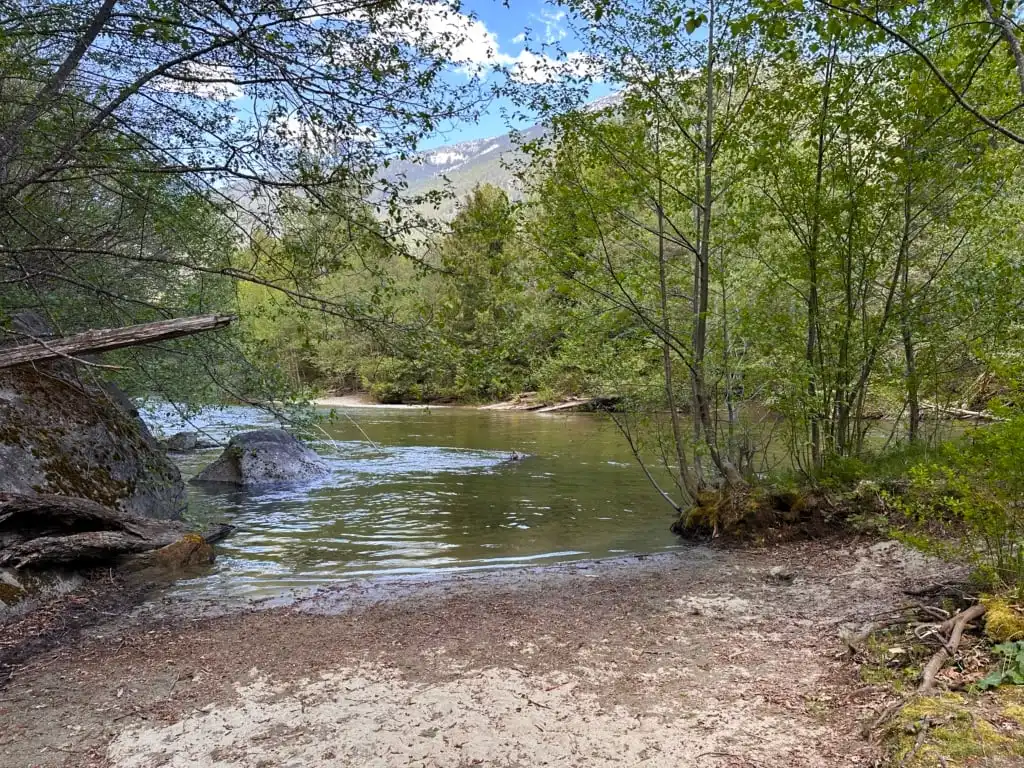
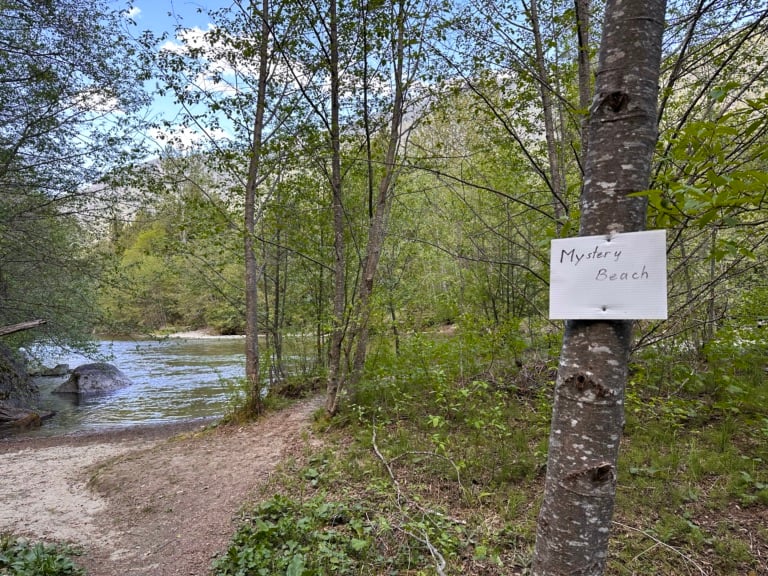
Around 91.7 km, the trail passes a sandy area called Mystery Beach. While the river is cold and fast, locals do dip here.

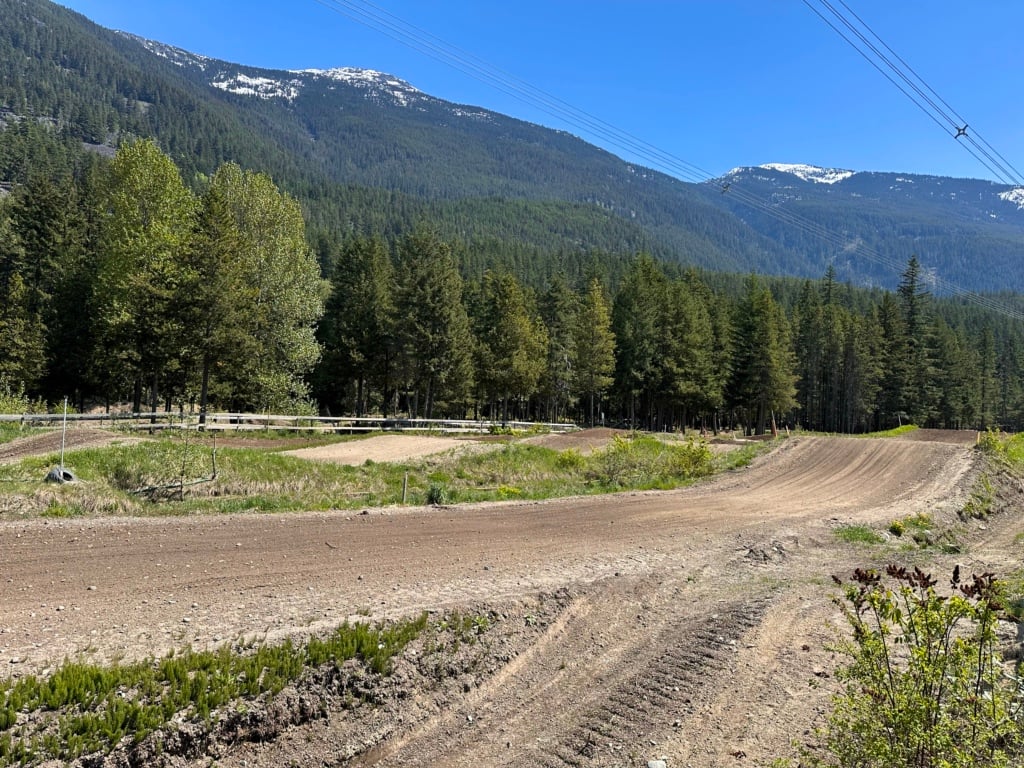
Emerge on the gravel Mount Currie Road at 92.3 km. There is an outhouse here. Turn left and follow the flat road past the oval of the Pemberton Speedway and the jumps of the Green River Motocross Track, both on your right. They both have outhouses.

Green River Motocross to Nairn Falls Provincial Park
Distance: 8.3 km
Elevation Gain: 260 m
Elevation Loss: 350 m
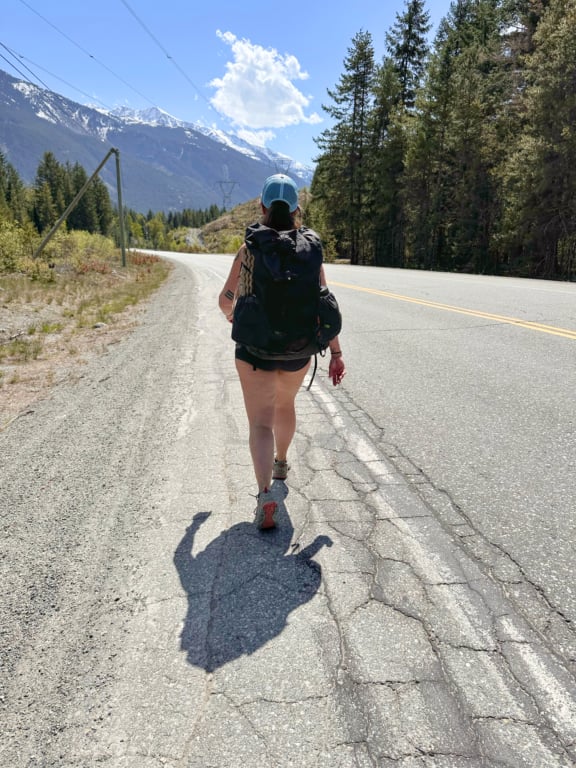
Turn right on Highway 99 at 94.7 km to start your last highway section. It’s 1.9 km long. The shoulder is moderately wide here, and traffic is lighter here than south of Whistler, so it’s not a high-stress section. Follow the Highway across the Soo River Bridge. Pass the Sea to Sky Soils Compost Plant – hopefully it’s not too smelly.

Immediately after crossing the Rutherford Creek bridge, turn left onto North Rutherford Creek Road at 96.6 km. Walk uphill on the steep gravel road, passing an outhouse. About 500 m from the highway, turn right onto the Sea to Sky Trail. This newer section provides an alternative route to the highway (which is scary to ride/walk), but does involve lots of short, sharp climbs and descents.
The trail climbs up onto a bluff with a view down to the river. Then it descends into an open and flat area under the power lines. Next, the trail goes into some beautiful cedar woods as it passes several creeks and the remains of an old cabin.


Stay on the trail as it swings close to the highway, then climbs up onto another bluff under the powerlines. Cross the entrance road to the gun range, and continue along the trail as it climbs under powerlines. Descend to Highway 99 and cross it at a railway crossing at 102.2 km.

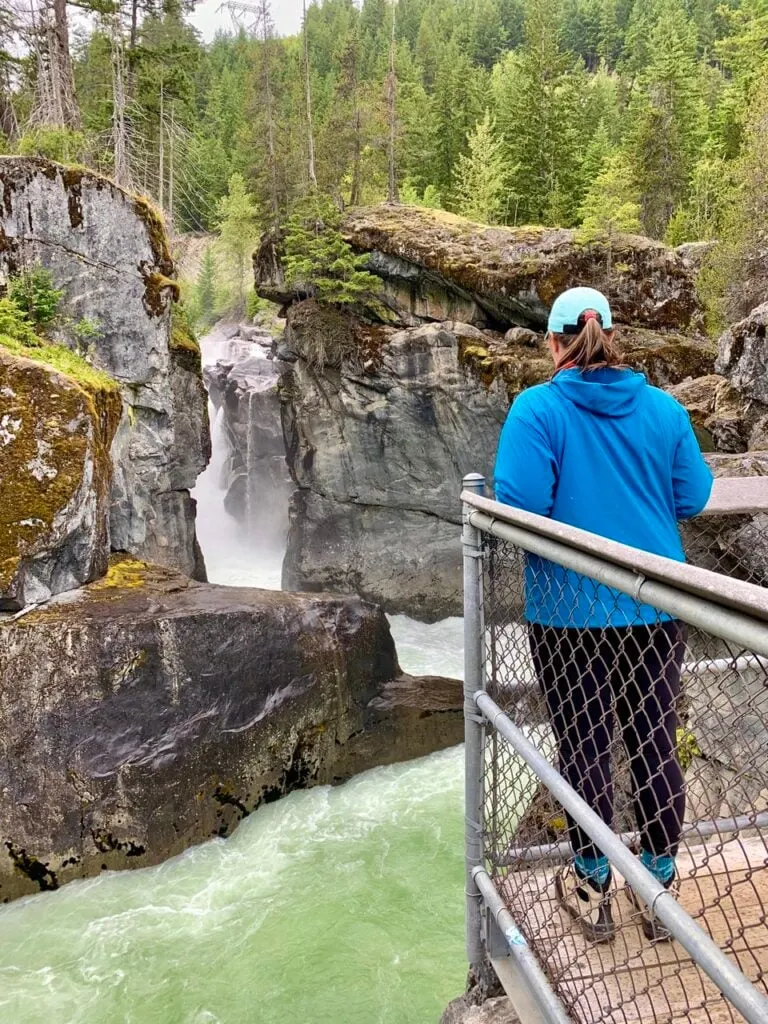
From here, a new trail parallels the highway on the east side and brings you into the parking lot for Nairn Falls Provincial Park at 103.1 km. The trail to the falls is one of my favourite hikes in Whistler.

Nairn Falls Provincial Park to Pemberton
Distance: 4 km
Elevation Gain: 95 m
Elevation Loss: 140 m
Head into the campground, then turn left to follow the northernmost campground road to the northeastern corner of the campground, where you rejoin the Sea to Sky Trail. You’ll pass several outhouses and a water pump.
The trail winds through the woods and zigzags up a hill. You’ll enter a zone with several mountain bike trails joining from the right – ignore them and stay on the main Sea to Sky Trail. The trail also passes through a challenging and wooded disc golf course.
At 105.7 km, reach One Mile Lake. A spur trail to the left leads to the beach, parking lot, and toilets. Turn right and follow the trail around the east side of the lake. At the north end of the lake, take the trail north to a bridge over Pemberton Creek.

Stay on the trail as it becomes Vine Road, passes McDonald’s, and then crosses Highway 99. Congratulations, you’ve finished all 107.4 km of the Sea to Sky Trail from Squamish to Pemberton.
If you’re really keen, the trail continues to the tiny town of D’Arcy. However, most of the trail is on a boring paved road, so I haven’t done it.
Sea to Sky Trail Itineraries
Hiking Itineraries
If you’re planning to hike the Sea to Sky Trail as a backpacking trip, stopping to camp along the way, it makes sense to do it as a four-day/three-night trip.
Here is my recommended itinerary for hikers:
Day 1: Sp’akw’us Feather Park to end of Paradise Valley Road: 26.5 km, 255 m gain, 160 m loss
Day 2: End of Paradise Valley Road to Cal-Cheak Campground: 24.9 km, 870 m gain, 495 m loss
Day 3: Cal-Cheak Campground to Riverside Dispersed Camping: 28.3 km, 765 m gain, 660 m loss
Day 4: Riverside Dispersed Camping to Pemberton: 27.6 km, 595 m gain, 970 m loss
You can also create other itineraries by using car shuttles or taxis, since there are lots of places to access the trail from Highway 99. See the camping and where to stay section below for accommodation options along the trail.
Biking Itineraries
Strong gravel riders or mountain bikers can ride the Sea to Sky Trail in a single day. However, it is a common bikepacking destination, and most bikepackers will ride in two days.
Here is my recommended itinerary for biking the Sea to Sky Trail:
Day 1: Sp’akw’us Feather Park to Cal-Cheak Campground: 51.4 km, 1125 m gain, 655 m loss
Day 2: Cal-Cheak Campground to Pemberton: 55.9 km, 1360 m gain, 1630 m loss
You can also stretch out the trip to three or even four days using the accommodation options listed in the camping and where to stay section below.
Camping and Where to Stay on the Sea to Sky Trail
There are lots of accommodation options along the Sea to Sky Trail, including campgrounds, hostels, and hotels. My guide to hotels in Squamish and my guides to camping in Squamish and camping in Whistler have more info.
Please note that I’ve included some dispersed and informal camping areas that have no facilities. In these areas, you will need to go to the bathroom the Leave No Trace way, filter water, pack out your trash, and store your food/toiletries/garbage securely in a bear hang or Ursack.
Below, I’ve got a breakdown of the major campgrounds and hotels arranged in the order you will encounter them along the trail.
Squamish Area Camping and Hotels
Downtown Squamish Hotels and Hostels: There are several hotels and the Squamish Adventure Inn Hostel in downtown Squamish between the 1.5 and 2.8 km marks on the trail. I recommend Howe Sound Inn and Brewing Company.
Mamquam River Campground: Located a few blocks east of the trail near Brennan Park Rec Centre at the 5.9 km mark. Both drive-in and walk-in sites. No water or showers. Reservations are required.
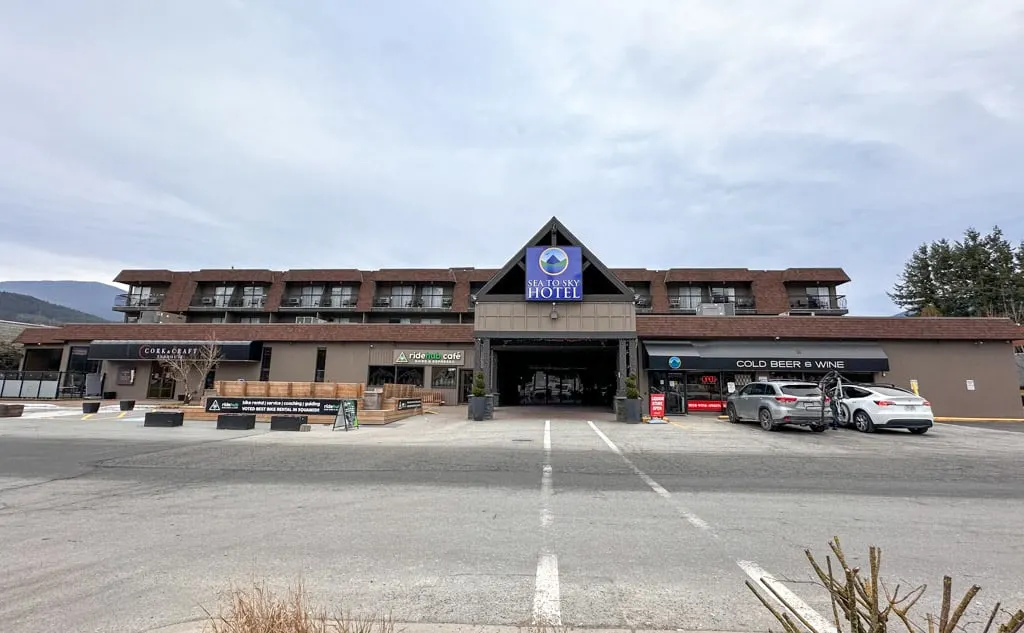
Garibaldi Estates Hotels: There are two hotels along the northern part of the paved trail through Squamish: The Executive Suites Hotel and Resort (8.7 km mark) is my top pick, but the Sea to Sky Hotel (at the 7.5 km mark) is right next to shops and restaurants.

MTN Fun Basecamp Campground: Located at the 10.9 km mark. Drive-in sites. Free hot showers. Reservations required.
Sunwolf Riverside Cabins: Hipster cabins and a famous brunch spot next to the Cheakamus River Bridge near the 16 km mark.
Paradise Valley Campground: Located at 19.7 km. It has a few walk-in sites and lots of drive-in sites. Pay showers. Reservations required.
End of Paradise Valley Road: An informal dispersed camping area with drive-in access next to the river at the 26.5 km mark. No toilets or other facilities.
Starvation Lake: There is an informal dispersed camping area near the north end of the lake at the 28.6 km mark. No toilets or other facilities.
Shadow Lake: There is an informal dispersed camping area north of the lake near Roe Creek at the 40 km mark. No toilets or other facilities.
Whistler Area Camping and Hotels
Cal-Cheak Campground: This drive-in campground at the 52.2 km mark has 55 first-come, first-served sites spread over three loops next to a creek and a river. It has bear-proof food lockers and outhouses, but no water taps or showers.
HI Whistler Hostel: Located near the 59.4 km mark in the Cheakamus Crossing neighbourhood.
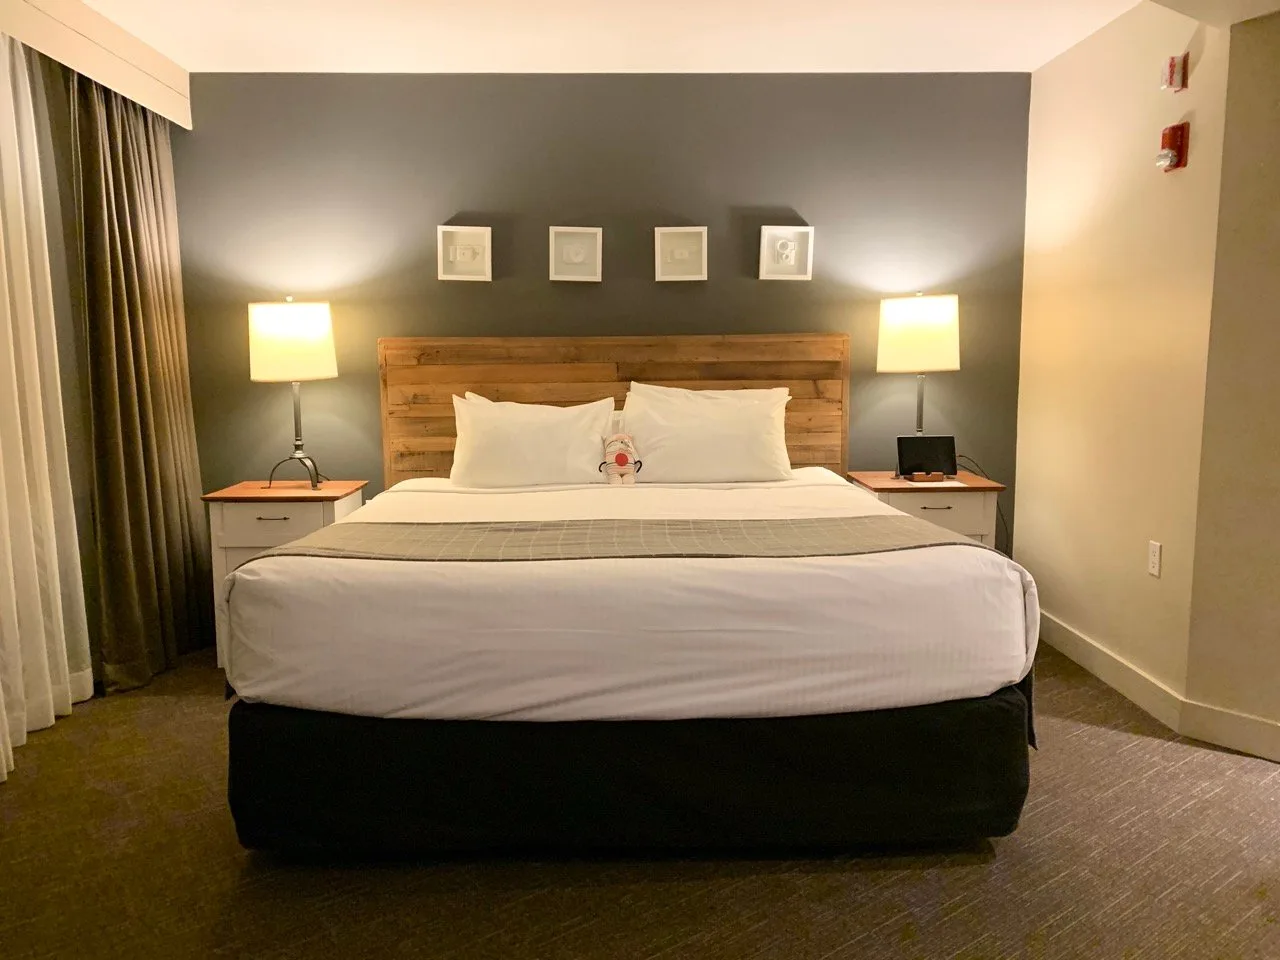
Whistler Hotels: There are lots of hotels located between the 65 and 70 km marks in Whistler Village and Creekside. My favourite is the Summit Lodge since it is quiet and has large rooms but isn’t too pricey (by Whistler standards anyway).

Parkbridge Riverside Whistler Campground: Take a 1 km detour off the trail at the 74 km mark in the Lost Lake Trail system to reach this luxury drive-in campground with showers. In addition to tent sites, they have log cabins and yurts. Reservations required.
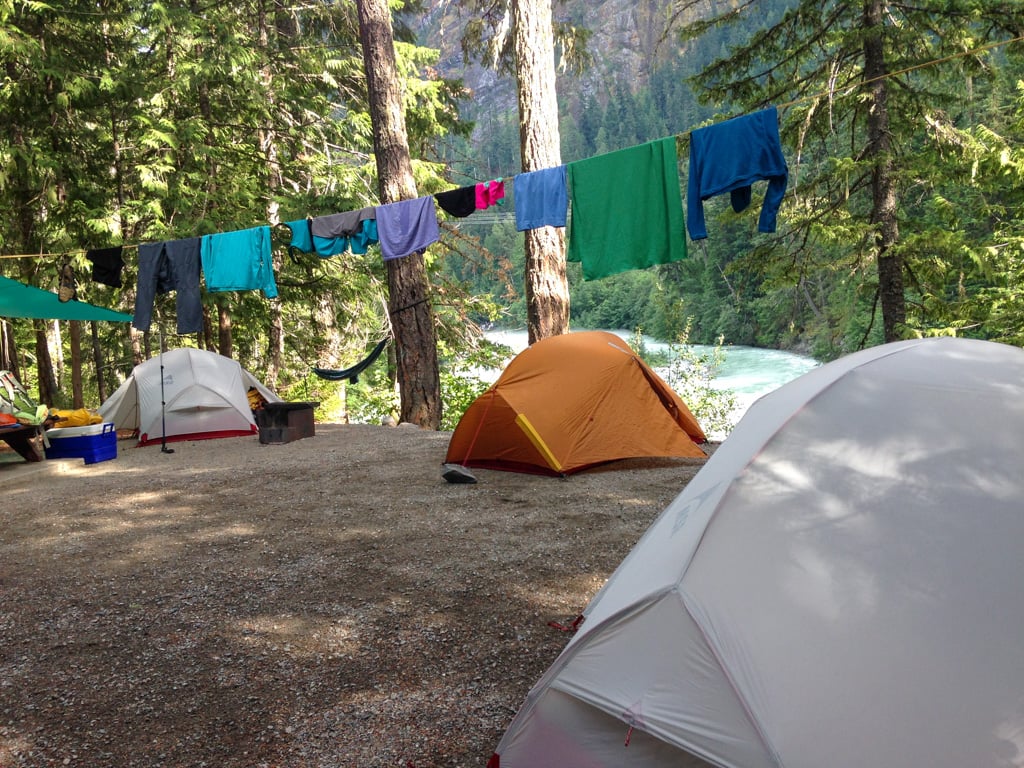
Riverside Dispersed Camping: There is informal camping along Riverside Road/Wedge FSR near the intersection with Highway 99 at the 80.4 km mark. You’ll find lots of vanlifers on the road and tents down along the Green River. There is an outhouse here, but no other facilities.
Pemberton Camping and Hotels
Gord’s Garden Dispersed Camping: There are several informal campsites with no facilities on the banks of the Green River along the Gord’s Garden section of the trail between the 89 and 91.5 km marks. The best one is near 90 km.
Nairn Falls Provincial Park: A big drive-in campground at the 103.1 km mark. It has outhouses and a water pump. Reservations required.

Pemberton Hotels: There are two hotels in downtown Pemberton near the 107.4 km mark. I recommend the Pemberton Valley Lodge, which is near the trailhead.
Tips for Hiking and Biking the Sea to Sky Trail
General Tips
Black bears are common in some sections of the trail. Carry bear spray in an easy-to-reach spot and know how to use it.
If you choose to use one of the informal camping areas, stow all food, toiletries, and garbage securely at night to protect them from bears, birds, and other critters. You can rig a bear hang in a tree, but I prefer to use an Ursack with a smell-proof liner.
There is cell phone coverage on most of the trail, but there are dead zones. Download offline maps ahead of time. Leave a trip plan with a friend or family member so someone knows where you’ll be.
Water Access on the Sea to Sky Trail
The trail passes lots of creeks, rivers, and lakes, so it’s usually fairly straightforward to get water. However, some smaller water sources will be dry in July, August, and early September. Unless you are filling from a tap or pump, you’ll need to filter or treat your water. I use a Katadyn BeFree since it is light, compact, and fast.

Below, I’ve identified the easiest places to fill up. These are all reliable year-round water sources.
- Sp’akw’us Feather Park (0 km): Water fountain next to the washroom building.
- Brennan Park Recreation Centre (5.7 km): Water fountain and washrooms inside.
- Cheakamus River Bridge (16 km): Access the river by walking through Sunwolf/Fergie’s.
- Cheakamus River Bridge (19.3 km): Access to the river on the north side of the bridge.
- End of Paradise Valley Road (26.5 km): Access to the Cheakamus River on the gravel flats at the north end of the informal camping area.
- Starvation Lake (28.6 km): Easy access to the west and north sides of the lake.
- Roe Creek (40.2 km): Water access next to a bridge, a few minutes north of Shadow Lake.
- Bungee Bridge Lake (49.8 km): Small lake on the west side of the trail just before the bungee bridge.
- Cal-Cheak Campground (52.2 km): Access to Callaghan Creek from the campground.
- Alpha Lake Park (64.5 km): Washroom building.
- Wayside Park (66.2 km): Washroom building.
- Whistler Village (69.2 km): Washrooms and water bottle refill stations at Olympic Plaza and Gateway Bus Loop.
- Lost Lake Passivhaus (70.7 km): Washrooms and water bottle refill station.
- Lost Lake Beach (72 km): Washroom building.
- Riverside Dispersed Camping (80.4 km): Access to the Green River.
- Gord’s Garden (89 to 91.5 km): Several spots to access the Green River.
- Nairn Falls Provincial Park (103.1 km): Water pump.
Join the Backpacking in BC Facebook Group
Hiking Tips
The trail is mostly hard surfaces (packed gravel, pavement, logging roads), so big hiking boots are overkill. I wore big boots for the section I backpacked and regretted it – I would do it in low-cut hiking boots or trail runners next time.
The Highway sections aren’t that long but, they can be intimidating. Wear bright clothing. Next time, I would wear my headlamp on blinking mode and a blinky bike light on the back of my pack.
In a few places, you can walk on the other side of the concrete Highway barrier from traffic, which helps. While walking facing traffic is the safest option, in some places the shoulder is wider on the other side of the Highway, so you might want to cross over. But do it carefully, of course.
Biking Tips
The trail is intermediate/challenging for most bike packers. The hike-a-bike section near Starvation Lake (including lifting your bike over the railway barrier) and a few steep, punchy climbs just south of Nairn Falls are the main obstacles.
You will also want to be a confident bike handler, especially fully loaded, because in places the trail passes close to steep drops off or river banks.
Unlike many other bike packing or cycling touring routes, there is a lot of semi-technical single-track. Mountain bikers will find this terrain easy, but those unused to riding off road will find it challenging.
Most of the trail is packed gravel single track, dirt roads, or pavement, making it great for gravel bikes and hard-tail mountain bikes. In general, you’ll want wider tires – at least 38 mm but ideally 45+ mm or 2″ MTB tires. You’ll also want gearing for the steep climbs.
A bikepacking set-up is ideal for the bumpy terrain. You could do it with panniers, but they will get jostled around a lot. Don’t go too heavy, or you will hate the hills.
The Highway sections are short, but in places the shoulder is narrow and traffic is fast. Consider bringing a blinky light and wearing bright clothing to keep yourself visible. Take extra care crossing the highway.

How to Get to the Sea to Sky Trail (And Between Trailheads)
There are a few ways to get from Vancouver to Squamish, Whistler, and Pemberton and between these towns.
Driving
It’s an easy (and beautiful) 1-hour drive to Squamish from Vancouver via the Sea to Sky Highway. It’s another hour to 45 minutes to Whistler, and then a further 30 minutes to Pemberton.

Biking
You can bike the Sea to Sky Highway from Vancouver to Pemberton, passing Squamish and Whistler, but it’s not for everyone – many cyclists will appreciate driving or taking the bus to skip the highway, especially between Vancouver and Squamish.
The section between Vancouver and Squamish is about 68 km with about 650 m of elevation gain. In some places, there is little to no shoulder. There are sharp turns, and traffic is very fast.
The section between Squamish and Pemberton is 93 km with 830 to 1050 m of elevation gain (depending on which direction you are going). It has more shoulder than the southern section, but there are still some tight spots.
Buses
There are four bus services you can use to get between Vancouver, Squamish, Whistler, and Pemberton. The bus stops in Squamish and Whistler are on the Sea to Sky Trail. In Pemberton, the bus stop is 1 km from the trail. Getting to Squamish or Whistler is easy, but you’ll have to transfer in Whistler to get to/from Pemberton.
- Epic Rides: Stops in Whistler and downtown Vancouver. Takes bikes on a rear rack or in a box/bag. No charge for bikes.
- YVR Skylynx: Stops at YVR Vancouver airport, downtown Vancouver, Squamish, and Whistler. Takes bikes if they are in a box or bag.
- Squamish Connector: Stops at downtown Vancouver and Squamish. Takes bikes on a rear bike rack if you call or email ahead of time to reserve.
- BC Transit: Public transit between Pemberton and Whistler via the 99 Commuter bus route. Takes bikes on a front rack for free, but space is limited.
Taxis and Ride Shares
Squamish and Whistler have taxi services you can use to get between trailheads or to road crossings along the trail. Depending on the distance travelled, it can get expensive.
Whistler and Squamish do not have Uber or Lyft. However, you may be able to find a ride via Poparide, a carpooling app that is popular locally.
Squamish Trailhead
The Squamish Trailhead is located at Sp’akw’us Feather Park in downtown Squamish. The Sea to Sky trail ends/begins here next to the ocean.
The best place to park overnight is the gravel lot next to the Adventure Centre on Loggers Lane. It’s right on the Sea to Sky Trail and is 3.5 km from the trailhead. You can walk, bike, or take a taxi to the trailhead. Here are Google Maps directions to Sp’akw’us Feather Park.
Pemberton Trailhead
There isn’t a designated trailhead in Pemberton since the trail technically continues onward to D’Arcy. However, since that section isn’t finished and is essentially just a road, I recommend starting or ending in Pemberton rather than continuing to D’Arcy.
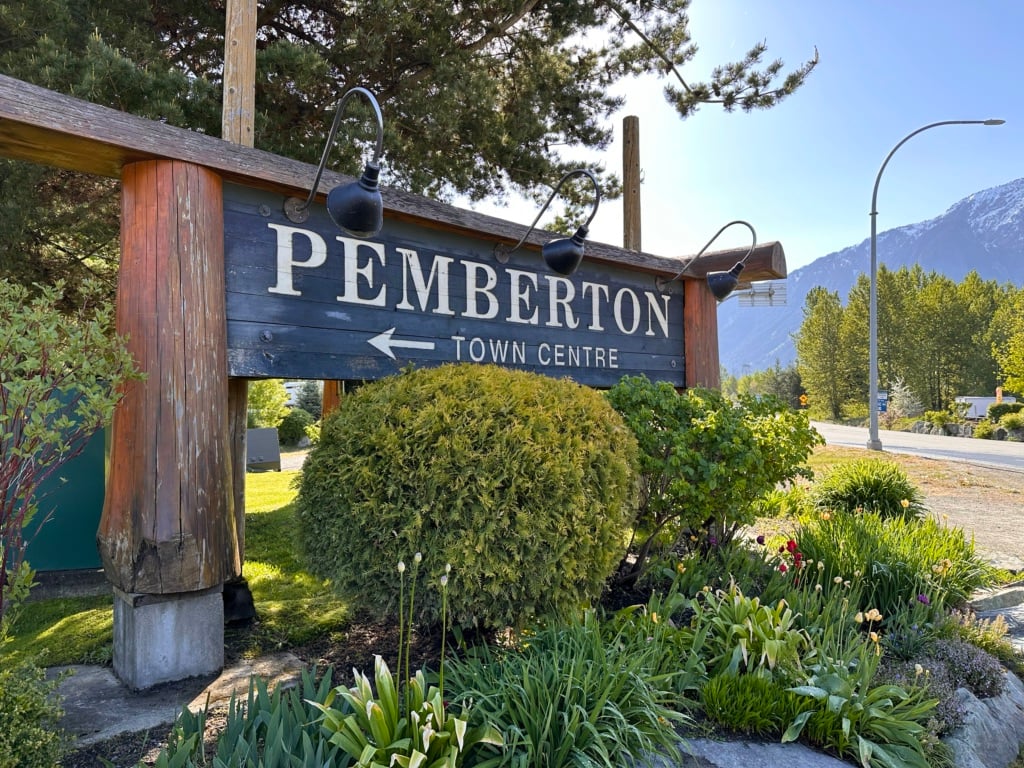
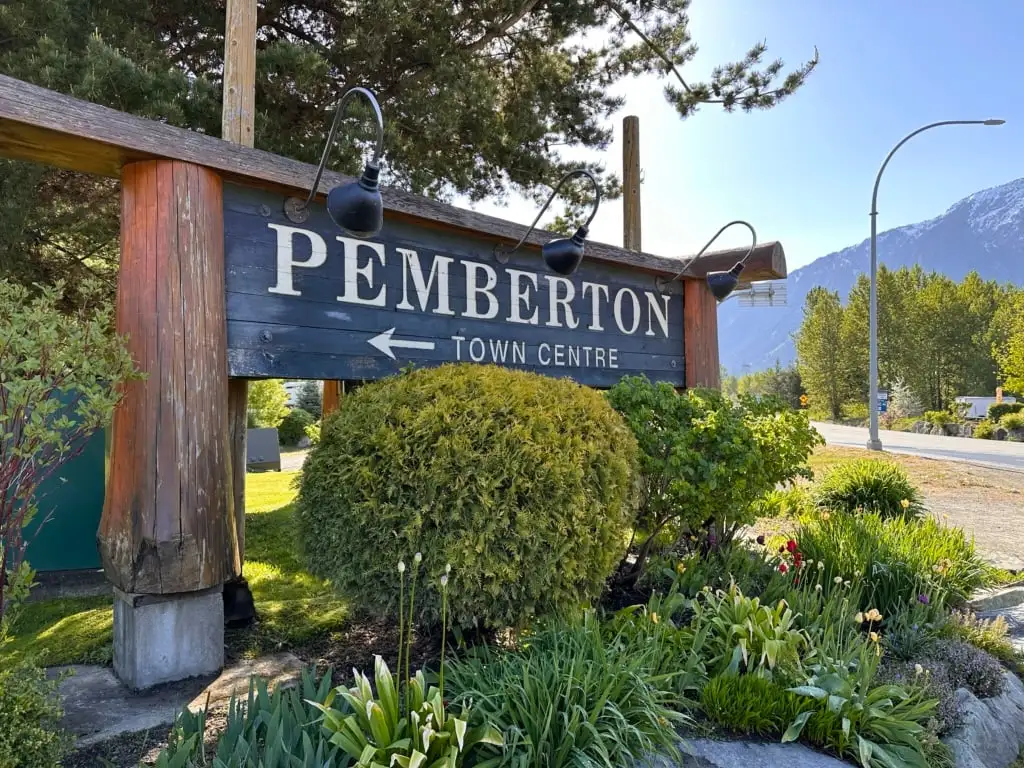
I consider the big “Pemberton” sign outside Mile One Eating House at the intersection of Highway 99 and Pemberton Portage Road to be the trailhead. It’s about 1 block from the trail, and there’s something cool about saying that you hiked or biked from downtown Squamish to downtown Pemberton. Here are Google Maps directions to the Pemberton sign.
I don’t have a great recommendation for overnight parking in Pemberton since we got dropped off. However, Pemberton’s bylaws allow anyone to park on the street for up to 72 hours, so you should be fine to leave your car in street parking. There is also a parking lot next to the Pemberton Skate Park on Pemberton Portage Road that could be ok to leave your car.
Sea to Sky Trail Review: My Opinion
I have to be honest: I have some mixed feelings about this trail (especially for hikers), and I don’t necessarily recommend it. However, it has enough redeeming features that I thought it was worth writing a guide. My opinion can be broken down into two broad themes:
It’s Not a Wilderness Trip
For the most part, the trail is surrounded by stunning natural scenery: forests, rushing rivers, lakes, etc. But the Sea to Sky Trail crosses Highway 99 and other car-accessible roads over 25 times. The farthest you will ever be from a car accessible road is 3 or 4 km on the Cal-Cheak to Trainwreck, Gord’s Garden, and Green Lake sections.
That’s great because it gives you flexibility for resupplying or getting on and off the trail. But it also means this is definitely not a wilderness experience. It’s not an urban trip either – it’s something in between. If you’re looking to detach yourself from the world and head into the bush, this trip isn’t that.
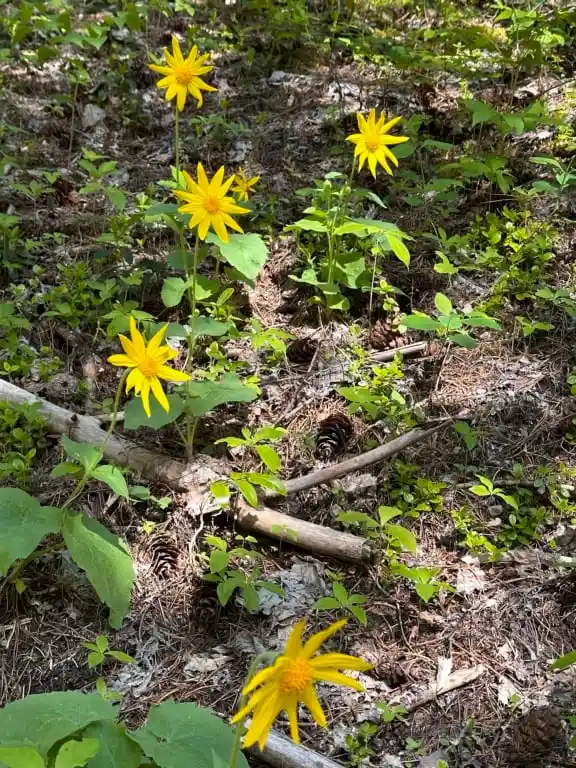
But I also loved the way that the Sea to Sky Trail shows you that despite being close to a rushing Highway, the entire corridor is full of wilderness. On my trips, I spotted lots of wildflowers, berries, old-growth trees, and animal tracks, often within sight or sound of Highway 99. It was great to slow down and enjoy walking and biking through a landscape that is usually rushed through in a car. So it’s not a wilderness experience… but there is still lots of nature.
And honestly, being close to population centres can also be great. You can stop for coffee, sandwiches, groceries, etc. You can have friends shuttle you and/or your gear between sections so you don’t have to carry heavy packs. An overnight in a hotel with a real bed and a shower is also possible!

It’s Better as a Bikepacking Trip Than a Backpacking Trip
In general, the Sea to Sky Trail is much better for cyclists. Even though it is bumpier and more technical than many bikepacking routes (which usually use gravel roads), it is quite scenic in places, and the single-track sections are a nice change of pace. Bikes can also get through the highway sections quickly.
As you can see in the surface breakdown at the top of this post, only 51.8 km of the 107.4 km is single-track trail. The rest of the trail is paved surfaces or hard-packed gravel roads, which are fun for cyclists but boring for hikers. Those hard surfaces are also killer on hikers’ feet.
That doesn’t mean that hikers shouldn’t do this trail. It just means that I recommend you understand what you’re signing up for. As well, if you’re doing it as a backpacking trip, I think the Sea to Sky Trail is best for spring or fall when other destinations are too snowy. Don’t waste prime summer weather on this trip.
Do I Recommend the Sea to Sky Trail?
For bikepackers looking for something a bit different than the usual gravel logging roads, yes, I recommend the Sea to Sky Trail. If you’re up for single track, a bit of hike-a-bike, and short, steep climbs, it’s great. The campground at Cal-Cheak (the typical overnight on a 2-day bikepacking itinerary) is also very nice.
For hikers, I don’t necessarily recommend the Sea to Sky Trail. If you’re already in Vancouver or the Sea to Sky region and are looking for a unique spring or fall trip, give it a go. Otherwise, I think there are so many other backpacking destinations in BC that are better.
The main reason I don’t recommend this trip for hikers is that there is too much road and paved trail. As well, many of the unpaved trail sections are under powerlines, which you’ll pass through quickly on a bike, but as a hiker, they get tiresome. And finally, the way that the campsites are spread out on the trail means you’ll have to do 20+ km days each day, which can be a lot for fully-loaded backpackers.
Final Thoughts
While the Sea to Sky isn’t my favourite trail, as a local, I do still have a soft spot for it. I love that the trail lets us see the plants, animals, and scenery that most people drive through the region without slowing down to appreciate. It’s also pretty cool to be able to go backpacking or bikepacking from the centre of one town to another!
If you’ve got questions about the trail, I’m happy to help. Hit me up in the comments.
READ NEXT:
- 30 Best Backpacking Trips in BC
- 60+ Things to do in Squamish
- Visiting Whistler, BC in Summer
- 22 Places to Camp Near Squamish
- 18 Places to Camp Near Whistler
- 10 Best Hotels in Squamish
- The Best Hikes in Squamish
- The Best Hikes in Whistler


- 10 Best Things to Do in Saskatchewan - March 22, 2026
- The Best Things to Do in Saskatoon - March 17, 2026
- Grasslands National Park Travel Guide - February 4, 2026