
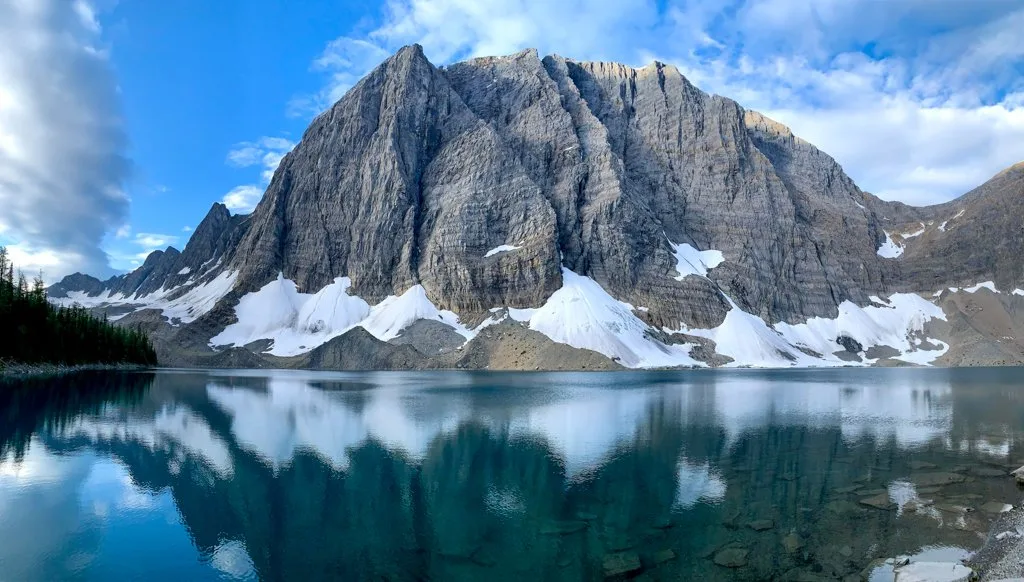
The Rockwall Trail in Kootenay National Park has been on my list for a LONG time. I had seen photos online of a trail stretching for kilometres beside towering cliffs and I knew I had to hike it. This August, I spent 5 days on the Rockwall Trail and it was insanely beautiful – easily one of the best backpacking trips I’ve ever done (and I’ve done LOTS). My favourite spots were Rockwall Pass and Numa Pass, but there were so many gorgeous areas – it’s easy to see why the Rockwall Trail is on many hiker’s bucket lists. In this guide, I’ll give you all the insider info you need to plan your own Rockwall Trail hike.
This Rockwall Trail guide includes:
- Rockwall trail maps
- how to get to the Rockwall Trail
- reservations for the Rockwall Trail
- how much it costs to hike and camp on the Rockwall Trail
- a detailed day-by-day description of the Rockwall Trail
- Itinerary options for the Rockwall Trail
READ NEXT: Rockwall Trail Packing List: Everything You Need to Bring
This is a sensitive wilderness area. Learn how to Leave No Trace to keep the wilderness wild. Make sure you are prepared by bringing the 10 Essentials. Get ready for adventure with this checklist of things to do before every hike.
Hey there: Some of the links in this post are affiliate links, which means I earn a small commission at no cost to you. Thanks for your support. -Taryn
Rockwall Trail Overview
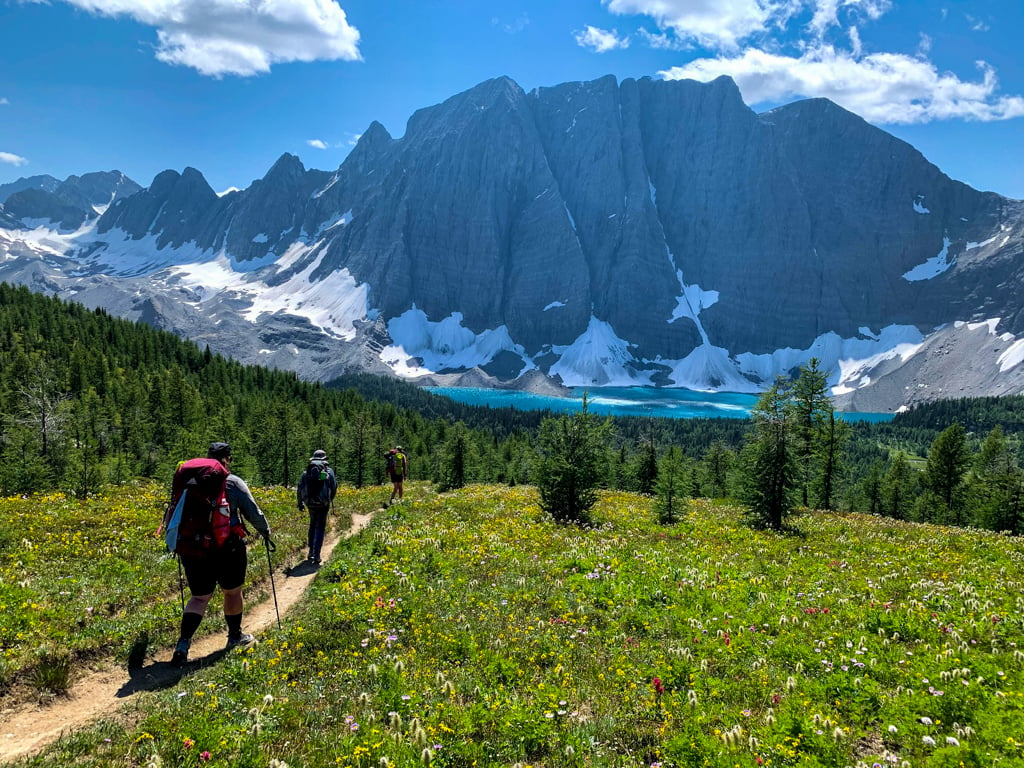
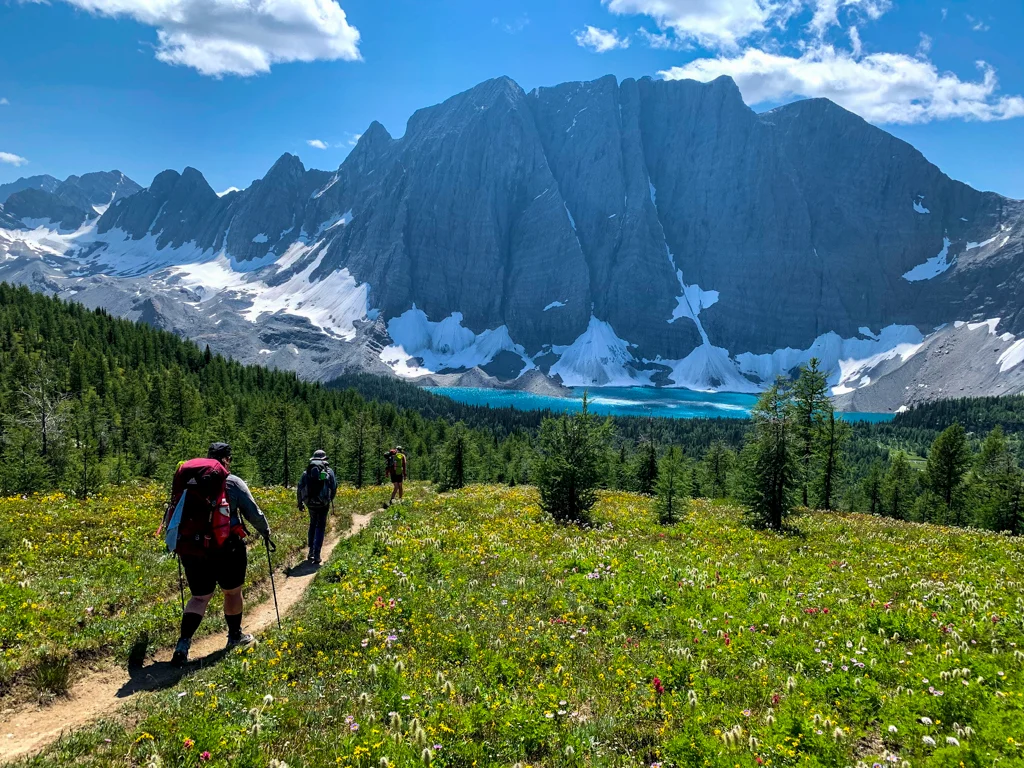
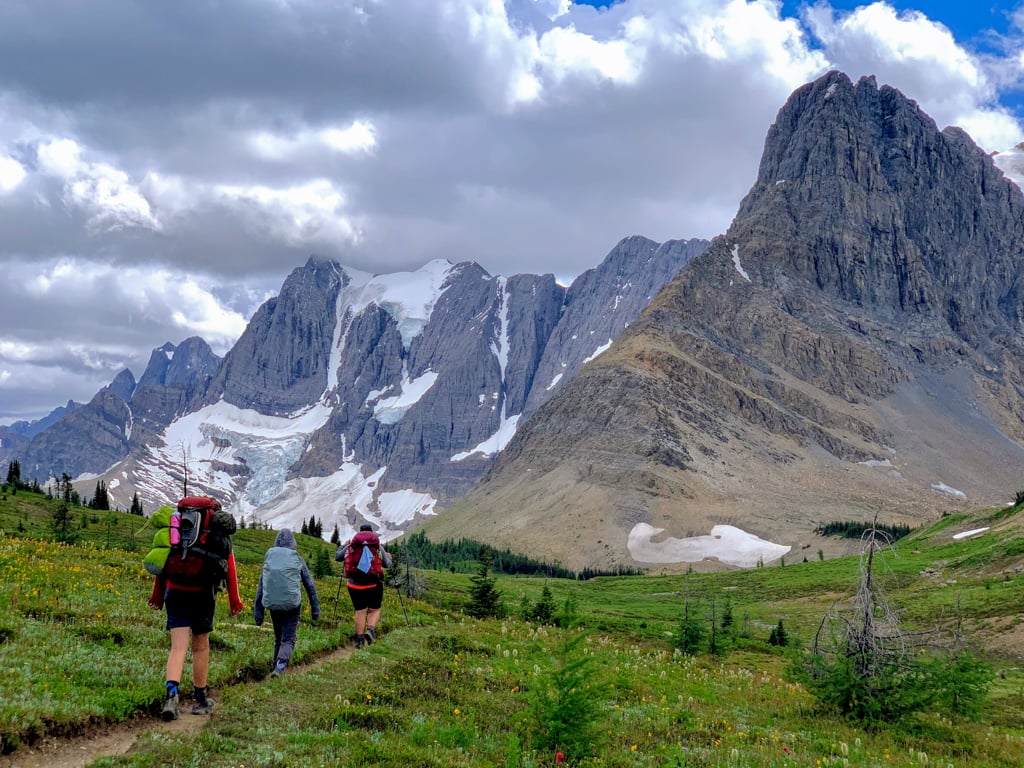
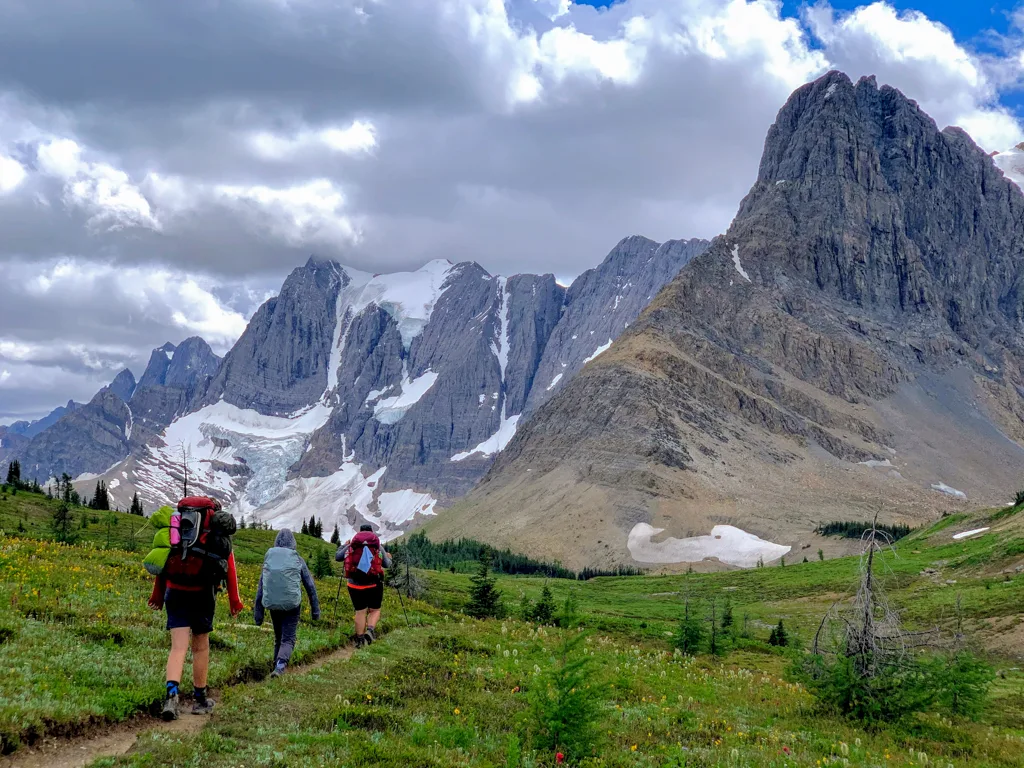
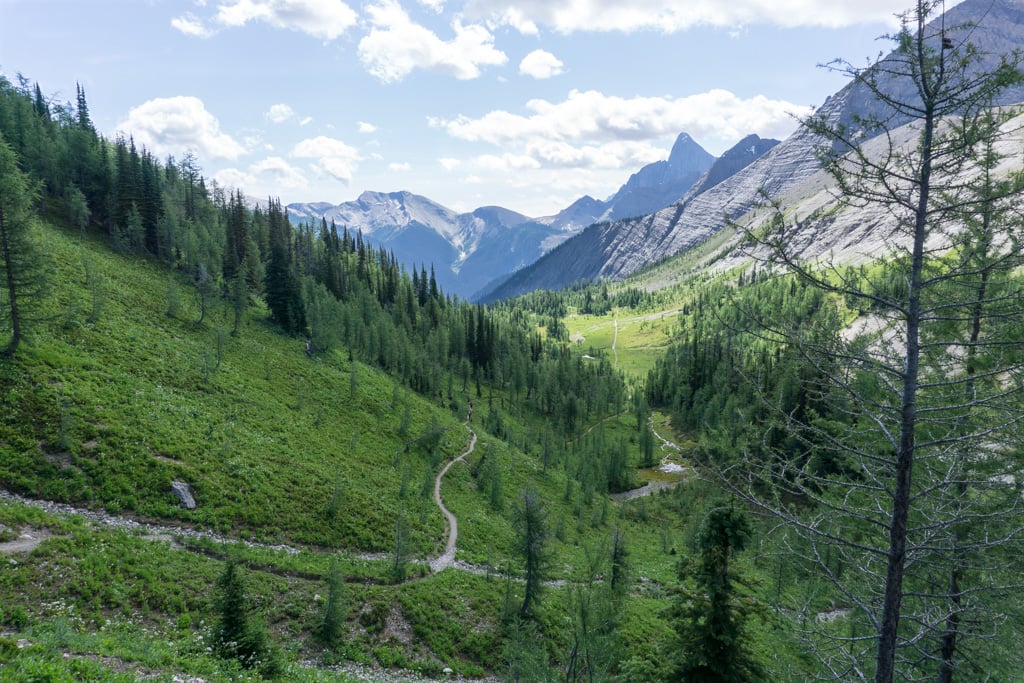
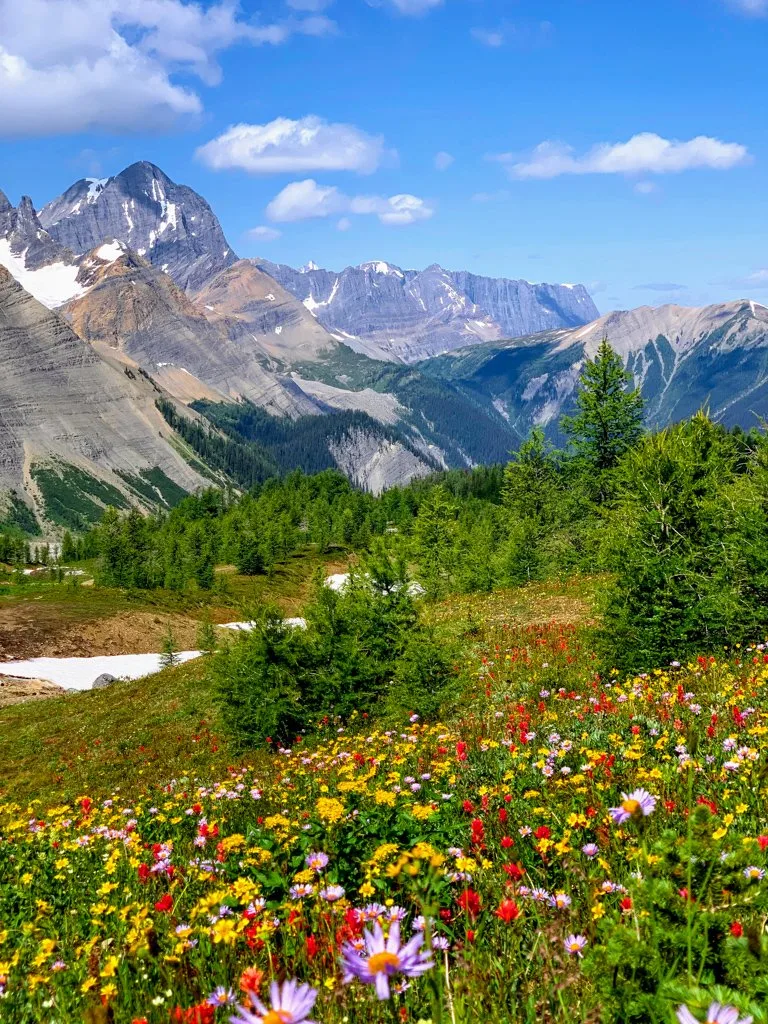
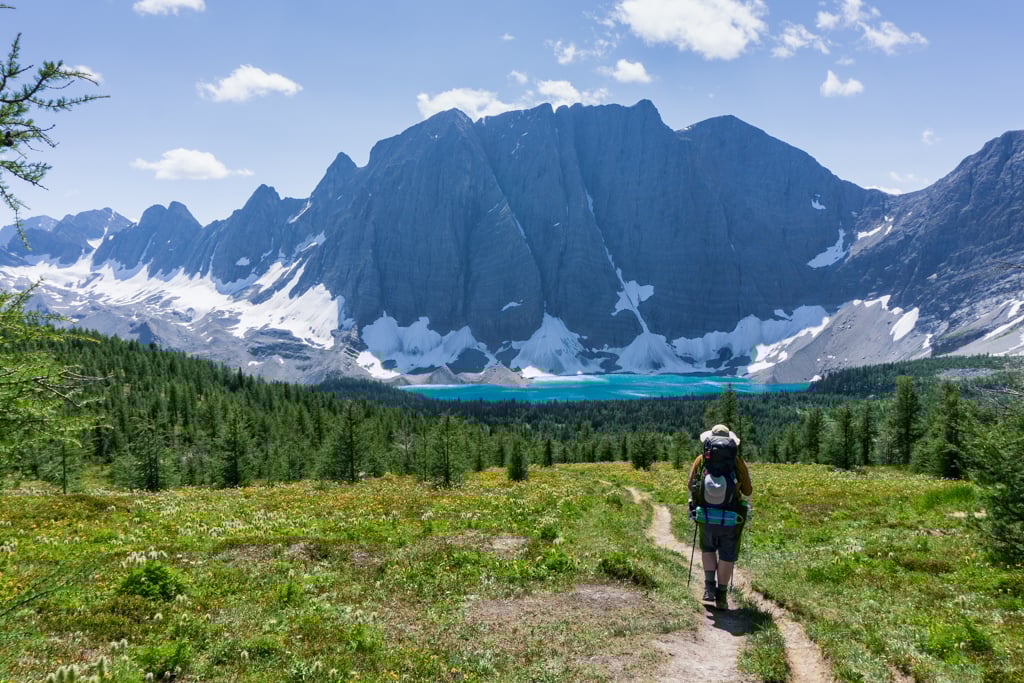
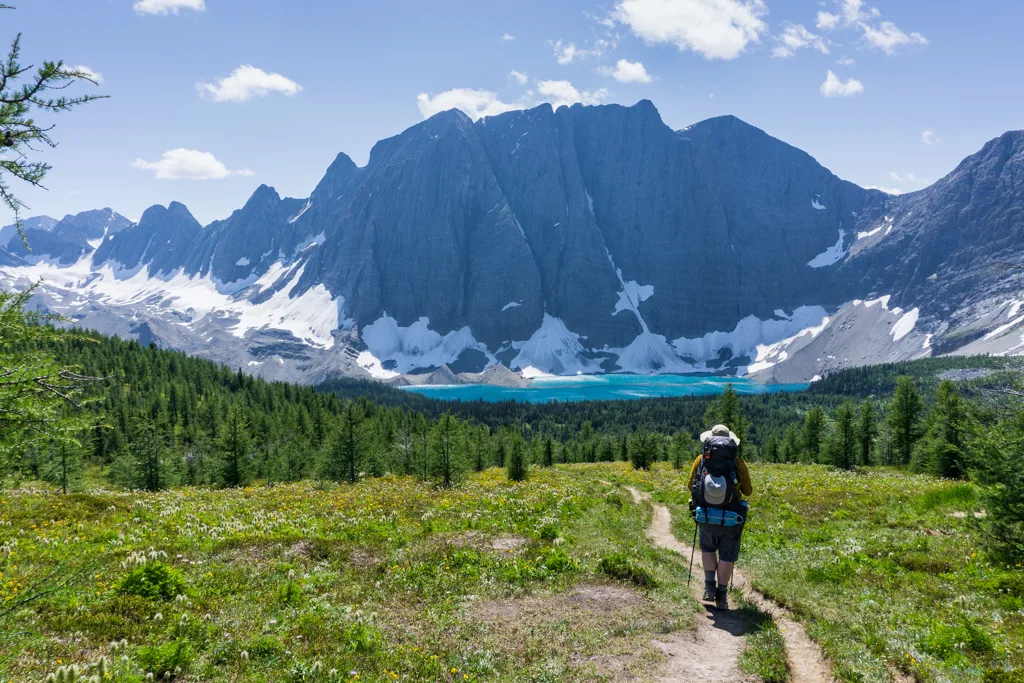
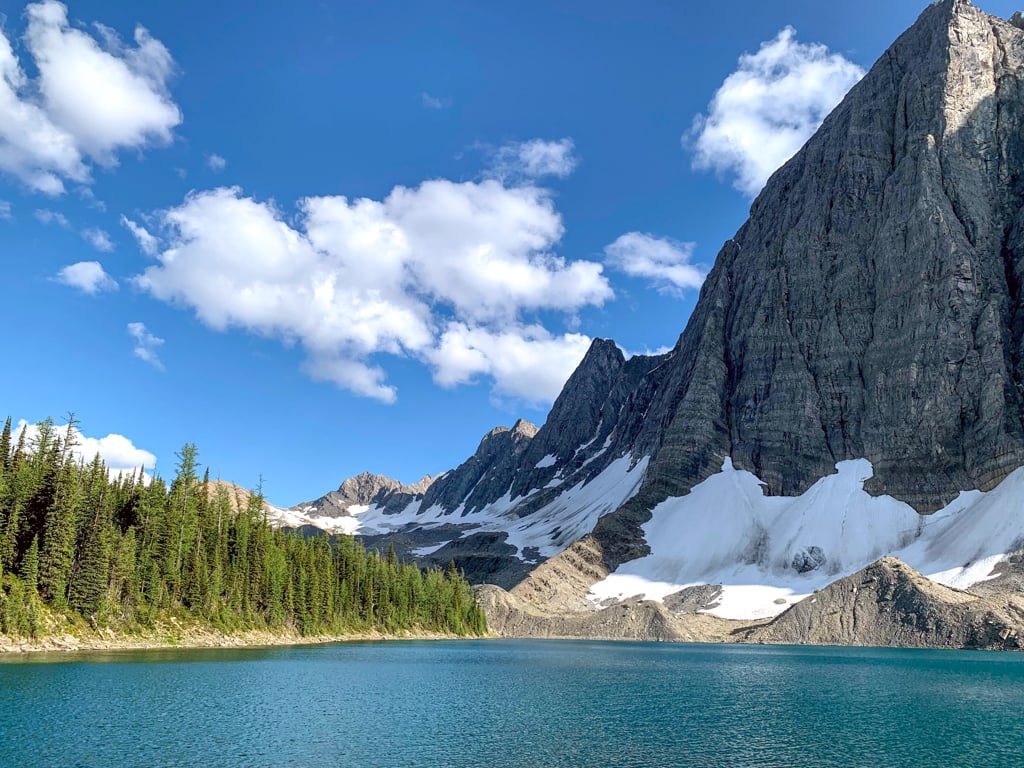
The Rockwall Trail is a 55km-long multi-day backpacking trip in Kootenay National Park in the Canadian Rockies. The horseshoe-shaped route travels beside a spectacular formation known as the Rockwall where sheer cliffs rise up to 900m above the landscape. You’ll walk past spectacular glaciers, beside gorgeous blue lakes, and through beautiful subalpine meadows.
The Rockwall Trail isn’t actually one trail – it’s a series of trails strung together. You’ll hike the Ochre Creek Trail, Helmet Creek Trail, Rockwall Pass Trail, Wolverine Pass Trail, Tumbling Pass Trail, Numa Pass Trail, and Floe Lake Trail.
Have questions about the Rockwall Trail? Join the Rockwall Trail Planning Facebook Group to connect with other hikers!

Rockwall Trail Basics
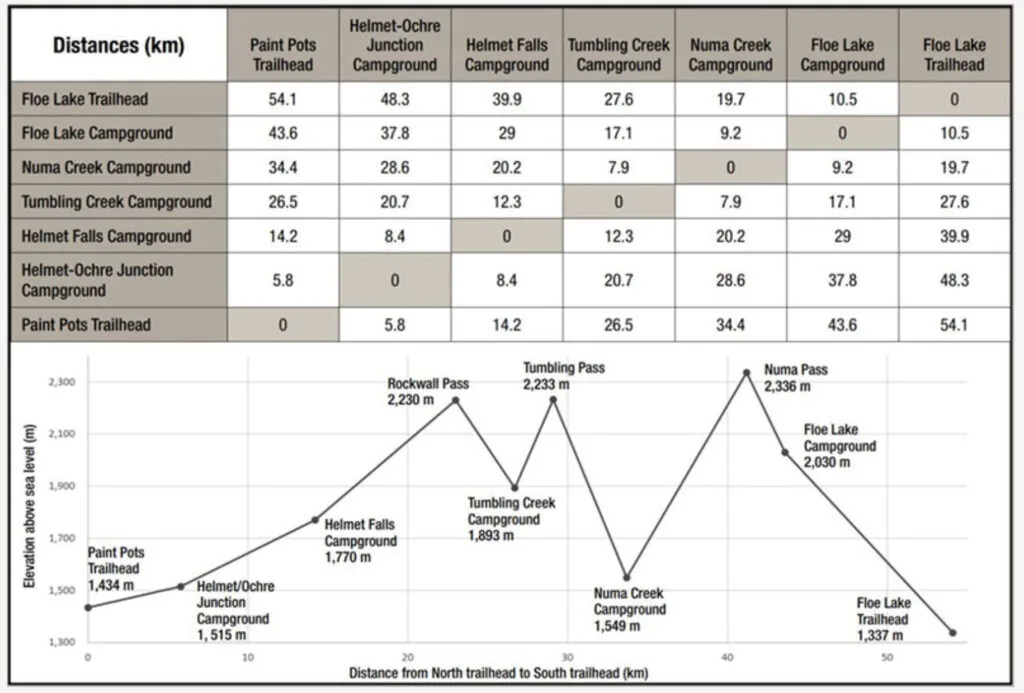
Trail Distance: 55km (one way between the Paint Pots and Floe Lake Trailheads).
Trail Elevation Gain: 2600m. However, the trail has numerous ups and downs as you climb over 4 passes. See the detailed trail description below for a better idea of how much elevation and loss you’ll tackle on the Rockwall Trail.
How long does it take to hike the Rockwall Trail: Most people hike the trail in 4 or 5 days, but 3 day trips are also common. The trail is increasingly popular with trail runners, who blitz the whole route in one long day.
Best Time to Hike the Rockwall Trail: The trail is snow-free between late July and mid-September. You can also hike in mid-July and late September, but there is usually a bit of snow. Between October and mid-July the trail has enough snow that avalanches are a hazard and Parks Canada does not accept campground bookings, so it’s not a good time to hike. If you want to see the larch trees after their needles turn golden, plan to hike in mid-September.
Rockwall Trail Weather: The Rockwall Trail sits high up in the Rocky Mountains. In July and August, the average high temperature is 21C and the average low is 2C. The mountains create their own weather and short rainstorms are common. Use my picks for the The Best Weather Apps for Hiking.
Rockwall Trail Cost: About $91.75 per person, but travelling in a group is cheaper (see Cost section below).
What to Bring on the Rockwall Trail: Everything you need to be self-sufficient. Use my Rockwall Trail Packing List to get your gear prepped for the hike.
Wildlife on the Rockwall Trail: This is bear country and both black bears and grizzly bears live in the area. Carry bear spray, hike in a group, and make noise, especially through brushy sections. Use the campground kitchen areas and store all your food and toiletries in the bear lockers at night. Read my bear safety tips for backpackers for more advice.
Rockwall Trail Rules: Dogs are permitted on leash. No drones. No firearms.
Further Resources: Check the backpacking section of the Kootenay National Park website as well as the trail conditions and bulletins pages. The best guidebook for the trail is Don’t Waste Your Time in the Canadian Rockies by Kathy and Craig Copeland. (It’s worth the price if you plan to do other hikes in the Canadian Rockies.)

Rockwall Trail Maps
Hiking the Rockwall Trail is straightforward, with signs at all junctions. For most hikers, the basic Kootenay National Park hiking map from Parks Canada is all you’ll need.
I brought a copy of the Kootenay National Park Map by Gem Trek Maps. It’s a topographic map with all the trails and campgrounds. I found it really helpful to visualize the terrain (and elevation gain) for each day.
We also used the Gaia GPS app on our phone. It was helpful to know where exactly we were on the trail (and how much further we had to go!) All Trails+ is also great.
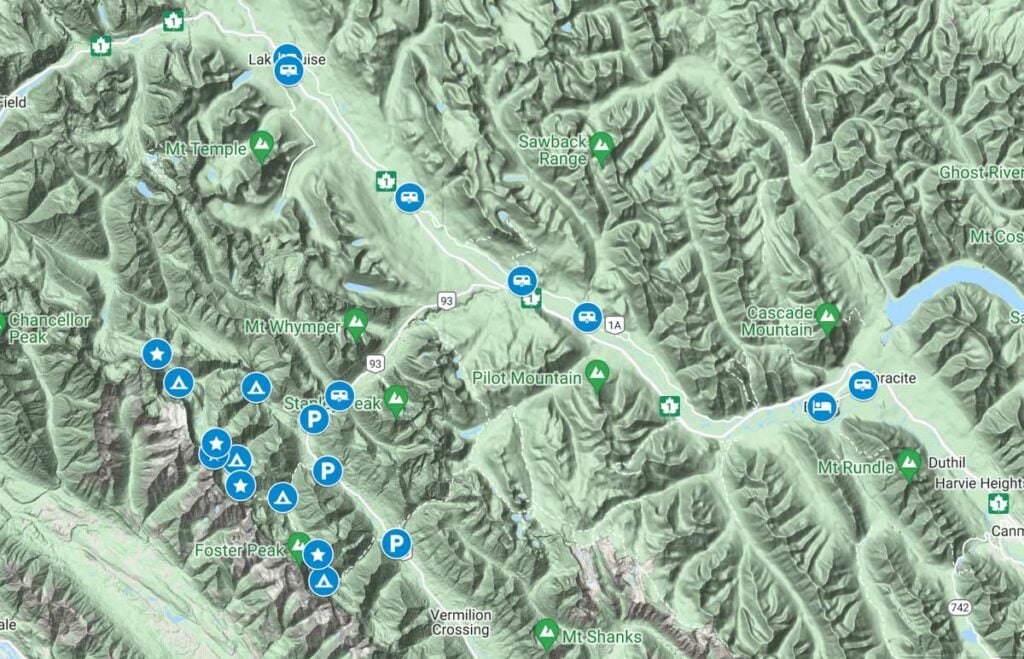
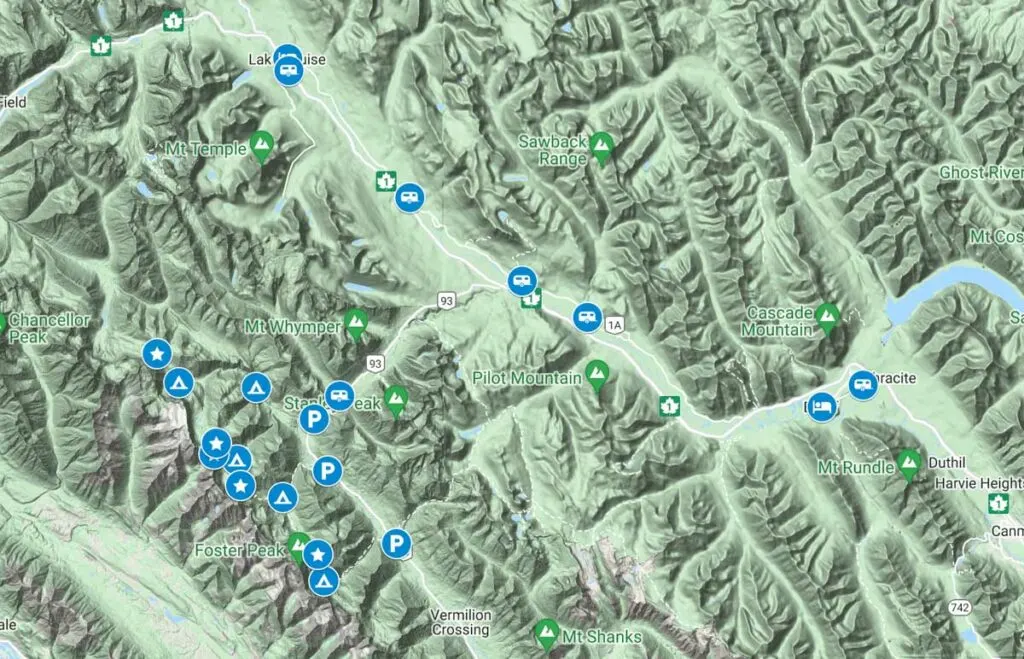
I also made a custom Google map for you to help you plan. It includes all the places I mention in this post. Zoom in and click around to see everything. (But don’t use it on the trail since there’s no cell service and this isn’t a good map for navigation.)
How to Get to the Rockwall Trail
The Rockwall Trail is located in Kootenay National Park in British Columbia, just over the border from Alberta. The trail traverses the mountains on the west side of Highway 93. There is no public transport to the trail so you will need to drive yourself.
If you need to rent a car, it’s easiest to fly into Calgary airport and rent one there. You can also rent cars in Banff. I use Discover Cars since it lets you compare prices from lots of different rental companies. That way you know you’re getting the best deal.
Rockwall Trail Driving Directions
There are two main trailheads for the Rockwall Trail: Paint Pots and Floe Lake. You can also access the trail from the Numa Creek Trailhead.
All trailheads are on the west side of Highway 93 and are a 30-45 minute drive from Lake Louise or Banff and about 1 hour from Radium Hot Springs.
Parking can be limited at all three trailheads, so arrive early to get a spot. We couldn’t find a spot at Floe Lake and ended up parking on the side of the highway. Google maps links for driving directions for all three are below.
- Paint Pots Trailhead driving directions
- Floe Lake Trailhead driving directions
- Numa Creek Trailhead driving directions
How to Get Between Trailheads on the Rockwall Trail
The Paint Pots and Floe Lake trailheads are 13km apart. There is no shuttle service between the two trailheads so you’ll need to figure out your own transportation. My group had two cars, so we left one at each trailhead.
I’ve heard biking between the two parking lots is not bad since the highway shoulder is wide.
Hitch-hiking is also a good option as you can just approach other hikers in the parking lot and ask if they will drive you to the other parking lot. If you are going to hitch-hike, do it at the beginning of your trip so you can hike back to the car. (And so you don’t smell! 🙂 )
Want to connect with other hikers to arrange a car shuttle between trailheads? Join the Rockwall Trail Planning Facebook Group!
Where to Stay Near the Rockwall Trail
To get an early start on the trail, it’s best to book accommodation nearby. Banff and Lake Louise are the closest towns with lots of hotels. It’s worth spending a few days in the area before or after your hike. Here’s everything you need to know about visiting Lake Louise.
If you want to camp, Kootenay National Park’s Marble Canyon Campground is a few minutes from the trailheads. You could also camp in Banff National Park. The Castle Mountain, Protection Mountain, and Johnston Canyon campgrounds are the closest to the Rockwall Trail. But the campgrounds at Lake Louise and Tunnel Mountain in Banff are also not too far away.

Rockwall Trail Reservations
You need to make a reservation to hike the Rockwall Trail. To reserve, visit the Parks Canada website. Rockwall Trail reservations for 2026 will open on January 26, 2026 at 8:00 am Mountain Time.
Be ready to make your reservation right at 8:00 am as popular dates book up in under 5 minutes!
You will need to book each individual campsite when you make your reservation. So prepare a few different itinerary options and dates.
You can make a reservation for up to 10 people in a group and up to 3 tent pads. Park rules specify that you can only have one tent per pad and that the maximum number of people per pad is four. Our friends (a family of four) did the trail in a four-person tent and it just barely fit on the tent pads.
Have the following information ready to go when you make your Rockwall Trail reservation:
- preferred itinerary and backups
- the number of tent pads you need.
- the number of hikers in your group, plus their full names and emergency contact info
- credit card
If you didn’t get a reservation, all is not lost. Keep checking Parks Canada’s website. People cancel and spots do open up. Or join the Rockwall Trail Planning Facebook Group to connect with other hikers who may have spots available on their reservations.
READ NEXT: How to Make Backcountry Camping Reservations in BC
Rockwall Trail Costs
There are a few costs associated with hiking the Rockwall Trail: wilderness permits, National Park entry passes, and reservation fees.
Wilderness permits for backcountry camping cost $12.75/person/night.
You also need a National Park entry pass to park your car at the trailheads for the Rockwall Trail. You can buy one at any of the mountain national parks, either at a drive-up entrance booth or a visitor centre. National Park entry passes are $10.50/person/day. If you already have a Parks Canada Discovery annual pass it covers people in the same car and saves you some money if you plan to spend more time in the National Parks.
Reservation fees are $11.50 per reservation (and you can reserve for up to 10 people on one reservation).
Assuming a four-day trip, a solo hiker would pay at total of $91.75 to hike the Rockwall Trail. Per person costs decrease if you hike in a group since you can share the cost of national park entry passes and reservation fees.


Which Direction to Hike the Rockwall Trail?
You can hike the Rockwall Trail in either direction. When I was researching my trip, most of the trip reports I found were from south to north (Floe Lake to Paint Pots). I couldn’t find a lot of info online about why people usually go direction that besides it being the “traditional way”. And when we were hiking the trail, most other hikers seemed to be going south to north.
We hiked the trail from north to south (Paint Pots to Floe Lake). We enjoyed doing it that way for one main reason: To avoid a long and steep climb with heavy backpacks and no shade on the first day. Our first day starting from Paint Pots was long but not too steep and it was a much easier introduction to the trail than the Floe Lake Trail. Going from north to south we also saved the best campsite (Floe Lake) for last and did most of the steep climbs in the shade of the trees rather than on exposed terrain.
READ NEXT: Rockwall Trail Packing List: Everything You Need to Bring
Rockwall Trail Description
Paint Pots to Helmet Falls
Distance: 15km | Elevation Gain: 300m | Elevation Loss: 50m | Time: 4.5-5.5 hours
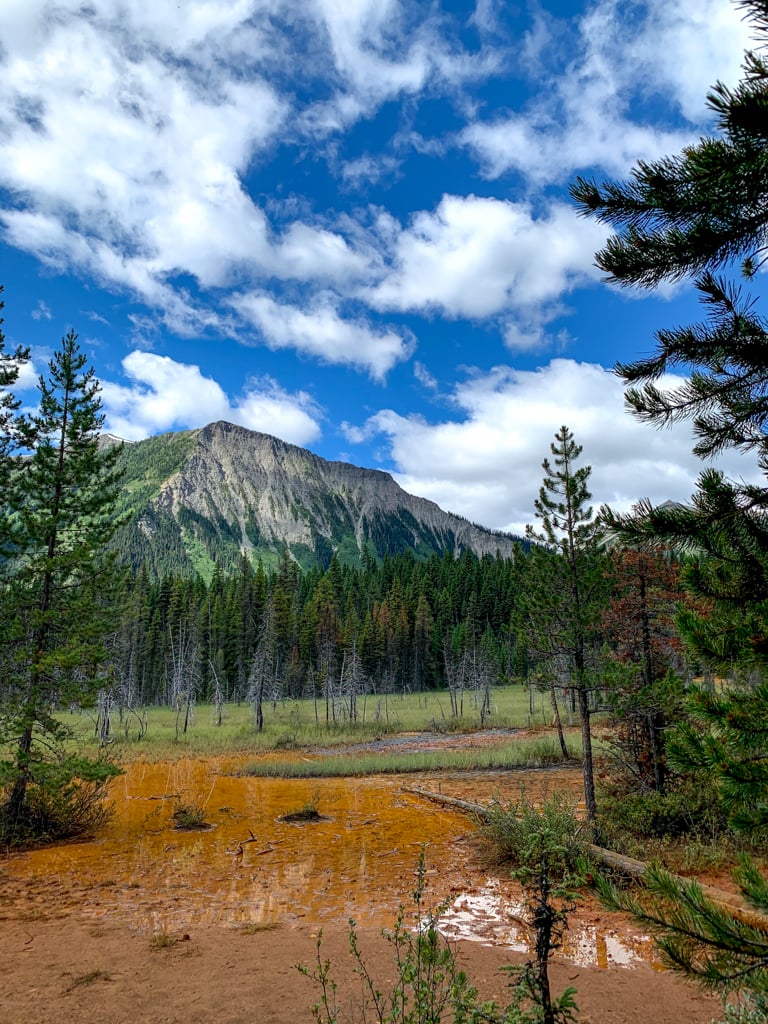
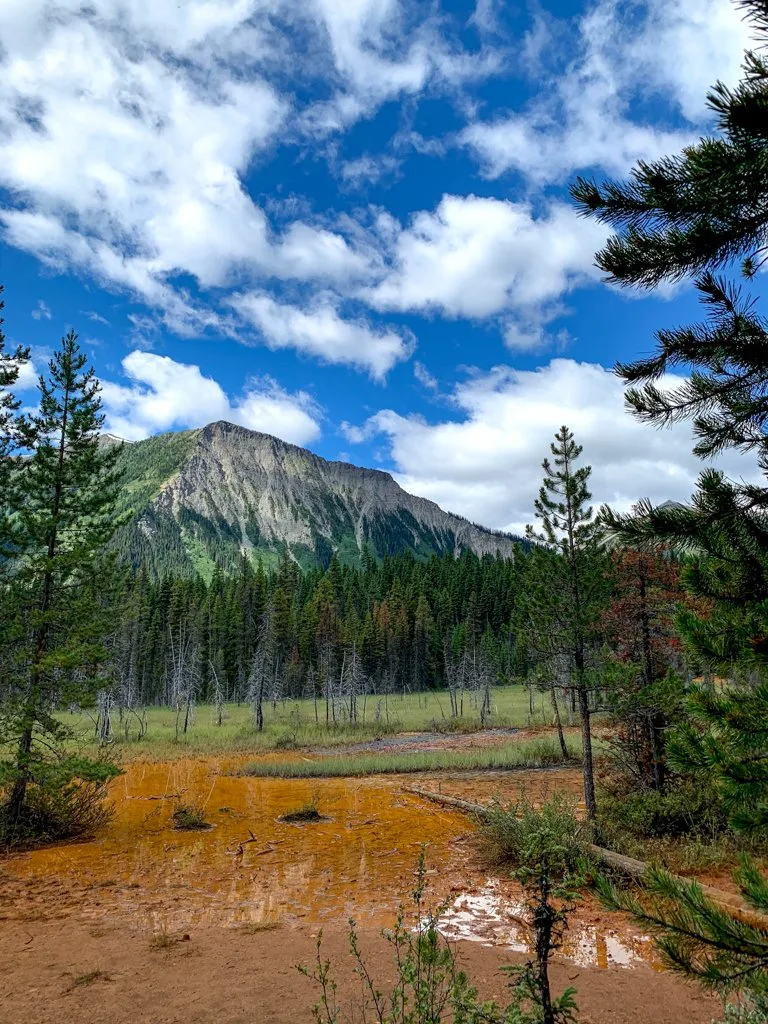
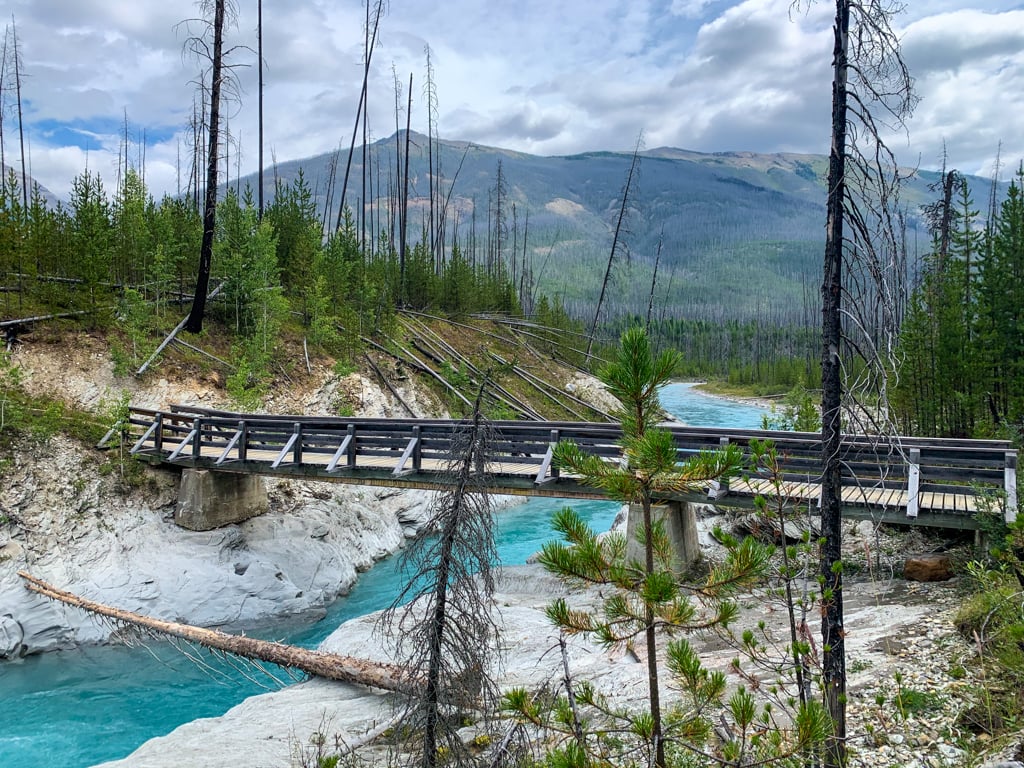
From the Paint Pots trailhead, follow the flat Ochre Creek Trail through the trees to a big bridge across the Vermillion River. On the other side, walk through a wet area to Ochre Spring about 1km from the trailhead. The spring and nearby stream have an orange-red tint thanks to high mineral content. Most day-trippers stop here so the trail ahead will be much quieter.
The next section of trail is through the forest. About 3km from the car, emerge into an open avalanche path. Soon after re-entering the forest, reach a junction. The trail to Tumbling Creek Campsite goes left and your trail to Helmet Falls campsite goes right. You could take the trail to Tumbling Creek and skip the first campsite at Helmet Falls, but that would mean missing out on Rockwall Pass, which is one of the most scenic spots on the trail.
Follow the Helmet Creek Trail to the right, continuing through the forest. Around 6km from the trailhead, cross Ochre Creek on a bridge and arrive at the Helmet/Ochre Junction Campsite. This small campground is a good place to take a break.
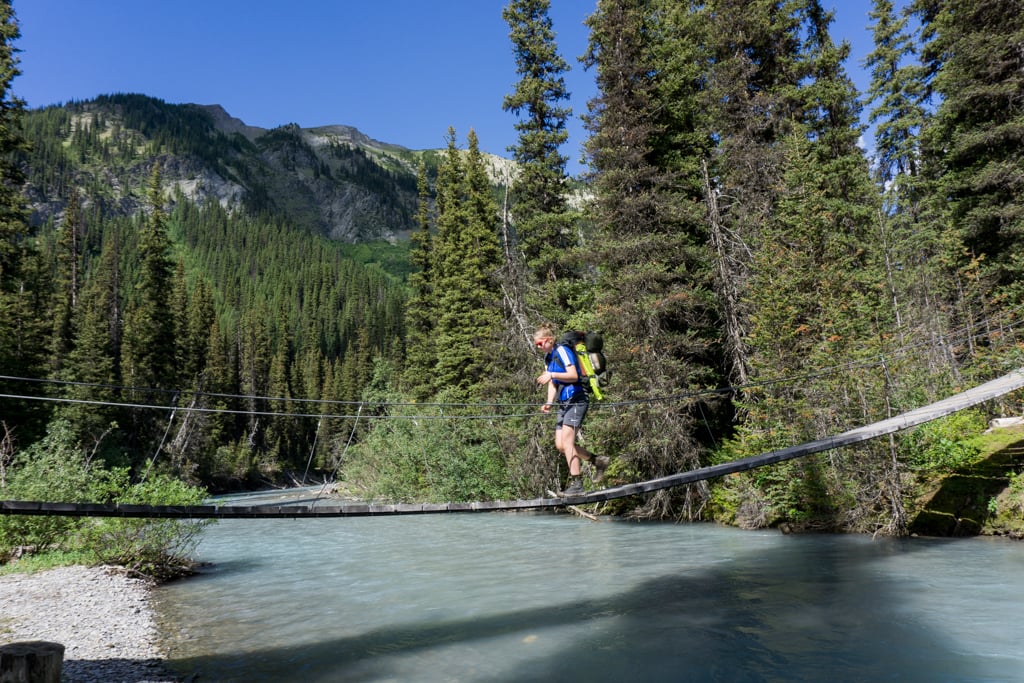
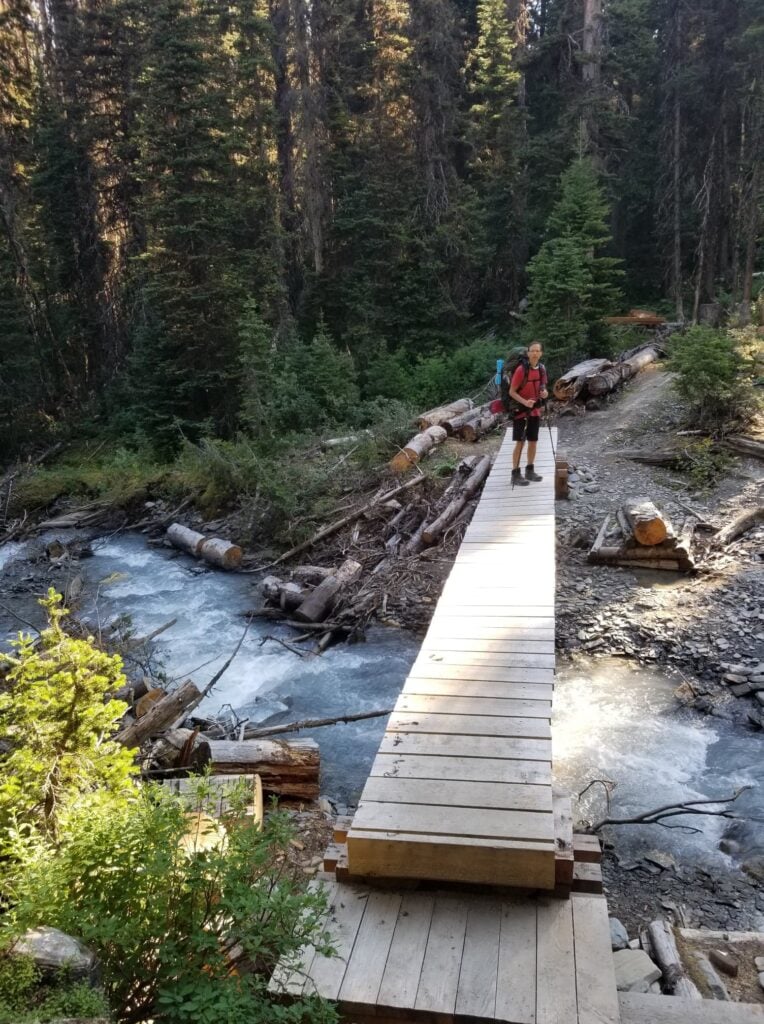
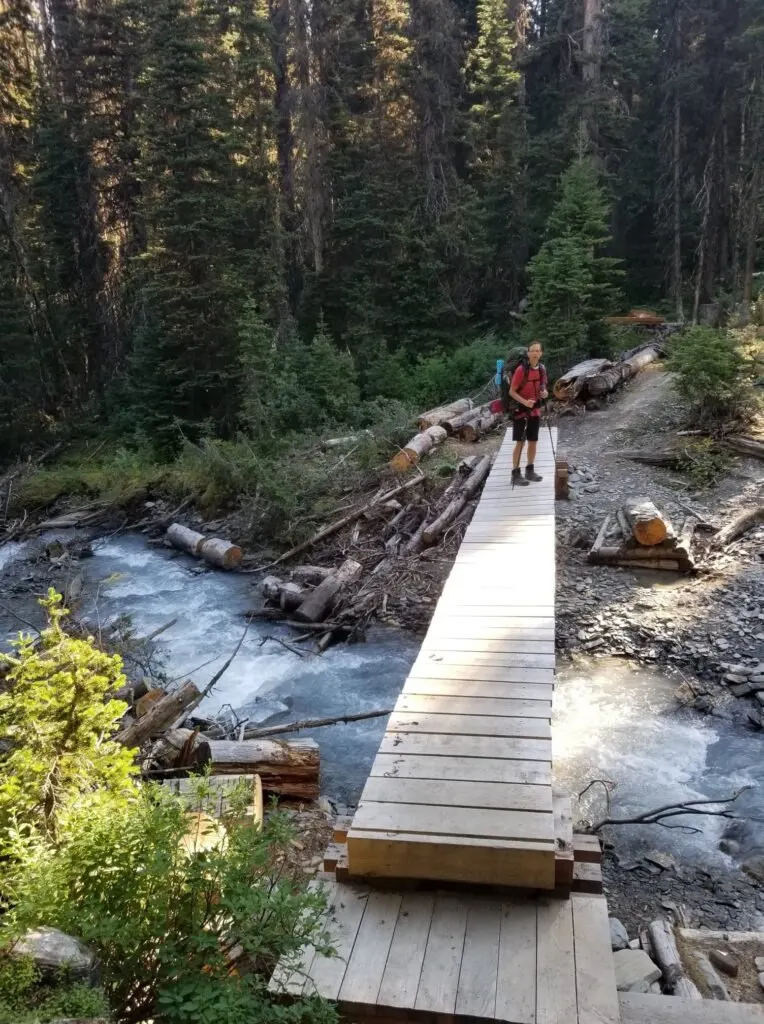
Leaving the campground ignore the side trail to Ottertail Pass and cross Helmet Creek on another bridge. The next section of trail is through the forest high above the banks of Helmet Creek. Around the 12.5km mark, cross Helmet Creek on a suspension bridge. From here the forest begins to open up slightly as you walk through several avalanche paths. Look for patches of wildflowers and enjoy views of the mountains in this section.

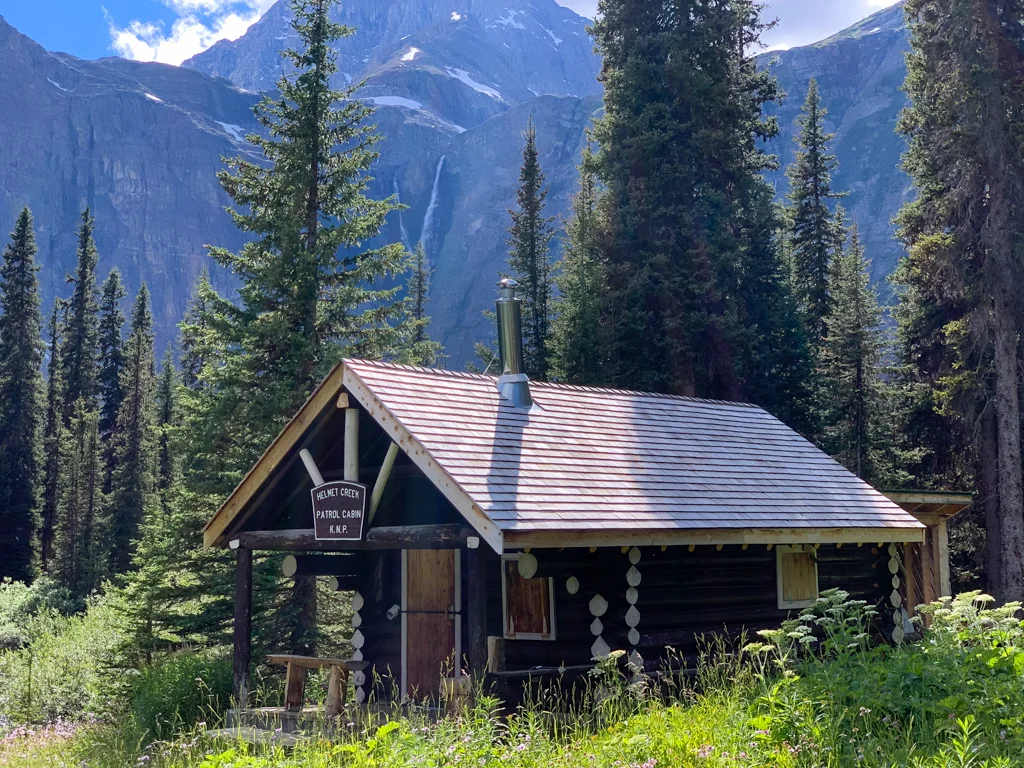
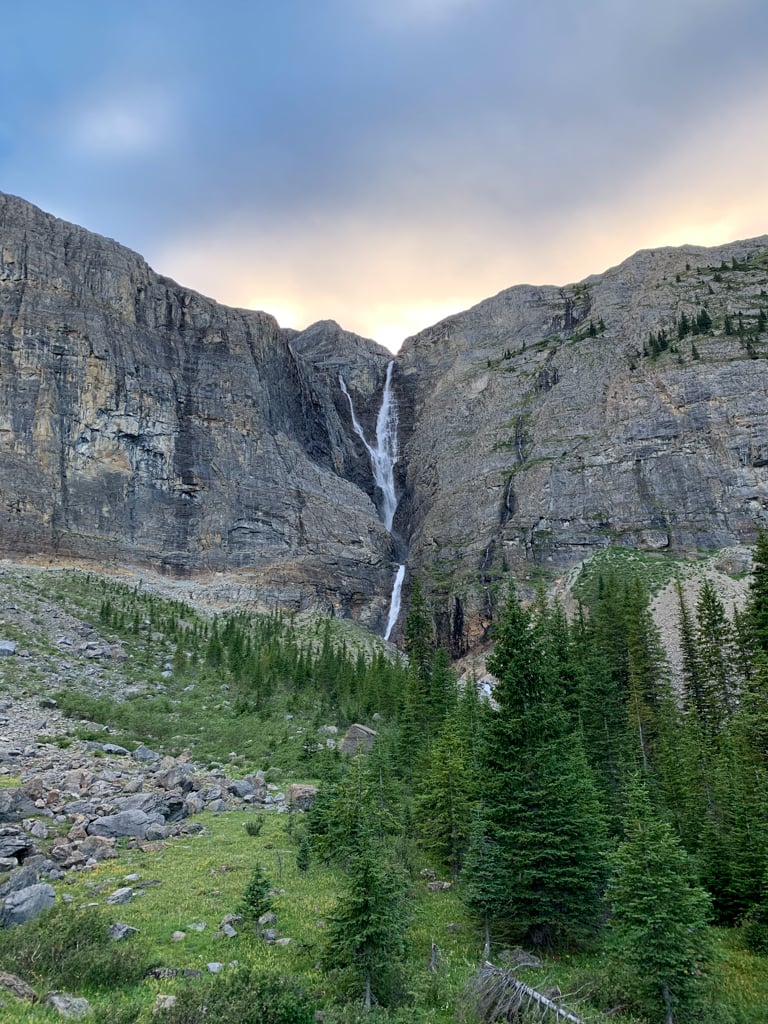
At about 15km, reach a junction with the Goodsir Pass Trail where your route stays left. A few minutes later, pass the Helmet Warden Cabin. Cross a small creek, then arrive at the Helmet Falls Campground. You can glimpse the falls through the trees from the campground, but for a close-up view follow a faint trail for about 500m. The 2888m-tall bulk of Limestone Peak towers overhead.


Helmet Falls to Tumbling Creek
Distance: 12km | Elevation Gain: 640m | Elevation Loss: 500m | Time: 5-6 hours
From the campground, follow the Rockwall Pass Trail towards the waterfall. Watch for the main trail going left across a small creek. (If you go straight you’ll dead end at Helmet Falls.) For the next three kilometres the trail switchbacks steadily uphill through the forest, gaining 400m. The first two kilometres are the steepest (with some good views of Helmet Falls), but eventually, the grade lessens. There are lots of wildflowers in mid-August here.

When you emerge into an open area at the top of the climb you will be able to look south and see the length of the Rockwall for the first time. After stopping to enjoy the view, head downhill. In the next 2km, you’ll lose about 200m of elevation as you descend through meadows to a creek crossing about 5km from Helmet Falls Campsite. If you need water, fill up here as this is the last reliable water source before Tumbling Creek Camp.

From the creek crossing, you’ll gain 240m over the next 4.5 km. Cross the creek, then climb a gravel slope and traverse a rocky glacial moraine past a small turquoise pond. Your route then heads back into the trees and climbs steadily in a rising traverse. As you get higher, you’ll get better views of the Rockwall beside you and a large unnamed glacial lake at its base.
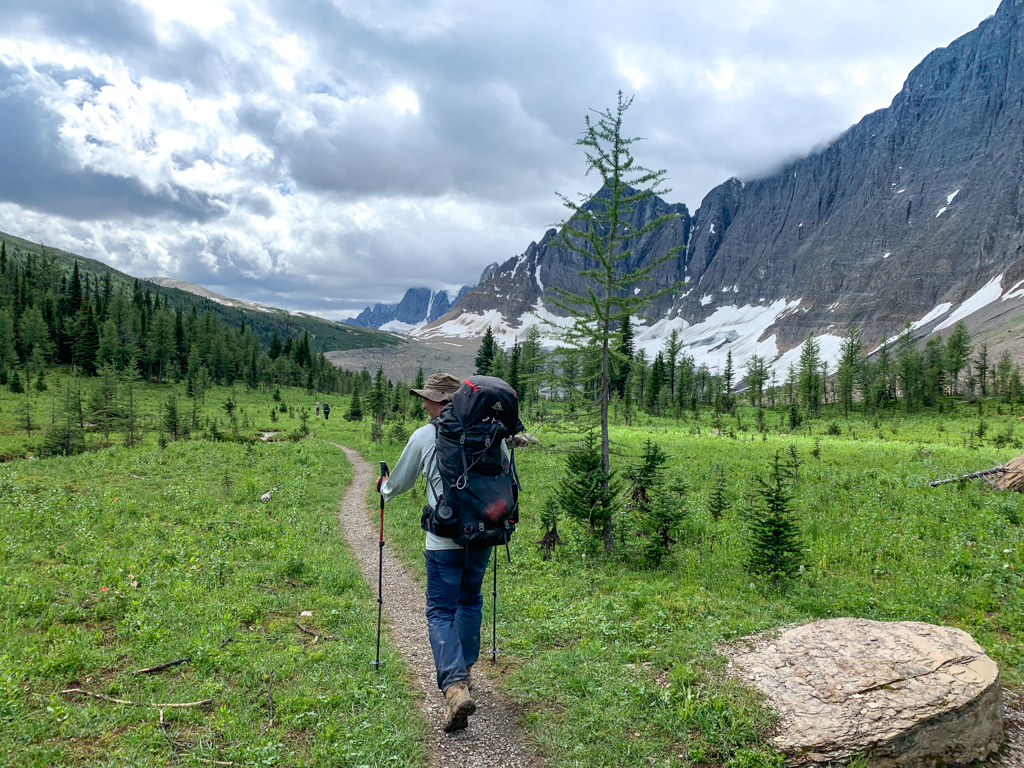
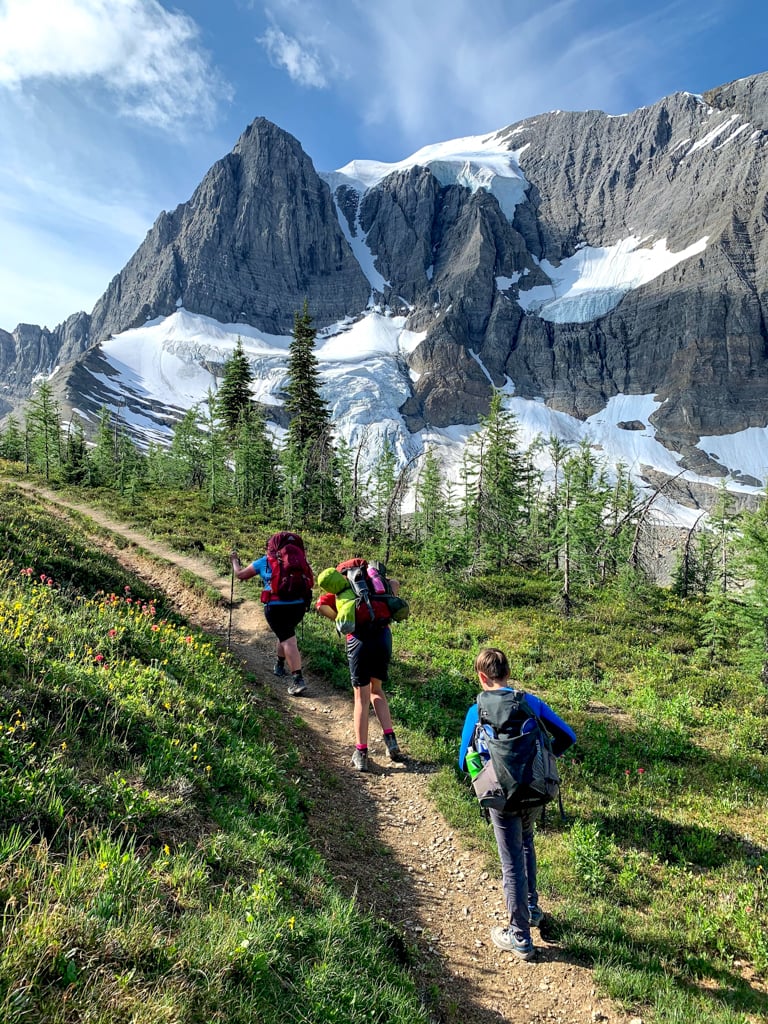
Eventually, you will break out of the trees into a high subalpine meadow. This is one of the most scenic sections of the whole trail with incredible views of the Rockwall Trail. Crest 2214m-tall Rockwall Pass about 8.5km from camp. Continue along the trail for another half kilometre to a junction at Wolverine Pass. Go left onto the Wolverine Pass Trail to stay on the Rockwall. The Dainard Creek trail turns right here to descend through Wolverine Pass, which is the only break in the length of the Rockwall.
From the pass you’ll descend for 3km to Tumbling Creek campground, losing 300m of elevation. The first kilometer is a mellow downhill through meadows and open forest. You’ll be able to spot the Wolverine Warden Cabin to your left, but it is off-trail so you won’t reach it. As the forest closes in, the final 2km to camp is a very steep descent on a switchbacking trail. At the bottom, arrive at Tumbling Creek camp, spread out along the north bank of the creek.

Join the Rockwall Trail Facebook group
Tumbling Creek to Numa Creek
Distance: 8km | Elevation Gain: 340m | Elevation Loss: 700m | Time: 4-5 hours
From the campground, follow the trail downstream for a few minutes to the junction with the Tumbling Creek Trail. You can use this route to return to the Paint Pots 10.5km away, but if you want to stay on the Rockwall Trail, turn right. Immediate after the junction, cross the bridge over Tumbling Creek. You are now on the Tumbling Pass Trail where you will gain 340m over the next 3km.

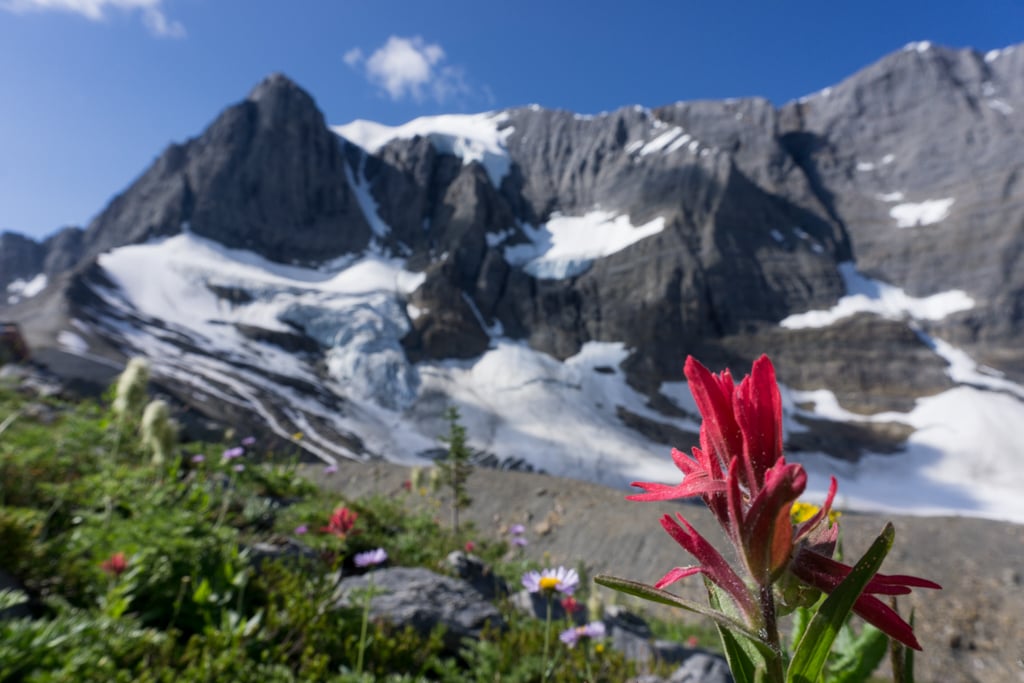
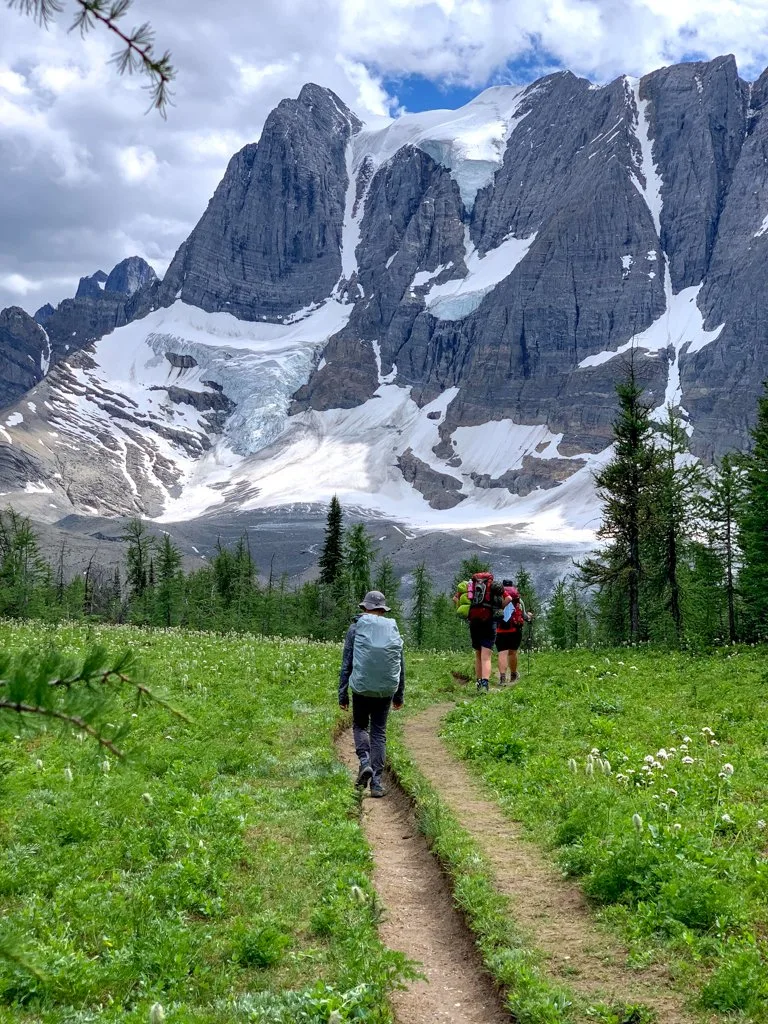
The first two kilometres climb steadily through the trees. But the views open up and the trees transition to meadows as you approach 2165m-high Tumbling Pass. There are incredible views of the Rockwall and the huge Tumbling Glacier.


Take a break at the pass, then begin the descent. You’ll drop 700m over the next 5km. The first kilometre of descent from the pass is gentle, as you amble through meadows and cross a small stream where you can fill up with water.
But soon you will descend onto a steep and rocky slope, dotted with low bushes. The trail switchbacks sharply through the gravel and crosses several meltwater streams. About 2km from the pass, the trail enters a tunnel of alder and willow that can be quite overgrown. This section seems to stretch on forever, but it is really only a couple of kilometres.
About 6.5km from Tumbling Creek Camp the brush lets up, the slope becomes less severe, and the trail begins to wind through the forest again. Reach a junction with the Numa Creek Trail (which leads to Highway 93 6.3 km away), and then a few minutes later, arrive at the Numa Creek Campsite.
Join the Backpacking in BC Facebook Group
Numa Creek to Floe Lake
Distance: 10km | Elevation Gain: 790m | Elevation Loss: 300m | Time: 4-5 hours
Leaving the campground on the Numa Pass Trail, the first few kilometres are a gentle climb through the forest, crossing several tributaries of Numa Creek. Many trip reports I read talked about high bear activity in this section, but we didn’t encounter any on our trip.
After passing through a large open area in an avalanche chute, you’ll encounter a new bridge about 3 km rom Numa Creek Camp. It replaces an older log crossing that required a bit of agility to cross.
Once you are across the bridge, the grade steepens as you being a long ascent up switchbacks to Numa Pass. Most of the ascent is in the trees so it isn’t too hot.
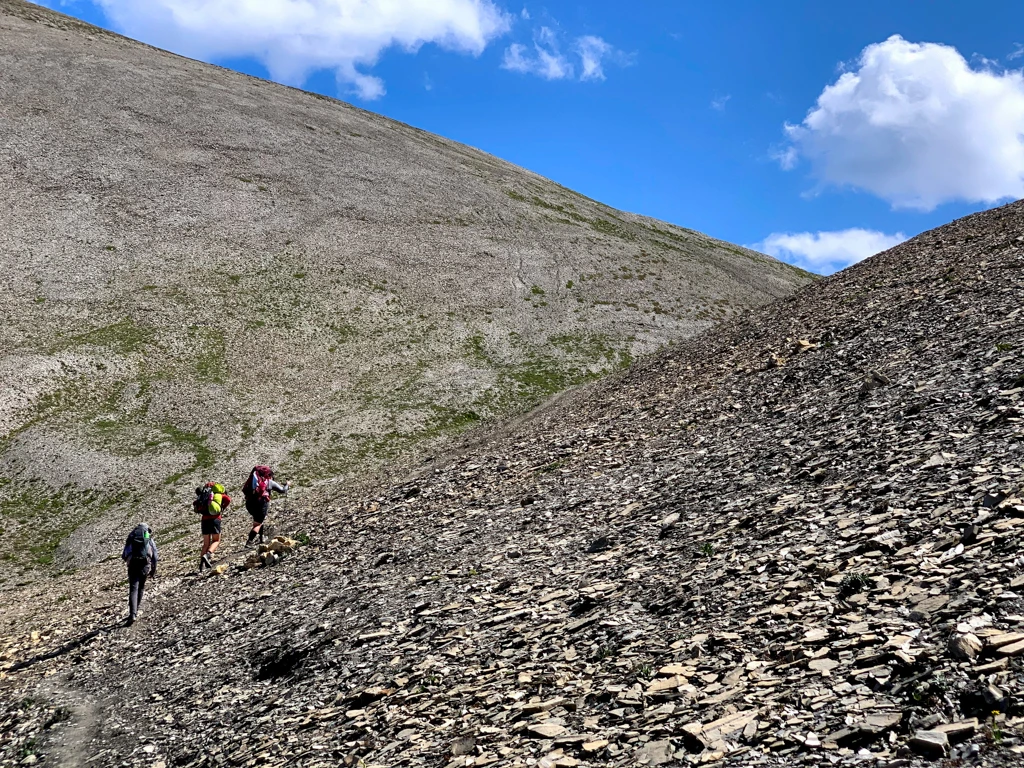
The grade stays steep until around the 6km mark when you begin to break out into the alpine and cross a scree slope. You’ll top out at 2355m-high Numa Pass about 7km after leaving camp, having gained 700m along the way.

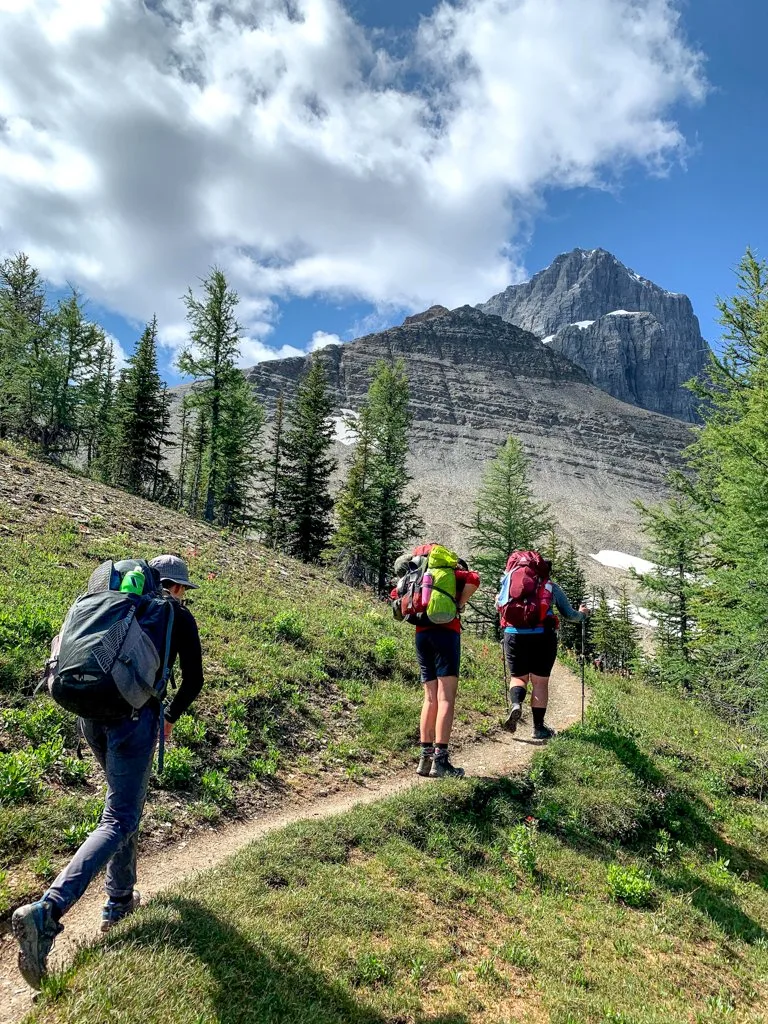
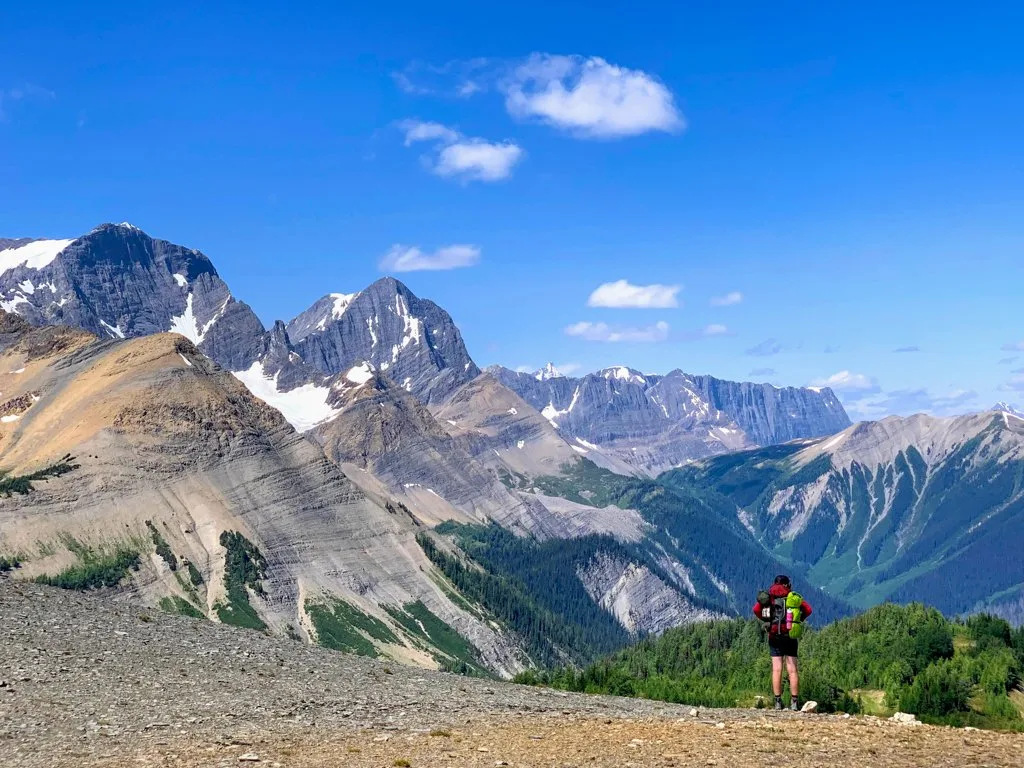
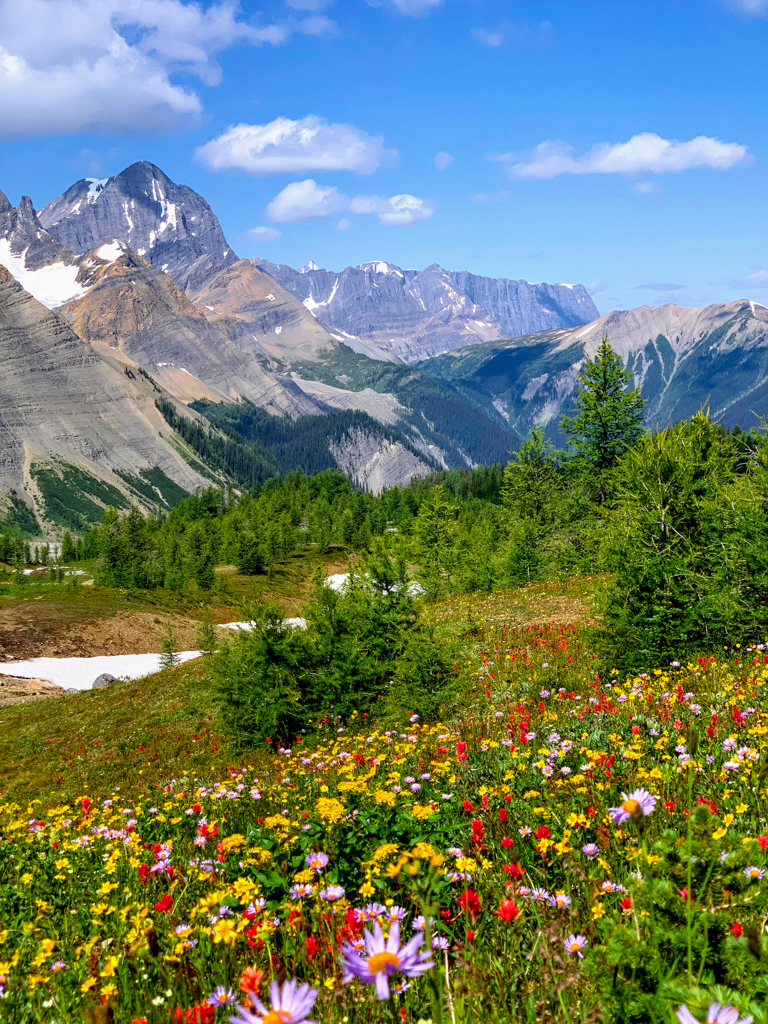
I enjoyed the views in this section of the Rockwall Trail the best and in mid-August the wildflower display was unreal. The imposing spire of Foster Peak dominates to the southwest and the Rockwall stretches away from you to the north. You also get incredible views of Floe Lake below you, which I think are even more beautiful than the ones you can get from the lakeshore.

After leaving the pass, the trail heads downhill, switchbacking through open forest and pockets of meadow where wildflowers are abundant. You will drop 300m from the pass to the campsite at Floe Lake.
Floe Lake to Floe Lake Trailhead
Distance: 10km | Elevation Gain: 30m | Elevation Loss: 730m | Time: 3-4 hours
Leaving Floe Lake on the Floe Lake Trail, you’ll quickly gain 30m through open forest before starting the long descent to Highway 93. You’ll lose 730m of elevation between the lake and the trailhead. The bulk of the trail is through recently burned forest, which means it can be hot and exposed on sunny days.

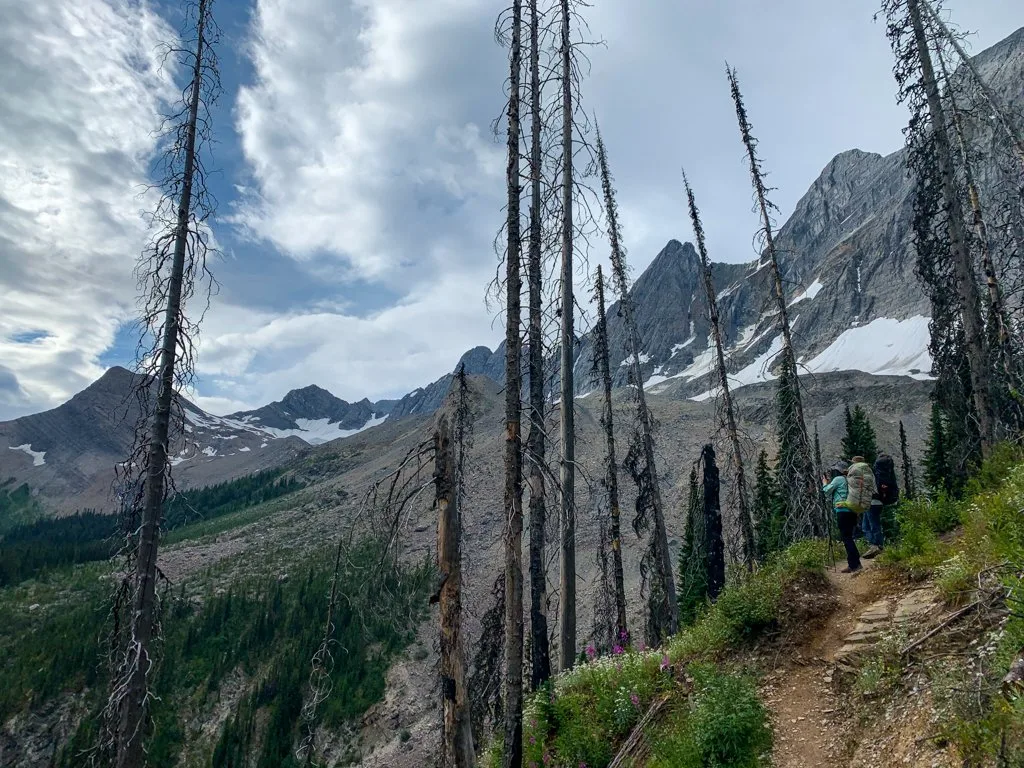
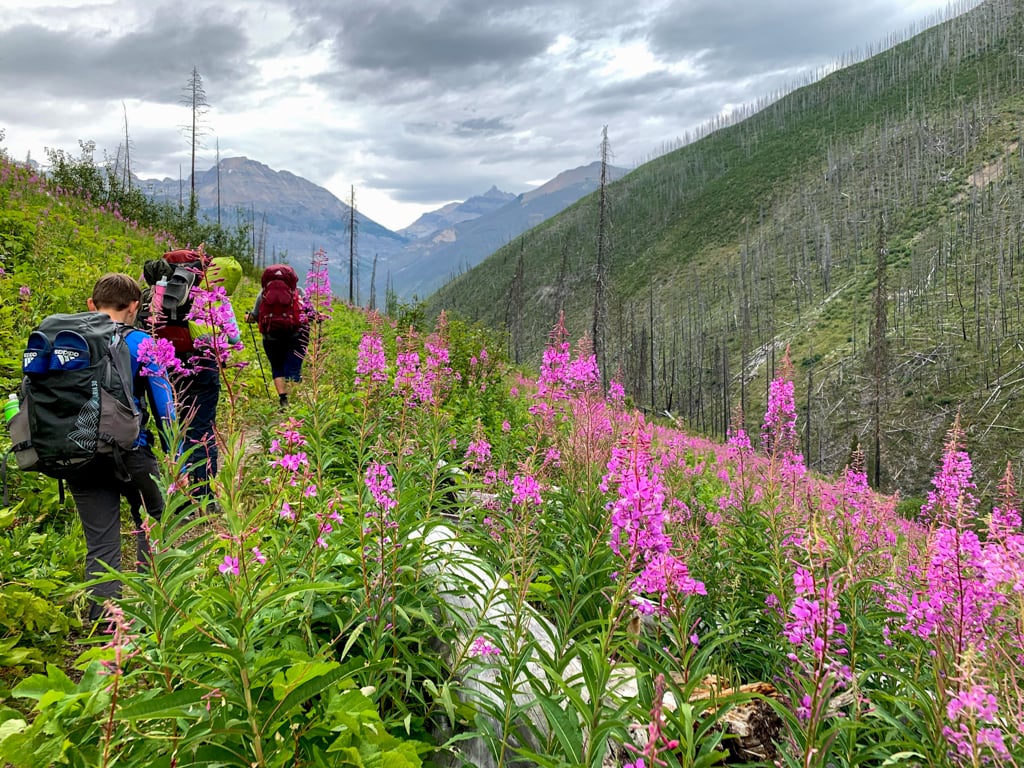
The first two kilometres of trail switchback steeply downward. After crossing a wide and rocky creek, the grade eases as you begin a long descending traverse high above Floe Creek. There are good views of the Rockwall behind you and the surrounding mountains, and as you get lower, you’ll be able to see the highway. Watch for beautiful fireweed blooming amongst the charred stumps.
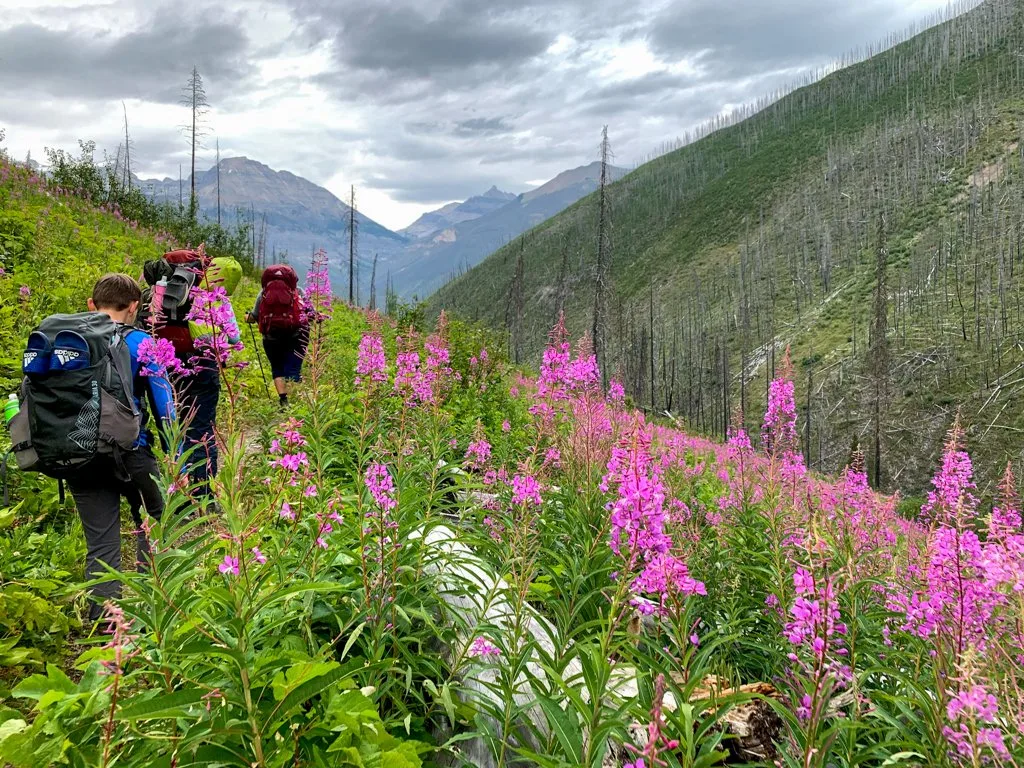
The trail steepens about 7.5km from Floe Lake as it makes a long switchback, then heads down to cross Floe Creek on a small bridge near the 8km mark. There’s a bench to rest here if you need a break. The remaining two kilometres to the trailhead are in a young and uniform forest, which blocks the views. Reach a large bridge over the Vermillion River, and the parking lot a few minutes later.

Hiking the Rockwall Trail from South to North
If you choose to hike the Rockwall trail from south to north, you can still use my directions above, but you’ll have to reverse them. However, the elevation gain, elevation loss, and time stats will be different. I’ve listed them below to help you out:
- Floe Lake Trailhead to Floe Lake: Distance: 10km; Elevation Gain: 730m; Elevation Loss: 30m; Time: 4.5-5.5 hours
- Floe Lake to Numa Creek: Distance: 10km; Elevation Gain: 300m; Elevation Loss: 790m; Time: 3.5-4.5 hours
- Numa Creek to Tumbling Creek: Distance: 8km; Elevation Gain: 700m; Elevation Loss: 340m; Time: 4-5 hours
- Tumbling Creek to Helmet Falls: Distance: 12km; Elevation Gain: 500m; Elevation Loss: 640m: Time: 5-6 hours
- Helmet Falls to Paint Pots Trailhead: Distance: 15km; Elevation Gain: 50m; Elevation Loss: 300m: Time: 4-5 hours
Join the Rockwall Trail Facebook group
Camping on the Rockwall Trail
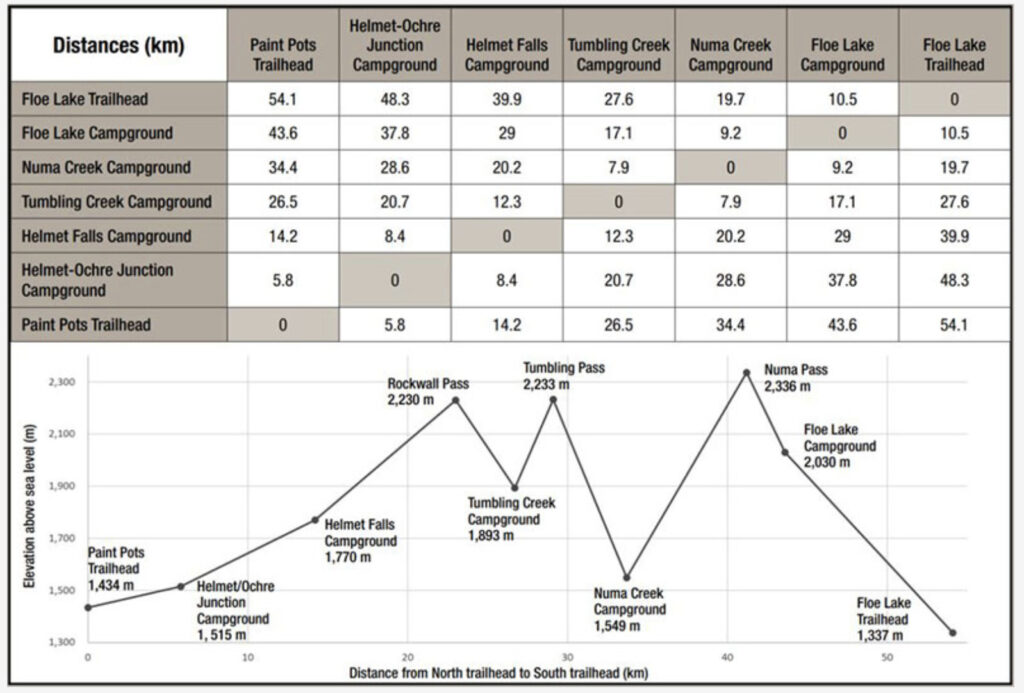
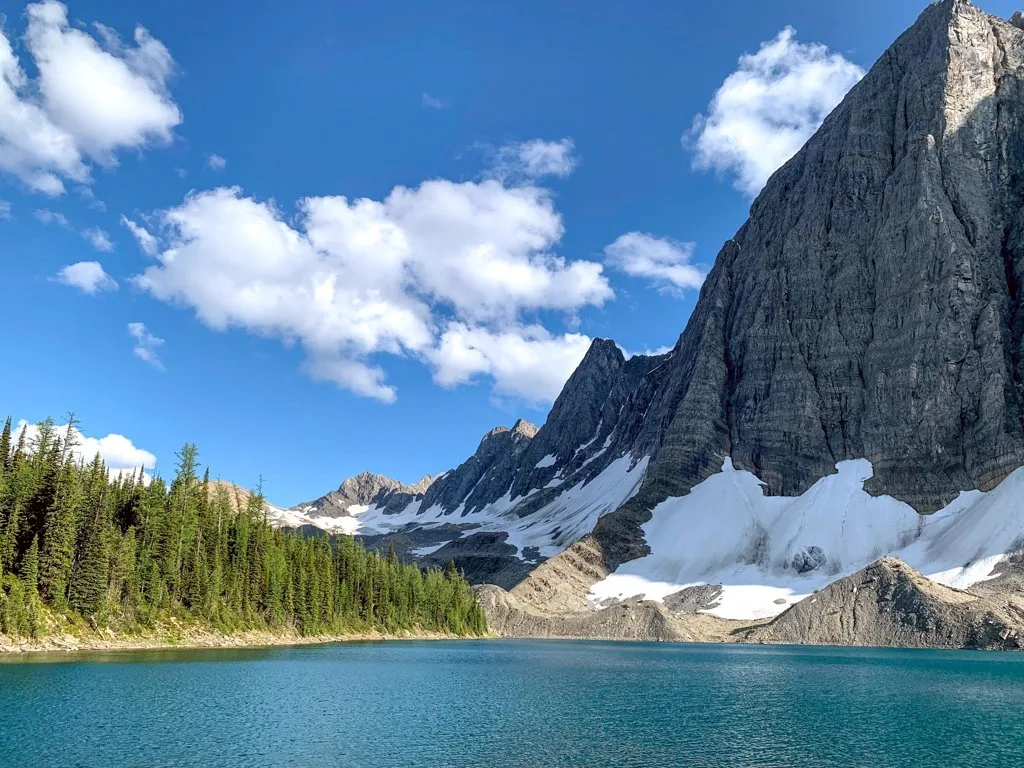
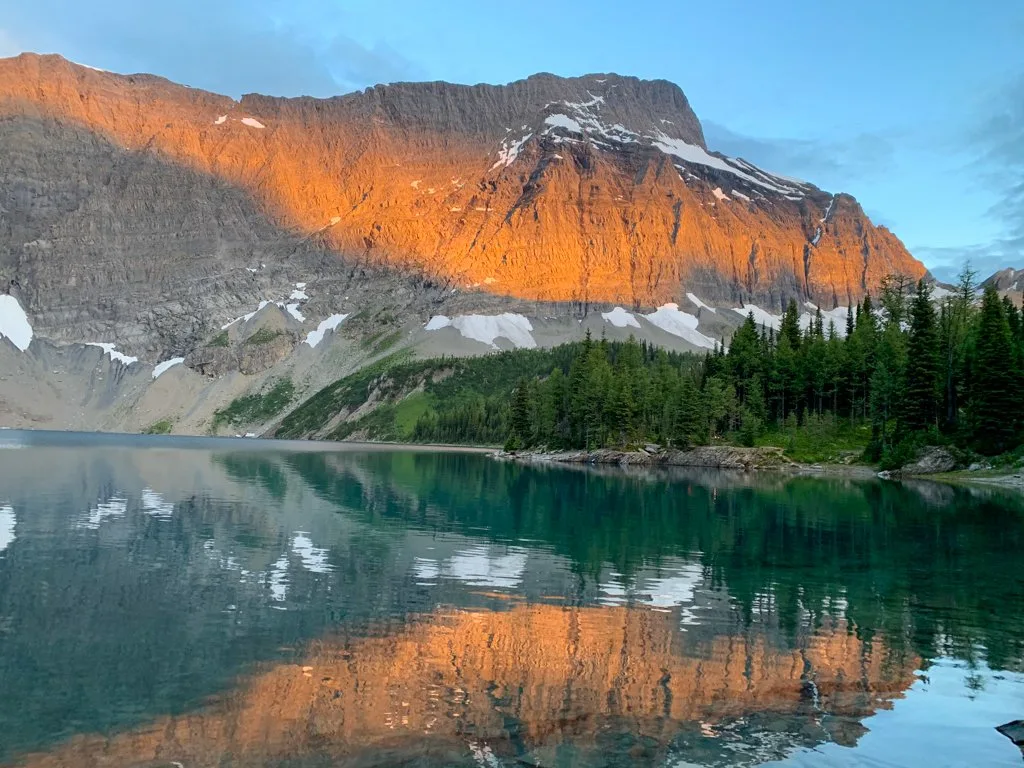
There are five campgrounds on the Rockwall Trail: Helmet/Ochre Junction (6km from Paint Pots), Helmet Falls (15km), Tumbling Creek (27km), Numa Creek (35km), and Floe Lake (45km). Floe Lake is by far the most beautiful campsite. The others are in deep creek valleys and don’t have the same amazing views.

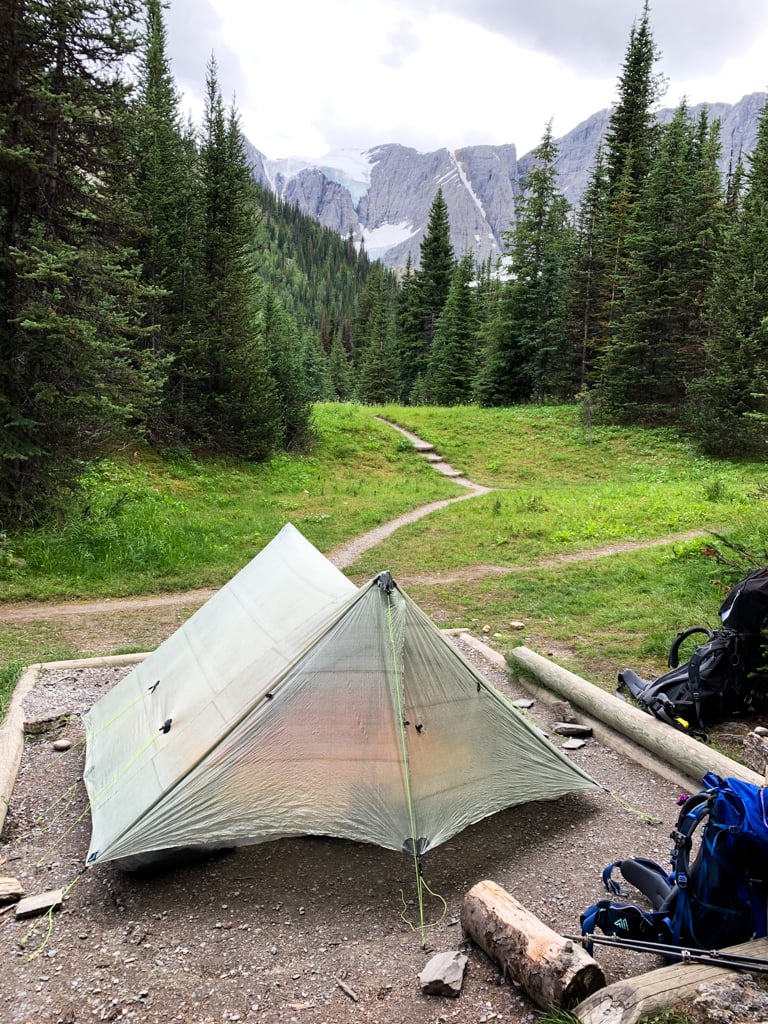
Each campground has gravel tent pads, outhouse(s), and a shared cooking area set away from the tenting area. The cooking areas have a few tables with benches and metal food storage lockers. All of the campgrounds are next to a creek or lake where you can get water.
In previous years, campfires were allowed inside metal fire rings at the Numa Creek and Helmet Ochre Junction campgrounds. However, as of 2024 the Kootenay National Park website says that fires are prohibited everywhere in the backcountry. The presence of fire rings and the absence of no campfire signs at these campgrounds means that many hikers don’t know they aren’t supposed to have a fire there.
READ NEXT: How to Stay Warm in a Tent: Over 40 Tips
Rockwall Trail Itineraries
How many days should you spend on the Rockwall Trail? The answer to that question depends on who you ask. Most people hike the Rockwall Trail in 4 days. My group spent 5 days on the trail. We also met people doing it in 3 days. Below, I’ll set out some itinerary options and explain the pros and cons of each.
5-Day Rockwall Trail Itinerary
If you want to take your time and enjoy the scenery, spend 5 days hiking the Rockwall Trail. This 5-day itinerary is also great for families or people who aren’t in amazing shape. We hiked with our friends and their kids (13 and 10 years old) and this was a great itinerary for them. If you take 5 days, you also won’t have any crazy long days of hiking.
- Paint Pots to Helmet Falls (15km, +300m, -50m, 4.5-5.5 hours)
- Helmet Falls to Tumbling Creek (12km, +640m, -500m, 5-6 hours)
- Tumbling Creek to Numa Creek (8km, +340m, -700m, 4-5 hours)
- Numa Creek to Floe Lake (10km, +790m, -300m, 4-5 hours)
- Floe Lake to Floe Lake Trailhead (10km, +30m, -730m, 3-4 hours)
4-Day Rockwall Trail Itinerary
Many people choose to hike the Rockwall Trail in four days. This reduces the amount of food you have to carry, but does mean you have a really big day in the middle of the trip. The most common 4-day itinerary (below) skips the Tumbling Creek campsite, but you could choose to skip Numa Creek campsite instead.
- Paint Pots to Helmet Falls (15km, +300m, -50m, 4.5-5.5 hours)
- Helmet Falls to Numa Creek (20km, +980m, -1200m, 9-11 hours)
- Numa Creek to Floe Lake (10km, +790m, -300m, 4-5 hours)
- Floe Lake to Floe Lake Trailhead (10km, +30m, -730m, 3-4 hours)

3-Day Rockwall Trail Itinerary
If you like putting in long days, this speedy 3-day Rockwall Trail itinerary might be for you. The first day is a nice warm-up, then the next two days are full-on… but with lots of scenery.
- Paint Pots to Helmet Falls (15km, +300m, -50m, 4.5-5.5 hours)
- Helmet Falls to Numa Creek (20km, +980m, -1200m, 9-11 hours)
- Numa Creek to Floe Lake Trailhead (20km, +820m, -1030m, 7-9 hours)
No-Floe Lake Rockwall Trail Itineraries
Floe Lake is by far the hardest campground to book since it is the most spectacular. But you can still do the Rockwall Trail and see Floe Lake without getting a reservation a the Foe Lake Campground. Here are three ways:
3-Day Option:
- Paint Pots to Helmet Falls (15km, +300m, -50m, 4.5-5.5 hours)
- Helmet Falls to Numa Creek (20km, +980m, -1200m, 9-11 hours)
- Numa Creek to Floe Lake Trailhead: (20 km, +820m, -1030m, 7-9 hours)
4-Day Option:
- Paint Pots to Helmet Falls (15km, +300m, -50m, 4.5-5.5 hours)
- Helmet Falls to Numa Creek (20km, +980m, -1200m, 9-11 hours)
- Day hike from Numa Creek to Floe Lake and back (18.6 km, +1136m, -1136m, 6-9 hours)
- Numa Creek Camp to Numa Falls Trailhead (6.6 km, +83m, -241m, 1.5-2.5 hours)
5-Day Option:
- Paint Pots to Helmet Falls (15km, +300m, -50m, 4.5-5.5 hours)
- Helmet Falls to Tumbling Creek (12km, +640m, -500m, 5-6 hours)
- Tumbling Creek to Numa Creek (8km, +340m, -700m, 4-5 hours)
- Day hike from Numa Creek to Floe Lake and back (18.6 km, +1136m, -1136m, 6-9 hours)
- Numa Creek Camp to Numa Falls Trailhead (6.6 km, +83m, -241m, 1.5-2.5 hours)
Partial Rockwall Trail Options
If you don’t have time for the whole Rockwall Trail, or you can’t get campsite reservations for the dates you want, you can also do portions of the Rockwall Trail. Below are some popular (and beautiful) options:
- Helmet Falls/Tumbling Creek Loop: Park at the Paint Pots and hike in to Helmet Falls campground on the first day. On the second day, hike to Tumbling Creek campground. If you have time, do a day hike up to Tumbling Pass on the third day, then hike back out to Paint Pots on the Tumbling Creek Trail on the fourth day.
- Floe Lake Overnighter: Hike up to Floe Lake from the Floe Lake Trailhead. Leave your overnight gear at the campground and day hike up to Numa Pass either the day you arrive or the following morning, then hike back out to the trailhead.
- Rockwall Pass and Tumbling Pass: Park at Paint Pots and hike in to Tumbling Creek Campground. Base camp there, then do day hikes to Rockwall Pass and Tumbling Pass before hiking back out along the Tumbling Creek Trail.
So that’s everything you need to know to hike the Rockwall Trail in Canada’s Kootenay National Park. I can’t recommend this trail enough – it’s so beautiful! And since it’s in a National Park, the trail is well-graded and easy to follow. If you have questions about the Rockwall Trail, ask away in the comments. I’d love to help you plan your trip.
READ NEXT: Rockwall Trail Packing List: Everything You Need to Bring
More Bucket-List Worthy Backpacking Trips:
- Your Guide to the West Coast Trail in British Columbia
- The Ultimate Guide to Hiking the Berg Lake Trail
- Cape Scott Trail Guide: Hiking and Camping on Northern Vancouver Island
- Your Guide to Camping and Hiking at Lake O’Hara in Yoho National Park
- 30 Best Backpacking Trips in BC
- 11 Best Backpacking Trips in the Canadian Rockies
Must-Have Backpacking Advice:
- How to Make Backcountry Camping Reservations in BC
- Backpacking Checklist: Gear You Need To Go Backpacking
- How to Stay Warm in a Tent: Over 40 Tips
- How to Choose the Best Backpacking Meals
- Bear Safety for Hikers, Campers and Backpackers
- How to Leave No Trace (And Why it’s Important!)


- Best Sun Hoodies for Hiking - June 3, 2026
- Lower Stein Valley Trail Hiking and Backpacking Guide - May 27, 2026
- The Best Things to Do in Vernon, BC - May 21, 2026
Stephanie Strandt
Tuesday 30th of January 2024
I have booked the trail in mid August (2024) and have spots for all the nights except the last one at Floe lake. They were all full by the time I got to this day. This is the second year I have tried to do this hike and dont want to cancel the other three nights. If I show up at Floe lake would there be any place to put a tent besides the tenting pads? I'm open to any helpful suggestions to make this trip work. Thank you
Stephanie Strandt
Wednesday 31st of January 2024
@Taryn Eyton, Thank you Taryn, I have signed up for the cancellation apps and will try to book another night at Numa as a back up.
Taryn Eyton
Tuesday 30th of January 2024
I would wait and see if someone cancels and you can get a night at Floe. Using a camping cancellation app like Campnab or Schnerp will help - here's my review of those camping cancellation apps. There is no overlow area at Floe lake and if you show up without a reservation you will be fined and asked to leave. If you can't get a spot at Floe Lake, it's a long hike from Numa camp to the trailhead, but it is doable in one long day if you start early. If you don't have the energy for that, another option is to book a second night at Numa. Then you can day hike to Floe Lake and back from Numa, then exit the trail to the Numa trailhead. The only thing you will miss is the boring walk from Floe Lake to Floe Lake Trailhead.
Derek (100 Peaks)
Wednesday 20th of December 2023
Taryn, I am so happy you were able to go. We got rained out in 2015 and this has remained on my list since then. I'm glad you had decent weather. Cheers!
Nicki
Wednesday 8th of March 2023
Hi Taryn, When making a reservation on the Parks Canada site which view do you suggest using: map, list, or calendar? Also, do you book one night at a time or put in 4 nights and then choose campsites? Thanks so much! Nicki
Taryn Eyton
Thursday 9th of March 2023
Whether you choose map, list, or calendar really depends on personal preference. Map is good for visualizing things if you are unfamiliar with the area. But if you do your research ahead of time (which you should) then I think calendar is the most useful as you can see availability at a glance. It's also good if you have some flexibility on dates. Play around with the system a little - you will see that you can book multiple nights in the same campsite at once, but if your itinerary involves more than one campsite, you have to add each night to your trip individually - once you have them all in your cart you can check out.
Jen
Monday 30th of January 2023
Hi Taryn, super helpful post!
I was wondering, if you park at Paint Pots or Floe Lake trailhead, how do you get back to the original parking spot if it is not a loop?
Or is there another option where theres an additional hike to get back to the original start?
Thank you!
Taryn Eyton
Monday 30th of January 2023
There's a section in the post about how to get between the two trailheads: https://happiestoutdoors.ca/rockwall-trail-guide/#How_to_Get_to_the_Rockwall_Trail They are 13km apart and there is no shuttle service or taxi. The main options are hitch hiking (easy to do with other hikers), bringing two cars, or stashing a bike.
Seanyboy
Monday 9th of August 2021
Hi Taryn, looking for any info you might have about security at the Trailhead parking lots? are they manned?
Taryn Eyton
Tuesday 10th of August 2021
The trailhead parking lots are along a quiet highway. There are no security guards or other security measures. While the trailheads do not have a reputation for theft, I would advise against leaving anything valuable in your car when hiking. When we hiked the Rockwall Trail, we were at the start of a 2 week hiking and camping roadtrip so we were forced to leave quite a bit of gear in our car. We didn't have any problems with breakins and did not notice any broken glass in the parking lots.