

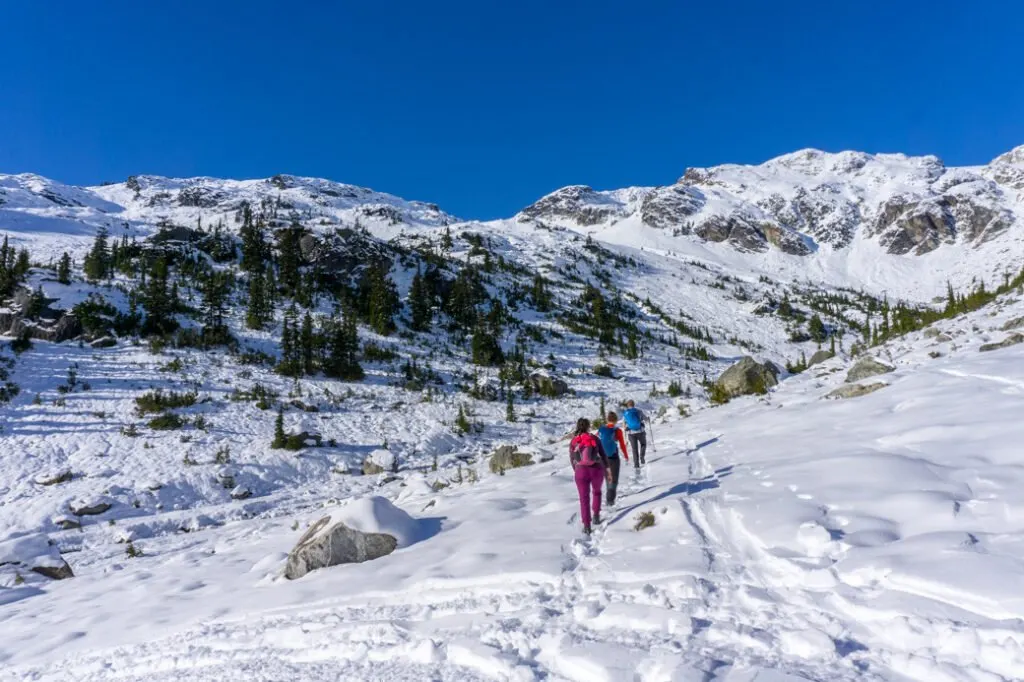
Winter hiking and snowshoeing are more dangerous than summer hiking. There are just so many more things that can go wrong when it’s cold outside and the weather can turn bad in an instant. That’s why learning about snowshoeing safety is so important.
But I don’t want to scare you off winter hiking and snowshoeing adventures. They can be so much fun, as long as you’re prepared.
In this post, I’ve partnered with a Search and Rescue expert to lay out all the ways you can get into trouble when snowshoeing or winter hiking. But we will also tell you how to prevent these issues AND what to do if something does go wrong despite your prevention efforts.
This post includes info and advice on:
- Hypothermia
- Slip and Falls
- Getting Lost
- Getting Caught Out After Dark
- Frostbite
- Falling Into Water
- Avalanches
- Glissading Injuries
- Tree Wells
- Dehydration
- Blisters
- Getting Caught in a Storm
- Cornices
- Your Ego
Hey there: Some of the links in this post are affiliate links, which means I earn a small commission at no extra cost to you if you make a purchase. Thanks for supporting my website! -Taryn
This is a sensitive wilderness area. Learn how to Leave No Trace to keep the wilderness wild. Make sure you are prepared by bringing the 10 Essentials. Get ready for adventure with this checklist of things to do before every hike.
Expert Advice
To really make sure I was getting the most expert info when it comes to snowshoeing safety, I chatted with Michael Coyle, a Search and Rescue volunteer with over 20 years of experience.
You’ll find advice from him throughout this post. Michael has been on countless rescues in the Vancouver area, and many of those rescues involved snowshoers. I’m so grateful that he shared his expertise on this subject.
Why is Winter Hiking and Snowshoeing More Dangerous than Summer Hiking?
At first glance, snowshoeing might seem pretty similar to summer hiking. You strap snowshoes on your feet, wear a few more clothes and set out on the same trails, right? Well not exactly. As Michael put it:
“Winter reduces the margin for error: Winter has shorter days. Travel in the snow is always slower than walking. Snow creates more problems route-finding because it blocks trail markers and landmarks. The combination of those three factors turns a winter expedition into a more serious thing because you’ve got less time, you’re moving slower, and you’ve already got a challenge navigating. And of course, cold weather reduces survivability. Somebody who gets lost in the winter is automatically in a life-threatening situation.”
– Michael Coyle, Search and Rescue volunteer in Coquitlam, BC
That’s why being prepared and knowing the basics of snowshoeing safety is so important.
Here are 14 ways you can get into trouble snowshoeing, how to prevent them, and what to do if they happen.
Hypothermia
What is hypothermia?
There’s feeling a little chilly, and then there’s hypothermia. A person is hypothermic when their core body temperature drops too low (35°C/95°F). It’s easy to get hypothermic when it’s really cold out, but it can also happen in wet and windy weather that isn’t below freezing.
People with hypothermia shiver, slur their speech, lose their balance, get clumsy, and generally act a bit “slower” than normal.
In the later stages of hypothermia, they may have shallow breathing, a weak pulse, and may lose consciousness. If left untreated, hypothermia can lead to death. Knowing the signs of hypothermia is an important part of snowshoeing safety, and hiking safety all year round.
How to prevent hypothermia
Prevention is key when it comes to hypothermia. Ensure you bring lots of warm clothing. Avoid sweating since it will cool you down when you stop. Pack dry clothes to change into if you do get sweaty.
Dress in layers so you can easily regulate your temperature. Read more about what to wear winter hiking and snowshoeing.
Check the weather forecast before you go out and make sure you have the right gear for the temperature and wind. And keep an eye on the weather as you snowshoe. If it looks like it’s getting worse, it might be a good idea to turn around early.
What to do if someone gets hypothermia
Hypothermia can be difficult to diagnose in the early stages, and the sufferer may not even think they are hypothermic since their mental capacity is diminished. Make sure you check in with your friends so you can recognize the symptoms of hypothermia in each other.
The only treatment for hypothermia is warming up the victim. First, get out of the cold. That may mean setting up a tent or just finding a sheltered spot and wrapping the patient in an emergency blanket.
Cuddling can also be really helpful. Remove any wet clothing and have them put on something dry and warm. Have the patient drink and eat lots of warm things. Bringing a stove on a winter trip can be the difference between life and death! Call Search and Rescue for help if necessary.
Slip and Falls on a Steep Slope
How do slip and falls on a steep slope happen?
Falls on steep slopes are actually one of the most common ways for snowshoers to injure themselves. In Michael’s experience, in places with steep and icy conditions, such as the mountains near Vancouver, slip and falls are far more common for snowshoers than avalanches.
Snowy and icy conditions make things more slippery in the winter, leading to more falls. A few other factors also come into play:
First, when you slip on ice or snow, you are much more likely to slide a long way down, possibly bumping into things along the way. This means that the consequences of a winter fall on a slope are often high.
Second, on a slippery slope, you need lots of traction, and snowshoers don’t usually have it.
How to prevent slip and falls on a steep slope
The first thing you can do is try to avoid steep slopes. Michael says snowshoers need to be careful in any steep terrain since the chance of a slip and fall will have more of a consequence.
Look for gentler, more gradual slopes to travel on. In particular, he says side-hilling and going steeply up or down a slope are the most dangerous.
1. Snowshoes don’t provide good traction
If you need to travel on a steep slope, make sure you have traction. Snowshoes are primarily intended to help you float on top of the snow. They have cleats underfoot for a bit of grip, but in general, snowshoes aren’t very good at biting into the snow. (Read more about how to choose snowshoes.)
Snowshoes can be particularly dangerous when you are traversing across a slope since, in that orientation, the cleats under the snowshoes aren’t biting into the snow at all! Going down is also problematic since the cleats aren’t designed to grip well in that direction.
2. Take your snowshoes off, then kick steps or use microspikes
On steep and snowy slopes you may want to remove your snowshoes entirely and kick steps into the snow using your boots.
If the slope is icy, I find using microspikes to be really helpful and Michael highly recommends them too. They are spikes that strap to the bottom of your shoes and give you a great grip on ice.
Michael recommends you change your footwear “earlier rather than later. Transition on flat terrain if you can or if you know you’re coming up on a steep area. And don’t be afraid of backtracking a bit.” Balancing on the side of a hill is not the best place to be fiddling with straps!
Read more about the differences between microspikes, crampons, and snowshoes.
3. Use trekking poles
You also need to add traction with your hands. I always bring trekking poles when I go snowshoeing. They add extra security on steep slopes.
Michael recommends removing the baskets or flipping the poles upside down so you can “plunge them deeper into the snow to get stability”. He says most people use poles as a balance tool, but that when you plunge a pole deep into the snow, you are essentially creating a self-belay to anchor yourself to the slope.
Another option he recommends is to “shorten the poles, then grab them above the basket and use them like little daggers.”
4. Use an ice axe
Mountaineers use ice axes for even better security. Many snowshoers don’t carry one, but it’s a good idea if you’re getting into steep backcountry terrain.
Michael recommends that you “get an ice axe and learn how to use it” to self-arrest. Take a mountaineering course to learn how. And definitely pick up a copy of Mountaineering: The Freedom of the Hills, the mountain travel bible for hikers and mountaineers.
What to do if you do slip and fall on a steep slope
If you do start to slide on a steep slope, I hope you’ve got an ice axe. Doing a self-arrest maneuver with an ice axe, is the best way to stop a slide. If you don’t have an axe, you can use your hiking poles or try to dig into the snow with your hands, elbows, knees, and boots.

Getting Lost
How do snowshoers get lost?
It’s a lot easier to get lost in the winter since the snow can obscure summer trail markers. If the weather is good and you lose the trail, you can follow your footprints in the snow to backtrack. But that doesn’t work when it’s snowing.
Another way snowshoers get lost is when they lose the trail, they head downhill and end up going down a slope that is too steep to climb back up.
How to prevent getting lost while snowshoeing
In some areas, park rangers mark winter routes with long reflective wands. This makes it easier to find the trail. However, in a snowstorm, even the wands might be hard to find.
If you hike or snowshoe in the winter, you should brush up on your navigation skills. Carry a map and compass and know how to use it. A stand-alone GPS or GPS app on your phone like Gaia GPS is also a good idea. But make sure you pack extra batteries, especially if you use your phone since you’ll need it in an emergency.
What to do if you get lost snowshoeing
If you do realize you are lost, don’t panic. Stop and think. See if you can remember any landmarks you may have passed. If the weather is good, turn around and follow your footprints back the way you came. Look at your map or use your GPS to see where you are and where you might have gone wrong.
If you really aren’t sure where you are or how to get back to the trail, stay put and call for help. Don’t keep moving as it will be harder for rescuers to find you. And DON’T start blindly descending the mountain. Many snowshoers have been injured or died this way.
When you go downhill, you can get into very steep gullies that are hard to get out of or slip and fall off cliffs. Michael says that his Search and Rescue teams have rescued many people in these types of situations where they have gone down a slope and can’t get back up.
Getting Caught Out After Dark
How do snowshoers get caught out after dark?
Many snowshoers forget that there are fewer hours of daylight in the winter and don’t leave enough time to get back to the trailhead. They often also forget to pack a flashlight or headlamp.
How to prevent getting caught out after dark
Look up the sunset time for the day you plan to hike. If your hike takes you into a valley or is in a forest, keep in mind that it will be dark on the trail earlier than the forecasted sunset time.
Research the trail you want to snowshoe. Give yourself enough time to complete the hike before it gets dark.
And remember that snowshoeing can be MUCH slower than hiking. As well, travel times on snowshoes are very dependent on the snow conditions. I like to start my winter trips as early as possible to give myself a buffer of a few hours just in case it takes longer than I think it will.
I always pack a headlamp on every winter hike, just in case. You never know when you’ll end up hiking in the dark. A headlamp or flashlight is much brighter and will last longer than the light on your phone. And you should save the battery on your phone in case you need to call for help.
What to do if you have to hike out in the dark
Try to avoid using a light until you really need it to save batteries. Your eyes can adjust well to the dark. If you brought a headlamp or flashlight, use it once it gets really dark.
Be extra vigilant to make sure you stay on the trail – it’s a lot easier to get lost at night.
If it’s really dark and you don’t have a light, don’t keep hiking. You’ll just get lost or fall and hurt yourself. Stay put and call for help.


Frostbite
What is frostbite?
Frostbite happens when your skin and tissue get so cold that they freeze. Frostbite can cause permanent damage.
The most common way to get frostbite is when skin is exposed to cold air. The first symptoms of frostbite are numbness or a pins-and-needles feeling. As it gets worse, frostbite will start to feel painful and the skin will change colour and feel firmer.
How to prevent frostbite
Bundle up! Protect all your exposed skin from the cold winter air. Wear layers, warm gloves and a hat. (Read more about what to wear winter hiking and snowshoeing.) Consider bringing backups in your pack so you can add a layer or swap damp gear for dry.
In very cold temperatures you may want to wear a balaclava and ski goggles to make sure you have no exposed skin.
Check the weather. If exceptionally cold temperatures or high winds are forecast, stay indoors. The risk of frostbite increases greatly when temperatures are below -15°C/5°F.
What to do if you get frostbite
Frostbitten tissue is very sensitive and vulnerable. Don’t try to rub it to warm it up, as you can damage it. Get out of the backcountry and to medical attention as soon as possible to have professionals rewarm the affected tissue.
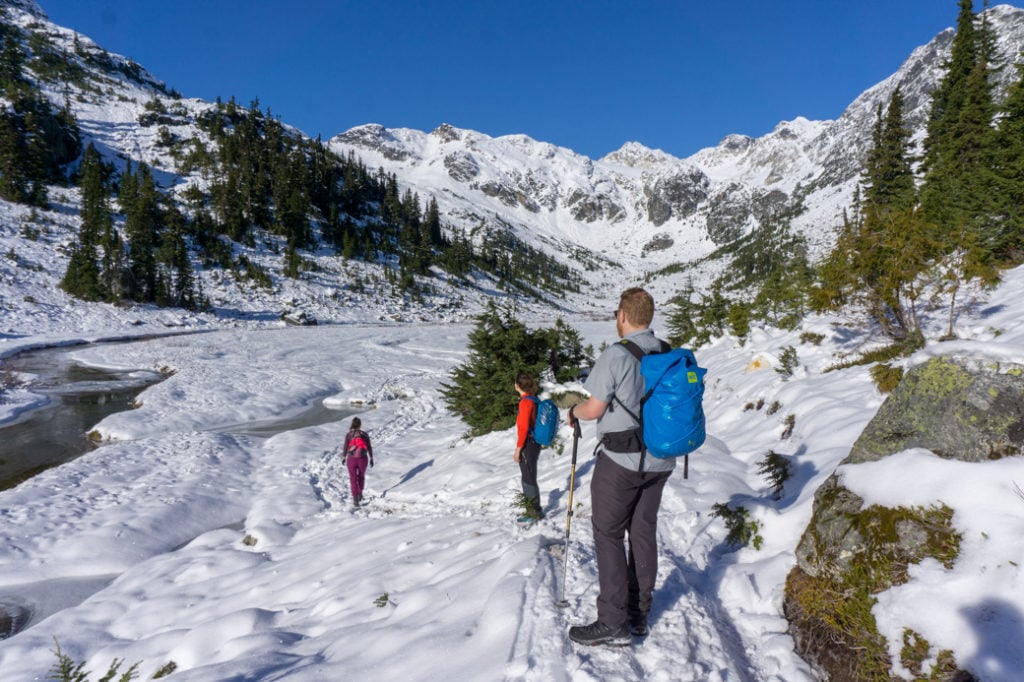
Falling Into Water
How do snowshoers fall into water in the winter?
Unfortunately, it’s pretty easy to accidentally fall through thin ice on lakes or streams. Or you might be crossing when you think is a depression in the snow, that turns out to actually be a creek bed. You could crash through the snow bridge over the top of a creek and end up in the water.
Being wet and cold in the winter is dangerous. It can lead to hypothermia and frostbite. No bueno.
How to avoid falling into water in the winter
Know your surroundings! Use a map or GPS app to figure out if you’re actually walking on a frozen lake or stream.
Ice needs to be at least 4″ (10cm) thick to safely walk on it. However, keep in mind that ice is usually not the same thickness across an entire body of water. It may be thinner in some areas, especially where there is moving water.
Keep an eye out for hidden stream crossings as well, especially early and late in the winter. If there’s a trench in the snow, it’s likely there’s a creek flowing underneath. You can use hiking poles to probe the depth of the snow to see if it is thick enough to cross. If in doubt, turn around.
What to do if you fall into water in the winter
If you fall through ice into deep water, try to remain calm and get out of the water as soon as possible.
Try to hoist your torso onto the ice, then use your feet to propel the rest of you onto the ice. Once all of your body is on the ice, roll towards the shore. If you get up, you risk breaking through the ice again. After you are onshore, begin treatment for hypothermia (see above).
If you plunge your feet or lower body into a creek by falling through a snow bridge, climb up out of the creek as soon as you can. The sides of the creek bed may be very steep, so consider taking off your snowshoes so you can kick steps.
Once you are out, remove your wet boots and socks. Try to get as much water out of your boots as possible before they freeze. Change into dry socks if possible. Get out of the backcountry to somewhere you can warm up and dry off as soon as possible. Watch for signs of hypothermia and frostbite.
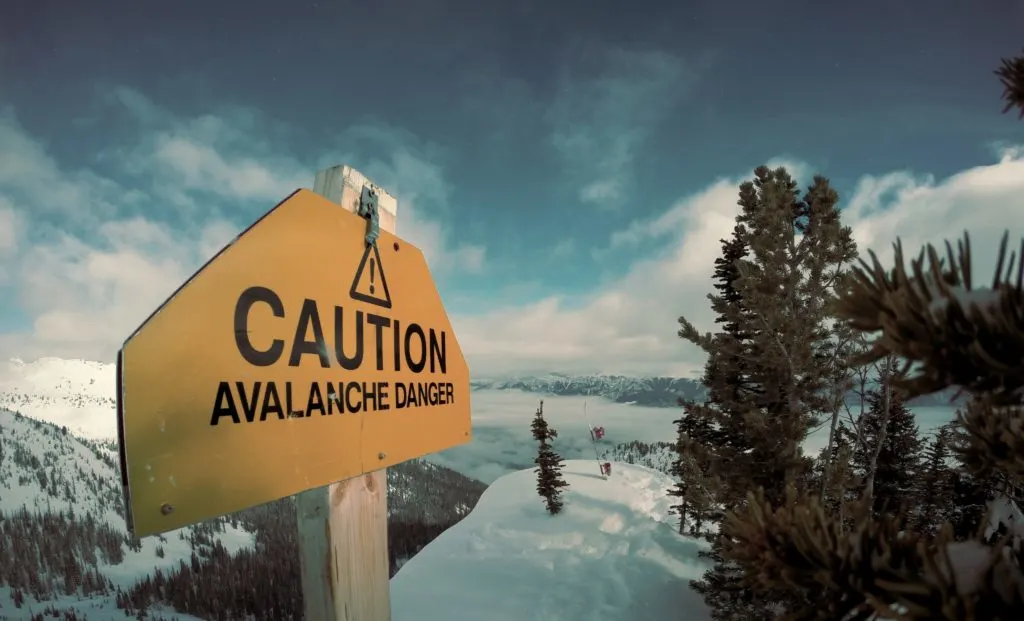
Avalanches
What is an avalanche?
Many people associate avalanches with skiing, but avalanche knowledge is also an important part of snowshoeing safety. An avalanche happens when snow slides down a slope.
Michael says it’s easy to recognize avalanche terrain: “If it looks like you could ski it – it’s avalanche terrain. For snowshoers, if it looks like you could butt-slide down it – it’s avalanche terrain.”
Another thing Michael says is important to keep in mind: “avalanches are most often triggered by people... most of the time people are on the slope when the avalanche starts.” Avalanches can bury people, causing them to suffocate to death.
Even if people aren’t buried, avalanches also cause grave injuries since they carry people downhill, banging into trees and rocks along the way.
How to avoid getting caught in an avalanche
1. Take an avalanche training course
Every snowshoer should take an avalanche training course. You can find course listings and more information on Avalanche.ca or Avalanche.org. When you snowshoe keep the terrain in mind.
Michael says “steep terrain means more exposure to avalanches.” Avoid steep slopes and the area directly below steep slopes until you have avalanche training and can evaluate the risks.
Summer hiking trails often travel right through avalanche terrain. Just because somewhere is safe in the summer doesn’t make it safe in winter.
2. Check the avalanche forecast
If you don’t have avalanche training and the forecast is rated anything except “low”, don’t go. Michael says “Avalanche accidents don’t happen when the forecast is ‘extreme’, ‘considerable’, or ‘low’. They happen when the forecast is ‘moderate’. When the forecast is ‘extreme’ it’s obviously dangerous, and when it’s ‘low’, it’s obviously not dangerous. At ‘moderate’, people say ‘I think it’s okay’…” but then it isn’t.”
3. Bring avalanche safety gear
If you plan to travel in avalanche terrain (or if you’re not sure if it is avalanche terrain), you should bring avalanche safety gear. That means an avalanche transceiver (also called a beacon), a probe and a shovel. Everyone in your group needs their own gear and training in how to use it.
What to do if you get caught in an avalanche
If you are in an avalanche, try to grab onto something to avoid being swept downhill. If you are swept away, try to stay on the surface of the slide by “swimming”. When the avalanche slows down, try to push yourself towards the surface.
If possible, try to get part of your body sticking out of the snow. Make an air pocket in front of your face so you can breathe. Try to relax and stay calm as you wait for rescue.
Rescuers will use their transceivers and probes to locate you under the snow, then dig you out using shovels. Take an avalanche class to learn the best way to locate and recover a person buried by an avalanche.

Glissading Injuries
How do snowshoers injure themselves glissading?
Glissading is just a French word for sliding down a snowy slope on your butt. Mountaineers use this technique to descend a mountain quickly and snowshoers often do it for fun. However, it’s easy to injure yourself by going too fast, sliding into something, or catching on something.
How to prevent glissading injuries
Assess the slope before you slide. Make sure you can see the run-out and there aren’t rocks, trees, etc. you will hit along the way. As well, don’t glissade on the main trail. You could hit other people and it makes the path icy and dangerous for others who choose to walk. Be mindful of avalanche conditions. Glissades can cause avalanches.
Remove your snowshoes or microspikes before you glissade. Having a spike catch on the way down is the most common way people injure themselves glissading. When you catch a spike it can send you flying head over heels, break bones, or sprain your ankles and knees.
Use an ice axe or ski pole as a brake to keep your speed under control.
What to do if you injure yourself glissading
Assess the injuries and administer first aid. Call search and rescue for help when necessary.
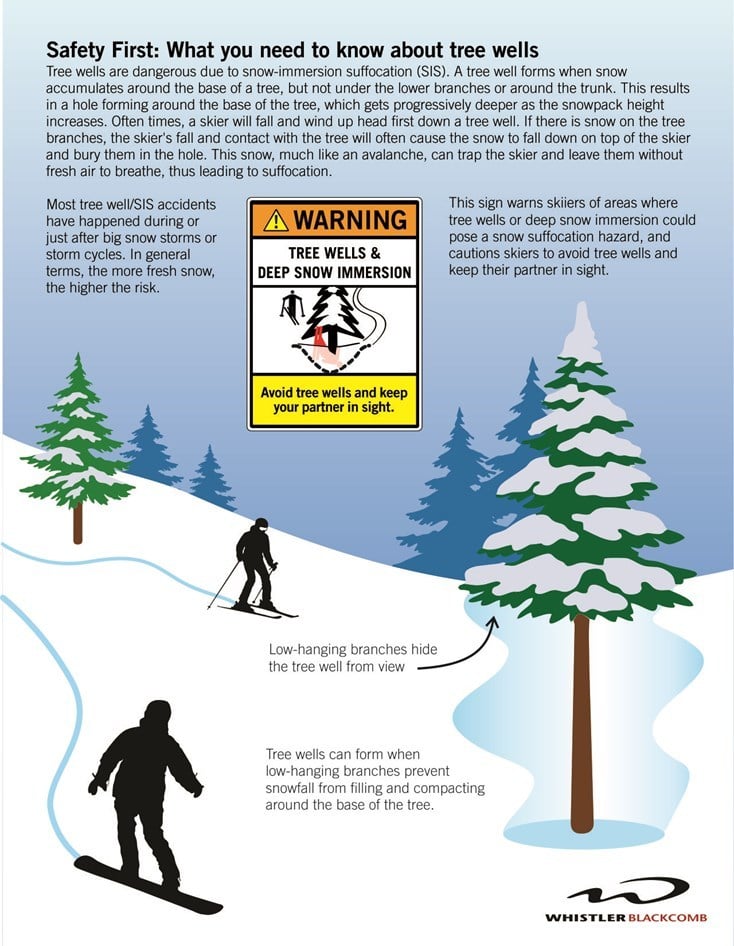
Tree Wells
What is a tree well? Why are they dangerous?
A tree well is a hollow area at the base of a tree. The branches above the hollow collect snow, causing an empty area of powdery snow to collect near the tree trunk. The same phenomenon can occur in a boulder field where gaps between the rocks get covered in snow, hiding the openings beneath.
When a person falls into a tree well, it can be difficult to escape since the snow is so powdery. Usually, people fall into the tree well headfirst. People have suffocated to death in tree wells when no one was around to help them.
How to avoid tree wells
Use caution when snowshoeing or hiking near trees. Assume all trees have tree wells. They may be well hidden. Always snowshoe with a friend and keep an eye out for each other. Clip a whistle on to the strap of your backpack to use to call for help if you do fall in.
What to do if you do fall into a tree well
Don’t panic. Keep your breathing steady and try to find an air pocket. Try not to move too much. If you move, it will just cause the loose snow to pack in around you. If you can, grab part of the tree and hang on to keep from falling in further.
Use your whistle to call for help. Friends can help dig you out, being careful to keep your airway clear.

Dehydration
How do snowshoers get dehydrated?
When it’s cold out, it’s easy to forget to drink. As well, water bottles can ice up and hydration pack hoses can freeze over, making drinking impossible.
Dehydration doesn’t just make you feel thirsty. It can cause muscle cramps, dizziness, headache, and nausea. It can also make you feel so fatigued that you can’t keep hiking or so disoriented that you end up lost.
How to prevent dehydration when snowshoeing
Start by camel-ing up. Chug water in the car on the way there. Remind yourself (and your friends) to have a drink each time you stop for a break.
Pack your water in an insulated bottle to keep it from freezing. If you’re using a regular bottle, store it upside down to prevent the lid from icing up.
If you use a hydration pack get a tube insulator for it. Another pro tip: each time you take a drink from your hose, blow air back into the tube to force the water back into the reservoir and out of the tube. It freezes faster in the tube.
Bring a thermos of warm tea, coffee or hot chocolate to enjoy during your lunch break. Or pack a stove and make a hot drink or some soup.
Get more advice in my tips for winter hiking
What to do if you get dehydrated
Drink and rest until you feel better. Don’t try to eat snow – it actually takes more heat from your body to melt the snow than it’s worth. If it’s serious, call search and rescue for help.
Blisters
What causes blisters? Why are they a problem?
Blisters form when your skin gets irritated or damaged from friction or pressure. Blisters and other foot problems can be severe enough to make snowshoeing difficult or impossible.
Snowshoers and winter hikers are especially susceptible to blisters for a few reasons: They are often wearing heavy socks that can bunch up or cause your feet to get sweaty. Snow dripping into boots can cause blisters. The increased rubbing of snowshoe or microspike straps can cause blisters. And finally, the uneven snow surface causes your feet to be less stable in your shoes, causing more foot movement and rubbing than on the bare ground.
How to prevent blisters
There’s actually so much to know about this topic that I wrote an entire post about how to prevent blisters. Head over there to read it.
But here are the main points for snowshoers: Keep your feet dry, both from snow and sweat. Pay attention to the way your boots, socks, snowshoes, and microspikes fit. If it doesn’t feel good, change something. Don’t wait until a blister has formed.
How to treat blisters
There’s a whole section on blister treatment in my post about blister prevention. But in a nutshell, carry bandaids, medical tape, and blister dressings on every hike. Treat your blisters early so they don’t get worse.
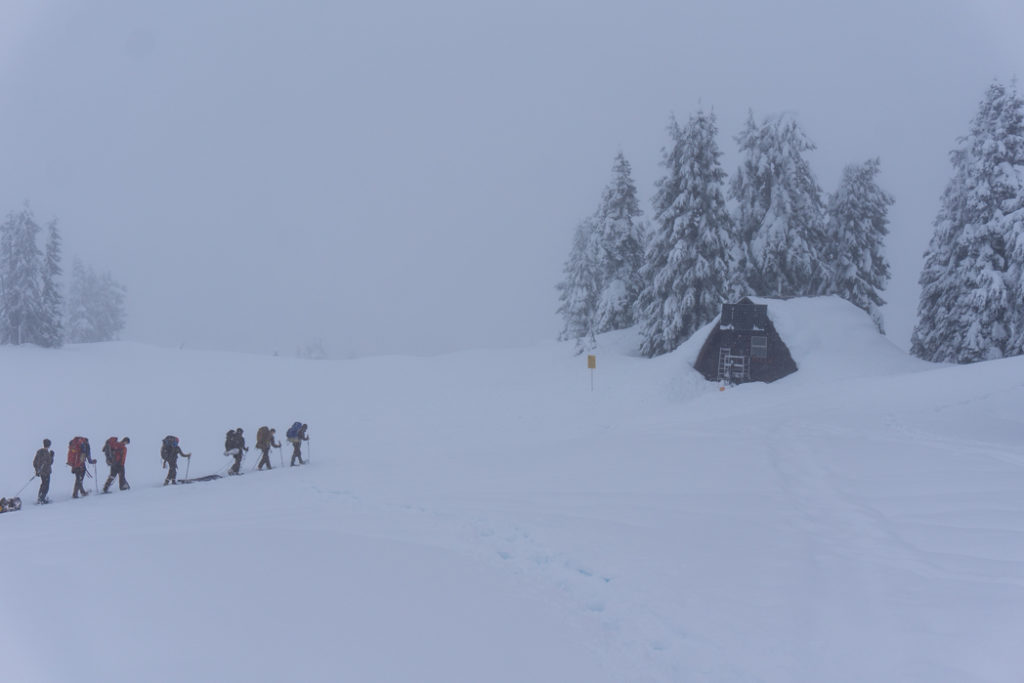
Getting Caught in a Storm
Why are winter storms dangerous for snowshoers?
Winter storms can bring exceptionally cold weather and high winds. Swirling fog and snow can also reduce visibility, making navigation really difficult.
Winter storms often combine with other dangers on this list such as hypothermia, getting lost, avalanches, and frostbite, sometimes with tragic outcomes. Michael says: “when it’s actively snowing the visibility is bad, your tracks are getting buried, and the snow is becoming less stable, which makes avalanches more likely.”
How to avoid getting caught in a storm
Check the weather forecast before your trip and plan to go another time if it looks bad. Keep an eye on changing weather conditions as you snowshoe and be prepared to turn back. Carry extra warm clothing, navigation gear and an emergency shelter like a space blanket just in case.
READ NEXT: The Best Weather Apps for Hiking
What to do if you get caught in a storm
Bundle up in warm clothing and keep exposed skin covered. If you can stay on the trail and hike out, do it. If not, find a sheltered spot or dig a snow cave and settle down to wait it out.

Cornices
What are cornices? Why are they dangerous?
A cornice is a mass of overhanging snow that wind forms on the top of a mountain or ridge. They can break off unexpectedly, sometimes well back from the edge, causing anyone standing on them to fall.
In 2017, five snowshoers fell to their deaths when a cornice collapsed on Mount Harvey, near my home in Vancouver. Michael says that cornices are something that doesn’t get talked about often when it comes to snowshoeing safety, but more people should know about.
How to avoid cornices
Know how cornices form and be careful to stay well back from the edge on slopes where cornices can occur.
What to do if you are in a cornice fall
If you are on a cornice that collapses, you are essentially now in an avalanche. Follow the advice for surviving an avalanche above.
Your Ego
Why is your ego dangerous for snowshoers?
Accidents aren’t usually the result of one big mistake. Instead, a cascade of small mistakes or bad decisions builds up to cause a dangerous situation.
Our egos often make us push forward to the summit when it’s safer to turn around. Or they make us keep going when we are lost, instead of backtracking. Our egos also make us afraid to tell our adventure buddies that we aren’t confident in the situation since we don’t want to look weak.
We can also fall victim to confirmation bias. Essentially, confirmation bias makes us think that since we’ve done something like this before and nothing bad happened then, nothing bad will happen this time.
A lot of people don’t realize the potential dangers of a situation until something goes wrong. Sometimes that just means getting a little bit lost, but other times it can be far more tragic.
How to keep your ego in check when snowshoeing
Keeping your ego in check is a key component of snowshoeing safety. Stay humble. Be okay with turning around. Check-in with your snowshoeing buddies and make sure you are all okay with the conditions periodically.
Your number one goal each time you go into the wilderness should be returning safely. Summiting a peak, reaching a viewpoint, or getting a killer shot for Instagram are all lower priority.
In Michael’s experience, “intermediates get into trouble” most often, not beginners. That’s because people with an intermediate level of experience have enough skills to get themselves into more challenging situations, but they don’t always have the knowledge to assess the risks of those situations. In Michael’s words “they don’t know what they don’t know… and confirmation bias is kicking in.”
What to do if your ego gets the best of you
Try to take a step back and assess the situation with a clear head. The bravest thing to do is admit you made a bad decision and take steps to reverse it.
Final Thoughts
So there’s all the ways you could get into trouble snowshoeing and winter hiking. I hope you never find yourself in any of these situations, but if you do, at least now you’ll have a better idea of what to do.
And honestly, the wilderness gets the best of us sometimes, even if we think we are super-prepared and know about snowshoeing safety. Have any of these situations happened to you while snowshoeing? Leave a comment and tell me about it.
More snowshoeing and winter hiking advice:
- How to Choose Snowshoes: A Complete Guide
- Microspikes vs. Crampons vs. Snowshoes: What’s the Difference?
- The Best Boots For Snowshoeing
- Best Gifts for Snowshoers (20+ Ideas)
- What to Wear Winter Hiking and Snowshoeing
- 9 Tips for Winter Hiking (You Don’t Have to Freeze!)
- How to Stay Warm in a Tent: Over 40 Tips
More outdoor safety advice:
- The 10 Essentials: Things You Should Bring on Every Hike
- How to Prevent Blisters When Hiking
- 16 Things to do Before a Hike


- Best Sun Hoodies for Hiking - June 3, 2026
- Lower Stein Valley Trail Hiking and Backpacking Guide - May 27, 2026
- The Best Things to Do in Vernon, BC - May 21, 2026
Steve Ingold
Saturday 28th of November 2020
Wonderful article Taryn, there's a lot of mention of batteries and carrying extra. But I want to point out that you want more extra batteries than you normally would bring in summer. Batteries in cold weather die extra fast and if you are depending on them for a phone or light, you'll be surprised by how quickly they drain. A few tips, use Lithium batteries, they perform better in the cold. Keep batteries/phone in your inside pocket so they stay warm.
Deb
Thursday 2nd of January 2020
Who's Michael?
Taryn Eyton
Thursday 2nd of January 2020
Hi Deb, The "Michael" mentioned in the article is a search and rescue volunteer with over 20 years of experience. You can read more about him in the second paragraph of the article.