
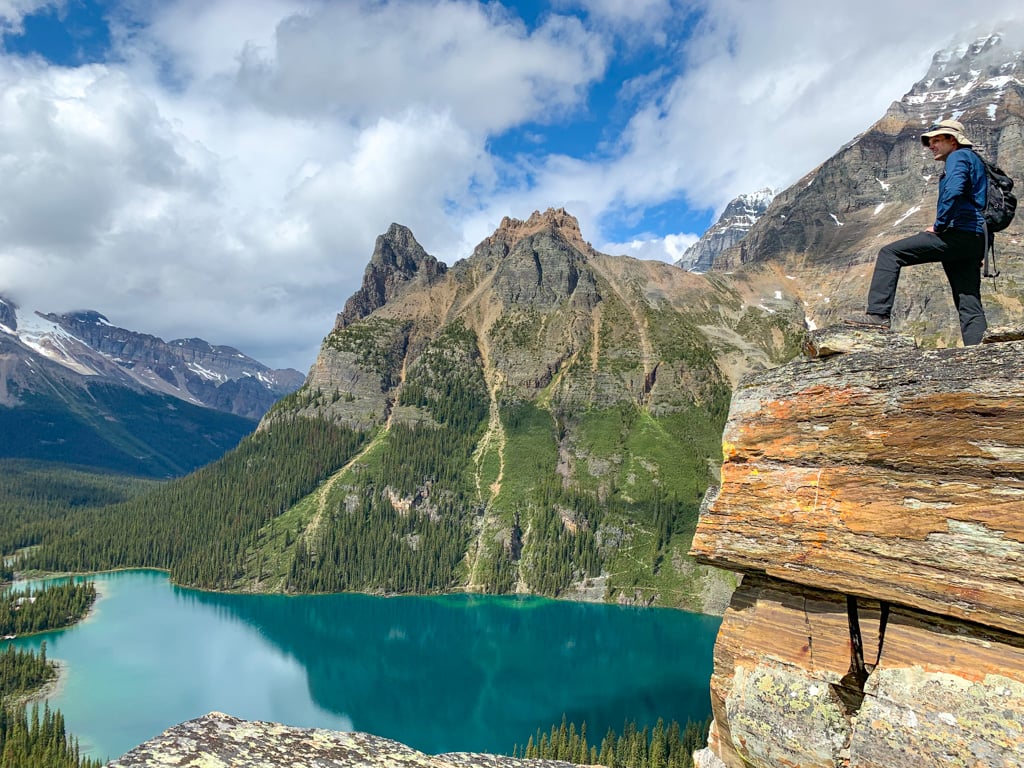
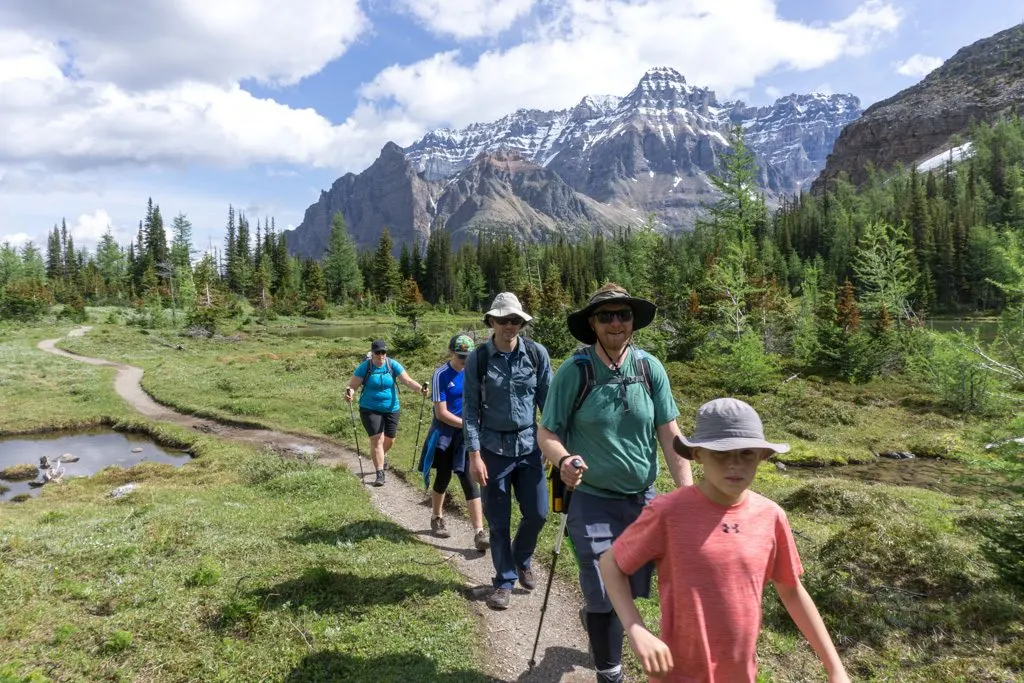
Getting to visit Lake O’Hara in Canada’s Yoho National Park is likely a once-in-a-lifetime experience. (Mostly because reservations are SO hard to get!) You need these Lake O’Hara packing lists to make sure you have the right gear so you can stay warm, dry and happy.
I’ve been to Lake O’Hara twice: On one trip I spent 4 days camping and hiking in early July. We had some chilly nights, sunny days and crazy rainstorms. On another trip in late August, I took the bus in for the day hiked the Alpine Circuit in variable weather. I’ve also done countless other trips to nearby destinations in the Canadian Rockies.
I’ve put together two packing lists for you. There’s a Lake O’Hara packing list for hikers that has everything you need for a day on the trails, no matter what the weather. And there’s a Lake O’Hara packing list for campers staying at the Lake O’Hara campground. Enjoy!
READ NEXT: Your Guide to Camping and Hiking at Lake O’Hara in Yoho National Park
Hey there: Some of the links in this post are affiliate links, which means I earn a small commission at no extra cost to you if you make a purchase. Thanks for supporting my website! -Taryn
This is a sensitive wilderness area. Learn how to Leave No Trace to keep the wilderness wild. Make sure you are prepared by bringing the 10 Essentials. Get ready for adventure with this checklist of things to do before every hike.

Lake O’Hara Essentials for Every Visitor
National Parks Pass
You need a National Parks Pass to park at the Lake O’Hara parking lot. You can buy day passes and multi-day passes at Yoho National Park visitor centre in Field, BC. If they aren’t open, there’s a park pass vending machine in the parking lot.
You can also buy a pass when you enter nearby Banff, Jasper, or Kootenay National Parks – the same pass covers all of the Rocky Mountain Parks.
If you plan to spend more than seven days in any Canadian National Park in a 12 month period, it makes more financial sense to buy an annual Discovery Pass. You can buy one online or at any visitor centre. I get one every year!
Leave your Parks Pass on the dash of your vehicle in the Lake O’Hara parking lot. If you don’t have a pass displayed, you could get a fine.
Bus and Campsite Reservations
You need to make advance reservations for the Lake O’Hara Bus and Lake O’Hara campground. (Read more about how to make reservations in my Lake O’Hara guide.)
Bring a print out of your confirmation email or save it as a PDF on your phone. The Park Ranger will ask to see it when you check-in at the bus stop and the campground. They may also ask to see a piece of photo ID to crosscheck against the name on the reservation.
Cash
If you want to buy any snacks or souvenirs at Le Relais, the day-use shelter/coffee shop, you will need to bring cash to Lake O’Hara. The carrot cake is especially popular.
You can also buy lunch or afternoon tea at the Lake O’Hara Lodge… but they only take cash.
And if you lose your return bus token or you walk up and are hoping to get on the return bus on stand-by you can only pay for the bus in… you guessed it… cash.
I recommend bringing at least $25.50 per person – that’s the cost of the bus back down.
Map and Guidebook (Optional)
The Lake O’Hara area has excellent signage so it’s pretty easy to find your way. However, with so many trails to choose from, it can be hard to plan your route without a map.
Gem Trek makes a Lake O’Hara specific map. (This is the only map they sell at Le Relais.) However, for some perplexing reason, this map doesn’t have trail distances on it. I brought the more general Lake Louise and Yoho National Park map, which has a Lake O’Hara inset. That one DOES have trail distances and I found it waaay more helpful.
While it’s not essential, I like having a guidebook to choose which trail to hike. I recommend the Canadian Rockies Trail Guide by Brian Patton and Bart Robinson. It has a good overview of each of the hikes at Lake O’Hara.
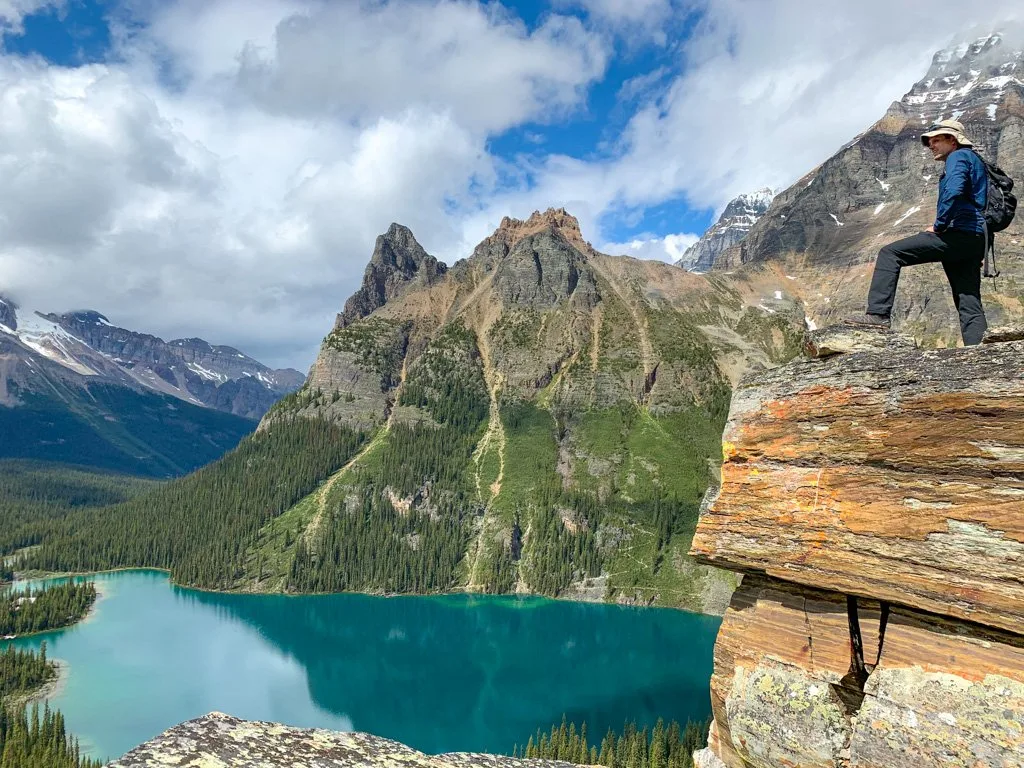
You should also check out my guide to the Lake O’Hara Alpine Circuit. It’s the best hike at Lake O’Hara, but it isn’t for everyone due to narrow ledges. My guide has lots of photos and details so you can decide if this hike is right for you.
READ NEXT: Lake O’Hara Alpine Circuit Hiking Guide

GPS App (Optional)
I use Gaia GPS on all of my hikes since I like to be able to tell how far we have walked (and therefore how much further we have to go).
Another good option is All Trails. It is more of a trails database than a GPS, but it does have good maps. Make sure you get an All Trails+ subscription since that is the only way to access maps when you don’t have cell service (which you won’t at Lake O’Hara).
I didn’t need the GPS for navigation at all at Lake O’Hara since the trails were so well marked. But it was handy to see our elevation and the names of the mountains. We also used it to get a good overview of the trail system.
Join the Lake O’Hara Facebook group
Lake O’Hara Hiking Gear Packing List
If you’re planning to do any of the day hikes at Lake O’Hara, here’s a few essentials you should pack.
Psst: Looking for an overview of which hikes are available? Read my Lake O’Hara Hiking and Camping Guide.
Day Pack
If you’re going hiking, you’ll need a backpack to carry your gear. If you’ve already got a backpack, go ahead and bring it – as long as it’s not too little, you’ll be fine.
But if you’re shopping for a day pack, I recommend one that has about 20-25 litres of capacity. Great features to look for are a spot to hold a hydration reservoir and hip belt pockets so you can easily grab snacks, lip balm or your phone without taking the pack off.
I also likes backpacks with a rain cover so I don’t have to worry about my stuff getting wet. If your backpack didn’t come with a raincover, you can always buy a rain cover separately.
I brought my Gregory Jade 28 to Lake O’Hara. It was big enough to carry my rain gear, snacks, camera, and water. Plus it comes with a rain cover that was REALLY helpful on wet days. The men’s version is the Gregory Zulu 30.

Hiking Boots
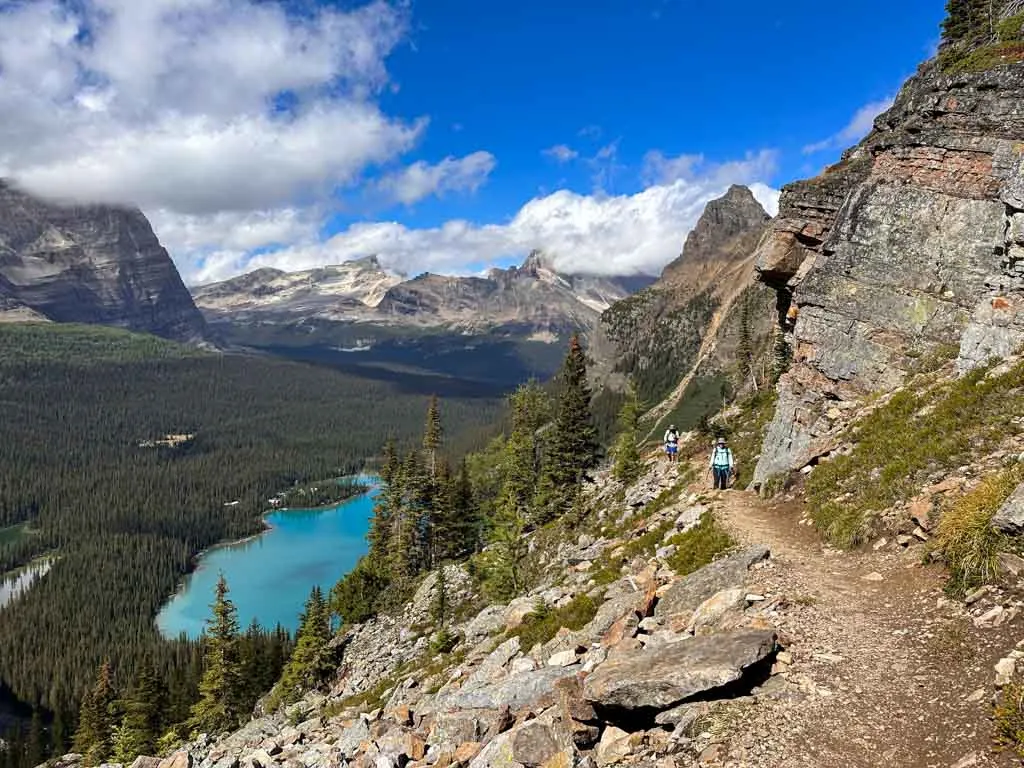
The trails in Lake O’Hara are meticulously maintained, but there are some really steep sections and lots of rocks. Wearing hiking boots gives you ankle support. And the tread on hiking boots also gives you better traction on steep slopes so you won’t skid out.
On my first trip to Lake O’Hara, I brought my trusty Salomon Quest hiking boots. They’re pretty lightweight and breathable for high cut boots with ankle support, so they don’t get too hot.
The second time I went to Lake O’Hara the weather was hot and I didn’t feel like wearing boots, so I wore my Salomon XA Pro trail runners. They are pretty burly for trail running shoes, so they provide a fair amount of stability but are still so much lighter than boots.
Hiking Socks
One of the biggest mistakes new hikers make is wearing their regular cotton socks on a hike. Cotton socks hold in your sweat. That’s a surefire way to get blisters! Wearing proper hiking socks made of wool or synthetics will help keep your feet dry.
My favourite hiking socks are actually the Smartwool Run Targeted Cushion Mid socks. They are designed for trail running so they have cushion under the forefoot and at the heel, but otherwise they are lightweight and breathable.
If you want a slightly thicker traditional hiking sock, I love the Darn Tough Light Hiker Micro Crew socks. They’re comfortable and seem to last forever.
READ NEXT: How to Prevent Blisters When Hiking
Quick-Drying Hiking Clothing
You can definitely hike in your regular clothes, but they won’t be as comfortable. Bring some hiking pants or shorts and a hiking shirt made of quick-drying synthetic material. They’ll keep you cool and dry when you get sweaty! And don’t forget quick-drying hiking underwear.
Lately I’ve been loving hiking in a long sleeved sun hoodie since it keeps me cool and I don’t have to wear as much sunscreen. I have lots (and I reviewed them all in my guide to the best sun hoodies) but fave is the Mountain Hardwear Crater Lake Sun Hoody.
READ NEXT: Best Sun Hoodies for Hiking
On most summer days you’ll find me hiking in my Eddie Bauer Guide Pro Shorts. I have two pairs. They aren’t too short or too long and they fit my curvy body. They also have big side pockets that hold my phone.
If it is chilly enough to want pants, I reach for my Mountain Hardwear Dynama pants. I actually have three of these! They are so good: soft and stretchy waist, durable yet lightweight material, and good pockets.
READ NEXT: 12 Best Women’s Hiking Pants (Picks for Every Body Type)

Fleece or Lightweight Puffy Jacket
Even if you visit in the middle of summer, Lake O’Hara can be chilly since it’s high in the Rocky Mountains. Pack a cozy fleece jacket or a lightweight puffy to wear for chilly mornings and evenings.
On my visit in mid-July, I ended up wearing my MEC Rockwall fleece at some point every day. My husband brought his Patagonia Nano Puff Jacket. For a synthetic puffy it’s really light and warm.
Rain Gear
It can rain at any time at Lake O’Hara since it has unpredictable mountain weather. On my first trip, we had a few light showers. And then one afternoon the heavens opened up for an hour into a torrential downpour. I kept my rain jacket in my day pack on every hike and was glad to have it.
These days, my go-to rain jacket is the Outdoor Research Aspire. (The men’s version is called the Outdoor Research Foray.) It’s lightweight, breathable, and fairly packable. It also has incredibly long pit zips that let me open it up for tons of ventilation. Plus, it’s not crazy expensive.
If rain is in the forecast, waterproof rain pants that you can layer over your hiking pants are a great idea. I brought mine and wore them around camp in the downpour on my Lake O’Hara camping trip. Rain pants with side zippers for venting that are easier to put on and take off without removing your shoes.
I have the MEC Hydrofoil Stretch Rain Pants. They have a little bit of stretch, so they don’t feel as constricting as other rain pants. They also are often on sale so it’s easy to get a deal.
Bear Spray
The core Lake O’Hara area doesn’t usually have very many bears, but they are around. However, the McArthur Valley and Linda Lake area nearby are home to lots of grizzly bears and black bears.
Carry bear spray and make lots of noise when hiking. Make sure you get a bear spray holster so you can attach it to your backpack or belt.
READ NEXT: Bear Safety for Hikers, Campers and Backpackers

Sun Protection
The sun can be really harsh at Lake O’Hara since it’s at such a high elevation. Protect yourself from sun burns.
Bring a wide-brimmed hat or baseball cap for protection. My fave sun protection combo is my lightweight Ciele GoCap along with a sun hoodie like the Mountain Hardwear Crater Lake Sun Hoody. The cap shades my face and when the sun gets harsh, I put the hood up on my sun hoodie to cover my neck and the sides of my face. Ciele makes my fave caps because they are lightweight and don’t seem to absorb sweat.
You’ll also want to bring high SPF water resistant sunscreen. I like Sun Bum’s Sunscreen Face Stick for on-the-go sunscreen application. It goes on like deodorant so I can reapply to high risk areas like my nose and cheeks without getting my hands messy. It’s also pretty sweat proof.
Don’t forget lip balm to avoid sun burned lips. You can’t beat basic Blistex. The SPF is low (only 15) so you have to reapply often. But I find it feels normal and doesn’t taste gross, unlike the thicker, bitter tasting formulas in SPF 30 lip balms.
Pack some sunglasses too. By far my favourite sunglasses are from Goodr. I have a few pairs. They are polarized, which makes the colours of the glacier lakes really pop. Since they are designed for running, they stay in place. They also really reasonably priced for polarized sunglasses.

Bug Spray
In early summer, the mosquitos at Lake O’Hara can be bad. If you’re sensitive to bites, bring some insect repellent. I like bug sprays that use picaridin instead of DEET since it is just effective against insects but doesn’t melt synthetic clothing the way DEET can.
First-Aid Kit
Pack a basic first-aid kit. Make sure it includes bandages, gauze, and medical tape. You’ll also want to have lots of foot care supplies like blister bandages.
READ NEXT: How to Prevent Blisters When Hiking
Bring anti-inflammatory painkillers like Advil, and anti-diarrhea pills like Immodium just in case. And don’t forget your usual prescription medications.
I like the Adventure Medical Ultralight first aid kits since they come in a water-resistant pouch. I always add more stuff to them, like more blister care and bandaids.
Camera or Phone and Charger
Lake O’Hara is STUNNING! You’ll want to take all the photos (and videos!) I brought my Sony A6400 camera. It’s a mirrorless camera which is more compact than a full DSLR but still produces high-quality images. I find it easy to use, plus it’s not that expensive.
I also brought my iPhone for quick on-the-go shots. There is no cell service at Lake O’Hara, so I kept it on airplane mode.
Taking so many photos and videos, plus cold nighttime temperatures meant that my battery died pretty quickly. I was glad I brought a portable power bank to stay charged. I use a tiny Anker power bank that charges my phone a couple of times.

Water Bottle or Hydration Reservoir
You need to stay hydrated at high elevations. Bring a water bottle or hydration reservoir. If you run out, you can fill up at the campground taps.
I use the Platypus Big Zip hydration reservoir. It’s pretty lightweight and the closure is really bomb-proof so it doesn’t leak.
Water Filter (Optional)
If you’re doing a long hike (like the Alpine Circuit) in hot weather, it can be tough to carry enough water to last the whole day. On my last trip to Lake O’Hara, I brought my Katadyn BeFree filter. It’s a simple to use squeeze filter that means I can filter water anywhere. It’s also really light and compact so I don’t mind carrying it.
Toilet Paper and Hand Sanitizer
There are a few outhouse-style toilets in the Lake O’Hara area. You can find them at the parking lot, in the campground, at the Elizabeth Parker hut, and next to Le Relais. Parks Canada supplies toilet paper and hand sanitizer, but they do run out. Keep some with you just in case.
And if you really need to go and can’t make it to a toilet, go to the bathroom the Leave No Trace way: Dig a small hole 70 big steps away from trails, roads, campsites, and water. Then bury your waste, and pack out your toilet paper in a plastic bag. I carry a super lightweight titanium trowel for backcountry poo-mergencies. Hilariously, it’s called the Deuce of Spades.
Snacks
You can buy snacks and drinks and Le Relais (get the carrot cake!!), or eat lunch at the Lake O’Hara Lodge, but plan to bring a few snacks on the trail.
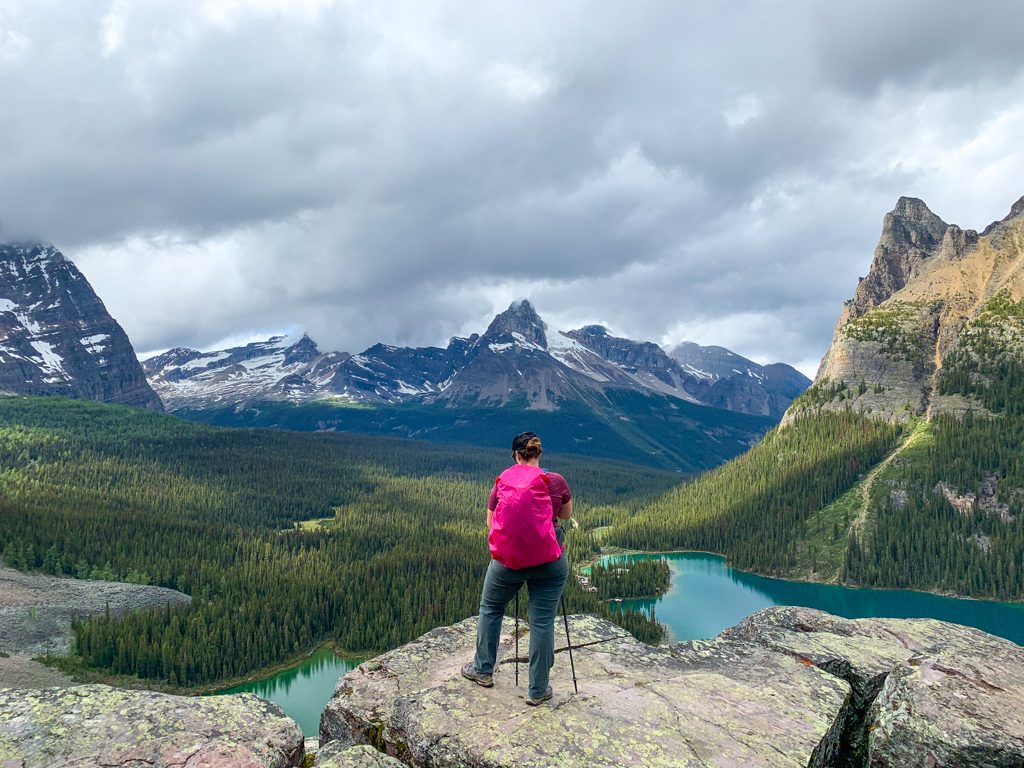
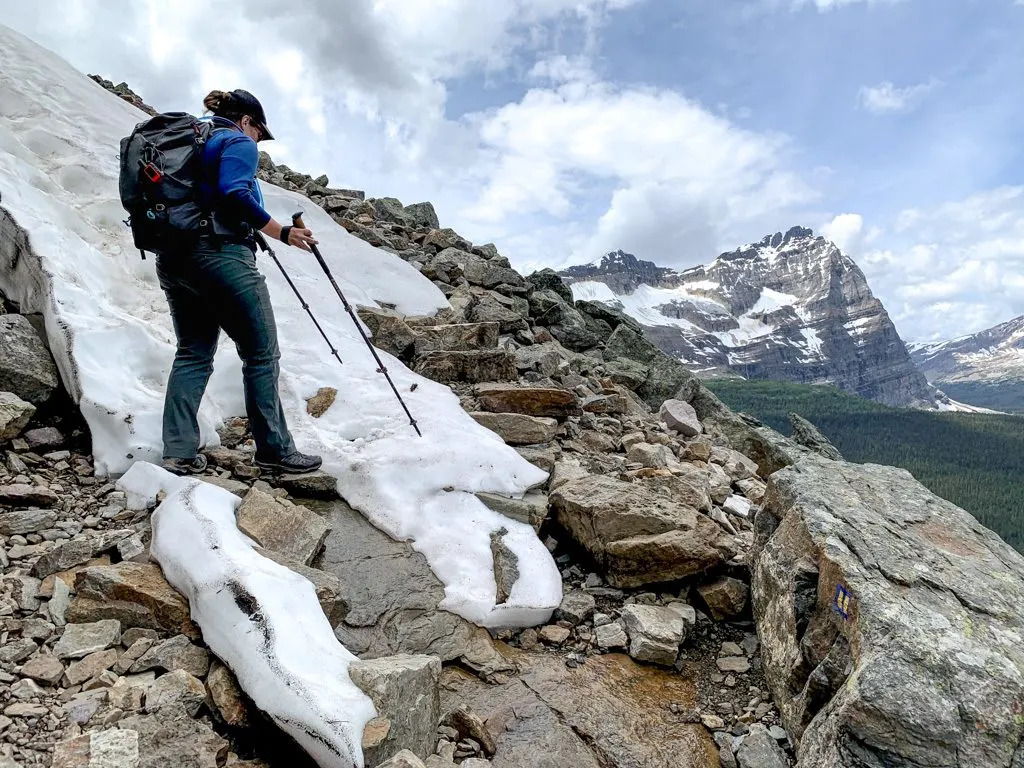
Trekking Poles (Optional)
Besides the Lakeshore Trail, all the trails at Lake O’Hara have some super steep sections. Trekking poles can be really helpful for saving your joints on the downhills or keeping your balance. I also found them really helpful on the steep and slippery snow patches we encountered on the Alpine Circuit.
I’ve been hiking with poles for the last two decades and can’t imagine going without them. So of course, I brought my Black Diamond Distance FLZ trekking poles to Lake O’Hara. These poles fold up instead of telescoping, which means they pack down super small so I can stash them in my pack when I’m not using them.

Join the Lake O’Hara Facebook group
Lake O’Hara Camping Gear Packing List
One of the best ways to experience Lake O’Hara is to camp. After the day hikers leave on the last bus of the day, it really quiets down.
When planning to camp at Lake O’Hara keep in mind that it is at 2,020m elevation, which means it can be chilly at night, even in the summer. The average low temperature in June, July, and August is between 2 and 5C (36-41F). Brrrr!
As well, afternoon and evening thunderstorms are common, so you’ll want to make sure you are prepared for rain.
There’s also the bus baggage limit to contend with. All your gear must fit in one large bag per person. (Read more about the bus baggage limit in my Lake O’Hara guide.) In practice, that means camping like you are going on a backpacking trip.
If you are camping at Lake O’Hara, bring all the things on my hiking gear list above, plus these items:
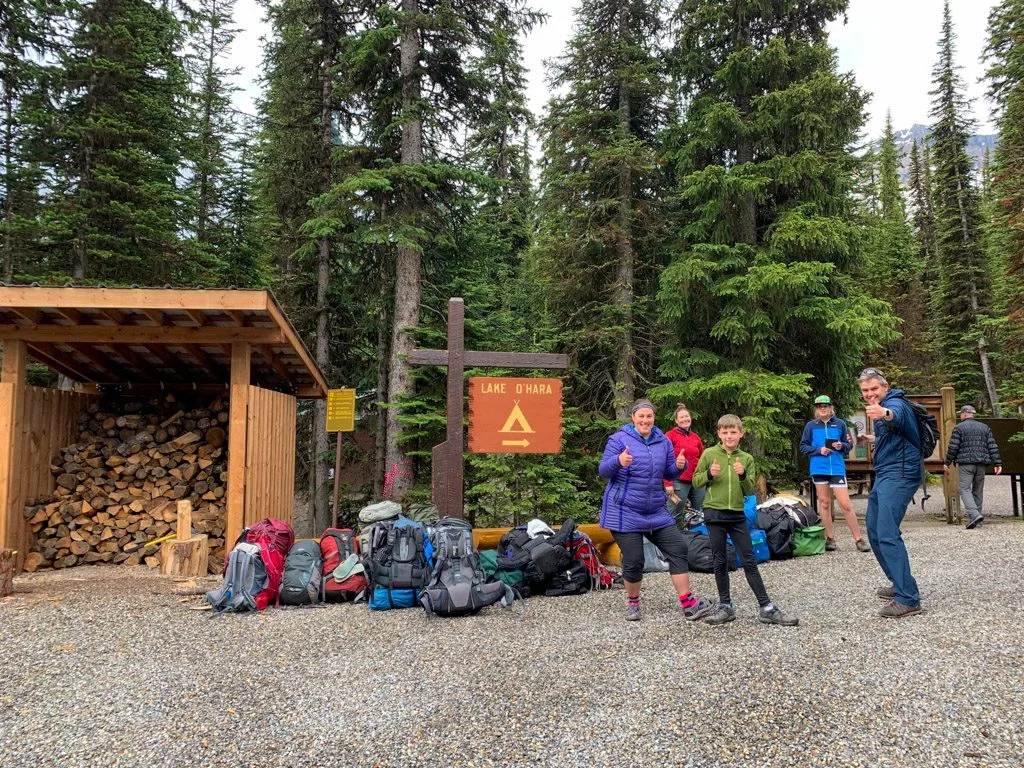
Backpacking Pack or Duffle Bag
The checked baggage limit for the bus is one large bag or two small bags per person. (You can also bring a day pack as a carry on.) Parks Canada specifies that checked bags must weigh no more than 25 kg/55 lbs. and cannot be longer than 97 cm/38″ on the longest side.
Many people choose to bring their backpacking pack as their checked bag, but a large duffle bag is also a better option.
You can get a huge duffle bag that holds up to 100 litres (way more than the 60L that most backpacking packs carry) and still fits within the maximum baggage dimensions for the Lake O’Hara bus.
My husband and I brought one backpacking pack and a giant waterproof MEC duffle bag. It was helpful to have it as we could store extra gear in it outside our tent without worrying about rain.
If you’re looking for a budget option, I like MEC’s Classic Recycled Duffle Bags in the 90L size.
Don’t bring rolling suitcases. They will get stuck in the gravel and will be tough to carry over roots in the campground.

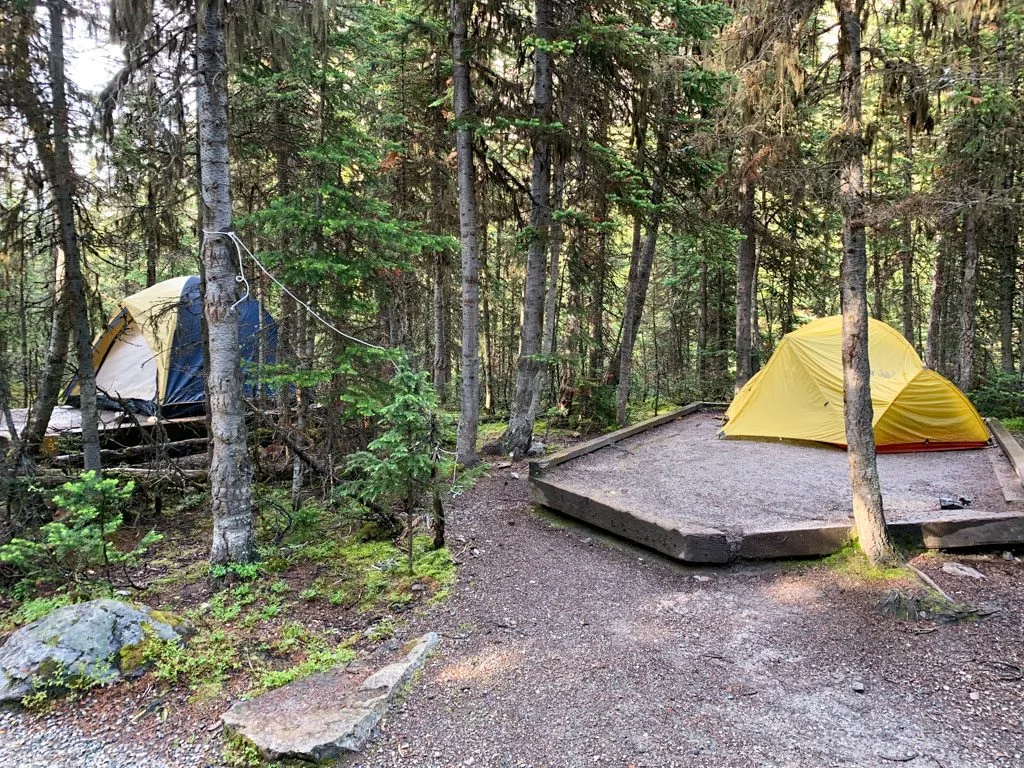
Tent
The tent pads fit 4-person tents or smaller. If you bring a bigger tent, it will hang off the end of the tent pad and park rangers make ask you to take it down and leave.
Bring a waterproof tent that can stand up to rain. If possible, choose one with a full-length rain fly that reaches all the way to the ground and covers the door. That offers MUCH more protection than the ones with a little fly on the top that you find at Canadian Tire.
We lent our MEC Volt 4 LT 4-person tent to our friends for our Lake O’Hara trip since they were camping as a family of 4. It’s a big tent, and it just fit on the tent pad. It has a full-length fly so it’s totally waterproof.

Warm Sleeping Bag and Insulated Sleeping Pad
The Lake O’Hara campground is at 2,020m elevation (6627 feet). It can be cold at night up there!
Pack a sleeping bag rated at least 0C (32F), but preferably -5C (23F). Choose one with a hood for extra warmth. If you’re looking for a backpacking sleeping bag on a budget, I can’t say enough good things about the MEC Draco/Delphinus bags. They are lightweight, compressible, warm, and won’t break the bank.
Even the warmest sleeping bag can’t protect you from the cold ground. Sleeping pads don’t just provide comfort – they also provide insulation since you lose heat to the ground. Choose a sleeping pad that has an R-value of at least 2.5. (R-value measures insulation and warmth). If you expect really cold weather or know you feel the cold at night, pick a pad with an even higher R-value.
I use a Therm-a-rest NeoAir Xtherm which has an R-value of 7.3 since I sleep really cold. My husband loves his Sea to Summit Ether Light which isn’t as warm (R-value 4.1), but is long and wide for a more comfortable sleep.
READ NEXT: How to Stay Warm in a Tent: Over 40 Tips
Pillow (Optional)
You can use a bunched up jacket as a pillow, but I recommend bringing a compact camping pillow to save your neck.
I love my Sea to Summit Aeros Pillow Premium. It is lightweight and compact but still really comfortable once you blow it up thanks to the plush fabric. For a budget option, the basic Air Pillow is good – just layer an extra shirt over it to use as a pillowcase.
Thermal Base Layer Top and Bottoms
When it’s chilly, I sleep in thermal base layers while camping. They keep me way warmer than regular PJs. They are also nice to wear around the campsite under my clothes on cold evenings and mornings.
Choose mid-weight thermals made of polyester or merino wool and be sure to pack both bottoms and a long-sleeved top. I sleep cold so I wear a Smartwool merino wool top with a hood and matching bottoms. MEC makes great polyester mid-weight base layers at a budget price.
Warm Hat and Gloves
You lose a lot of heat through your head and hands. Pack a cozy toque and some lightweight fleece gloves to wear in the mornings and evenings.
Headlamp or Flashlight
Pack a headlamp or flashlight to find your way around at night. I like using a headlamp since it keeps my hands free. I use the basic Fenix HM23 Headlamp. It’s super bright and easy to use. Plus the batteries last a long time on low power.
Camp Shoes (Optional)
Pack a lightweight pair of slip-on sandals, flats or Crocs for around camp. You’ll want a break from your boots at the end of each day. If you choose to bring camp shoes, pick ones that are light and don’t take up too much room in your pack. I like to bring shoes that I can wear with socks for extra warmth. (Flip flops don’t work so well for that!)
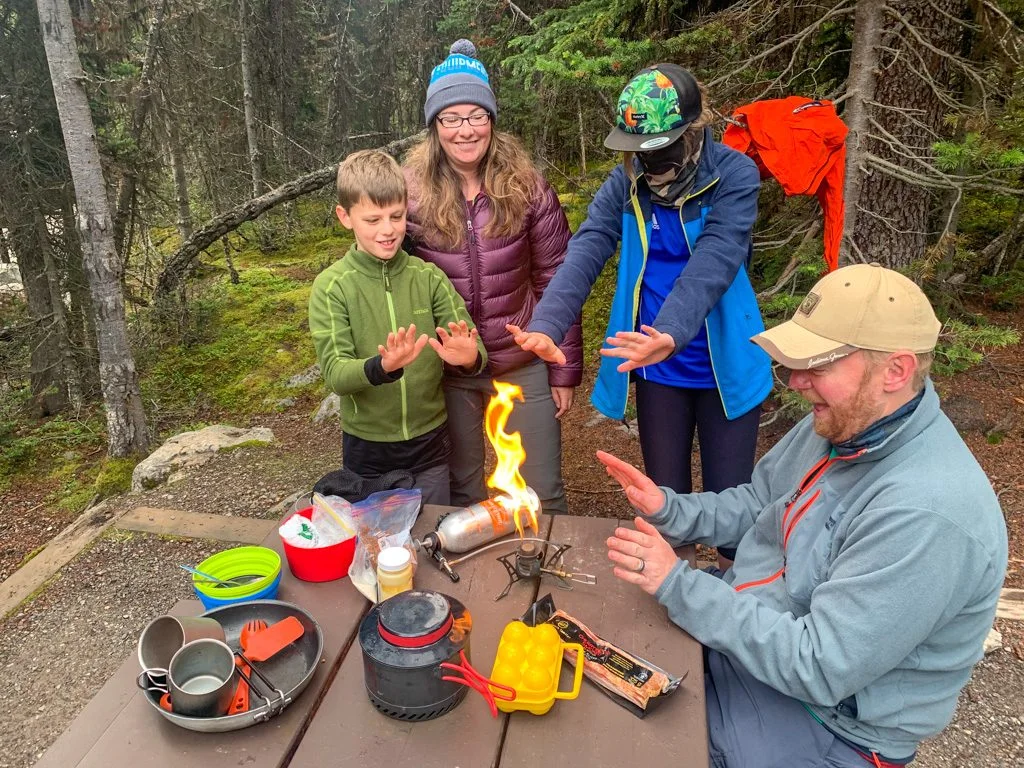
Stove, Fuel, Pots and Cooking Utensils
There is a fire pit at the Lake O’Hara campground, but you aren’t supposed to cook on it. We brought our lightweight Primus OmniFuel backpacking stove and pot. If you’re looking for a simple stove, I recommend the MSR Pocket Rocket Deluxe.

Plates, Mugs, Forks, Cutting Board, and Knife
We brought our collapsible Sea to Summit bowls and our trusty Snow Peak camping sporks.
But we totally forgot to bring a cutting board. We have this fancy (and amazing) Snow Peak cutting board and knife set. It’s a bit too heavy for backpacking, but it’s perfect for car camping. It folds down so it doesn’t take up much space – I don’t know why we didn’t bring it!
We also brought our Snow Peak double-wall insulated mugs to keep our drinks warm for longer.
Dishwashing Supplies
We brought a small pot scraper, a tiny microfibre cloth, and some Dr. Bronner’s biodegradable soap.
There are sinks for doing the dishes at the campground, but they ask you not to put food into them as it clogs the drains. Parks Canada provides a few plastic washbasins. Heat up a bit of water on your stove, then do dishes in the washbasin. Strain out the food particles, then pour the soapy water down the sink and put the food particles in the garbage.
Small Soft-Sided Cooler
You aren’t allowed to bring hard-sided coolers to Lake O’Hara. But you can bring a small soft-sided cooler either as one of your two small bags, or tucked inside a larger bag.
Your cooler has to fit inside the 24″ cube-shaped bear lockers at the campground so pick a small one. Use ice packs or pack your ice inside ziploc bags to avoid a wet mess inside.
We have a little Hydro Flask Insulated tote bag cooler that we bring on trips like this. It’s big enough to fit a few small perishable items like cheese or half a dozen eggs.
Food
Unlike most backcountry trips, food weight and bulk aren’t a problem at Lake O’Hara since you get to take the bus in. We brought fresh food we wouldn’t normally bring hiking including veggies and frozen steaks! And don’t forget the snacks!
Tarp (Optional)
There are shared cooking shelters, but in rainy weather they get full and not everyone can fit inside. If rain is in the forecast, bring a tarp to string up over the outdoor picnic tables to create a cooking area.
I use an ultralight MEC Scout Silicone Tarp since it packs down small enough to bring on backpacking trips. But if you’re on a budget, a good old giant blue tarp will work just fine.
Bring some rope or paracord to string up the tarp. I swear by these Nite Ize Figure 9 Caribiner Rope Tighteners – they make it so much easier to pitch a tarp without having to tie all kinds of crazy complicated knots.


Toiletries
Bring all your usual camping toiletries including a toothbrush, toothpaste, deodorant, baby wipes, hairbrush, and contact solution.
Entertainment for Camp (Optional)
You’ll have a few hours each night in camp when you’ll need to entertain yourself. Consider bringing a book or some headphones to listen to music or podcasts.
The shelters can be really social so a deck of cards or a compact game can be a good way to meet new friends.
I always travel with my Kindle eReader so I have hundreds of books to choose from. We’ve brought the card game Exploding Kittens on a few trips and it’s always a hit.

Join the Lake O’Hara Facebook group
Stuff You Don’t Need to Pack for Lake O’Hara
Even though you can bring tons of stuff to Lake O’Hara, you don’t want to over pack. Here’s what you shouldn’t bring.
- Climbing gear: The trails are non-technical and you won’t need harnesses, ropes, helmets, crampons, etc. However, if you do plan to climb some of the peaks nearby or head to the former Abbot Pass Hut site, you will need climbing gear, plus the knowledge of how to use it.
- Hammocks: They aren’t allowed in the campground since they can damage trees.
- Camping Chairs: It’s against park rules. There are lots of picnic tables and benches in the campground you can use.
- Portable speakers or other electronics: Most people come to Lake O’Hara to appreciate the sounds of nature and prefer not to hear your music. The campsites can also be really close together, so you’ll want to keep the noise down. Plus they are against the rules
- Musical instruments: Parks Canada doesn’t allow them.
- Hard-sided coolers or plastic bins. They aren’t allowed.
- Drones: They aren’t allowed in any national park unless you have a special use permit.
- Your dog: Dogs are permitted on leash on day hikes in the park, but they aren’t allowed on the bus or in the campground.
READ NEXT: Your Guide to Camping and Hiking at Lake O’Hara in Yoho National Park
Final Thoughts
With these two Lake O’Hara packing lists, you should have everything you need to have an awesome trip, whether you are hiking or camping. If you have questions about what to bring to Lake O’Hara, please leave me a comment. I’m always happy to help!
MORE LAKE O’HARA INFO:
- Lake O’Hara Camping and Hiking Guide (Yoho National Park)
- Lake O’Hara Alpine Circuit Hiking Guide
- Lake O’Hara Facebook Group
MORE HIKING TIPS:
- The 10 Essentials: Things You Should Bring on Every Hike
- How to Stay Warm in a Tent: Over 40 Tips
- 17 Ways to Save Money on Hiking Gear


- Grasslands National Park Travel Guide - February 4, 2026
- The Best (and Worst) Backpacking Meals Reviewed - December 16, 2025
- My Favourite Hiking Gear of 2025 - December 9, 2025
A
Tuesday 18th of April 2023
Thank you for sharing. I've booked my camp here this year. I just have one question: since the checkout time for the camp is 11am, is there anywhere near the campground that I can leave my belongings and continue the hike in the afternoon until 6pm (last bus)? Please help me and thank you very much.
Taryn Eyton
Monday 1st of May 2023
There is a designated luggage shed you can leave your baggage in after you check out from your campsite. You can find this info in my list of campground amenities.
Orion Tactical Gear
Monday 19th of August 2019
Very helpful article. Thanks for sharing. This gives us great idea.
Emily
Thursday 1st of August 2019
I love the 'what you don't need' section! I don't see that too often with packing lists. Keeps the 'I'll bring this just in case' items to a minimum. ;)
Taryn Eyton
Thursday 1st of August 2019
So glad you found it helpful. It's so easy to pack all the "just in case" stuff... and it's nice to know what you REALLY don't need.